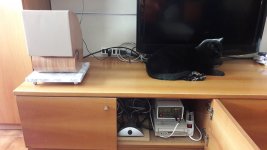
I’m talking about these:

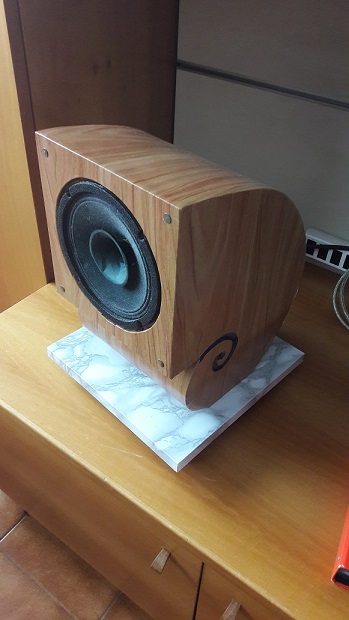
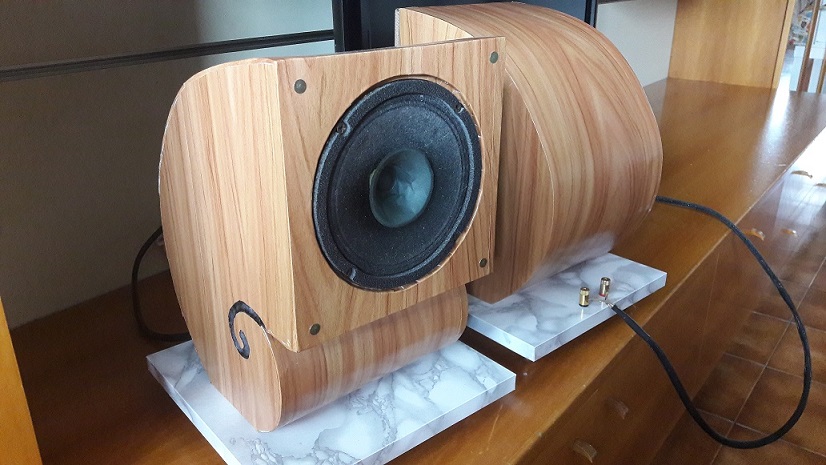
They were born as an answer to various needs:
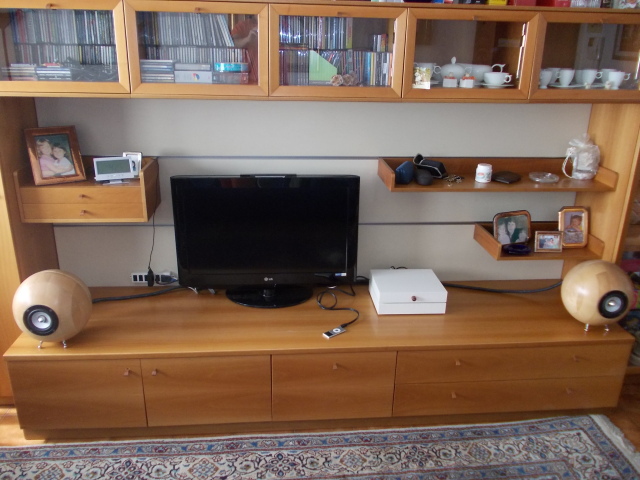
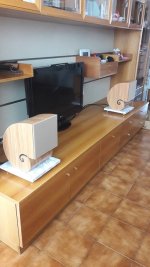
• to improve the ugly audio of the flat TV
• to reuse the very good Audax full range speakers that I used in a previous project
• to avoid, if possible, the classical squared shape that the female part of my family doesn’t like that much
As for this last point, as the round shape was already used ( please look at this thread
How to build simple, cheap, high WAF, full range speakers with Ikea woodden bowls )
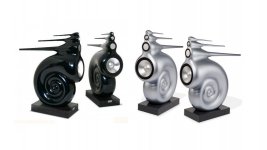
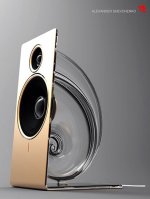
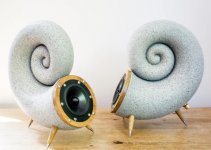
I got inspiration from:
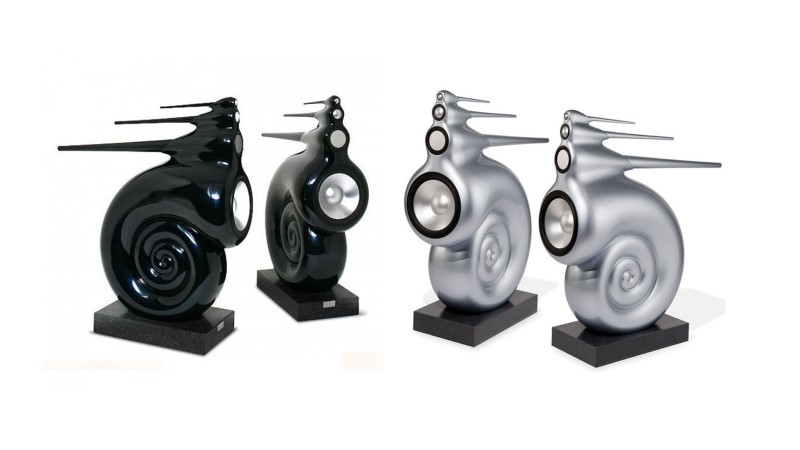
Everyone knows them, I suppose, but a little bit too ambitious as a target. So, I found something like:


but, again, too complicated. Till I found:
rather simple, but I needed a 3D printer: I don’t have. Anyway, the idea was outlined …
Further information and pics in next posts ( if someone is interested in … ).
Ciao.
Luca – Monza - Italy
Next episode: how to draw the spiral
They were born as an answer to various needs:
• to improve the ugly audio of the flat TV
• to reuse the very good Audax full range speakers that I used in a previous project
• to avoid, if possible, the classical squared shape that the female part of my family doesn’t like that much
As for this last point, as the round shape was already used ( please look at this thread
How to build simple, cheap, high WAF, full range speakers with Ikea woodden bowls )
I got inspiration from:
Everyone knows them, I suppose, but a little bit too ambitious as a target. So, I found something like:
but, again, too complicated. Till I found:
rather simple, but I needed a 3D printer: I don’t have. Anyway, the idea was outlined …
Further information and pics in next posts ( if someone is interested in … ).
Ciao.
Luca – Monza - Italy
Next episode: how to draw the spiral
Attachments
-
 1 in impianto.jpg119.2 KB · Views: 1,062
 -
 2 fronte sopra.jpg77.7 KB · Views: 1,271
 -
 3 fronte retro.jpg152.7 KB · Views: 1,171
 -
 casse in impianto.jpg192.5 KB · Views: 1,095
 -
 5 Nautilus.jpg42 KB · Views: 1,033
 -
 6 bichiocciola.jpg44.8 KB · Views: 1,042
 -
 7 scorpioni.jpg82.6 KB · Views: 1,010
 -
 8 chiocciola seria.jpg85.2 KB · Views: 1,063
Last edited:
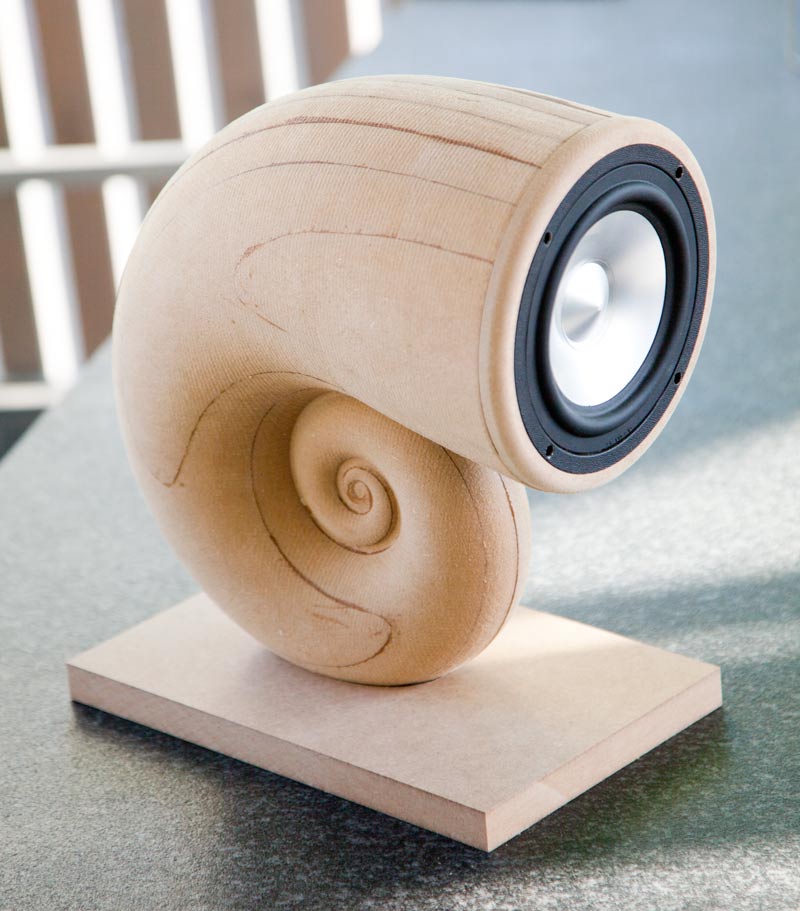
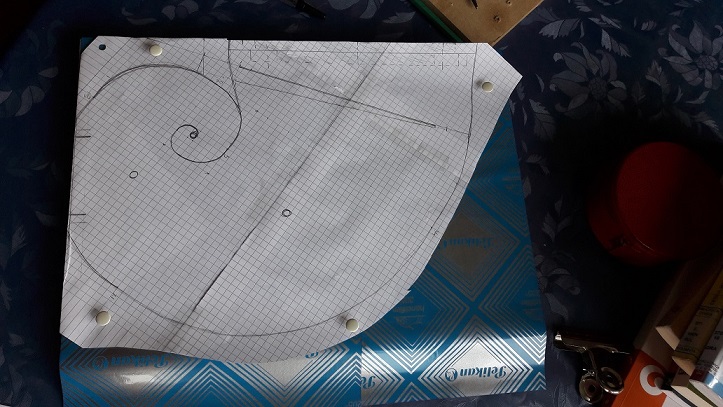
How to draw the spiral
We need to draw a spiral on the sides of these speakers.
Basically we have two kinds of spiral ( all the information on the web, of course ):
• logarithmic spiral ( also known as golden or Fibonacci spiral ) that grows in dimensions quite quickly, so you’ll have less coils and a shorter duct
• plain spiral, with constant grow, that allows you to have longer ducts
My choice was the first, as it’s quite easy to draw ( please look here:
La spirale logaritmica
in Italian sorry, but you don’t need to read everything: go to the bottom of the page and look at the drawings. The length of the radius follows the Fibonacci chain: 1, 2, 3, 5, 8, 13, 21, 34, … ).
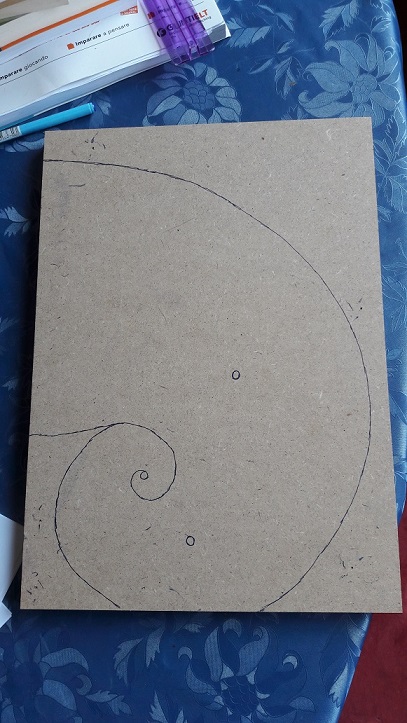
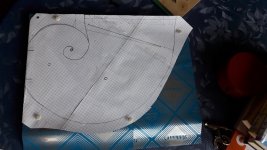
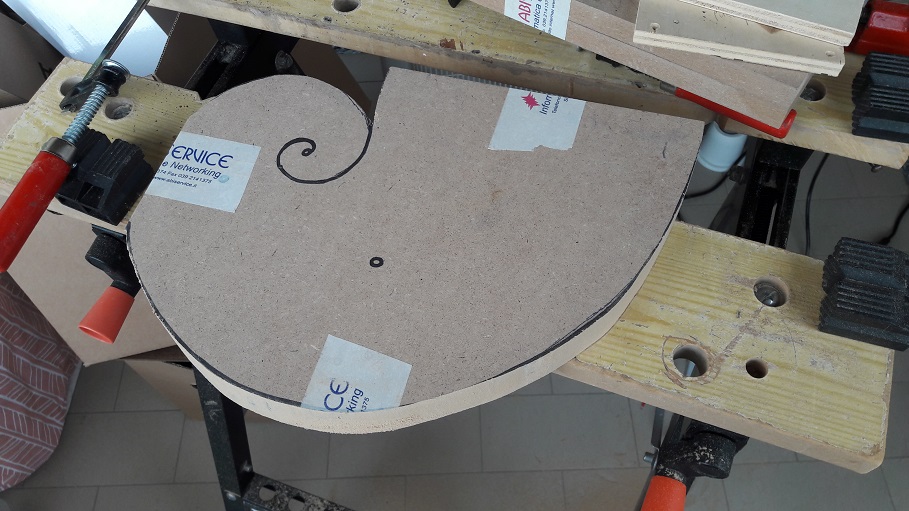
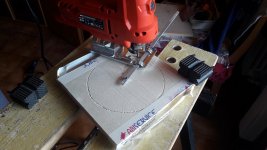
To draw it, I used sheets with little squares, tied together with tape, then transposed the drawing to the wooden board ( 16 mm MDF ) with carbon paper.
Ciao.
Next episode: cutting the boards.
We need to draw a spiral on the sides of these speakers.
Basically we have two kinds of spiral ( all the information on the web, of course ):
• logarithmic spiral ( also known as golden or Fibonacci spiral ) that grows in dimensions quite quickly, so you’ll have less coils and a shorter duct
• plain spiral, with constant grow, that allows you to have longer ducts
My choice was the first, as it’s quite easy to draw ( please look here:
La spirale logaritmica
in Italian sorry, but you don’t need to read everything: go to the bottom of the page and look at the drawings. The length of the radius follows the Fibonacci chain: 1, 2, 3, 5, 8, 13, 21, 34, … ).
To draw it, I used sheets with little squares, tied together with tape, then transposed the drawing to the wooden board ( 16 mm MDF ) with carbon paper.
Ciao.
Next episode: cutting the boards.
Attachments

Nice work, Luca! I’m sure they sound great. I made something similar with foamcore years back.
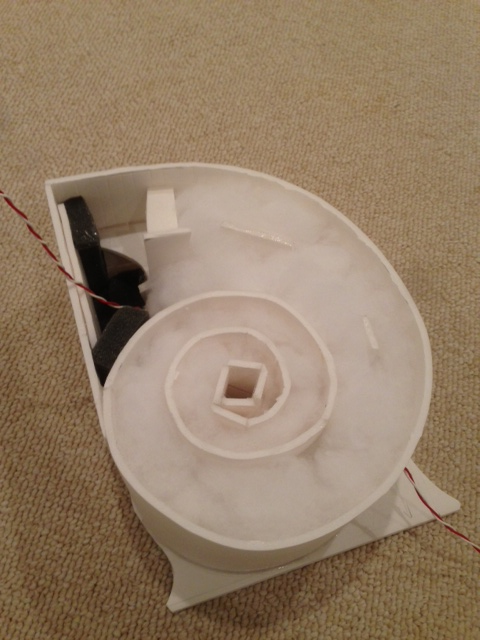
The Nautaloss Ref Monitor
The Nautaloss Ref Monitor
Hi Xrk,
I must admit that exactly the picture that You posted helped me in solving some issues that arose during the making.
Please stay tuned, we'll talk about this later on.
Best regards.
L.
I must admit that exactly the picture that You posted helped me in solving some issues that arose during the making.
Please stay tuned, we'll talk about this later on.
Best regards.
L.
Cutting the baords
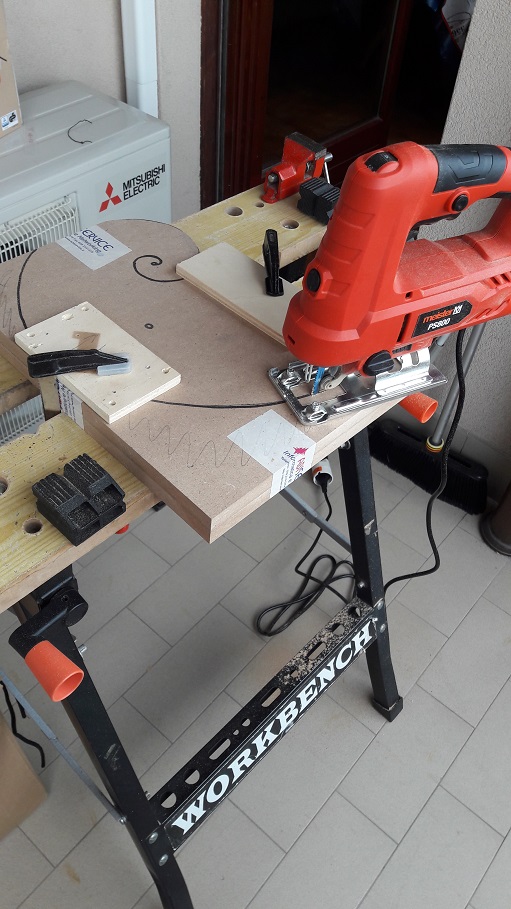
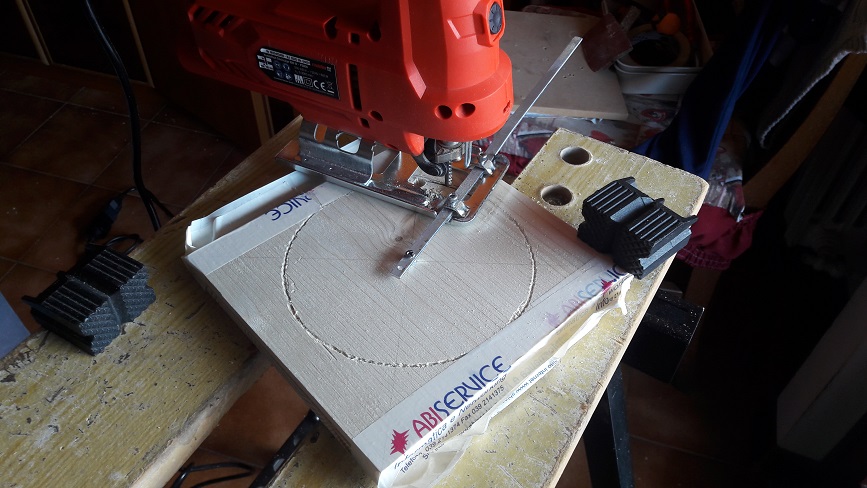
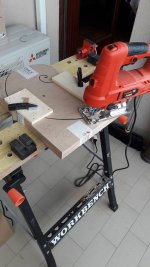
Nothing particular to say: I used a jigsaw to cut 2 16 mm MDF boards tied together at a time, to be sure that the sides of the same speaker have the same curvature.
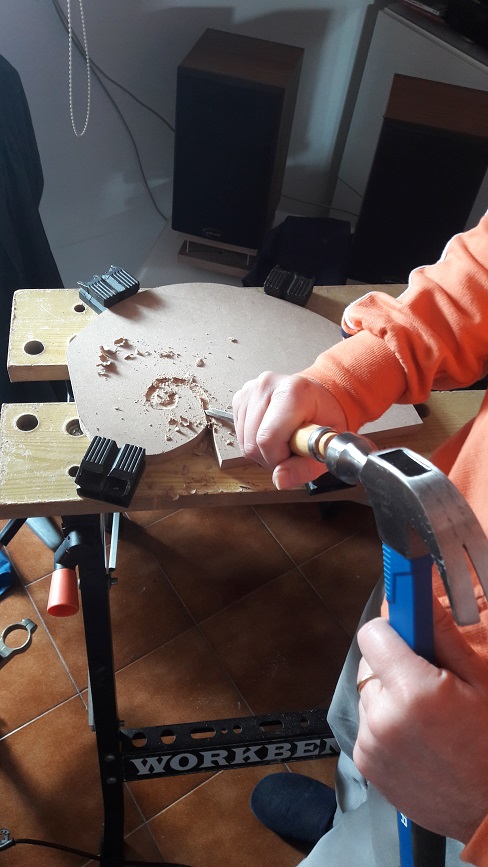
Then I dug the curl of the spiral with a chisel and smoothed it with a spherical file.
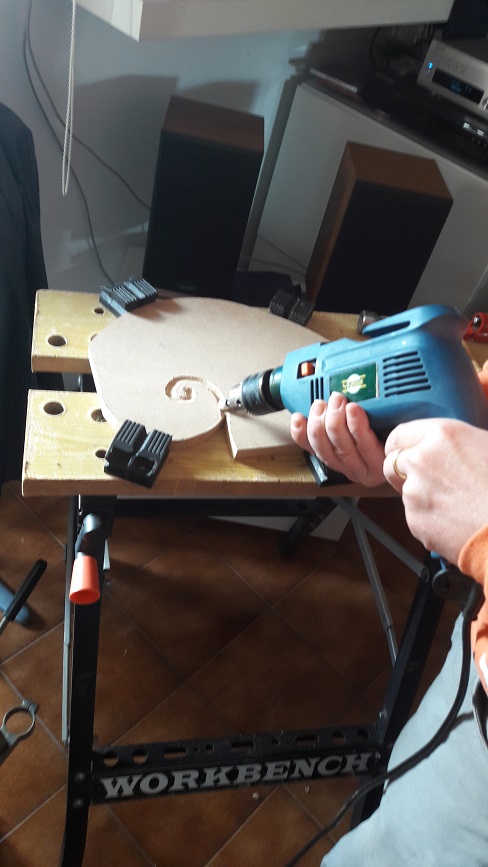
For the speaker flange, I used 7 mm plywood. 2 boards each speaker, glued togheter: the first with a larger circular hole to contain the driver, the second with a smaller hole to support the driver with 4 screws.
Ciao.
Next episode: bending the wood ( a flop … )
Nothing particular to say: I used a jigsaw to cut 2 16 mm MDF boards tied together at a time, to be sure that the sides of the same speaker have the same curvature.
Then I dug the curl of the spiral with a chisel and smoothed it with a spherical file.
For the speaker flange, I used 7 mm plywood. 2 boards each speaker, glued togheter: the first with a larger circular hole to contain the driver, the second with a smaller hole to support the driver with 4 screws.
Ciao.
Next episode: bending the wood ( a flop … )
Attachments


How do you decide the volume of the spiral for a particular driver? And then how do you measure the volume of the enclosure?
I'd like to try something with a bit of a challenge and this has always intrigued me.
I have seen decoration for the Autumn season that are similarly shaped: corncucopias. It might be interesting to find driver for some of these.
Thanks,
Mike
I'd like to try something with a bit of a challenge and this has always intrigued me.
I have seen decoration for the Autumn season that are similarly shaped: corncucopias. It might be interesting to find driver for some of these.
Thanks,
Mike
Last edited:
It’s a sealed rear chamber designed to absorb the back wave. So design as if making a sealed box driver. There is tradeoff for deeper extension vs providing enough acoustic suspension to reduce effects of over excursion. You can model that with sealed box simulator and TS parameters. Or not worry about it too much and use a high pass filter so that a woofer or sub handles the bass. Volume of final spiral can be measured using some dry goods like beans, rice, etc. add until it fills and then pour into known volume container. Or estimate by dimensions and subtract a percentage for the rounded parts.
Thanks a lot Xrk for answering to questions that I could never answer ...
The only measurement that I made was for the final dimension of the spiral: 4 cm in addiction to the diameter of the driver both vertically and orizontally.
Ciao.
The only measurement that I made was for the final dimension of the spiral: 4 cm in addiction to the diameter of the driver both vertically and orizontally.
Ciao.
Bending the wood ( a flop … )
I wanted to use wood for the front and rear curved walls.
On the web you can find many ways to bend tables, generally based on steam, water, transversal cuts filled with glue, etc. …
I tried various of them, with not satisfying results: the boards of plywood ( the wet MDF always breaks ), even full wet, tended to crack, because of the strength necessary to bend them to such curvatures, and the curvatures obtained were quite random, never accurate, even with a sort of template.


The transversal cuts filled with glue were not good too: there was always a cut deeper than the others that caused the board to break.
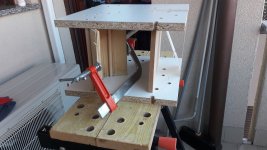
Maybe the only way could have been to put the wet boards between two templates as high as the speakers are wide, with big clamps to tighten: too complicated.
An alternative is to cut the boards in little transversal laths and put them in place one after the other, but the final surface wouldn’t be as smooth as with a single board.
So, which solution ? In the next post.
Ciao.
Next episode: aluminum and foam
I wanted to use wood for the front and rear curved walls.
On the web you can find many ways to bend tables, generally based on steam, water, transversal cuts filled with glue, etc. …
I tried various of them, with not satisfying results: the boards of plywood ( the wet MDF always breaks ), even full wet, tended to crack, because of the strength necessary to bend them to such curvatures, and the curvatures obtained were quite random, never accurate, even with a sort of template.
The transversal cuts filled with glue were not good too: there was always a cut deeper than the others that caused the board to break.
Maybe the only way could have been to put the wet boards between two templates as high as the speakers are wide, with big clamps to tighten: too complicated.
An alternative is to cut the boards in little transversal laths and put them in place one after the other, but the final surface wouldn’t be as smooth as with a single board.
So, which solution ? In the next post.
Ciao.
Next episode: aluminum and foam


That’s impressive work to bend your own wood. Did you soak in water overnight first?
“Bendy” plywood (precut with slits on one side) is also an option.
As is foam core with thin wood veneer.
“Bendy” plywood (precut with slits on one side) is also an option.
As is foam core with thin wood veneer.
Hi Xrk.
Yes, I kept the wood 3 days into water before working it.
I didn't know the existence of bendable plywood before now. Maybe it would have been quite useful. The only drawback I can see, after a quick look on the web, is that is sold only in large ( and expensive ) sheets.
Thanks a lot, as usual.
L.
Yes, I kept the wood 3 days into water before working it.
I didn't know the existence of bendable plywood before now. Maybe it would have been quite useful. The only drawback I can see, after a quick look on the web, is that is sold only in large ( and expensive ) sheets.
Thanks a lot, as usual.
L.
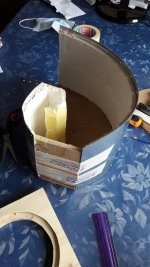
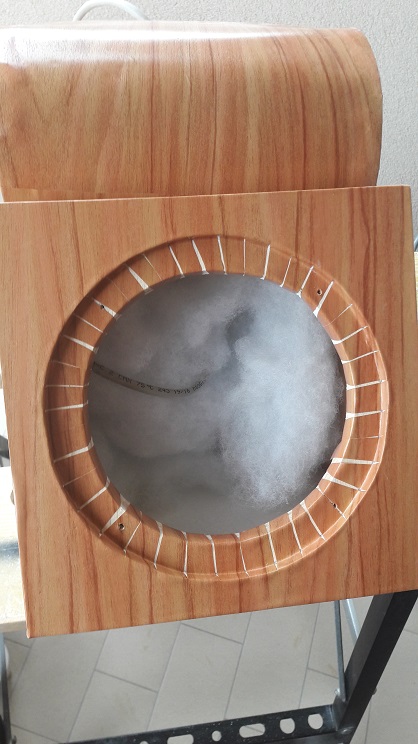
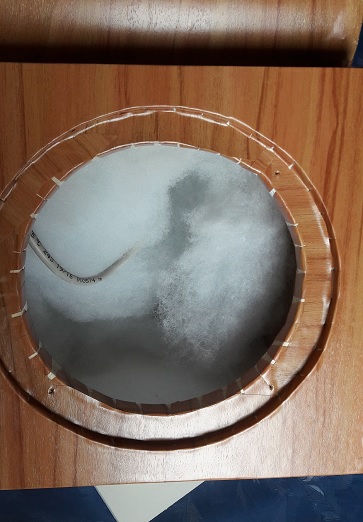
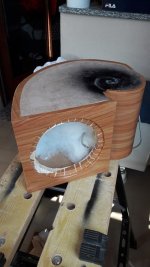
Aluminum and foam
Well, pictures are self explaining: thin aluminum sheet ( 0.4 mm ) tied to the vertical walls with glue and nails, kept in the right curvature with tape before connecting the other wall.
Tip: better to drill the holes for the nails before connecting the sheet to the wood, you’ll work more comfortably.
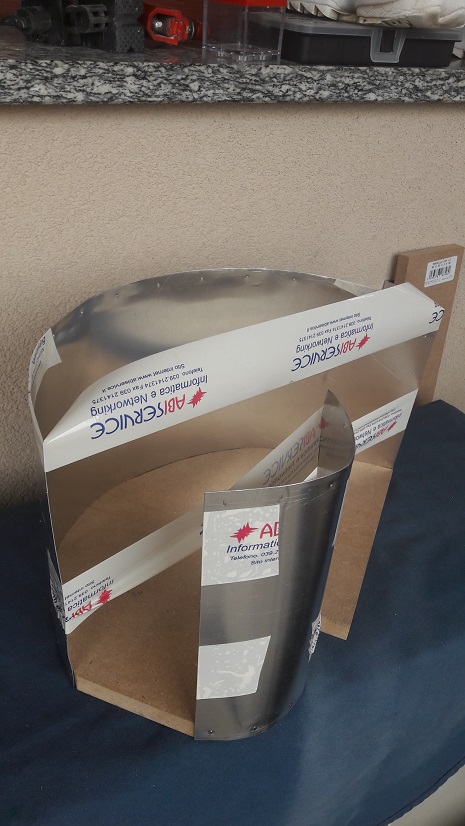
To dampen the sound reflections, I glued foam sheets, 1 cm thick, inside ( thanks Xrk for your projects, they inspired me ).
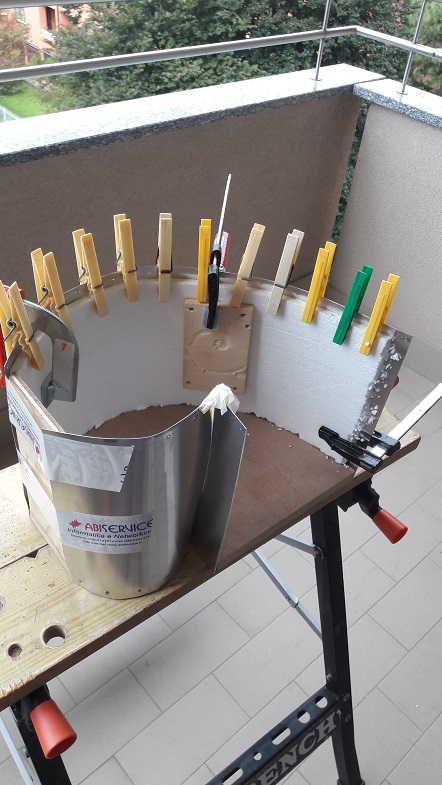
The internal curl was made with foam, too: small laths tied together with glue and paper tape.
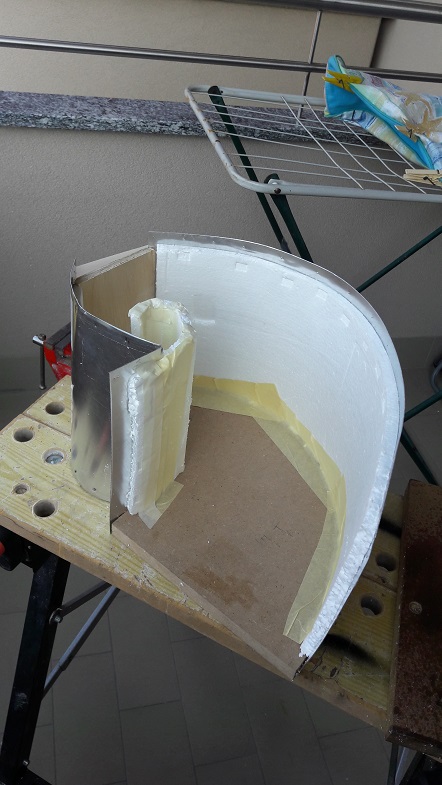

Before closing all with the other wall and driver flange, put the damping material and the cat. 5 cable.

Ciao.
Next episode: filling the holes with stucco.
Well, pictures are self explaining: thin aluminum sheet ( 0.4 mm ) tied to the vertical walls with glue and nails, kept in the right curvature with tape before connecting the other wall.
Tip: better to drill the holes for the nails before connecting the sheet to the wood, you’ll work more comfortably.
To dampen the sound reflections, I glued foam sheets, 1 cm thick, inside ( thanks Xrk for your projects, they inspired me ).
The internal curl was made with foam, too: small laths tied together with glue and paper tape.
Before closing all with the other wall and driver flange, put the damping material and the cat. 5 cable.
Ciao.
Next episode: filling the holes with stucco.
Attachments


Is the spiral a golden ratio or log?
Edit- ignore. I just realised they’re the same.
Edit- ignore. I just realised they’re the same.
Last edited:
You're right, Nick.
As i wrote in post #4, we are dealing with logarithmic or golden ( ratio ) or Fibonacci spiral.
Ciao.
L.
As i wrote in post #4, we are dealing with logarithmic or golden ( ratio ) or Fibonacci spiral.
Ciao.
L.
Filling the holes with stucco
Again nothing particular to say: just use stucco ( or whatever you like ) to fill all the slots that invariably happen when different materials and surfaces are tied together.
Don’t forget to put a generous amount also on the heads of the nails that fasten the aluminum sheets, so they will be hidden and won’t “spring up” in next processings.

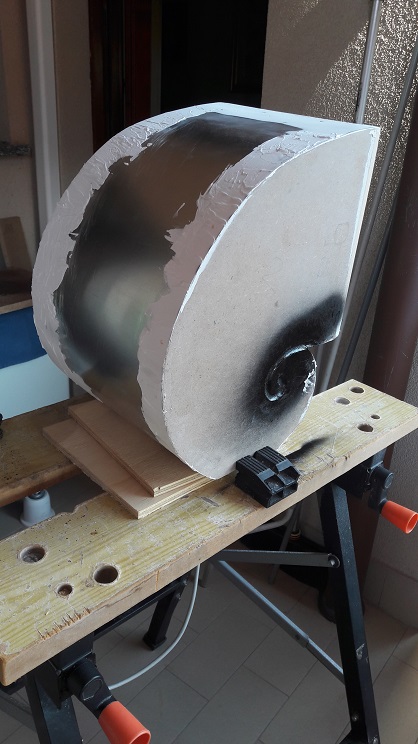
Then smooth everything with sandpaper.
In this phase it’s possible to paint the external curls with spray paint or other. It’s not necessary to stay precisely inside the curl: next working will hide inaccuracies.
Ciao.
Next episode: covering with adhesive vinyl sheets.
Again nothing particular to say: just use stucco ( or whatever you like ) to fill all the slots that invariably happen when different materials and surfaces are tied together.
Don’t forget to put a generous amount also on the heads of the nails that fasten the aluminum sheets, so they will be hidden and won’t “spring up” in next processings.
Then smooth everything with sandpaper.
In this phase it’s possible to paint the external curls with spray paint or other. It’s not necessary to stay precisely inside the curl: next working will hide inaccuracies.
Ciao.
Next episode: covering with adhesive vinyl sheets.
Attachments

Last edited:
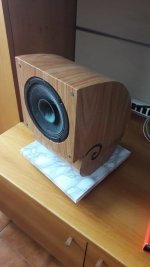
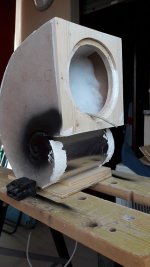
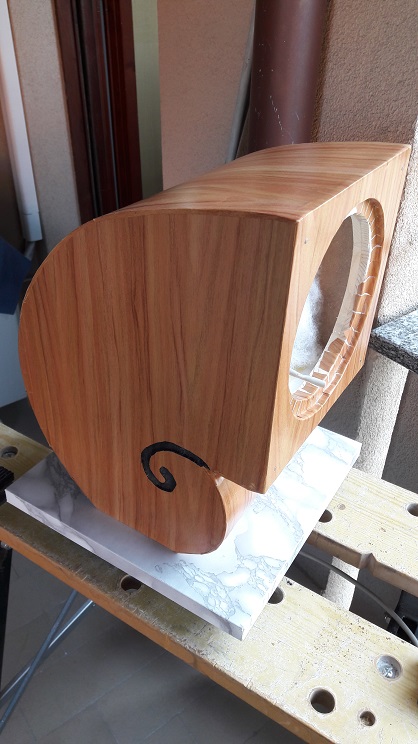
Covering with adhesive vinyl sheets
Why vinyl sheets rather than an ordinary paint ? Because I never got satisfying results by painting wood, MDF specially.
So for those who, like me, have not a great skill in painting wood:
• vinyl sheet provide a great choice of colours and designs. My choice was for cherry tree like, that matched with the furniture of my living room
• you’ll be more comfortable if you cover front and rear first, than the side walls

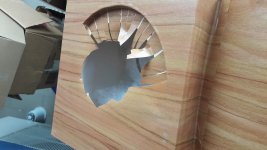
• the most difficult job is to cover the curved edges, where the vinyl tends to curl up. Here You can cut the edge of the vinyl transversally all along the edge ( please see pic )

or tie the vinyl in small “crests” all along theedge, then cut them with a knife
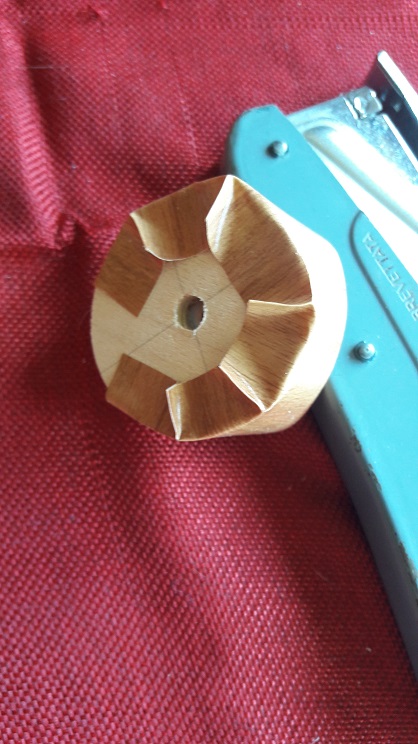
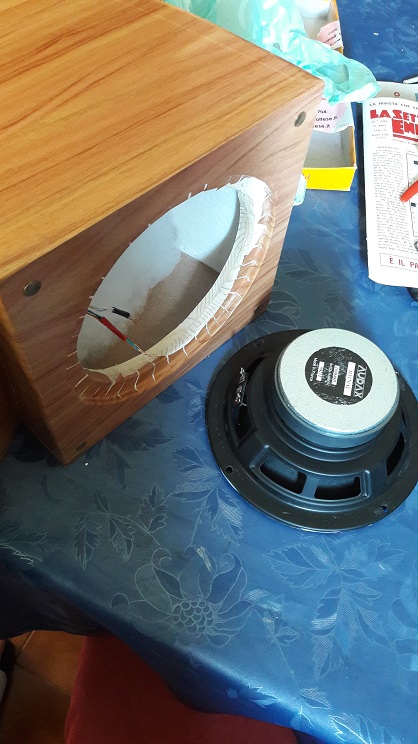
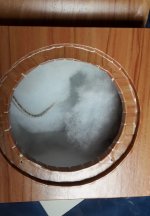
• as for the driver hole, cutting the vinyl in slices will leave some segments uncovered

cover them with small pieces of vinyl.
• then, uncover the external curls from the vinyl that hide them, taking ita way with a knife
I tell you that it’s difficult to obtain a good result on the first try. If so, don’t be lazy: take away all the vinyl and restart again: you’ll get more satisfaction.
Al last, you can solder the cat. 5 wire to the driver: I’m used to connect the 4 white cables to the – ( black ) pin, and the 4 coloured ones to the + ( red ) pin.
Ciao.
Next episode: the basement.
Why vinyl sheets rather than an ordinary paint ? Because I never got satisfying results by painting wood, MDF specially.
So for those who, like me, have not a great skill in painting wood:
• vinyl sheet provide a great choice of colours and designs. My choice was for cherry tree like, that matched with the furniture of my living room
• you’ll be more comfortable if you cover front and rear first, than the side walls
• the most difficult job is to cover the curved edges, where the vinyl tends to curl up. Here You can cut the edge of the vinyl transversally all along the edge ( please see pic )
or tie the vinyl in small “crests” all along theedge, then cut them with a knife
• as for the driver hole, cutting the vinyl in slices will leave some segments uncovered
cover them with small pieces of vinyl.
• then, uncover the external curls from the vinyl that hide them, taking ita way with a knife
I tell you that it’s difficult to obtain a good result on the first try. If so, don’t be lazy: take away all the vinyl and restart again: you’ll get more satisfaction.
Al last, you can solder the cat. 5 wire to the driver: I’m used to connect the 4 white cables to the – ( black ) pin, and the 4 coloured ones to the + ( red ) pin.
Ciao.
Next episode: the basement.
Attachments
-
 24 fianco pre copertura 2.jpg123.7 KB · Views: 367
 -
 25 spicchi laterali incompleti.jpg115.3 KB · Views: 365
 -
 26 creste vinile.jpg127.2 KB · Views: 350
 -
 27 foro speaker pre copertura.jpg121.9 KB · Views: 356
 -
 28 foro speaker a spicchi.jpg117.9 KB · Views: 358
 -
 29a foro speaker ricoperto.jpg67.7 KB · Views: 348
 -
 30 cassa senza speaker.jpg123.5 KB · Views: 359
 -
 31 cavi e speaker pre saldatura.jpg134.4 KB · Views: 340
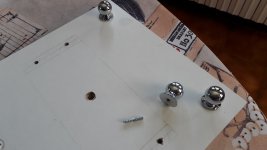
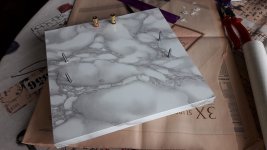
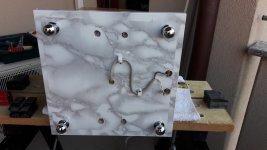
The basement
I just used a wooden board, a little bit larger than the speaker to improve stability, then drilled the holes for screws, cable, binding posts and support feet. These ones are just ordinary knobs for drawers, tied to the board by double thread screws.

The basement is covered with marble-like vinyl, to give impression of weight and firmness. Covering here is quite simple, as there are not curved surfaces.
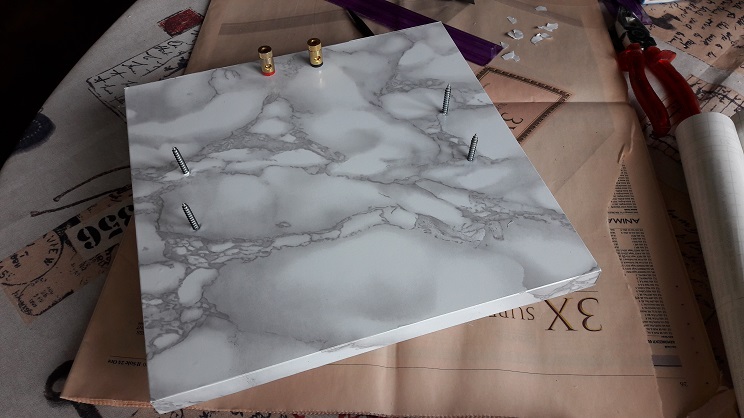
The speaker is connected by 4 long screws, 2 each vertical wall, then you can solder the wire to the binding posts ( 4 white cables to -, black, and 4 coloured to +, red ).

Ciao.
Next ( and last ) episode: the protection covers.
I just used a wooden board, a little bit larger than the speaker to improve stability, then drilled the holes for screws, cable, binding posts and support feet. These ones are just ordinary knobs for drawers, tied to the board by double thread screws.
The basement is covered with marble-like vinyl, to give impression of weight and firmness. Covering here is quite simple, as there are not curved surfaces.
The speaker is connected by 4 long screws, 2 each vertical wall, then you can solder the wire to the binding posts ( 4 white cables to -, black, and 4 coloured to +, red ).
Ciao.
Next ( and last ) episode: the protection covers.
Attachments
- Home
- Loudspeakers
- Full Range
- Nautilus Junior - easy full range loudspeakers