Inset or overlayed, I don't know which is what but the back panel is standing on the bottom panel.
I only have two good glamps of appropriate size. I have two small handclamps and then four big *** metal clamps that are over a meter long. So I'm doing it one step at a time and giving the glue at least an hour or two to dry (when glueing the port spacers I only gave it ~25 minutes).
Ingvar, you said you gave me some damping material to use for these cabinets. Is it the green or the white stuff that I'm supposed to use?
... big *** metal clamps that are over a meter long....
I've been in the shop where Chris has a half dozen of those clamping up a set of uFonken.
dave
At the moment I have 23 assorted bar clamps. This generally not enough to do two 40" MLTL's. Something that often comes in handy are strap clamps--1" or larger nylon tie down straps. Put three or four around a moderate sized BR and you are done.
Bob
Bob
if you're machining the rebated driver cutouts by CNC, I'd allow a fraction of mm ( a "blonde one") oversize for ease of driver fit
I know, learnt that the hard way.
Back panel is inset and all pieces are cut to 10degrees. Top and bottom are cnc ruoted to final size/shape except the last cut on the sides 90 degrees to front, i left that to Niklas to decide where to put.
The Tremco PVA glue i enclosed is very quick "biting" and dries in about 30min.
The green wool/cotton felt is for both these boxes and for the Oy kit. The
wool/fibre stuff is for damping of the braces in Oy and for the port damping.
Well, working with the big clamps is probably easy when you have a large working space.
This is how my workshop looks like. You can see part of the clamps in the upper right corner.
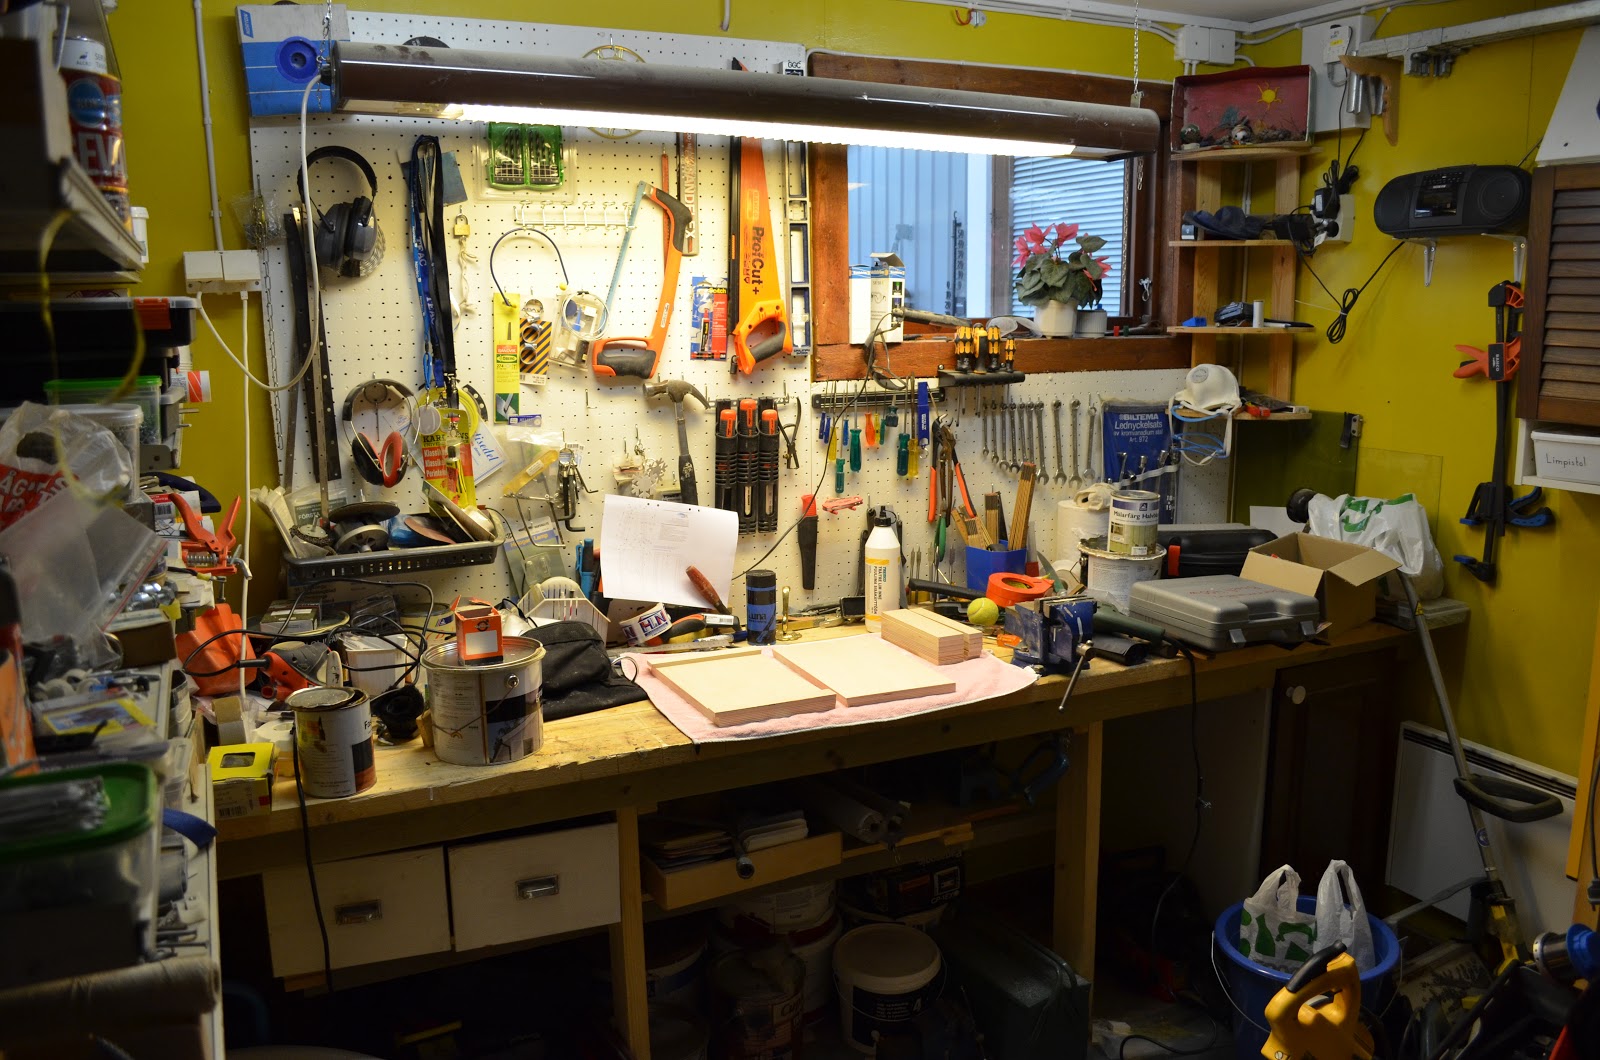
And working outdoor is not an option since the weather is like this at the very moment.

This is how my workshop looks like. You can see part of the clamps in the upper right corner.
And working outdoor is not an option since the weather is like this at the very moment.
As for joining the back and bottom panels my dad came up with an idea.
He said that I should screw the brace to the back panel because it will ensure that the angles between bottom and back panel will be correct.
I've also decided to get some new binding posts for this set of speakers.
Right now I'm using these
And I'm thinking of getting these
He said that I should screw the brace to the back panel because it will ensure that the angles between bottom and back panel will be correct.
I've also decided to get some new binding posts for this set of speakers.
Right now I'm using these
An externally hosted image should be here but it was not working when we last tested it.
And I'm thinking of getting these
An externally hosted image should be here but it was not working when we last tested it.
I've also decided to get some new binding posts for this set of speakers.
Right now I'm using these
An externally hosted image should be here but it was not working when we last tested it.
And I'm thinking of getting theseAn externally hosted image should be here but it was not working when we last tested it.
Are you making a removable back panel? If not the type you are using now will give you access to the connection wires, but the ones you are thinking of using will not. Also the new types look like they have much more more metal in them, not necessarily a good thing.
Nope, I don't think of making the back panel removable. If I go with the ones in the bottom picture I was thinking that I would mount them to the back plate early in the assembly process and solder the cables to them before mounting the baffle and the top.
With the type of terminal cup you are using now, you also have less sticking out of the backside of the speaker cabinet vs the ones you are planning to use.
until you break one of themYes, but that's not an issue really.
btdt
Regardless of the type of binding posts / connectors, I'd never consider not making them removable
The recessed cup types have the additional advantage of providing a grip-handle that does not strain the posts themselves
Part of this is covered in the binding posts thread. The cup you have been using is better with the posts with plastic nuts and the smaller cutout. The ones you have are better than the ones you propose.
dave
PS: the Volvo V70 is the same colour as ours.
dave
PS: the Volvo V70 is the same colour as ours.
until you break one of them
btdt
Regardless of the type of binding posts / connectors, I'd never consider not making them removable
The recessed cup types have the additional advantage of providing a grip-handle that does not strain the posts themselves
+2
New baffles sent, to same SJ adress as before.
Didn´t cut the champher on baffle as drawing notes recomends this done after assembly.
Also reading all notes carefully which i neglected to do at first, the senility issue again, i saw the info regarding brace damping so there´s low density polyester mat enclosed with baffles.
Take care to leave ~ 15 mm all around brace surface free from damping to
leave space for the felt on attached panels.
Niklas,
From the blog pictures, it looks like the dMar-Ken70T didn't come with the final "bevel" that makes it an 8 sided prism.
And i didn't trick you into making them 😀 .... until you posted about the brace i handn't given any thot that using a baffle for the rectangular one (like you already built) would lead to the smaller trapezoid.
dave
PS: and i see you are also using the letter phi (althou yours is a capital, mine lower case)
The building process is slow, as you might have seen if you've kept an eye on my blog. So much real-life stuff going on at the moment and dad is never home to help me glue. But I will work more on them the next week, taking a week off from the gym. Going to the gym seven days a week leaves little time and energy for building speakers.
By the way, just for fun I tried setting the XO between subwoofers and the Mar-Kel70s at 300Hz instead of like ~85-90Hz. The mids and highs became a lot better, dynamic improved and it actually sounded better overall. I guess it's because I got some more "punch" in the upper bass region now that I have two 10" drivers covering it instead of two 4". The weird resonance in the subwoofer boxes at ~150Hz seems to be gone. I played the same tracks as I did the last time I heard it and it sounded clean to me.
This will have to do for now. Soundstage is a little messed up because the woofers are playing so high up but it doesn't really matter since I'm not faced toward the speakers anyways.
I had some time to work today, check the blog!
How big holes should I drill for the screws for the drivers? 3mm?
I drilled 2.5mm today but it seemed a little too small, should I increase it to 3mm? Or maybe 3.5mm?
How big holes should I drill for the screws for the drivers? 3mm?
I drilled 2.5mm today but it seemed a little too small, should I increase it to 3mm? Or maybe 3.5mm?

- Home
- Loudspeakers
- Full Range
- Mar-Kel70 in Sweden