Bigun said:I haven't read anything on the 'tri-foil' - I thought perhaps it was proprietary to planet10 or something ?
It is mine, but diyers are encouraged.
Info here, and links to more. http://planet10-hifi.com/FE12xeN.html
dave
Bigun said:I left them playing during the day whilst I'm at work.
I've read a bit about the eNable, it appeals to my scientific interests and looks not altogether impossible to DIY.
I haven't read anything on the 'tri-foil' - I thought perhaps it was proprietary to planet10 or something ?
not in the sense of legally protected "tri-foil" is Dave's designation for the pattern discernible in this group photo of a batch of drivers part way through the full monty process
An externally hosted image should be here but it was not working when we last tested it.
DIYer's can contact Dave directly for details of materials and application techniques. It is not random or chosen for visual aesthetics.
This treatment helps considerably to tame the upper midrange resonances exhibited by both the FE126 and FE127, but is only a baby step compared to what is achieved with the full EnABL process.
Member
Joined 2009
Paid Member
thanks for the help again guys.
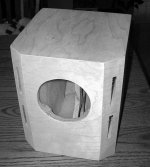
Had a little set back - first attempt at gluing on a layer of Birch veneer had me scraping it back off again.
Had a little set back - first attempt at gluing on a layer of Birch veneer had me scraping it back off again.
Bigun said:thanks for the help again guys.
Had a little set back - first attempt at gluing on a layer of Birch veneer had me scraping it back off again.
what technique are you using for the veneering?
Member
Joined 2009
Paid Member
pour carpenters glue on the side of the box, spread it uniformly all over the surface with a paint scraper. Cut a slightly oversized piece of veneer and lay on top. use a stiff BR port tube (!) as a roller to go all over the surface. Put a large piece of smooth plywood on top and load it down with two sacks of cement. Leave for half-an hour and ... elongated bubbles along one edge, some general unevenness.
I have since found a video on me-tube showing a guy who coats the veneer and the workpiece with a thin layer of carpenters glue and lets it dry. Then he uses a hot clothes iron to press the veneer into place. I didn't know you could do this with carpenters glue so I plan to try this tonight on a scrap piece of wood.
I have since found a video on me-tube showing a guy who coats the veneer and the workpiece with a thin layer of carpenters glue and lets it dry. Then he uses a hot clothes iron to press the veneer into place. I didn't know you could do this with carpenters glue so I plan to try this tonight on a scrap piece of wood.
Bigun said:pour carpenters glue on the side of the box, spread it uniformly all over the surface with a paint scraper. Cut a slightly oversized piece of veneer and lay on top. use a stiff BR port tube (!) as a roller to go all over the surface. Put a large piece of smooth plywood on top and load it down with two sacks of cement. Leave for half-an hour and ... elongated bubbles along one edge, some general unevenness.
I have since found a video on me-tube showing a guy who coats the veneer and the workpiece with a thin layer of carpenters glue and lets it dry. Then he uses a hot clothes iron to press the veneer into place. I didn't know you could do this with carpenters glue so I plan to try this tonight on a scrap piece of wood.
Gareth, learning to be comfortable with the iron-on method is definitely worth the effort - it gives you all the time you need for precision grain pattern matching, and pretty much foolproof adhesion. I personally use 4x8 ft sheets of paper back or 2 ply (wood backed) veneer that will contain flitches of generally no wider than 6", yellow carpenter's glue, and a velour pile paint roller to apply a thin very lightly stippled coats to both surfaces.
I've used this method exclusively for the better part of the past decade, and if you'd like to take this offline, could share a few suggestions.
Member
Joined 2009
Paid Member
well it seems to be working !
I've managed to Veneer one side of both boxes and expect the rest of the veneer to be in place this weekend if not sooner. The wife didn't mind so much me using the iron, but it was a bit telling that I didn't know where to find it !
Whilst I'm messing around waiting for the glue to dry I decide to hold the speaker up to my face and sing into the driver opening. At higher pitches the box sounds 'dead' and as I lower the pitch it comes to life with a clear resonance. I was a bit surprised - I assume this is the hoped-for resonance that the design is tuned for. I promise I hadn't had any beer by this time.
dude, how can you call yourself a canuck? - not having any beer when playing around like this is at least unpatriotic
Seriously, you'll likely get more comfortable with the ironing technique fairly quickly, and it wouldn't hurt you to visit your local Canadian Tire and buy your own cheap iron the next time you're stocking up on hockey-tape and snow-melter salt.
Take your time trimming around the port slot openings, and let the scorch-marks be your cut-out template.
most of all, just enjoy listening to the damned things
p.s.
Bob, thanks for posting the summary of your technique, I started typing out my own and it ran to much longer than that. The only comments I'd make is that with the open grain of Baltic Birch plywood and the preparatory sanding, the dilution of the yellow glue is probably not essential, and that as noted above, in the case of something like the Fonken enclosure, I take advantage of the heat scorching to delineate the edges of the slot port openings and rebated driver cut-out.
Member
Joined 2009
Paid Member
Good advice guys, and the masking tape over existing veneer is quite essential I've discovered.
The main issue I've had is that a couple of spots I got a crack in the veneer and the odd chip near a corner. It's not the best job ever, but it's the first time and if you don't hold it close up it looks good.
I haven't got much to delineate the port openings. Maybe I go with a sealed box instead !
For the driver cut-out I have a plan. I'm going to shine a light through the terminal cup opening and I'm betting that the driver opening will delineate quite nicely.
a couple of bottles are coolin' down in the fridge 😀
Member
Joined 2009
Paid Member
Well done
for cleaning out the veneer and glue in the port slots I use a PSA sanding disc stuck to a painting stir stick
the weekend's coming, so lift a few, eh?
for cleaning out the veneer and glue in the port slots I use a PSA sanding disc stuck to a painting stir stick
the weekend's coming, so lift a few, eh?
Member
Joined 2009
Paid Member
Of course every one has their own favorite material / technique, so it's really up to you, but considering the time it takes to build and veneer a pair of these, I tend to want to finish them as quickly as possible.
Normally I'm using cherry, walnut or mahogany veneer, so it's maybe some stain, then 3 or 4 quick coats of sprayed on post catalyzed nitro cellulose lacquer. With proper air flow, all 4 coats and the intervening sanding can be completed in a day in the booth.
If spraying any product, be sure to stuff the driver opening with newspaper or shop rags to prevent contamination of damping material. (since my driver cutouts are rebated for flush mounting, I'll mask them off with blue painter's tape)
Birch and cherry are probably the hardest to stain for the novice. They can blotch pretty badly. By all means use a pre-stain treatment before you put a dark stain on birch.
I have a fondness for natural cherry at the moment. Three coats of MinWax tung oil finish looks great.
Bob
I have a fondness for natural cherry at the moment. Three coats of MinWax tung oil finish looks great.
Bob
Member
Joined 2009
Paid Member
That's a good point about Birch, I hadn't been aware of that when I chose it. Fortunately, I found the pre-stain stuff at Home Depot today but held-off from buying it. I'd have to buy a few different stain colours to really see which one is going to work for me as the silly sample pieces of wood at the store are no good to man nor beast. This would be quite an expense and light finish might also be a good fit for where these will be used so a no-stain approach is an option.
There was some Tung Oil and Danish Oil at the store. Do these avoid the 'blotchy' risk with Birch straight out of the can yet give the wood a nice 'glow' - the sanded Birch is 'too white' as-is ?
In the meantime I've installed some veneer inside the vent openings and some stick-on felt pieces on the inside back of the box opposite the driver. And I'm going to put some 'natural' semi-gloss nickwax final coat on a test piece to see how a light finish would look.
Bob Brines said:I have a fondness for natural cherry at the moment.
That is the dominant "colour" around here too.. i am thou just putting some vibrant blue drivers in a red-stained Cherry boxe that looks like it will be a fethching combo.
dave
Just about anything you do to natural birch will give it a yellowish color. That's not necessarily a bad thing, you just have to be aware of it. Wipe on urethane is the easiest. MinWax tung oil finish gives the best results IMO. You might consider shellac. Definitely yellowish, or you could use the "amber" variety which is orangish. Get the newest can of "Bullseye" you can find (cans should be dated ) and cut it 2/1 with alcohol.
Wipe on acrylic will give the whitest finish. Personally, I think acrylic look plastic and fake.
Bob
Wipe on acrylic will give the whitest finish. Personally, I think acrylic look plastic and fake.
Bob
Member
Joined 2009
Paid Member
I've seen too many mid-scale restaurants with stained plywood trying to look like something else. I've decided to be true to the wood and go for...... Birch. So I'll follow your advice Bob, wipe on urethane it is. 
- Status
- Not open for further replies.
- Home
- Loudspeakers
- Full Range
- I've started my first project...