Not really, still need to learn more. For this project, I used OpenSCAD and EstlCAM.

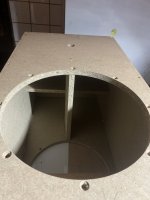
The box went together surprisingly well. I put it together with a brad nail gun and predrilled holes for screws. I learned my lesson, screws for chipboard boxes are way overkill, I should have glued it up just with the nails. I also cut some extra braces by hand from the bad panels, it should be quite solid in the end.
It might be just a feeling, but I think the chipboard used to be stronger 20 years ago when I was building my first boxes.
On the other hand, this is just a cheap project, and it machines like butter. The only downside is the weight. The front and back baffle will be doubled up and all well braced. I forgot to take pictures before taking it apart, I will post some from the build up - not that it would be actually something too interesting, just a rectangular box.
What I really like is OpenSCAD - I can create parametric model for the panels, both 2D and 3D. As I am a programmer, it is easier for me than creating the model in FreeCAD (which can, by the way, import the OpenSCAD projects as well). I can lay out the panels in groups which fit the bed size and then easily create the gcode in EstlCAM from a single exported DXF file. With a bit of optimization, the workflow will be really fast and smooth for 2D projects.
You can build Pyton Script in FreeCAD to create the 2D and 3D models but I can't see advantages using this approach over standard CAD modeling way, but more ways we find, better is.
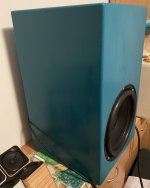
Done🙂 So far so good. In the SLOB, I got too much vibrations - so I thought there will be also some present. But there are none. It turned out I mixed 2x4 ohm and 2x2 ohm woofers in the SLOB due to wrong labels on them. The sealed box got two woofers and the force cancelling seems to work fine. What is less nice is, that it seems to me that one of the new woofers still makes some funny noise. I need to take it out and test both separately. It might be things vibrating in the room though, so I have to try somewhere else, too. I had only a few minutes, it is too loud for late night testing.
Attachments

It looks like you went in a different direction, but the slot is an area I'm curious about. I wonder if VituxCAD or what's that other acoustic simulator could give good results. I'm also curious about woofers facing the wall, which is also a kind of slot...What would be the ideal slot width? Any tips for simulation?
The rear woofer is just a few cm from the wall. I do not know how to predict the influence really.
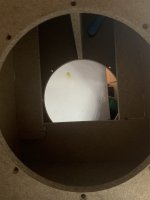
I had my lesson yesterday about what a sealed box means. The funny noises were from around the screws. The rubber seal deforms and is not really air tight. I replaced it with self adhesive window seal and it is completely silent.
The second lesson was that if a threaded insert is stuck on a screw, it is damaged and needs to be replaced. While installing the woofer back, one of the threaded inserts was torn out and the "funny noises" are from the screw hole, since it is not air tight. I do not want to risk damaging another one. I will therefore use silicone to seal the hole and basically glue the screw in. The foam seal seems to be tight enough.
The second lesson was that if a threaded insert is stuck on a screw, it is damaged and needs to be replaced. While installing the woofer back, one of the threaded inserts was torn out and the "funny noises" are from the screw hole, since it is not air tight. I do not want to risk damaging another one. I will therefore use silicone to seal the hole and basically glue the screw in. The foam seal seems to be tight enough.
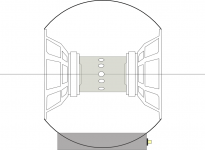
You'd better figure it out because thats the thing that makes the real killer improvement. Just glue say a drain pipe onto one driver. Make the pipe so that it touches the other when mounted - use a softer, thicker bushing for the last driver so that the force can be controlled, yet sealed.
I would fo so far and say that one could have soft mounting in both ends to make the drivers "float" in the cabinet.
You "must" do it 😉
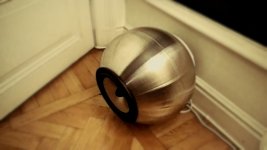
I made this for my ball subs...
//
I would fo so far and say that one could have soft mounting in both ends to make the drivers "float" in the cabinet.
You "must" do it 😉
I made this for my ball subs...
//
Attachments

Last edited:
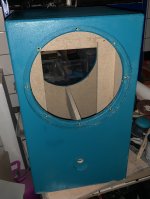
I could not resist and made a 20 second test in the morning. After sealing the stripped screw, the noise seems to be gone! Tomorrow I will test and listen more, so far it seems to be a success. Quickly equalized with 12 dB boost, it is flat to 30 Hz and louder than the room can handle even with just 75 W amp.
The box is pretty calm even without the brace between drives, but it rattles a lot pf things in the room🙂
The box is 37 cm deep and 34 cm wide, so the woofer centers are 17 cm from the edge. Should I expect some cancellation at a frequency corresponding to 71 cm half wavelength? I wonder if it could be used with woofers pointing to the sides as well.
The box is 37 cm deep and 34 cm wide, so the woofer centers are 17 cm from the edge. Should I expect some cancellation at a frequency corresponding to 71 cm half wavelength? I wonder if it could be used with woofers pointing to the sides as well.
- Home
- Loudspeakers
- Subwoofers
- Force cancelling subwoofer up to 200 Hz - or any other suggestions?