They have their uses, that's for sure. 😉 Although they don't always handle response relative to distortion ideally, so for this particular application, I still find manually designing preferable. A lot easier now given the improved interfaces relative to the old DOS software (I still rather like Calsod though -ye gods, that's an impressive bit of software, even now).
… B652-Air speakers ...
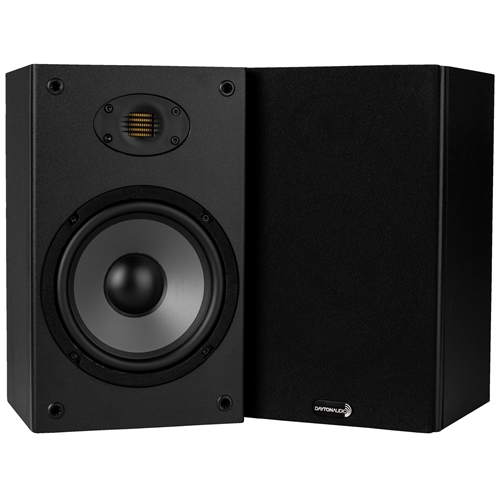
https://www.daytonaudio.com/product...2-way-bookshelf-speaker-with-amt-tweeter-pair
Less than $10 in driver & XO parts? (per box).
Likely a lot can be done to clean up the rough edges.
dave
I did modify the B652-Air crossover, you can see that in this thread:
https://www.diyaudio.com/community/threads/dayton-b652-air-outdated-bsc-crossover-mod.335560/
I'm appreciative of any tips. The woofer is polypropylene and could be used for a McKenzie style mod, although I have no way of knowing where the dimples should go.
Mark McKenzie mentioned writing an article on ribbon tweeters/speakers in the 80's I think, it might be useful to track down.
https://www.diyaudio.com/community/threads/some-speaker-driver-measurements.317632/
https://www.diyaudio.com/community/threads/dayton-b652-air-outdated-bsc-crossover-mod.335560/
I'm appreciative of any tips. The woofer is polypropylene and could be used for a McKenzie style mod, although I have no way of knowing where the dimples should go.
Mark McKenzie mentioned writing an article on ribbon tweeters/speakers in the 80's I think, it might be useful to track down.
I think this is him:Could you provide a link to Yevgeniy...
https://www.diyaudio.com/community/threads/some-speaker-driver-measurements.317632/
@ Keantoken: do you have access to ARTA?
I would suggest to start with a number of dimples, say 8, some half inch away from the surround attachment and see if that does anything, and work form there in a second and third ring of dimples, this last ring being about an inch or so from the voicecoil attaching. You need a soldering iron and a round iron piece to make the dimples. Measure every step and see what it does. A ring of glue may also be required.
Really looking forward to see what each step in treatment does.
This type of surgery on this particular woofer is not too dramatic, in case the PE patient dies in your audio hospital.
I use REW extensively and you can see that in my B652 thread.
I have a little 4" surround speaker driver (3" cone). It had a peak at 2KHz, I tried putting 3M PVC electrical tape on the dustcap and on the cone to see if it affected performance, it only worsened breakup. But when I removed the tape from the cone, it pulled off a layer of fibers from the surface. This may have shifted the peak to 3KHz. So this may be an interesting way to affect cone modes, if the lay of the fibers allows for predictable removal by this method. The cone is the smooth black paper you find on the cheapest drivers on CD players and radios. Wouldn't it be funny if we could make those speakers transient perfect by treatment?
I have a little 4" surround speaker driver (3" cone). It had a peak at 2KHz, I tried putting 3M PVC electrical tape on the dustcap and on the cone to see if it affected performance, it only worsened breakup. But when I removed the tape from the cone, it pulled off a layer of fibers from the surface. This may have shifted the peak to 3KHz. So this may be an interesting way to affect cone modes, if the lay of the fibers allows for predictable removal by this method. The cone is the smooth black paper you find on the cheapest drivers on CD players and radios. Wouldn't it be funny if we could make those speakers transient perfect by treatment?
I used a phono cartridge as an accelerometer to see if I can plot out the breakup modes of this speaker.


At 2.4KHz the cone edge becomes stationary and the center flexes in and out.
4KHz is an interesting case where there is almost no movement of the inner half of the cone but then there is too much movement in the outer half.
It's hard to tell but this pattern may repeat across the spectrum.
The cone edge and surround don't seem to resonate except in certain cases.
Still, it's not obvious how to translate this into an effective cone treatment.

Here is the same thing for the B652 woofer.
The surround resonates at 1KHz, so some doping of the surround would probably be good.
Major cone resonances are at 3.4KHz and 8KHz.
The noisy lines after ~10k should not be trusted, they are either the noise floor or residual magnetic coupling to the cart.


The surround resonates at 1KHz, so some doping of the surround would probably be good.
Major cone resonances are at 3.4KHz and 8KHz.
The noisy lines after ~10k should not be trusted, they are either the noise floor or residual magnetic coupling to the cart.
Intriguing technique! It is somewhat difficult to interpret these measurements. It looks as if both speakers -although very different- have an anti-resonance at 1 kHz, but maybe I misinterpret the graphs.
If you could plot the cone from outer edge to middle on the x axis, each above plot arranged as a range of movement along the Y axis covering all frequencies.... and then a slider could limit the information to bands or frequencies.
This is the best I can do without writing a program. Former is on the left, surround is the last column.
https://docs.google.com/spreadsheets/d/1kPhLe9nDM26gkHg1gl0mGz2LK7fNWuBGe6nc9Lz85ug/edit?usp=sharing
Note that these charts only give the vibration, they do not give phase. So a hot spot may be in phase or out of phase.
B652 woofer:

TV speaker:

https://docs.google.com/spreadsheets/d/1kPhLe9nDM26gkHg1gl0mGz2LK7fNWuBGe6nc9Lz85ug/edit?usp=sharing
Note that these charts only give the vibration, they do not give phase. So a hot spot may be in phase or out of phase.
B652 woofer:
TV speaker:
The 19th-century Chladni-plate technique can be interesting, too - sprinkle some light-coloured powder (table salt works) on the cone, facing upwards, vary the drive frequency, and look for shapes and patterns to appear.
A few years ago I saw documentary film in which a luthier was using this same technique to help him to carve the top and bottom plates of a 'cello. He used the resonance frequencies and vibrating mode shapes to guide him as to where and how much wood to carve.
Years ago I mounted a piezo disc in a small plastic holder (which I machined from Perspex on a lathe), and fitted the whole thing in place of the dust-cap on an 8" woofer. With some home-made electronics added, the piezo became a pretty decent one-axis accelerometer. The combination of speaker + piezo had an enormous resonance - a big spike - at somewhere between 1 & 2 kHz.
The point of that piezo was to build a motional-feedback system, with servo feedback flattening the frequency response of the woofer. It worked quite well, but that is another story entirely.
These days you can buy tiny accelerometer chips, as well as little breakout boards with the chips already mounted to them. Find one with the right maximum G rating, and it should work quite well as a woofer accelerometer - and it would be lighter than my old home-brew one.
-Gnobuddy
Try it and see - the powder bounces around once the speaker cone is vibrating, and I could see patterns. When you shut off the audio, all the powder settles back to the centre.The problem is how to keep the power resting on a conical surface.
-Gnobuddy
I've tried it in the past but couldn't keep the powder on the cone. Maybe I didn't try hard enough.
- Home
- Loudspeakers
- Full Range
- Does anything remain of Mark McKenzie's dimple cones and madsound?