
I'm still busy bribing my friend to bring his digital camera, so I can get better pictures, but I'd just like to share the concept... planting th idea is enough to get you going...
I still have to add the timer circuit, but needed to check what exposure was needed first... 2 minutes works pefectly.
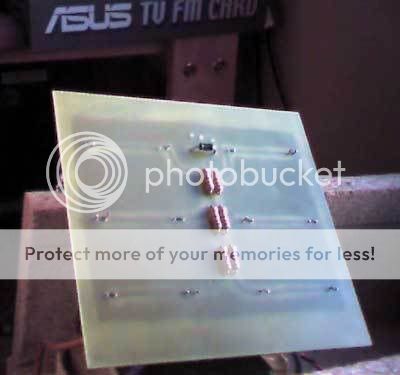
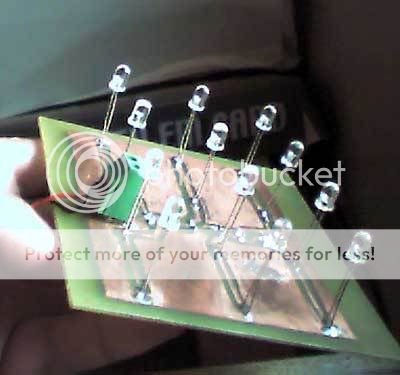
there are 6 branches with one 120R and 2 5mm UV LEDs each driven off a 12V supply.
The LEDs are not lit in the photo.. they are just reflecting the webcam's infrared beam.
Ok I just figured out how to operate the focus ring on the cam.. will take pictures in the day tommorrow...
This is a thread i will follow with big interest.
Nothing lees than genius is the word that comes to mind 😀
Thanks a lot for sharing this one, looking forward to hear about experiences with it in practical use.
Best regards
Ebbe
Nothing lees than genius is the word that comes to mind 😀
Thanks a lot for sharing this one, looking forward to hear about experiences with it in practical use.
Best regards
Ebbe
probably, I used a piece of paper to determine the optimal distance by looking at the light pattern through the page. Got it so, that all overlap, and it realy works very well. It is only sized for half Eurocards , maye up to 10 x 10CM (4 x4").
But I plan to add 2 of the panels to give me 20 x 10cm, and I might play with the spacing as it works exceedingly well now... might get even more footprint out of it... the majority of PCBs I make, will fit with no problem...
But I plan to add 2 of the panels to give me 20 x 10cm, and I might play with the spacing as it works exceedingly well now... might get even more footprint out of it... the majority of PCBs I make, will fit with no problem...
Check Elektor-Electronics, may 2006. They have a nice article about this!😀
Elektor-Electronics
Direct link
Elektor-Electronics
Direct link
Yeah , thats where I got the idea.. was too cheap to pay for the article... so I just looked at their PCB and worked it out for myself from there....
Instead of the silver foil , I just soldered the LED's on the coper side of the PCB to use as a reflector...
Did my first exposure last nigth and it came out realy nicely, except for me mixing the caustic soda too strong... luckily it was spray on photoresist so I can use the board again... But I could clearly see that it was working 100 times better than the sunlight method I used, and appart from the size restriction, it works 100%.
lemme know if you need a circuit diagramme... in retrospect I could have added the timer circuit on some of the unused copper areas.. but luckily it should be small so I can just glue it somewhere inside the case...
The LEDs were not quite as cheap as I hoped, but at least it is alot more durable than glass tubes and bulbs and should have a much longer and maintenance free lifespan. Total project cost +-$30.
If you are even thinking of makeing PCBs I can suggest this method, before trying any of the others I did before.
The total process is...
Lay out in eagle or obtain image file for pcb from someone.
Save it on a disk (yep its africa, the print shop has no usb port).
Drive to the print shop, and have them print it on acetate (tranparency), for which they charge me about 50c US. Which is a bargain considering how many sheets their printer mangles before it gets it right. 🙂 You can only smile and go with the flow sometimes...
I then come home, cut the printout closer to size so I don't have unsupported pieces lifting against the rest during exposure.. i.e. just cut out the outline a bit larger than the board...
Put glass from photoframe on UV box
place the transparency on it (make sure you got it the right way around)
Place the PCB on top of it
power UV LEDs for 2 minutes
remove pcb and rinse exposed photoresist with caustic soda (from your local hardware shop - its basicaly draincleaner , comes in white flakes or balls and is about $1 a small bag) and WARM water. -mixture (7g to 1l)
stick PCB under a cold running tap for a minute
drop pcb in luke warm Ferric chloride and water mixture (available from electronics shop normaly about 3 dollars for a 500g tub) You can reuse this mixture, I don't know how old mine is, I just add some hot water everytime I use it, and it stands in an open container from which water evaporates to counter filling...
Run under cold tap again. and finaly whipe off the remaining photoresist from the now completed traces with some acetone and kithen towels and you are all done....
CAUSTIC SODA
This stuff is very corrosive, throw it down the drain when you are done and run the tap for a while.
DON'T under any circumstances touch it, wear eye protection and rubber gloves, not material you do not want clingy wet material holding spilled chemicals agaisnt your skin ever. if you spill on your clothes ripp it off right there and go rinse the affected area under a tap... in fact work close to a tap to ensure running water for rinsing droplets from your hands , keep your face away from the tub , dont come close to look, you never know when you are going to do something stupid and splash yourself.
FERRIC CHLORIDE
This stuff is not so hectic on contact but will stain a turd or counter tops or anything for that matter....
These were budget +-$2 (in africa after import) 5mm UV LEDS, I think with about 20 degree exposure, so just about anything should work better...
UV LEDs tend to run on between 3.4 and 3.8V and operates at the top end of their ability at 40mA so for even this tiny circuit you need more power than a 9V battery can provide.
Thats why you have the 6 120R resistors. I used 1/2 watt but this is way excessive smaller wattage will do. the diode is a 1n4007 (first thing I could find on the floor) 1n4001 is fine and you need a 12V supply
I saw an interesting circuit the other day for how they do these high power LED torches... they basicaly strobe very fast and use less power as a result... could be we could get this baby battery operated...
I actually want to build something similar but the closest to UV LED's that I could get here is those clear ones that have a light output with a somewhat voilet-pink color to it.
it does have some UV content on the output shown by materials "glowing" under the light from it. not sure it would work though.
I've always used a flourescent table lamp for all photoetching. works well except that it takes 10 minutes to do a side.
it does have some UV content on the output shown by materials "glowing" under the light from it. not sure it would work though.
I've always used a flourescent table lamp for all photoetching. works well except that it takes 10 minutes to do a side.
I could experiment with some dark blue LED's. the light I get from those are rather deep blue to voilet but are much brighter and materials also flouresce (sp?) under those lights.
I think pointing one at a piece of photosensitive board for 2 minutes should give you an idea.. the resist should come off easily in the circle the light catches... unfortunately you can't see UV, and you should realy try not to look at the LEDs when they are lit as it is BAD for your eyes... I doubt the blue ones will work, but hey its not such a big deal to take 2 minutes and try it.

I notice my eyes take less stress around the panel in the daylight, probably because the pupils are smaller in the day...
But that horrible sand in the eyes feeling is not nice... and is normally the first sign of over exposure...
But that horrible sand in the eyes feeling is not nice... and is normally the first sign of over exposure...
- Status
- Not open for further replies.
- Home
- Design & Build
- Parts
- DIY UV Exposure box with UV LEDs