I do it manually gluing with oil on each contact. But to be sure that tension is equal you can first connect one side. On other side can be fitted weight let say 1g. using adhesive tape. This should be done in vertical position. So all ribbons will be tensioned with same force.
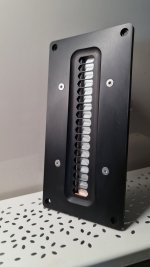
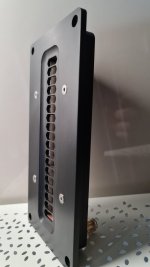
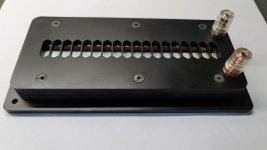

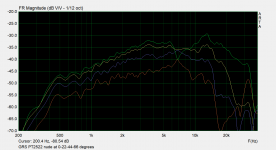
This is an interesting thread, and awesome DIY effort! But I have to post because I would like to point out a flaw with the design: the flange width compared to the ribbon width. The flange is a "baffle" and the ribbon is the acoustic radiator. When the baffle width exceeds about twice the width of the acoustic radiator, the response will have a dip and off axis the response level may exceed the on axis level. One good example of this is the B&G Neo3 (or the current GRS PT2522, see attached my measurements of the driver, nude) around 6k-10k Hz. This kind of response anomaly is undesired. If the flange width can be made as small as possible, these effects are reduced and largely eliminated. In the pics above there is an extra 1cm of flange on each side of the magnets (by my guesstimate) that doesn't need to be there.
Attachments
Hi CharlieLaub,
I'm not sure that I understand your comments. My measurement doesn't show any dip. Response is quite flat. Show me on picture what flange you are talking about?
I'm not sure that I understand your comments. My measurement doesn't show any dip. Response is quite flat. Show me on picture what flange you are talking about?
- Home
- Loudspeakers
- Planars & Exotics
- DIY ribbon dipole tweeter, reductio ad minimum