Why not try just using a large block of aluminum and cutting grooves in it using a table saw and a carbide tipped blade? I've done that with great results. Just make several passes to get it as deep as you want it. You can also make two deep cuts about 1/4" apart and use a drill bit to cut the bottom end out making a deep 'U' shape.
Attachments

mill?WTF?Isnt that that device for making a cofee?(English problems again)
It's what a machinist uses to...cut metal stock. It's a huge drill like machine which has a table that moves in a x and y axis.
You get the picture?
I can't find John's web site. I get page not found.
Sorry.
The water-cooled amp concept works well. Been there...still doing that. Use the search engine--I did a thread on this years ago. It's cheap and effective. At least for my way of doing things, you don't even need a fan. Convection is fine by itself.
Grey
Grey
I want to see pics of DIY passive(no water pump and other stuff) water-cooled heatsinks.Moray James has posted link,but its commercial design...
- http://www.variotherm.at/03_produkte/033_hl/heizelem.jpg ....mhm,this things needs water pump...
- http://www.variotherm.at/03_produkte/033_hl/heizelem.jpg ....mhm,this things needs water pump...

That looks really nice, i like how clean your layouts look.
I bought a box of surplus, small, aluminium project boxes that I've been thinking of using in like fashion. They are anodized black and are ribbed.
At the same shop I found some really neat bulbs for a ZenLite. ~6" dia. clear globes, 300W , $1/ea.
I bought a box of surplus, small, aluminium project boxes that I've been thinking of using in like fashion. They are anodized black and are ribbed.
At the same shop I found some really neat bulbs for a ZenLite. ~6" dia. clear globes, 300W , $1/ea.
I think you'll find that a water pump is a necessity, at least for class A amps.
Keep in mind that getting a good passive (i.e. non-pump) water flow is going to depend on having a pretty tall water column. That's going to be a nuisance in a room with a standard 8' ceiling. You're going to have to drill holes in the ceiling and take the water up to the floor above you. Be sure to keep the heat exchanger near the floor because the air there is cooler and the heat transfer will be more efficient--and remain that way as the room heats up. If you put the heat exchanger near the ceiling, you'll find that the air up there heats quickly and your exchanger will be sitting in an inverted "puddle" of hot air. Efficiency will drop considerably as the whole concept depends on the differential between the temperature of the water and that of the air you're trying to transfer the heat to. Cold outside temperatures are useful, but your efficiency will vary from day to day and from day to night. It's also a shame to waste all that nifty heat just when you need it most indoors. Not to mention the fact that summer heat will pretty much ruin the thing, leaving you bound to cool-season listening only.
Better to go with a pump if you intend to try water cooling.
Grey
I bought a pile of square aluminum tubing once upon a time
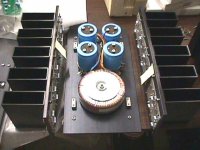
Great idea Nelson!! That stuff is very readily available too. BTW: is that the famous Pass family kitchen table under that amp?
Mark
Well that is one way to do it allthough I think for all the trouble I would rather buy a block of aluminum and cut it.
Well it makes nice fireworks thats for sure but its a bit ludicrous to be doing in the back yard. Not only is it dangerous but a foundry can do a much better job and also heat treat the sinks when completed to give them great strength and excellent machinability.
Nelson's idea looks much cleaner and if one needs more efficiency one can place a smaller size tubing inside the larger for higher dissipation. Its also very inexpensive and quick to build it up.
Mark
Nelson's idea looks much cleaner and if one needs more efficiency one can place a smaller size tubing inside the larger for higher dissipation. Its also very inexpensive and quick to build it up.
Mark
Looks creepy, actually. 
How about this:
Some copper plate and attach 3 in. aluminum "L" brackets bolted to the Cu plate.
Use paste for heat transfer for good measure.
However, the aluminum tubing looks promising. 😎
Guys, guys....
This is how you do it
DIY Heatsink (swedish version)
How about this:
Some copper plate and attach 3 in. aluminum "L" brackets bolted to the Cu plate.
Use paste for heat transfer for good measure.
However, the aluminum tubing looks promising. 😎
How about this:
Some copper plate and attach 3 in. aluminum "L" brackets bolted to the Cu plate.
I personaly like U-brackets,more effiency.
kmj said:Guys, guys....
This is how you do it
Would you like a welding course ?
That is probably the worst watt/lbs heatsink i've ever seen.
jacco vermeulen said:
Would you like a welding course ?
That is probably the worst watt/lbs heatsink i've ever seen.
A welding course, a course in basic math, a course in metallurgy..... then he should be good to go 😀
Magura 🙂
You forgott he course in heat treating!! Thats not covered under any of those that you listed.....😀
Mark
Mark
Hello diyaudio members🙂 This is my first post on this great forum.
I saw the link to my experiment and I felt I had to make some comments.Its like I said an experiment and I am still learning.
The heatsink on the pictures are already scrapped and remelted.
Nowadays I am using the better" pour into a mold method".
I have made 4 different testmolds to evaluate the right type.Ordinary concrete as seen on the latest pics did not hold up to the heat.The testmolds are made out of sand instead.
Soon there will be another test😎
I made the welds small and not so deep on purpose so that the mold would be easier to open afterwards.The weldinghelmet I used were very bad so that can explain the not so yummy welds.
- Status
- Not open for further replies.
- Home
- Amplifiers
- Pass Labs
- DIY heatsinks