So I got my prisms in the mail today--I was just wondering how far away from the projector you are holding your lens holders. I'd like to keep access to the zoom and focus functions on the projector, but since it is all going to be ceiling mounted, I am hoping I don't have to hold it close enough so I have to take the box down in order to focus/zoom
Mike
Mike
My case is buted up against the front of the projetor. I have two IR sensors on the projector and so far the front one works through the lens. I did have trouble with the water prisms which seemed to block the IR signal making even simple PWR ON/OFF a pain, but since upgrading to these crystal prisms, I have had no problems. In fact I simply point the remote at the screen and it works fine.
Zoom and focus should not change for a HE, and my controls are manual and are located on the side of the projector...
And I finnally got to do some 4 prims light tests. Right now I have mixed feelings about the success of the experiment, where Brub Bray clearly has had a positive result with a 4 prisms lens...
Basically I would have to increase the size of my lens to make it work. Right now my lens is slightly smaller (height is about 7.5") than an 8" cube. I would need to extend both the depth and possibly the width as well. I would also have to use two different size prisms. 2 of the 7.5" x 5.5" I use now and 2 of the 8.5" x 7.5" for the front optics.
Clearly this was a quick test, and I didn't have time to mess around too much. I did quickly try 3 tests - all HYPs in, all hyps out and 2 in (rear) and 2 out (front). The image stretch was good, but I had to use "all HYPs in" to get both the correct angles as well as to fit the 4 prisms into the case.
The CA was virtually non existant on the left, but I was seeing a large amount on the right. Again, clearly an alignment issue that could be fixed with more time as a 4 prism lens seems to behave slightly different to a conventional 2 prisms lens.
The other issue is weight. 4 of these prisms in a case is about 11 pounds and that will only go up with the larger prisms...
I will order 2 of the larger prisms and redesign the case, but that won't happen for at least a few weeks...
Mark
Mark Techer said:
And I finnally got to do some 4 prims light tests. Right now I have mixed feelings about the success of the experiment, where Brub Bray clearly has had a positive result with a 4 prisms lens...
Clearly this was a quick test, and I didn't have time to mess around too much. I did quickly try 3 tests - all HYPs in, all hyps out and 2 in (rear) and 2 out (front). The image stretch was good, but I had to use "all HYPs in" to get both the correct angles as well as to fit the 4 prisms into the case.
The CA was virtually non existant on the left, but I was seeing a large amount on the right. Again, clearly an alignment issue that could be fixed with more time as a 4 prism lens seems to behave slightly different to a conventional 2 prisms lens.
The other issue is weight. 4 of these prisms in a case is about 11 pounds and that will only go up with the larger prisms...
Mark
Um, that's BUD Bray and i've found the best setup is having the hyp one in front of the other as opposed to both together, ie, both facing the same way and one hyp against the other "OPP" side. That's been MY experience anyhow ,as for CA on the one side, check the one set...if you get CA on one side only, the culpret is one of the prism sets. I had it on the right side & it was the first set near the PJ, Luckilly I had spare prisms to swap out & replaced one & that solved the problem.
Bud
Ahh sorry Bud, can't edit after 30 min either 
And I two HYPs facing the same way was not tried, damn...I've already packed the prisms to be sent to a guy in Sydney...
As I said, I would need to seriously re-do the case. I really think it was simply a case of mis alignment as the left of the screen was near perfect. Right now, I'm back to the 2 prism lens and both sides are near perfect...
Mark
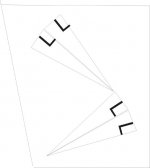
So you found that you had to increase the width (non-sysmmetrcal) on the case as well. Interesting...
My first cases looked very similar to your drawing, but in the end I found it neater to cut away the side which is why I now have a huge opening on the left.
Your angles ares still quite steep, and for me to do that would require a very much deeper case...
Mark
My first cases looked very similar to your drawing, but in the end I found it neater to cut away the side which is why I now have a huge opening on the left.
Your angles ares still quite steep, and for me to do that would require a very much deeper case...
Mark
Mark Techer said:So you found that you had to increase the width (non-sysmmetrcal) on the case as well. Interesting...
My first cases looked very similar to your drawing, but in the end I found it neater to cut away the side which is why I now have a huge opening on the left.
Your angles ares still quite steep, and for me to do that would require a very much deeper case...
Mark
By CRUDE I meant not to scale(this is just a diagram of the placement of the wedges)...the angles aren't right here. It's just to show how the prisms are put together in pairs. Since I presently have the smaller prisms as the first, I have a tapered case. Thinking of doing what you did & cutting off the one side shorter...several housing tests yet to go...But, yes, the angle IS steep. Have to try to take a pic or a GOOD illustration...
I have to take the housing down to work on it so i'll TRY to take a couple of GOOD pics (and hopefully I can ask ROAR to post them for me) Actually, I have the picture SO good right now i'm afraid to touch anything.
Bud
Bud
The diagram on the BLOG is about as close as I could draw to being correct for my lens...
I'll see if I can remove the lid and get a photo...
Mark
I'll see if I can remove the lid and get a photo...
Mark
So is the drawing on page 72--is that the "best" way to setup for a two prism configuration?
I hung up a sheet and threw up a few images--going to have to frame for my new screen tomorrow--fabric comes in the mail on thursday
On the left side of my screen, it seemed to almost frown down on the side, any ideas?
I did find if I tip the prism closer to the screen, it would push the left side of the screen up and down
Also, do you (Mark) happen to remember what page (or could you re-tell) the three step setup was on?
Thanks
Mike
mpotoka said:So is the drawing on page 72--is that the "best" way to setup for a two prism configuration?
Pretty much. You can compare that to THIS ONE.
mpotoka said:I hung up a sheet and threw up a few images--going to have to frame for my new screen tomorrow--fabric comes in the mail on thursday
On the left side of my screen, it seemed to almost frown down on the side, any ideas?
I did find if I tip the prism closer to the screen, it would push the left side of the screen up and down
Welcome to the joys of PINCUSHION...
mpotoka said:Also, do you (Mark) happen to remember what page (or could you re-tell) the three step setup was on?
Not really, but quickly -
1. start with both prisms aligned so that they form a rectangle.
2. move the front prism's think end out towards the screen.
3. move the rear prisms apex (thin end) towards the projector...
...or something like that 🙂
Key to good alignment is to ensure that you start in the middle and work out to the edges of your screen. This way you not over stretching one sode more than the other...
Mark
Mark Techer said:
Pretty much. You can compare that to THIS ONE.
Welcome to the joys of PINCUSHION...
Not really, but quickly -
1. start with both prisms aligned so that they form a rectangle.
2. move the front prism's think end out towards the screen.
3. move the rear prisms apex (thin end) towards the projector...
...or something like that 🙂
Key to good alignment is to ensure that you start in the middle and work out to the edges of your screen. This way you not over stretching one sode more than the other...
Mark
Remember, if you're projector is ceiling mounted, you must tilt the prism housing to match the light beam from the PJ. The prisms must be perpendicular to it, otherwise you will get bowing. On ceiling mount, the bow is on the bottom of the image, table mount it's the top.
Bud
Today was one of the first times I noticed how much the tilt factor affected the edges. Prior to using a 140 high prisms, I had to tilt the water prisms slightly to stop image clip.
When I had my projector ceiling mounted, I built a new mount with a huge shelf in front. The purpose of the shelf was to allow me quick and easy prisms changes whilst I was experimenting with resin prisms. The final lens just sat flat, and the edges on screen were quite straight.
Right now my system is shelf mounted, and today I noticed that there is quite a bit of play here...
Mark
Mark Techer said:Today was one of the first times I noticed how much the tilt factor affected the edges. Prior to using a 140 high prisms, I had to tilt the water prisms slightly to stop image clip.
When I had my projector ceiling mounted, I built a new mount with a huge shelf in front. The purpose of the shelf was to allow me quick and easy prisms changes whilst I was experimenting with resin prisms. The final lens just sat flat, and the edges on screen were quite straight.
Right now my system is shelf mounted, and today I noticed that there is quite a bit of play here...
Mark
Yep! And the angle affects the bowing.
So--what is the verdict on where to place the hyps. of the two prisms? On the blog it shows one hyp facing the PJ and the other facing the screen. Other spots it shows the hyps facing the same way.
I'm just wondering what difference it makes--or if one way has been found by many to work the best
Mike
I'm just wondering what difference it makes--or if one way has been found by many to work the best
Mike
OK, just went downstairs & took my lens housing down to answer this question...I have 2 dual prism sets, EACH set has the HYP facing out(ie, both right angles face the SAME way). In my housing I have BOTH lenses(1 prism set=1 lens) with the hyp facing the PJ. The right angles of each lens face the projector. I did taks some pix but since they are taped up, it's difficult to see from a picture which side is the right angle, but I checked them out. Now, this is MY result, mileage may vary, see dealer for details...yada, yada, yada! Also, as I said before, currently, i'm using 2 different sized sets, the small & the medium.
OK, my last post is a bit confusing...in or out? The hyps are facing in. I meant out as in the 2 prisms together have the hyp's one in front of the other, both facing the SAME way. 1st prism with right angle facing out...place 2nd prism the same way, butt up against the first. Does this make sense?
Now in the housing, each set has the hyps facing towards the pj.
Bud
Now in the housing, each set has the hyps facing towards the pj.
Bud
On my BLOG? The HYPs both face out with the Aussiemorphic, so right angles in. I've done this so that the largest face of the prism is in the light path front and back...mpotoka said:So--what is the verdict on where to place the hyps. of the two prisms? On the blog it shows one hyp facing the PJ and the other facing the screen. Other spots it shows the hyps facing the same way.
I'm just wondering what difference it makes--or if one way has been found by many to work the best
Mike
Mark
Ok thanks--my screen materials show up today in the mail, so I'll hopefully be posting some pics later today!
Mike
Mike
Bud Bray said:
Yep! And the angle affects the bowing.
And tonight I was surprized with how much correction some tilt actually provided...
Mark
- Home
- General Interest
- Everything Else
- The Moving Image
- Optics
- DIY anamorphic lens