Hi all
I am on a learning curve, and made my first speaker measurement today. I followed the great guide on Audiosciencereview Link on how to make Quasi-anechoic measurements with REW.
My aim is to get experienced with the needed measurement techniques, before i jump right into building my first speaker builds 🙂
I got the best measurements with the distance of 50cm, but all guidebooks recommend 1-2m. Gated window allowed ~5ms. I am sure i can improve that with better placement, and increased dampening in the room.
I would be happy with your feedback, tips & tricks etc.

I would investigate this further. IMHO there are still too many reflective surfaces in near the DUT. The stand for the speaker is not necessarily ideal either.Ich bin sicher, dass ich das durch eine bessere Platzierung und eine bessere Raumdämpfung verbessern kann.
But it looks well made for a first attempt. 👍
Btw.: what is your goal? To develope your own loudspeaker? Or is it to examine ready made constructions?
Your setup looks OK, but it can be better. A lot depends on why you measure. To improve things place the speaker on a stand and the stand on a box. Get the tweeter about 48" above the floor, or higher if your ceiling is more than 8'. Try to get all reflective items away from the speaker, and also away from the mic. Nothing behind either. A good goal is 4' in any direction. There's no need to use any absorption materials.
Did you open the gating presets to set the gate? Maybe there's more than one way to set the gate. I open the preset, and adjust there.
You could add smoothing, if you want. I use 1/6th typically, but sometimes 1/12th.
Did you open the gating presets to set the gate? Maybe there's more than one way to set the gate. I open the preset, and adjust there.
You could add smoothing, if you want. I use 1/6th typically, but sometimes 1/12th.
Last edited:
Looks reasonable and as others have said try and get as much clear as possible. The biggest mistake I made was to not include a timing loop back so that the acoustic offset for each driver was baked into the measurements. If you are just measuring the whole speaker it is fine but if you intend on measuring drivers individually to design crossovers then I think you need the loop back or an acoustic reference signal.
Edit, looks like you are running a Focusrite 2i2 3rd Gen so should be easy to take one of the outputs and link it to the second input Chanel.
For a few £/$/€ you can also make an impedance and TS measurement rig for use with REW, details online of what to do. I got best results using the headphone out and not the line out with a Behringer 204HD. Again, needed for crossover design with measurements of the drivers in the intended box with port
Last edited:
A good start, lots of good advice in above posts. 2dB division is a bit coarse, and I am wondering what level of smoothing you applied - assuming perhaps 1/6th octave, but not sure.
I would remove all reflective surfaces possible and all objects within a few meters.
Have you looked at off axis response?
I would remove all reflective surfaces possible and all objects within a few meters.
Have you looked at off axis response?
ground plane in an open space is good for getting a longer window. Good baffle step correction can need to see what is going on to 100 hz or less. Tilt the speaker down toward the mic to keep it on axis, but this part can be difficult. a laser pointer can help you aim tweeter at the mic. Try many different types and locations for measurement, see what changes, what stays the same. Getting many views is the way to learn to see what is noise and what is real.
The advantage of setting the gate with this window is that you can see the first reflection directly. I find that it is then easier to set the gate.Did you open the gating presets to set the gate? Maybe there's more than one way to set the gate. I open the preset, and adjust there.
That's why I asked about the intention behind the wish to learn how to measure. The article on Audiosciencereview refers to the testing of finished loudspeakers, which is why the USB mic used there is sufficient. With a USB mic, however, it is difficult (not impossible) to realise a timing reference, which, as you rightly say, is more than useful for developing loudspeakers.The biggest mistake I made was to not include a timing loop back so that the acoustic offset for each driver was baked into the measurements.
As for my question, the author of the thread already answered it in his first post and I had overlooked it: he probably wants to develop loudspeakers.
If I were to make groundplane measurements, I would rather only do this for the bass range and then add these measurements to the directly measured far-field measurements. I find it difficult, for example, to carry out reasonably accurate angle measurements using the ground plane method.ground plane in an open space is good for getting a longer window. Good baffle step correction can need to see what is going on to 100 hz or less.
However, I actually use baffle-corrected near-field measurements for the bass range.
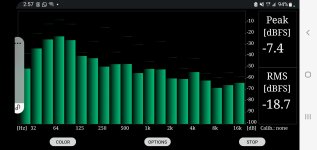
I'm not quite sure: is this meant seriously? 😳🤔Your phone can do this really well
Last edited:
Setting a gate is actually a post-processing of measurements that have already been carried out. For example, you can first carry out all your measurements and only then create the gate in order to then apply it to all measurements simultaneously or individually as required. Or - as you suggested - you can define the gate in the default settings, in which case it is automatically applied to the subsequent measurements.
Setting a gate is non-destructive so it's possible, to change the gate-settings or to turn the gate off. Only after exporting it e.g. in text files such changes are impossible.
Setting a gate is non-destructive so it's possible, to change the gate-settings or to turn the gate off. Only after exporting it e.g. in text files such changes are impossible.
I typically use a preset. After a sweep, it's one click. Typically 4.2ms, I think. I generally don't need a longer gate, even though I could. The preset has a scroll feature, so it's easy to adjust.
Did you say there is a default setting? That would be very handy. Where do I find that. I'd like to set it. I can look, and find it, but I didn't know the default existed.
Did you say there is a default setting? That would be very handy. Where do I find that. I'd like to set it. I can look, and find it, but I didn't know the default existed.
Open the "Preferences"-window and chose the tab "Analysis". Before doing changes to the width of the gate you have to uncheck the checkbox "Set window widths automatically":

But note: there are kinds of measurements that must be done without a small gate, e.g. nearfield measurements which sall deliever information about low frequencies after baffle compensation (gating cuts off information about deep frequencies, the smaller the gate, the higher the lower cut-off frequency of the usable measurement).
But note: there are kinds of measurements that must be done without a small gate, e.g. nearfield measurements which sall deliever information about low frequencies after baffle compensation (gating cuts off information about deep frequencies, the smaller the gate, the higher the lower cut-off frequency of the usable measurement).
Last edited:
Thanks. I know that sometimes, I want a long gate. Most of my x-over work is lots of sweeps at the same gate. Having the default would save me reaching for the mouse, and clicking after each sweep. My wrist gets sore after a while from holding the mouse, and waiting to click.
My way is to do all measurements and then to set the gate for all measurements at once. That also saves me from reaching for the mouse too often. 😎Having the default would save me reaching for the mouse, and clicking after each sweep.
Tukey 0.5 window gives more accurate results for merging with nearfield measurements. I don't have examples at hand, but @kimmosto explained it somewhere. Parasitic baffle below (toolbox) throws off the result somewhat, but no very significant at this stage. Adding thick absorption at first reflections point (roughly two basalt wool mats, 1.2x1 m total, 15 cm thickness) at the floor and ceiling can increas the first reflection arrival interval 2x or so, allowing 10 ms window. Mic holder reflections give ~2 dB hash at HF, inserting mic body into stainless or Al thin-walled tubing clears that.
You are a smart guy, learning to measure first and construct speakers later. The average dude wastes endless time on trying to get things done without a microphone, until he gives up or buys one.
The weather has improved, so you can get outside and put your speaker an a high object. Thomann sells all kinds of speaker stands, from simple & cheap to those you can telescope out with a speaker on top. For my final measurements I place a speaker on a 1.7 meter high stand., pointing away from any object. This gives very nice results. The louder you measure, the better the results. In the early evening you often can find quite silent moments. I use multiple measurements that are averaged outside. How you do measurements in different angles is up to you. My advice: Keep it simple, don't over engineer. You can build a well working turning table from two smooth Melamin coated wooden panels, grease and a bolt. No need for step motor driven ball bearing constructions. Also think about the use of +-90° measurements made in 60 steps. 0, 15, 30, 45° tell you most you need to know. If you measure the TSP of your bass drivers your self, simulations should be spot on, verfied by impedance curves. You don't need ground plane measurements for any project.
If you develop for your self and not for bragging rights in a forum, you can get a feeling for your special room acoustics. So most of the developments can be done under sub optimal conditions, backed up by simulations. The "correct" measurements are only used for final checks. Removing the car from your garage and a proper stand for 50% of room height should optimize your situation. Do not make the speaker point at a wall, better a little off, more to a corner. You will see how measurements change.
Doing some good outside reference measurements with your speaker will show the mistakes of your inside situation. As I said, try to develop a feeling for what is going on in your room and ask your self what is really relevant.
PS the baffle is the key to a good speaker. Instead of wood, extruded polystyrene (XPS) panels from the Baumarkt are great for quick test baffles. Cut with a Japanese saw or a heated SS wire.
Last edited:
HiYour phone can do this really well
what kind of app is that?
Thanks
I use AudioTool, a 3$ android app and a 27$ Dayton Audio calibrated microphone for quick measurements. iPhones can get away with the build in mike if you are on an even lower budget.
- Home
- Loudspeakers
- Multi-Way
- Did my first speaker measurement today - comments are welcome