A client recently asked about a custom set of speakers for his new home. He had looked at things such as the McIntosh line array towers and wanted something that would provide a BIG sound. With the new craze in open baffle speakers and the crazy sales of our Dipole woofers, I first though this to be a great option. The new home had lots of half moon windows. LOTS of them. So the original design was for a tall cabinet which would have a half moon curve at the top to tie in with the look of all the windows in the room. The cabinetry in the house is all hickory so a solid hickory baffle would work well with that also. To make something a little more unique the plan was to put in some clear glass in the baffle, again to tie in with all the glass that is used in the room. I also threw in some sealed box and vented box concepts in the case the open baffle bass section wouldn't be enough. Here are the original concept sketches of the speaker as proposed.
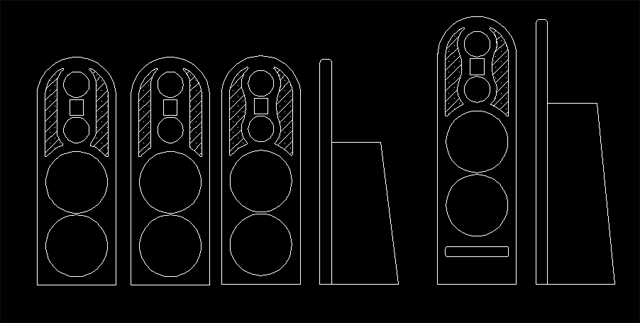
The three concepts to the left give a little different variation on the glass inserts at the top. The cabinet to the right gives a taller bass section as it is now a vented cabinet. At this point the choice was for the tall vented cabinet with the extra curves around the MTM. I needed to come up with a concept for a grill and here was the initial proposal.

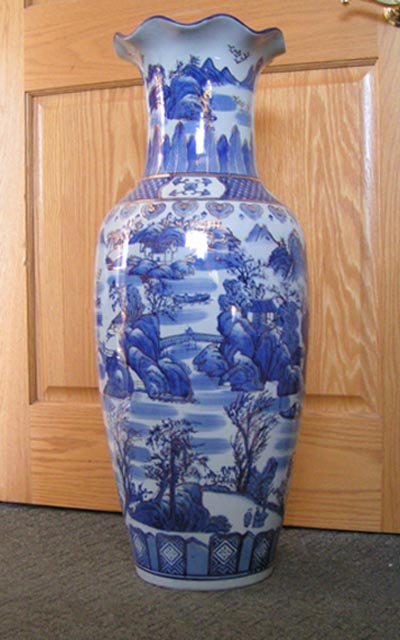
He said all looked good and that we could move forward with the project. Shortly after he had asked if it was possible to make the cabinet look like the shape of a giant vase instead. There are multiple large vases on display and he wanted to tie in with that theme. Ie hadn't done anything that shape ever but came up with a proposal. First I took a picture of one of the larger vases.
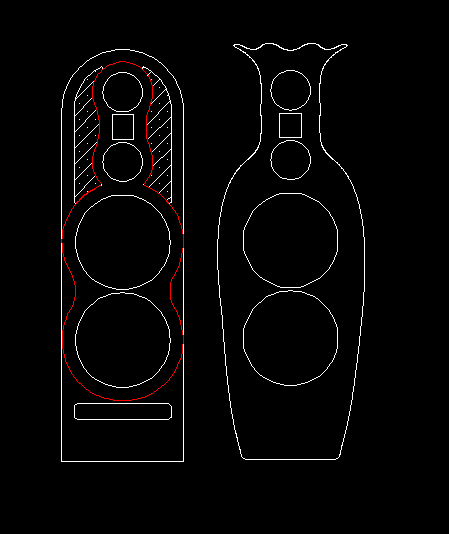
I then imported that into illustrator and created a vector image of the outline of the vase as best as possible. I imported that into autocad and played with the dimensions to allow for all the drivers to fit properly and for the bass section to be appropriately sized. Here is the concept of the vase speaker next to the original proposal.
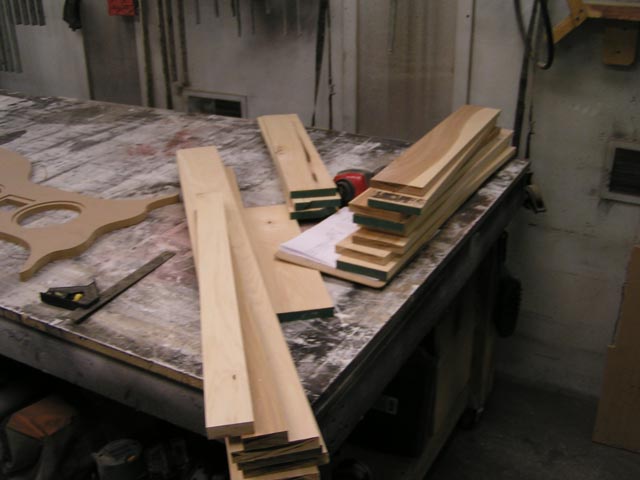
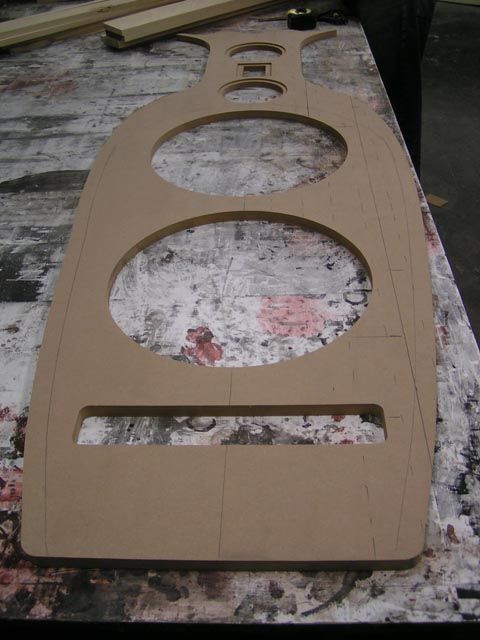
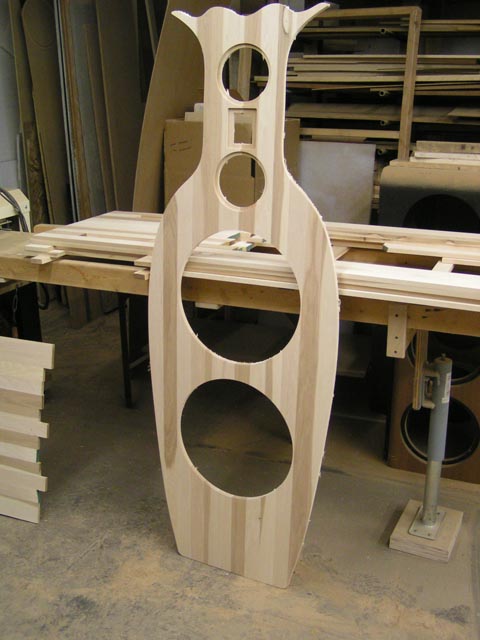
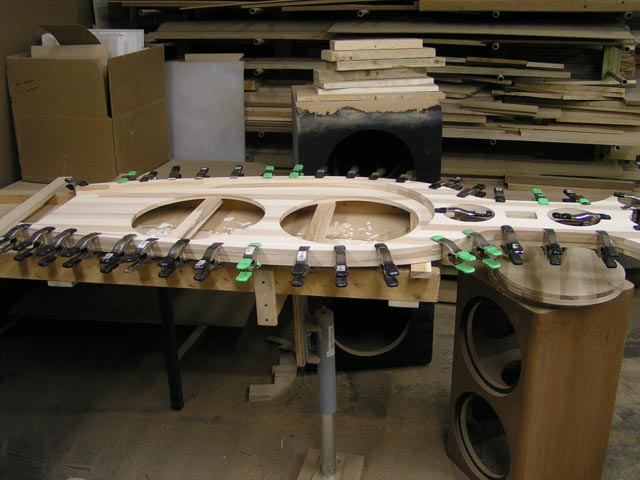
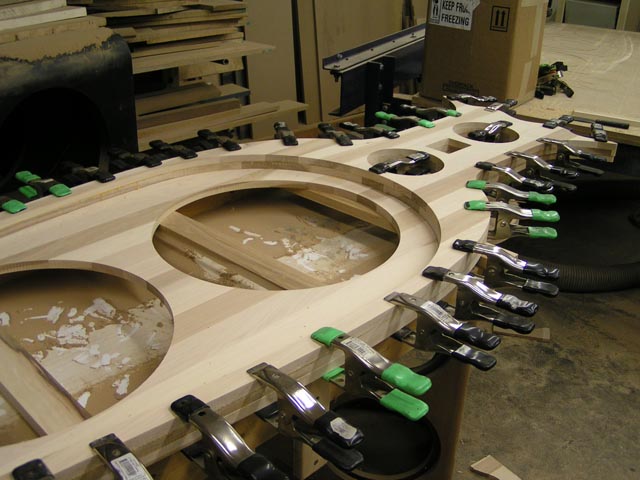
Once given the OK, we proceeded to plane down the hickory, joint and glue up the panels for the solid faces. The front face is one layer thick while the MTM baffle that extends upward is 3 full layers of solid hickory. We first glued up the solid front panels.

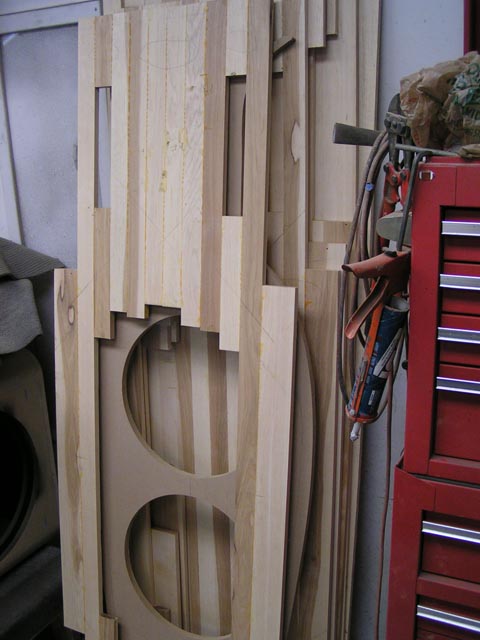
We then cut pieces to length and laid them out over a template for the two back layers.
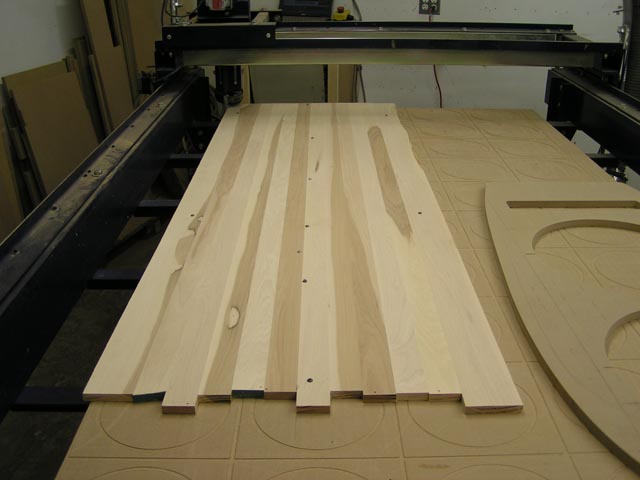
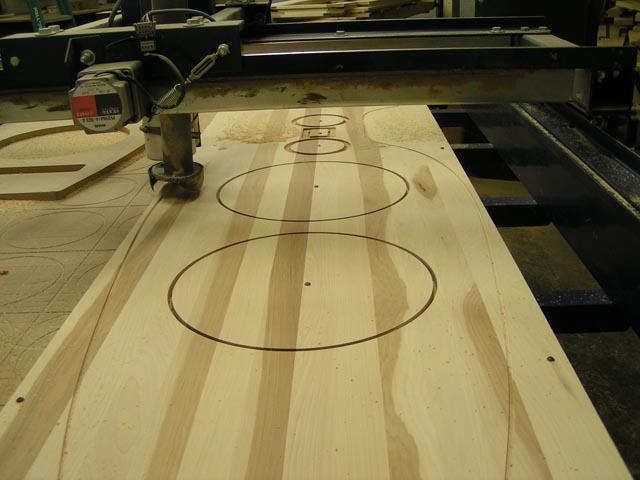
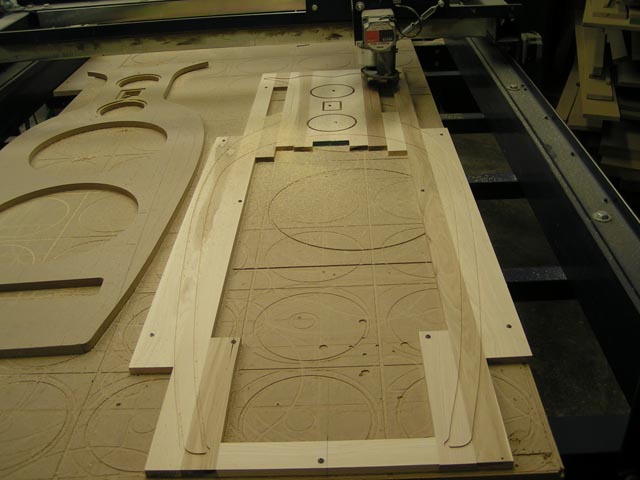
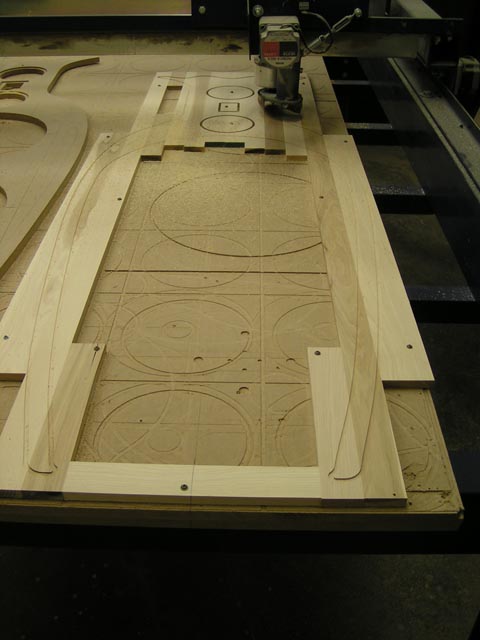
Once the layers were all glued up we sent them off to a local cabinet shop to be sanded. When they returned we got them on the CNC so the layers could get cutout. First were the solid front layers with driver recesses. Then were the two back layers that would wrap around the bass section.

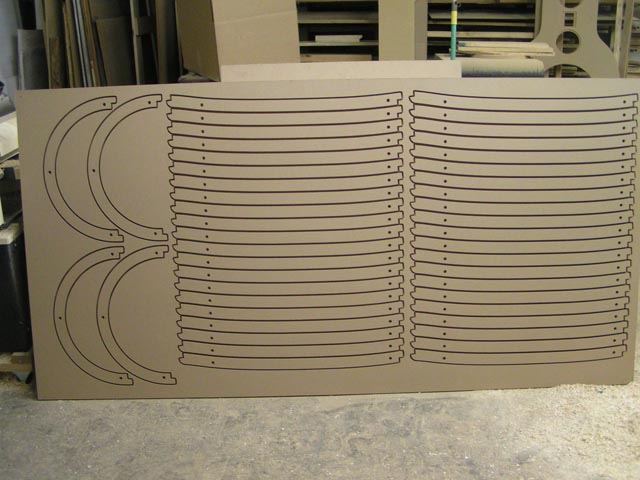
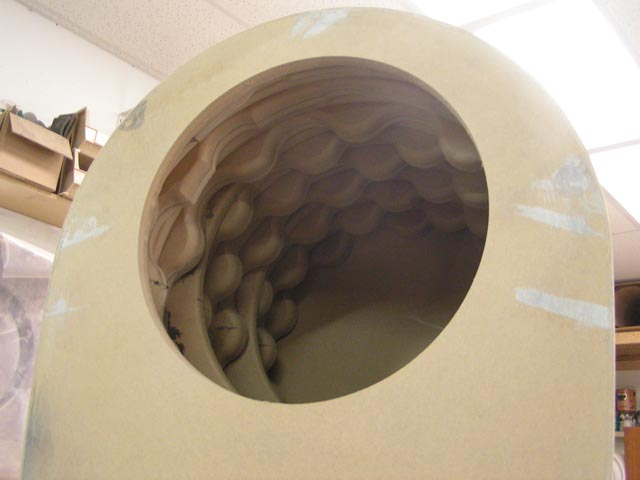
At the same time, we were working on assembling the bass sections. These as mentioned, were constructed of many layers of 3/4" mdf to be stacked up. A combination of flat layers and two profiles with alternating "bumps" were used in the construction of the cabinet walls. Two layers with integrated bracing were also spaced into the stack of the layers. Here you can see some of the layers cut before the tabs were being taken out of the sheet.
The "bump" layers were actually constructed of 2 layers of MDF so they are 1.5" thick. Then both sides are rounded off giving a smooth transition. "Bumbs" needed to be cut off in the first few layers on top to allow clearance for the top driver frame.
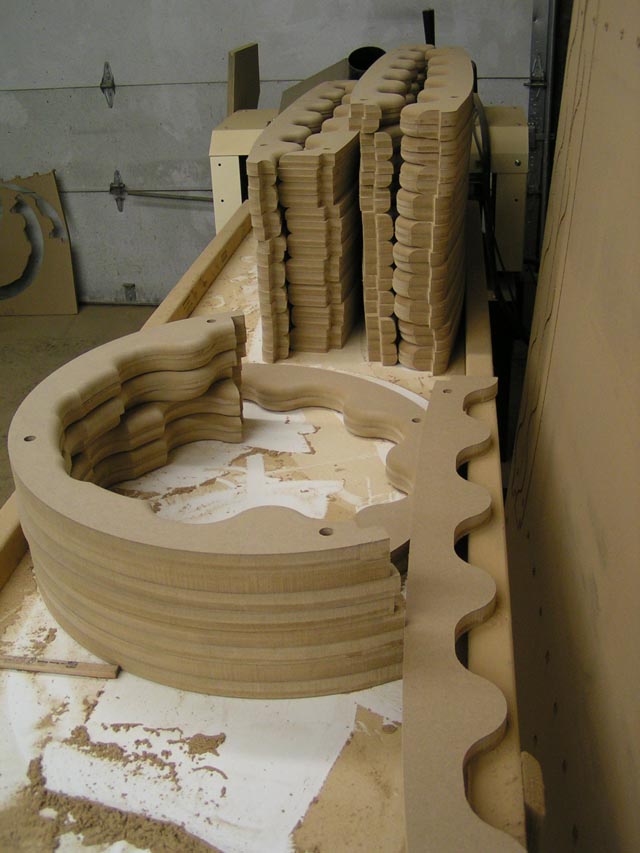
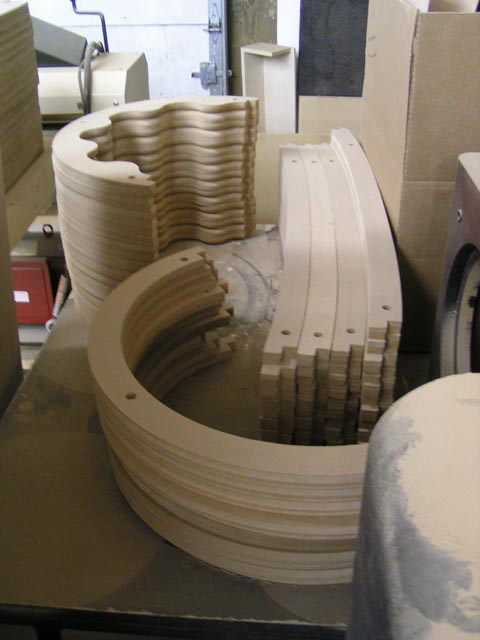
The layers all had 1/2" diameter holes in them which allowed us to run a threaded rod up through all the layers. This helped for alignment during the clamping process. When it was all finished we cut off the threaded rods and filled the ends of the holes flush with body filler. You can see a few images of the cabinet layers here.
Then the prep for the veneering process began. Even with the threaded rods, the layers didn't align absolutely perfect so it took some sanding and a little filling to smooth the transition of the sides to the top.

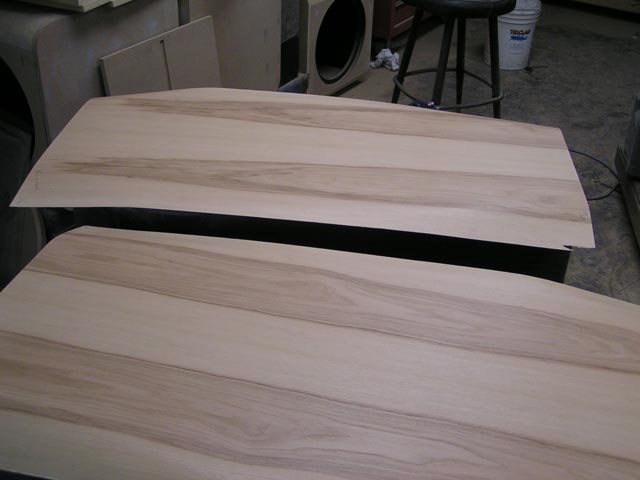
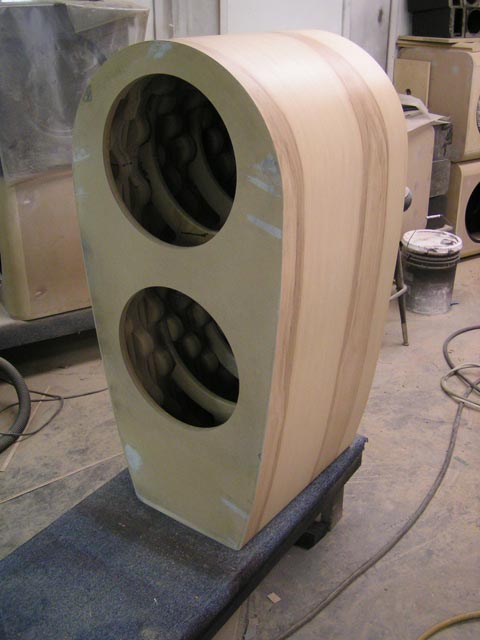
Once all of that was done, the bass section was ready for veneer. I found some nice 2ply 20mil wood backed hickory at Tape Ease and all 3 sheets required matched nicely. First was the veneering of the flat back section.
The veneer was put on and sprayed with our water based clearcoat prior to trimming. This prevents the veneer from any kind of chipping and you end up with very clean edges. I trimmed with a spiral downcut flush trim bit also.
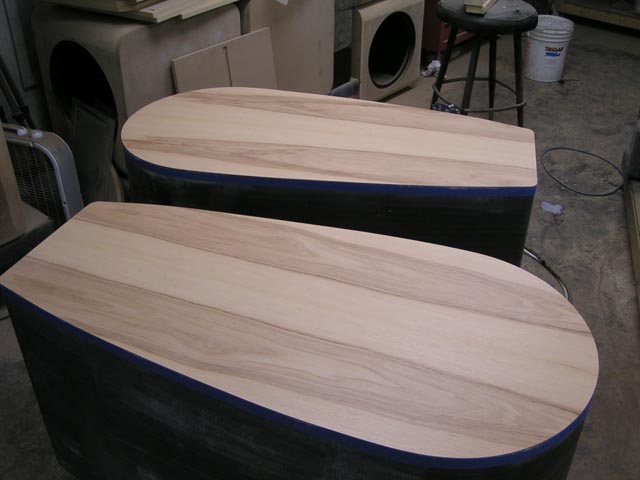
Then the sides were wrapped. This was quite a difficult task to bend the two ply veneer around the sharper curve at the bottom but it turned out quite nicely.
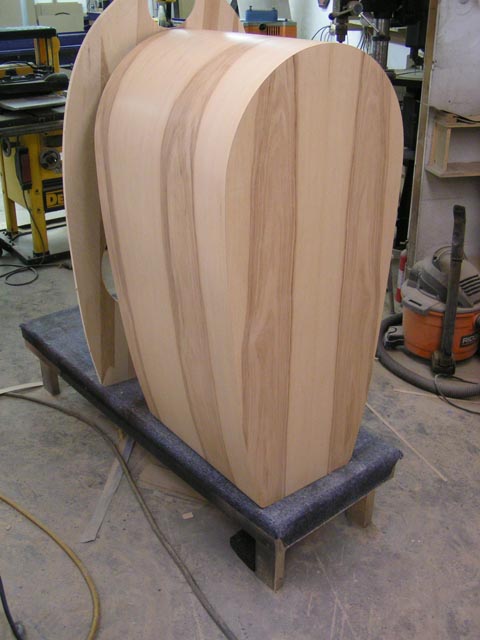
The layers for the front baffle were then glued together. Lots of spring clamps were used to get them fitted properly.
That's where things are at with pictures currently. Over the next week the rest of the build will be getting finalized. Baffles are currently being rounded and finished, inside of the cabinets are being sealed. Next we will be installing the drivers, building the amplifiers, taking measurements and setting up the all of the DSP settings. Will post more throughout the process.
FYI, we also plan to still do a similar speaker with the full open baffle bass section as originally planned.
Here's a link to the post I first put up on the forum. Will most likely be updating that one more regularly than here but I'll try to get all the measurements and data up here as I have it.
http://www.aespeakers.com/phpbb2/viewtopic.php?f=14&t=2624
John
The three concepts to the left give a little different variation on the glass inserts at the top. The cabinet to the right gives a taller bass section as it is now a vented cabinet. At this point the choice was for the tall vented cabinet with the extra curves around the MTM. I needed to come up with a concept for a grill and here was the initial proposal.
He said all looked good and that we could move forward with the project. Shortly after he had asked if it was possible to make the cabinet look like the shape of a giant vase instead. There are multiple large vases on display and he wanted to tie in with that theme. Ie hadn't done anything that shape ever but came up with a proposal. First I took a picture of one of the larger vases.
I then imported that into illustrator and created a vector image of the outline of the vase as best as possible. I imported that into autocad and played with the dimensions to allow for all the drivers to fit properly and for the bass section to be appropriately sized. Here is the concept of the vase speaker next to the original proposal.
Once given the OK, we proceeded to plane down the hickory, joint and glue up the panels for the solid faces. The front face is one layer thick while the MTM baffle that extends upward is 3 full layers of solid hickory. We first glued up the solid front panels.
We then cut pieces to length and laid them out over a template for the two back layers.
Once the layers were all glued up we sent them off to a local cabinet shop to be sanded. When they returned we got them on the CNC so the layers could get cutout. First were the solid front layers with driver recesses. Then were the two back layers that would wrap around the bass section.
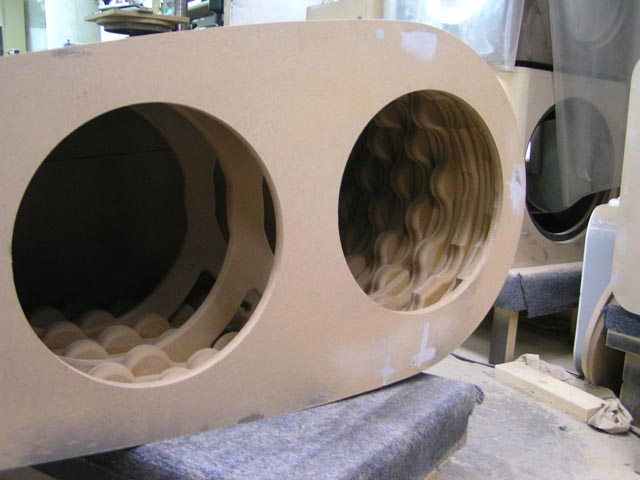
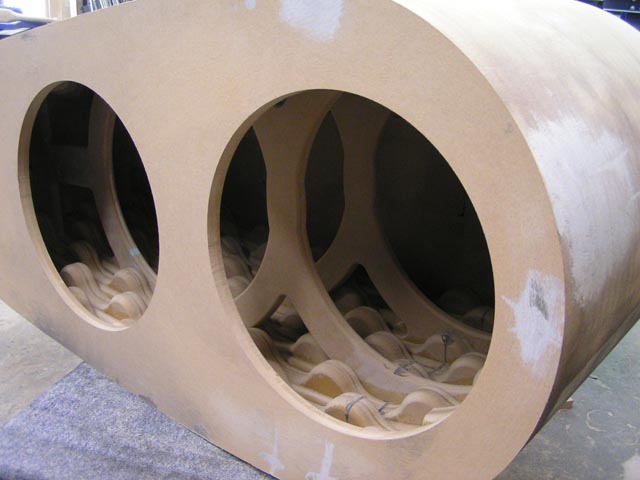
At the same time, we were working on assembling the bass sections. These as mentioned, were constructed of many layers of 3/4" mdf to be stacked up. A combination of flat layers and two profiles with alternating "bumps" were used in the construction of the cabinet walls. Two layers with integrated bracing were also spaced into the stack of the layers. Here you can see some of the layers cut before the tabs were being taken out of the sheet.
The "bump" layers were actually constructed of 2 layers of MDF so they are 1.5" thick. Then both sides are rounded off giving a smooth transition. "Bumbs" needed to be cut off in the first few layers on top to allow clearance for the top driver frame.
The layers all had 1/2" diameter holes in them which allowed us to run a threaded rod up through all the layers. This helped for alignment during the clamping process. When it was all finished we cut off the threaded rods and filled the ends of the holes flush with body filler. You can see a few images of the cabinet layers here.
Then the prep for the veneering process began. Even with the threaded rods, the layers didn't align absolutely perfect so it took some sanding and a little filling to smooth the transition of the sides to the top.
Once all of that was done, the bass section was ready for veneer. I found some nice 2ply 20mil wood backed hickory at Tape Ease and all 3 sheets required matched nicely. First was the veneering of the flat back section.
The veneer was put on and sprayed with our water based clearcoat prior to trimming. This prevents the veneer from any kind of chipping and you end up with very clean edges. I trimmed with a spiral downcut flush trim bit also.
Then the sides were wrapped. This was quite a difficult task to bend the two ply veneer around the sharper curve at the bottom but it turned out quite nicely.
The layers for the front baffle were then glued together. Lots of spring clamps were used to get them fitted properly.
That's where things are at with pictures currently. Over the next week the rest of the build will be getting finalized. Baffles are currently being rounded and finished, inside of the cabinets are being sealed. Next we will be installing the drivers, building the amplifiers, taking measurements and setting up the all of the DSP settings. Will post more throughout the process.
FYI, we also plan to still do a similar speaker with the full open baffle bass section as originally planned.
Here's a link to the post I first put up on the forum. Will most likely be updating that one more regularly than here but I'll try to get all the measurements and data up here as I have it.
http://www.aespeakers.com/phpbb2/viewtopic.php?f=14&t=2624
John
Last edited:
They look very interesting and beautiful, but I hope you have at least tested the drivers for the mid and tweeter on a test baffle to see what the response is, both on an off axis.
- Status
- Not open for further replies.