Quick updates:
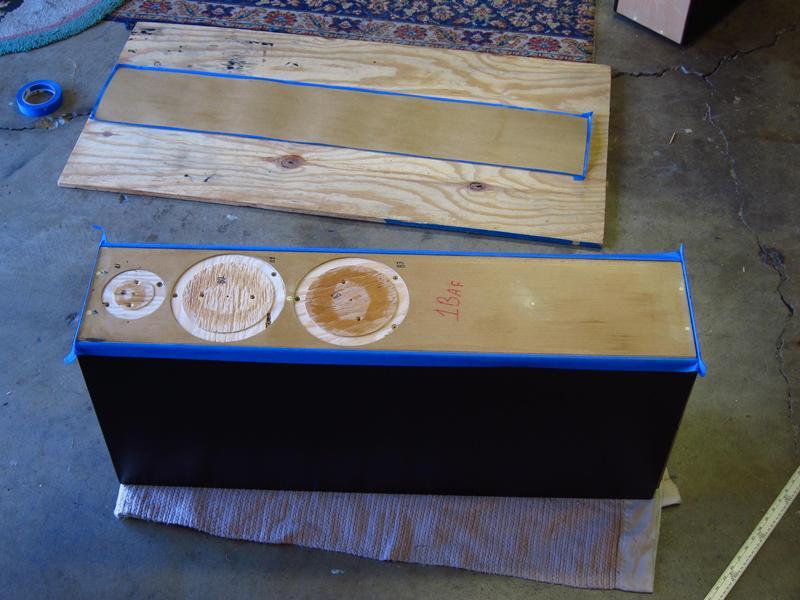
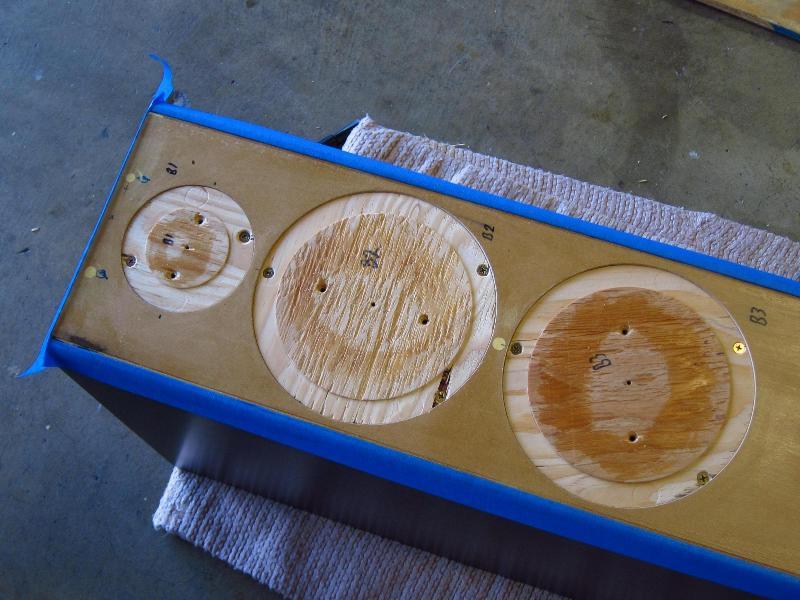
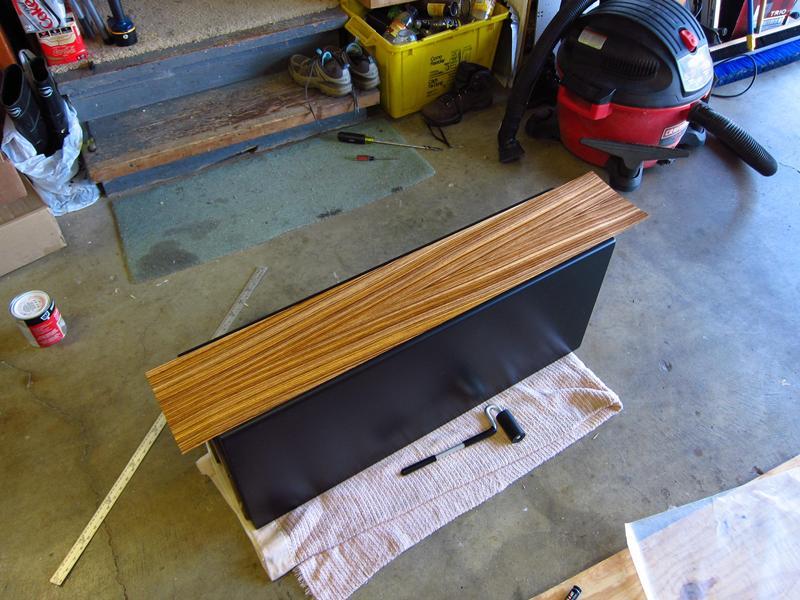
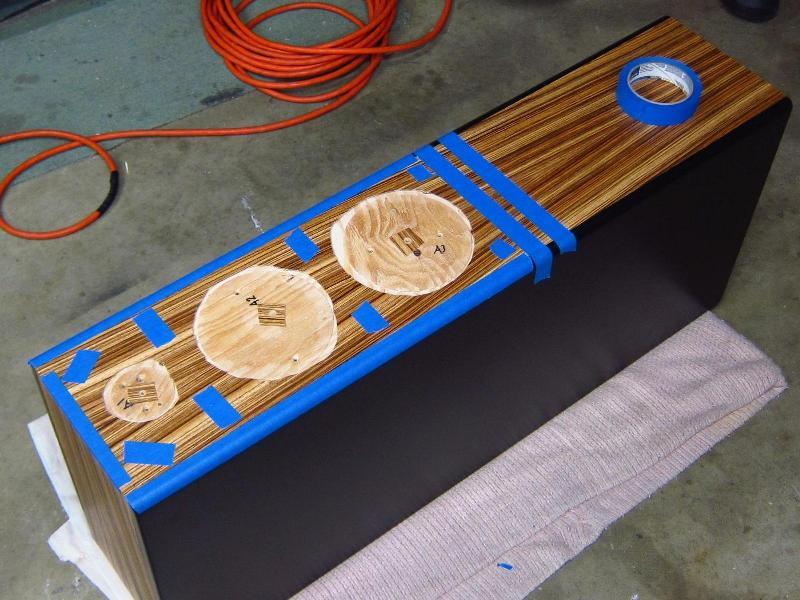
I made the driver "plugs" today, in preparation for veneering the fronts. Obviously, you don't want to be laying veneer over big open holes since you have to press really hard on it to get a good bond with the contact cement. So, these will get veneer glued to them along with the front panel, and then routed out & tossed.
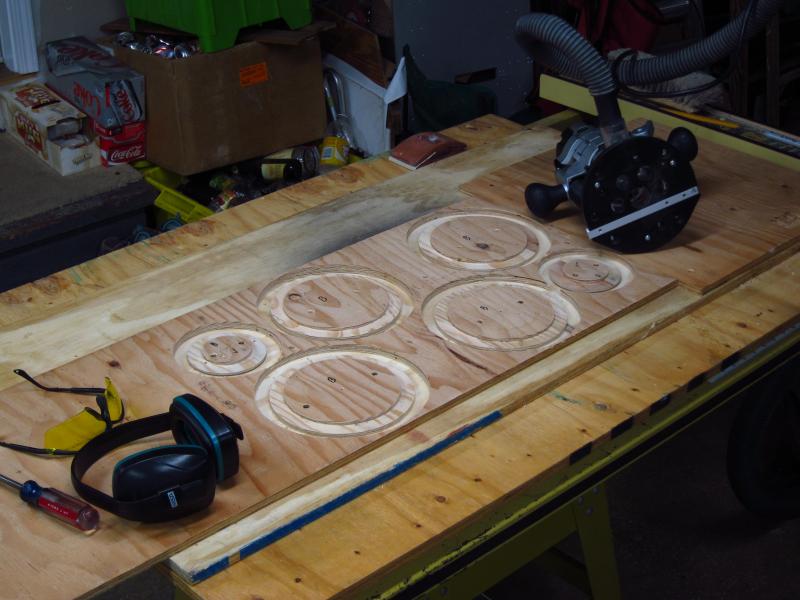
I cut them so that they fit TIGHT in all of the driver cutouts. Tight as in, "I needed some light sanding just to get them to go in." This is good, because the center hole for the pivot pin on the circle-cutting jig is now perfectly concentric with the driver cutouts, and that will be of great use when I use the router to trim the veneer. I am ditching my plans to use the large flush-trim bit with the custom bushing. The pivot pin in the circle-cutting jig will keep the router far more level and stable.
These little plugs will have their top surfaces flush with the front faces of the enclosures. I also made a 0.050" x 0.75" step in the tops so that, when I trim the veneer, I am not also cutting the plywood. I couldn't imagine any good outcome from having plywood chips flying out with the veneer chips. The back sides of them were routed in a similar fashion, but deeper to get the seating height just right (some are right-side up, others upside-down).
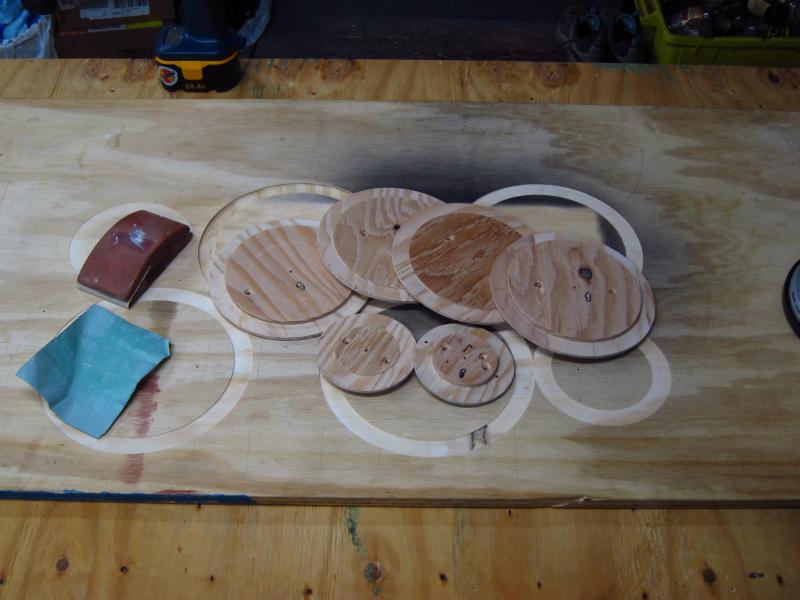
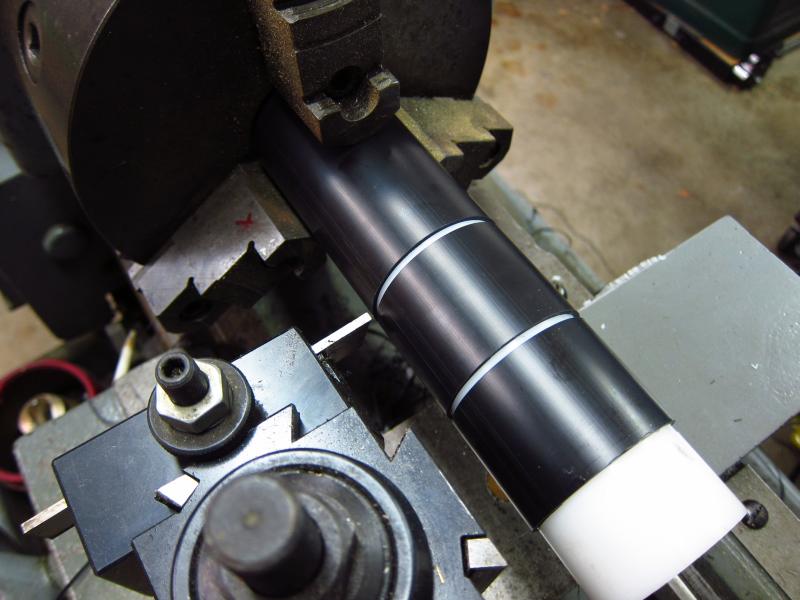
I also got the ports cut to the proper length for a 30Hz tuning. Once again, the lathe came in handy. Yeah yeah, a hack saw would be fine...but why not? Since the ABS tubes are sort of thin & flimsy, they were hard to grip in the chuck. However, their ID happened to be exactly 2", and I happened to have some 2" Delrin bar stock around. So, chucking-problem solved!
Here are the parts, and one of the four tuned port assemblies.

I used regular wood glue to stick the pieces together. For one, I couldn't remember where the ABS cement was. Also, since these are not exactly structural items, plain old "glue" seemed fine to seal the joints & keep them from rattling apart. A thin bead of glue was applied around the bottom of the flange, and then I screwed them down with 4 pan-head screws with a black oxide finish.
I plan to apply the veneer in a day or two, and then trim it after another day or two. While the stuff says that you can work on it within an hour, I don't want to take any chances here! After that, I just need to wire up the crossovers & terminals, install the drivers and figure out how to get them to my apartment unharmed (my parents are local and I make a mess in their garage since my fiancee and I are still in the process of saving & looking for a house...forget the house, just give me a garage!).
I made the driver "plugs" today, in preparation for veneering the fronts. Obviously, you don't want to be laying veneer over big open holes since you have to press really hard on it to get a good bond with the contact cement. So, these will get veneer glued to them along with the front panel, and then routed out & tossed.
I cut them so that they fit TIGHT in all of the driver cutouts. Tight as in, "I needed some light sanding just to get them to go in." This is good, because the center hole for the pivot pin on the circle-cutting jig is now perfectly concentric with the driver cutouts, and that will be of great use when I use the router to trim the veneer. I am ditching my plans to use the large flush-trim bit with the custom bushing. The pivot pin in the circle-cutting jig will keep the router far more level and stable.
These little plugs will have their top surfaces flush with the front faces of the enclosures. I also made a 0.050" x 0.75" step in the tops so that, when I trim the veneer, I am not also cutting the plywood. I couldn't imagine any good outcome from having plywood chips flying out with the veneer chips. The back sides of them were routed in a similar fashion, but deeper to get the seating height just right (some are right-side up, others upside-down).
I also got the ports cut to the proper length for a 30Hz tuning. Once again, the lathe came in handy. Yeah yeah, a hack saw would be fine...but why not? Since the ABS tubes are sort of thin & flimsy, they were hard to grip in the chuck. However, their ID happened to be exactly 2", and I happened to have some 2" Delrin bar stock around. So, chucking-problem solved!
Here are the parts, and one of the four tuned port assemblies.
I used regular wood glue to stick the pieces together. For one, I couldn't remember where the ABS cement was. Also, since these are not exactly structural items, plain old "glue" seemed fine to seal the joints & keep them from rattling apart. A thin bead of glue was applied around the bottom of the flange, and then I screwed them down with 4 pan-head screws with a black oxide finish.
I plan to apply the veneer in a day or two, and then trim it after another day or two. While the stuff says that you can work on it within an hour, I don't want to take any chances here! After that, I just need to wire up the crossovers & terminals, install the drivers and figure out how to get them to my apartment unharmed (my parents are local and I make a mess in their garage since my fiancee and I are still in the process of saving & looking for a house...forget the house, just give me a garage!).
Last edited:
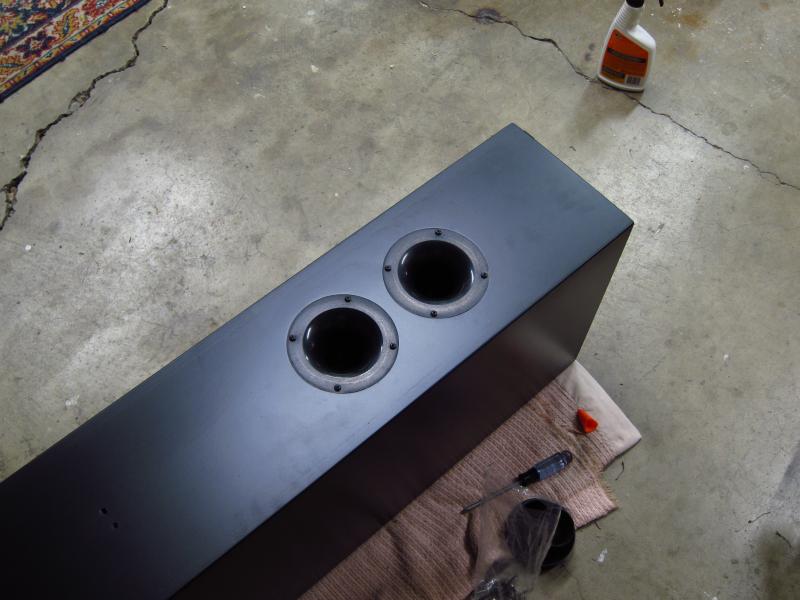
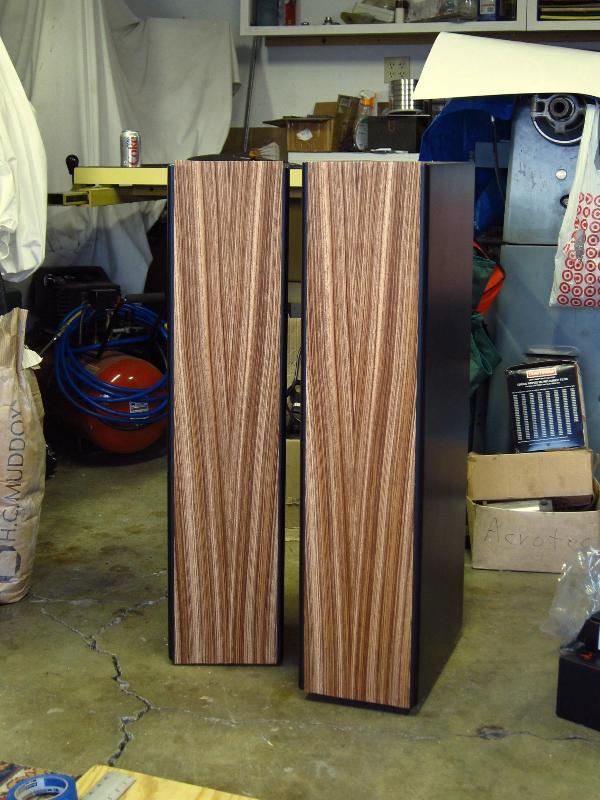
Alrighty, the final update. I finished these about a week ago, and have been enjoying them ever since! They sound great, and easily on-par with a pair of $12000 B&O's that I heard at a dinner party at my fiancee's boss' house. As far as I can tell, the bass output from these is more than enough, particularly for a chump like me that still lives in an apartment with shared walls. I tuned the ports for 30Hz (~6.1") for this box & drivers, and these seem to give effortless low frequency reproduction. The real fault here is the room that they are in. It is around 8m x 5m x 2.5m, and due to the layout one of the speakers is more or less in a corner. They are placed 1-2ft from the walls, and ~11ft from my listening position. I am 100% sure that this is the reason for the almost-boomy bass as the speakers themselves are basically without any fault that I can imagine.
Sadly, I really won't have a chance to turn these up super loud until I move elsewhere (fiancee & I are saving for a house) since one of my neighbors is a retired couple that is ALWAYS home. Nevertheless, even at "reasonable" volume levels, these suckers perform great and I can't hear any weaknesses in them. So, overall, I am very happy with my investment of ~150 labor hours and the amount of money that went into parts & materials.
Anyway, here's the rest of the construction process.
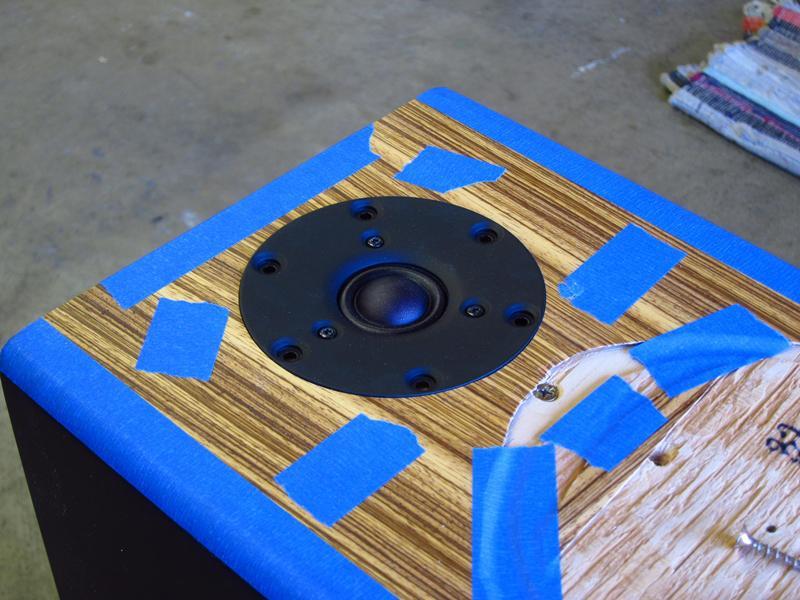
I installed my plywood plugs into the woofer cutouts, and applied contact cement to both working surfaces. The blue masking tape was peeled off of everything after the cement was given ~15 minutes to get tacky.
The centers of the plugs sit flush with the baffle, making it much safer to apply pressure to the veneer without it caving in. The center hole also provides a pivot point for the router when I trim the veneer, and it helps to keep the router level.
So, here we go! I started by placing two pieces of wax paper between the work pieces. The veneer had been carefully trimmed to fit earlier. I aligned the back edge with the recess (the wax paper was pulled back from that edge so I could get a good alignment).
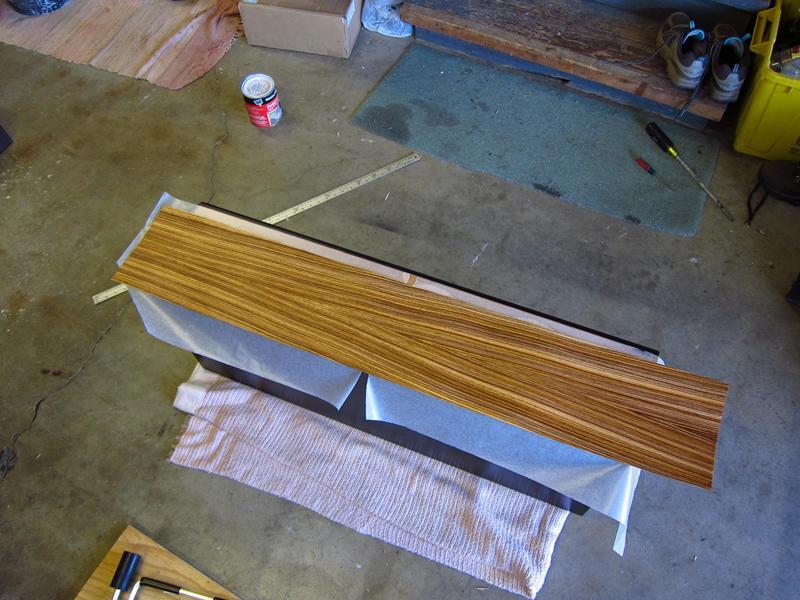
With the alignment set, I firmly rolled the middle 2" into contact to set the position. Generally, you want to start from the middle-middle of the work piece. In this case, I started at the aligned edge & worked to the other side at the start, so as to be sure to keep the alignment. Bubbles aren't really an issue with this method.
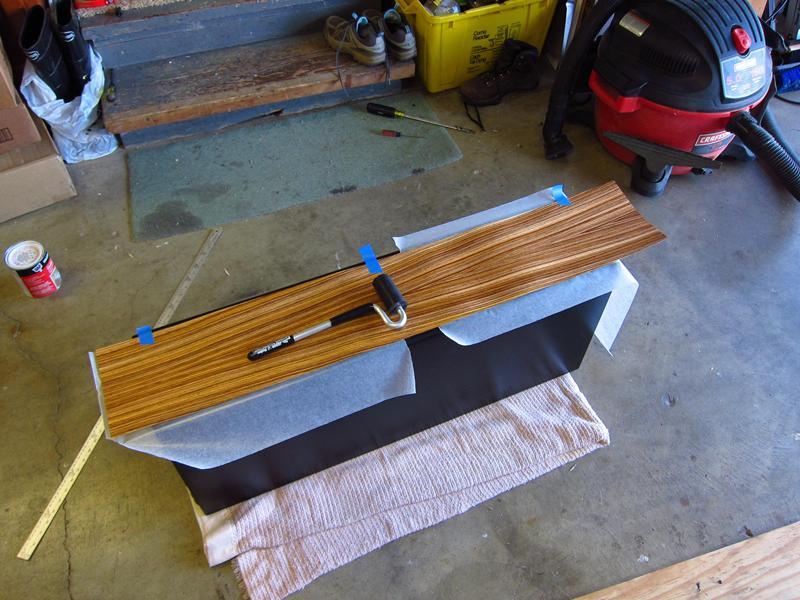
I then proceeded to pull the left piece of wax paper out about 4" toward the bottom and roll the veneer into place. I repeated this until I reached the end, and then repeated it for the right piece of wax paper.
Once I finished rolling the veneer down, I let it sit for an hour. Then I took a utility knife and trimmed the excess, leaving ~0.25" overhanging on each end (this picture). The router with a 3/8" flush-trim bit was used to get the edges flush.
I had some concerns about using the router to trim the driver cutouts. My worry was that it would grab & splinter the wood as it went ~45° against the grain and pulled it into the hole. I took some scraps & an old piece of MDF with holes in it to test-cut.
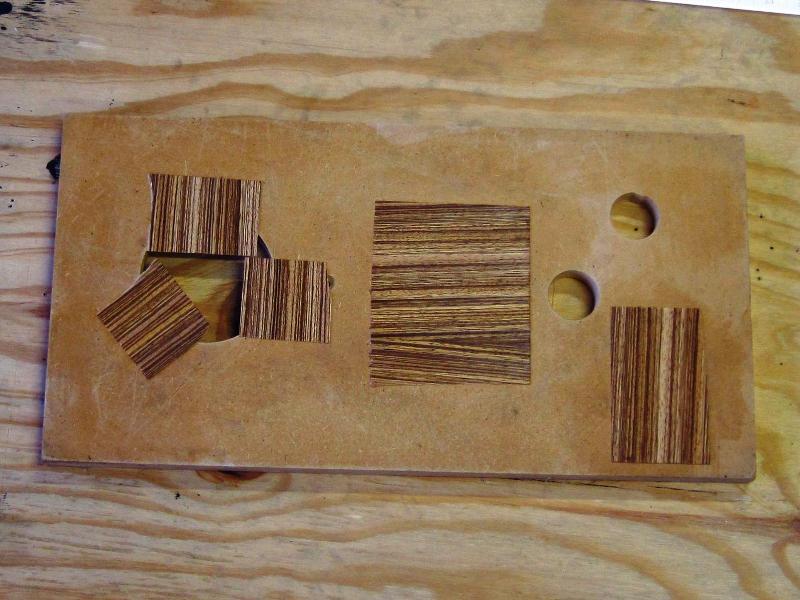
With a brand new 1/2" straight router bit at 18000RPM, there was no room for concern, at all. Cuts in all directions with/against the grain produced perfect edges!
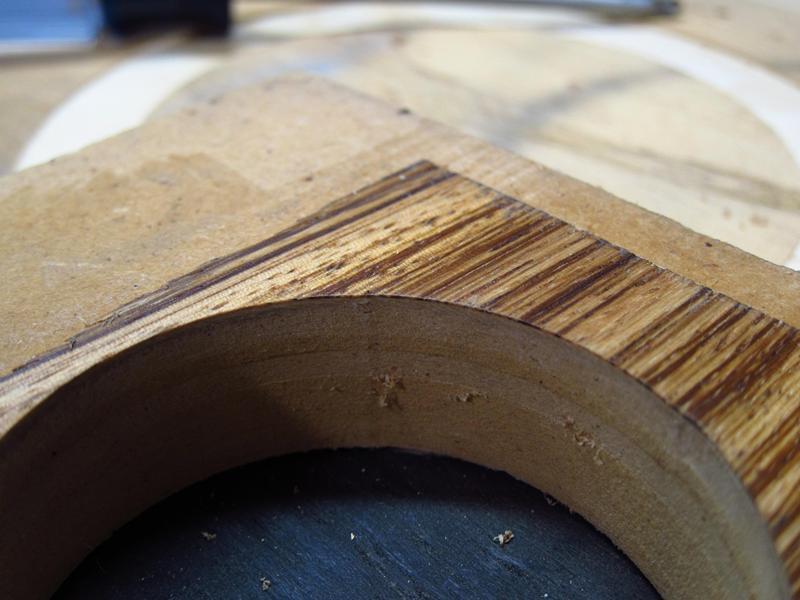
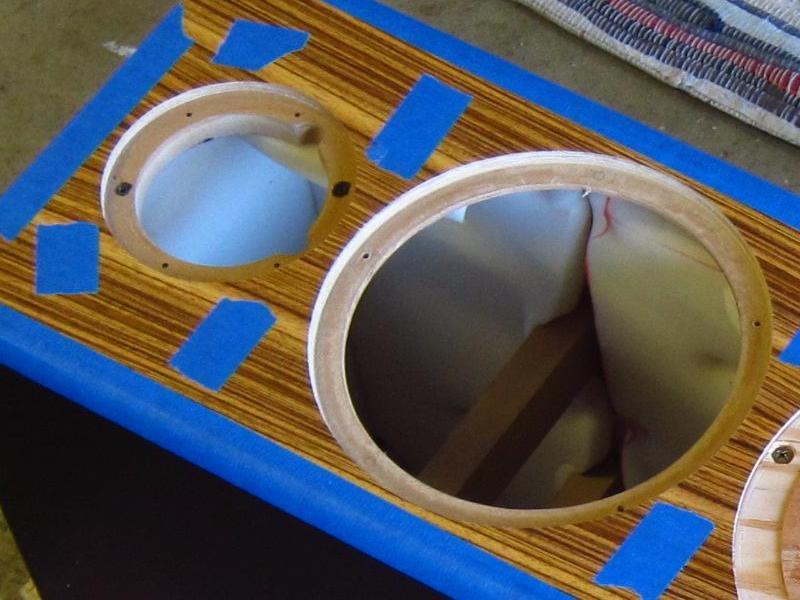
So, I took a utility knife and trimmed out the bulk of the veneer around the cutouts. I placed blue masking tape on the veneer to keep the router base from sliding on it and scratching it.
With one hole done, I test fitted a tweeter. I did the holes in multiple passes, starting intentionally under-sized and bringing things out ~0.005" per pass until I got the right fit.
It was the same story with the woofer cutouts.
I didn't take any pictures of the crossover / terminal assembly. Internal wiring was 12ga Dayton copper wire...plain old 259 x 36 AWG standed speaker wire. I don't buy into the "speaker wire makes a difference" argument. Connections to drivers / binding post terminals were made with some Home Depot crimp-on 1/4" spade terminal receptacles that passed the 5lb tug-test. I know, why bother building these at all, right? 😛 The other ends of the wires were soldered to the crossover boards. The crossovers were zip tied to the internal bracing behind the upper woofer and tweeter for easy access.
As usual, by the time I finished these I was tired of working on them & taking pictures, so the only shots of the finished products are lousy.

One more.

And there you have it! All done, and I am not sure if I will ever need to build another set again!
Sadly, I really won't have a chance to turn these up super loud until I move elsewhere (fiancee & I are saving for a house) since one of my neighbors is a retired couple that is ALWAYS home. Nevertheless, even at "reasonable" volume levels, these suckers perform great and I can't hear any weaknesses in them. So, overall, I am very happy with my investment of ~150 labor hours and the amount of money that went into parts & materials.
Anyway, here's the rest of the construction process.
I installed my plywood plugs into the woofer cutouts, and applied contact cement to both working surfaces. The blue masking tape was peeled off of everything after the cement was given ~15 minutes to get tacky.
The centers of the plugs sit flush with the baffle, making it much safer to apply pressure to the veneer without it caving in. The center hole also provides a pivot point for the router when I trim the veneer, and it helps to keep the router level.
So, here we go! I started by placing two pieces of wax paper between the work pieces. The veneer had been carefully trimmed to fit earlier. I aligned the back edge with the recess (the wax paper was pulled back from that edge so I could get a good alignment).
With the alignment set, I firmly rolled the middle 2" into contact to set the position. Generally, you want to start from the middle-middle of the work piece. In this case, I started at the aligned edge & worked to the other side at the start, so as to be sure to keep the alignment. Bubbles aren't really an issue with this method.
I then proceeded to pull the left piece of wax paper out about 4" toward the bottom and roll the veneer into place. I repeated this until I reached the end, and then repeated it for the right piece of wax paper.
Once I finished rolling the veneer down, I let it sit for an hour. Then I took a utility knife and trimmed the excess, leaving ~0.25" overhanging on each end (this picture). The router with a 3/8" flush-trim bit was used to get the edges flush.
I had some concerns about using the router to trim the driver cutouts. My worry was that it would grab & splinter the wood as it went ~45° against the grain and pulled it into the hole. I took some scraps & an old piece of MDF with holes in it to test-cut.
With a brand new 1/2" straight router bit at 18000RPM, there was no room for concern, at all. Cuts in all directions with/against the grain produced perfect edges!
So, I took a utility knife and trimmed out the bulk of the veneer around the cutouts. I placed blue masking tape on the veneer to keep the router base from sliding on it and scratching it.
With one hole done, I test fitted a tweeter. I did the holes in multiple passes, starting intentionally under-sized and bringing things out ~0.005" per pass until I got the right fit.
It was the same story with the woofer cutouts.
I didn't take any pictures of the crossover / terminal assembly. Internal wiring was 12ga Dayton copper wire...plain old 259 x 36 AWG standed speaker wire. I don't buy into the "speaker wire makes a difference" argument. Connections to drivers / binding post terminals were made with some Home Depot crimp-on 1/4" spade terminal receptacles that passed the 5lb tug-test. I know, why bother building these at all, right? 😛 The other ends of the wires were soldered to the crossover boards. The crossovers were zip tied to the internal bracing behind the upper woofer and tweeter for easy access.
As usual, by the time I finished these I was tired of working on them & taking pictures, so the only shots of the finished products are lousy.
One more.
And there you have it! All done, and I am not sure if I will ever need to build another set again!
Beautiful! 🙂 The V-shaped graining of the veneers is a nice touch. And don't knock 'all' B&O. I'm a collector and lover of some of their older stuff. I'm putting together an SR71 speaker kit that I'll be pairing with a late 80's Beosystem 6500.
Austin
Austin
No knocking of B&O here. My father has a TMM pair from the 1970's (uses Seas drivers, I believe) and they still sound great. My fiancee's boss' $12k B&O's sounded AMAZING, and inspired me to embark on this ZRT project since it showed me how much better I could do than my previous pair! The aesthetics of the current B&O's are also pretty amazing, and I wish I could build something like those!
When working with contact cement,make sure you use wax paper between the non tacky enclosure wall and the non tacky veneer face, then it assures good alignment technique. Then slowly slip the wax paper out while rolling the veneer flat. This is fairly difficult with large boxes🙁 There is only ONE take when the two sides touch and that's it.if you screw up you'll be chiselling the veneer off ....bit by bit.
I just revisited my old thread when I was sending a link to someone.
This is the best advice, ever. The wax paper method worked PERFECTLY, and I just wanted to make sure that I gave some credit for that! Thanks!
- Status
- Not open for further replies.