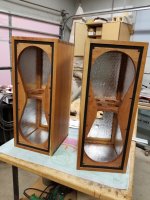
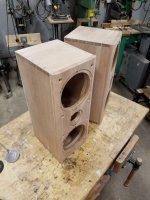
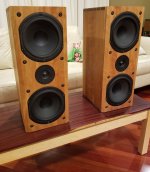
Here is a little photo essay of my latest build. An MTM with two Peerless HDS-P830869 woofers and a DX25BG60-04 tweeter. I wasn't sure if it was going to build an MTM or 2.5 TMM, I decided on an MTM.
Attachments
-
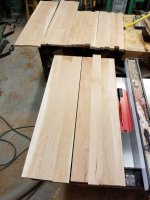
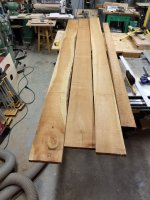 1 - thelumber.jpg241.4 KB · Views: 398
 -
 10 - gluup back veneer.jpg255.6 KB · Views: 128
 -
 9 - layup back veneer.jpg177.2 KB · Views: 134
 -
 8 - back veneer.jpg186.2 KB · Views: 145
 -
 7 - resawing for backs.jpg210.4 KB · Views: 160
 -
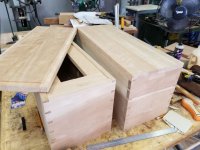
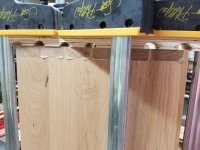
 6 - boxes dovetailed.jpg169.2 KB · Views: 150
 -
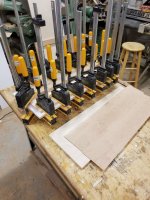
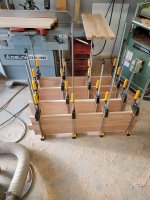
 5 - dt jig.jpg168.7 KB · Views: 367
 -
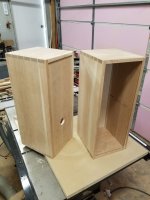
 4 - all glued up.jpg198.2 KB · Views: 359
 -
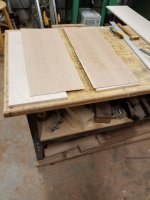
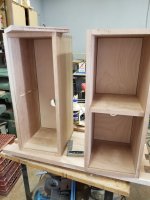
 3 the sides.jpg305.3 KB · Views: 379
 -
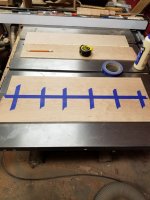
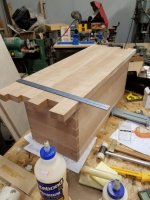
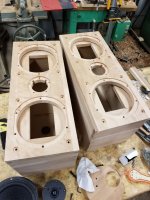
 2 - the baffle boards.jpg179.4 KB · Views: 387
More pics...
Attachments
-
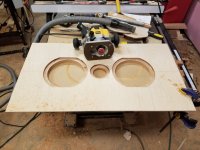
 20 - baffle layout.jpg140.5 KB · Views: 142
 -
 19 - rebating baffle.jpg134 KB · Views: 152
 -
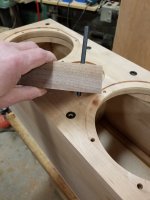
 18 - fitting baffle brace.jpg141.8 KB · Views: 153
 -
 17 - fitting brace.jpg167.6 KB · Views: 146
 -
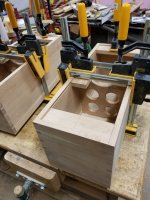
 16 - boxes glued.jpg166.1 KB · Views: 137
 -
 15 - pressure in the right places.jpg138.1 KB · Views: 126
 -
 14 - glueing boxes.jpg187.6 KB · Views: 127
 -
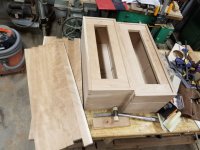
 13 - sizing baffle.jpg199.3 KB · Views: 130
 -
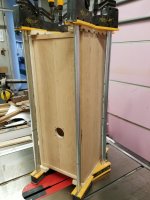
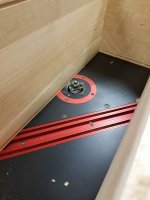 12- groove for back.jpg192.7 KB · Views: 197
 -
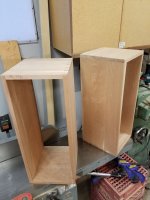
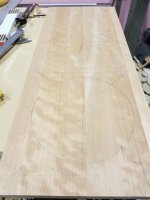
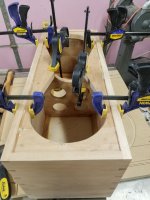
 11 - mtm or tmm.jpg160.1 KB · Views: 212
Can I ask the inevitable question about wood movement?
He's accounted for wood expansion/contraction, I believe the sides can expand without any impact. A proper wood cabinet I would say and quality work.
Not a bad looking woofer, that Peerless 830869. Cheap too! 30L of reflex per driver according to data, 23X7cm tube.

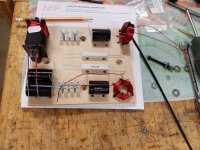
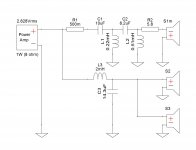
Of course, I want to see the crossover. This is a nice idea. Must be series wired bass, mustn't it? Otherwise the tweeter is going to get pushed too hard.
Anyone can build a box. Er, except me... I stick to soldering. 😀
Of course, I want to see the crossover. This is a nice idea. Must be series wired bass, mustn't it? Otherwise the tweeter is going to get pushed too hard.
Anyone can build a box. Er, except me... I stick to soldering. 😀
I was asking about how it worked. When the sides move does the glue (kind?) allow movement at the top and bottom joints? How is the baffle attached? And the rear panel?He's accounted for wood expansion/contraction, I believe the sides can expand without any impact. A proper wood cabinet I would say and quality work.
more pics...
Attachments
-
 27 - threaded inserts.jpg179.9 KB · Views: 130
 -
 28 - gluing in baffle supports.jpg182.8 KB · Views: 140
 -
 29 - marking for baffle bolts.jpg142.7 KB · Views: 115
 -
 30 - baffle bolting.jpg196.1 KB · Views: 126
 -
 26 - gluing in braces.jpg223.6 KB · Views: 115
 -
 25 - lots of holes drilled.jpg231 KB · Views: 117
 -
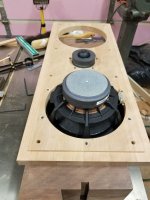
 24 - test fit drivers.jpg153 KB · Views: 127
 -
 23 - rebating for drivers.jpg144.7 KB · Views: 119
 -
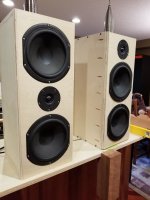
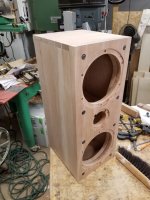
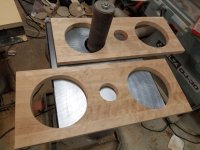
 22 - how it looks.jpg141.4 KB · Views: 122
 -
 21 - sanding jigsawn holes.jpg133.9 KB · Views: 102
Can I ask the inevitable question about wood movement?
Wood only moves width wise, not length wise (or very close to zero)
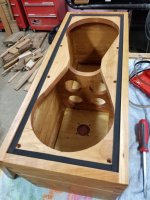
Sides/top/bottom are fine, grain all the same direction. The glued in back is veneered ply and is also not going to move.
The problem is a solid front baffle. I did it sort of the way I attach table tops. There is room for the bolts to move. That is why it is gasketed and bolted, not glued. The threaded inserts the bolts go into are the in bottom half of the board they are in which means there is lots of clearance for the bolt (the hole for the insert is much bigger than the bolt, I hope that makes sense).
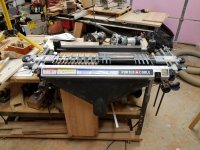
DaveFred some serious equipment you have there. How do you like the Porter Cable dovetail jig?
Like all dovetail jigs, it is a pain in the butt to set up, took me 6 test cuts before I was happy with the fit. But once it was dialed in it works great. The Porter Cable gives you the smallest dovetail pins of any of the jigs and is why I like it.
more pics...
Attachments
-
 37 - crossover in.jpg244.2 KB · Views: 144
 -
 36 - crossover done.jpg172.3 KB · Views: 138
 -
 35 - crossover layout.jpg165.3 KB · Views: 243
 -
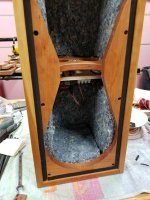
 34 - nocio dampening bitumen.jpg242.7 KB · Views: 235
 -
 33 - gasket for baffle.jpg222.4 KB · Views: 238
 -
 32 - applying finish.jpg149.7 KB · Views: 256
 -
 31 - sanded ready for finish.jpg214.5 KB · Views: 251
Great job. Very Nice woodwork and well thought out.
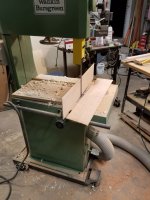
It is the wadkin band saw that caught my eye.
Enjoy,
Evan
It is the wadkin band saw that caught my eye.
Enjoy,
Evan
More pics...
The freq response is the left and the right, hard to put the mic at the exact same distance when measuring the separately.
The freq response is the left and the right, hard to put the mic at the exact same distance when measuring the separately.
Attachments

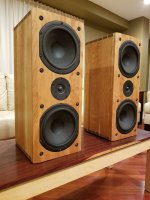


Great job. Very Nice woodwork and well thought out.
It is the wadkin band saw that caught my eye.
Enjoy,
Evan
I bought the bandsaw as a wreck for $200 from a window company and put another $1000 into it for a new motor, starter, vulcanizing new tires onto the rims, guides, bearings, paint, etc. Worth it in the end, $1200 (CDN) for a 20" 3hp bandsaw with 17" of resaw. 🙂
Like all dovetail jigs, it is a pain in the butt to set up, took me 6 test cuts before I was happy with the fit. But once it was dialed in it works great. The Porter Cable gives you the smallest dovetail pins of any of the jigs and is why I like it.
I went the Incra router table route and was always wondering how those jigs worked. Great project btw.
Member
Joined 2009
Paid Member
wow, not only a great build, great choice of wood and finish - but a workshop to make us all jealous. Where do you live again ? 🙂
And we like the Pink Panther...
And we like the Pink Panther...
Last edited:
Where do you live again ? 🙂
And we like the Pink Panther...
I am in SW Ontario like yourself.
There is a very long story about that Pink Panther... 🙂
- Status
- Not open for further replies.
- Home
- Loudspeakers
- Multi-Way
- Building a solid cherry MTM