Dave,
the biggest upgrade the youngsters can get is the one from earbuds to a pair of $300 canalphones, costing less than all but the very cheapest of DIY speakers, and sounding, at that pricepoint, nearly perfect. Let´s keep preaching.😀
Fixed that for you 😀 Granted, they aren't quite so comfortable to use as speakers, and a damn sight less social.
Dave,
the biggest upgrade the youngsters can get is the one from earbuds to boxes. Let´s keep preaching.😀
I mostly use the iPod as a source into a receiver, and it is a godsend when the power goes out. I haul out the A126 and the battery powered T-amp...
😀
dave
Dave, may one suspect we have European fall weather and you have Canuck fall, ie trees on power lines fall weather? Nice landscape you have, but damn to him who doesn´t have canned electricity...

Pit,
Living in a rain forest with lots of 100+ ft trees, we do get trees falling on lines. Occasionally ice rain, and snow a couple times a year takes out the power.
The last power outage thou was someone driving into a power pole.
dave
Living in a rain forest with lots of 100+ ft trees, we do get trees falling on lines. Occasionally ice rain, and snow a couple times a year takes out the power.
The last power outage thou was someone driving into a power pole.
dave
Didn´t you, some one or three years ago, post pics of a tree just by a hair missing your roof? Looked scary. 😱
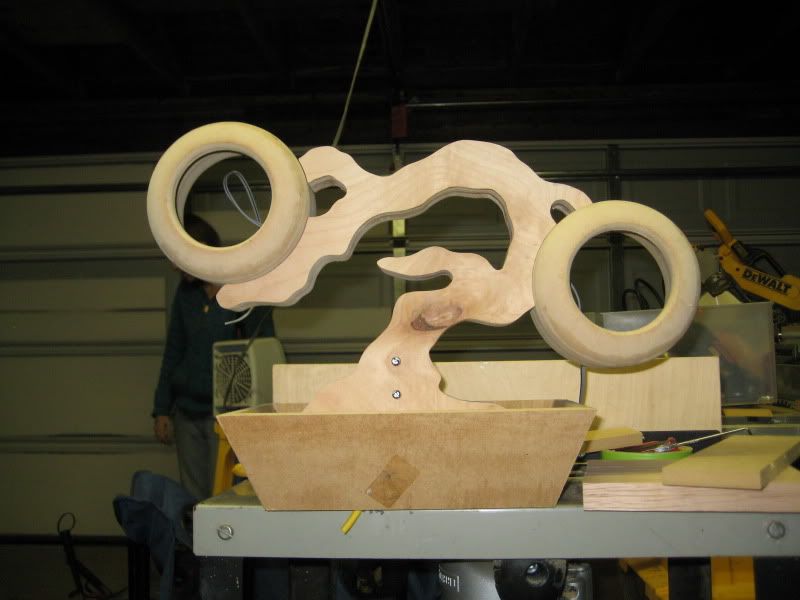
What type of finish are you going with? Is the tree going to actually be green? 🙂
Haha, no, the pods will be painted green most likely, while the tree will either be stained or just cleared. I have to try out different stains to try and get the most out of the grain without losing anything.
Got some more done in studying breaks.
Hand sanding edges of the tree with some really rough 60 grit. I was going to try sanding drums but I don't think I can find any small enough.

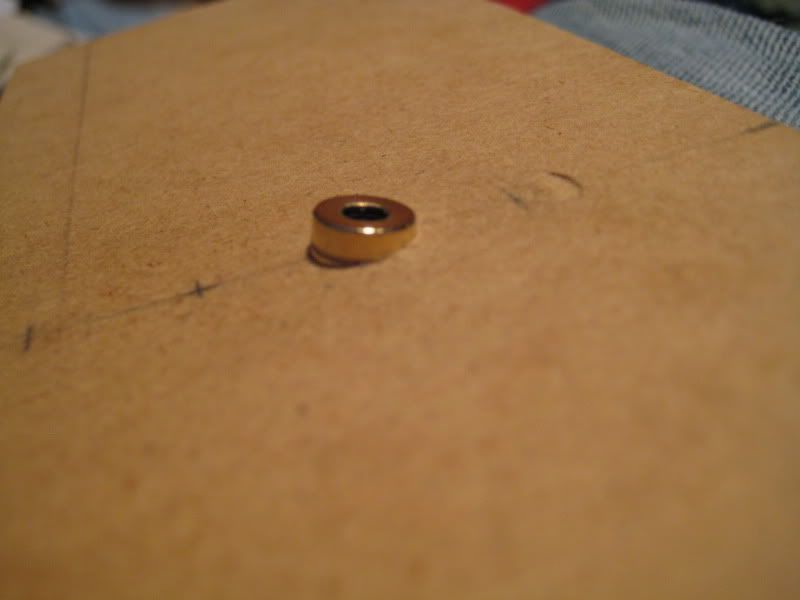
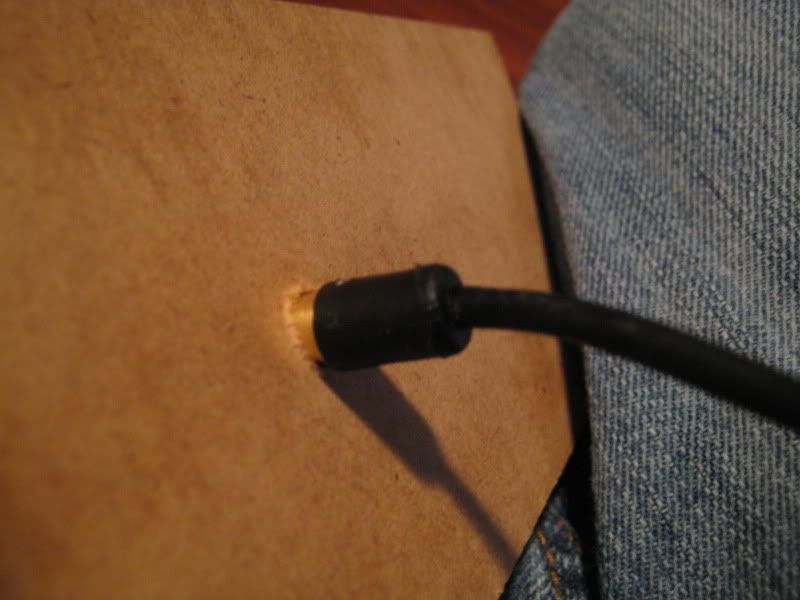
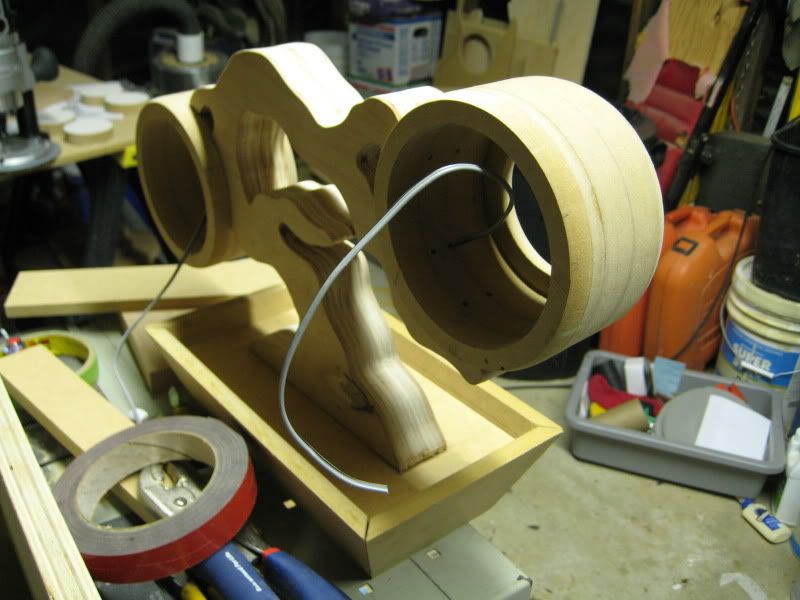
I was going to use the 3.5mm plug from the amp board, but I found a radioshack female 3.5mm plug that I had cut off the other end for some other project. I stripped the rubber and had a really nice plug to mount on the pot.

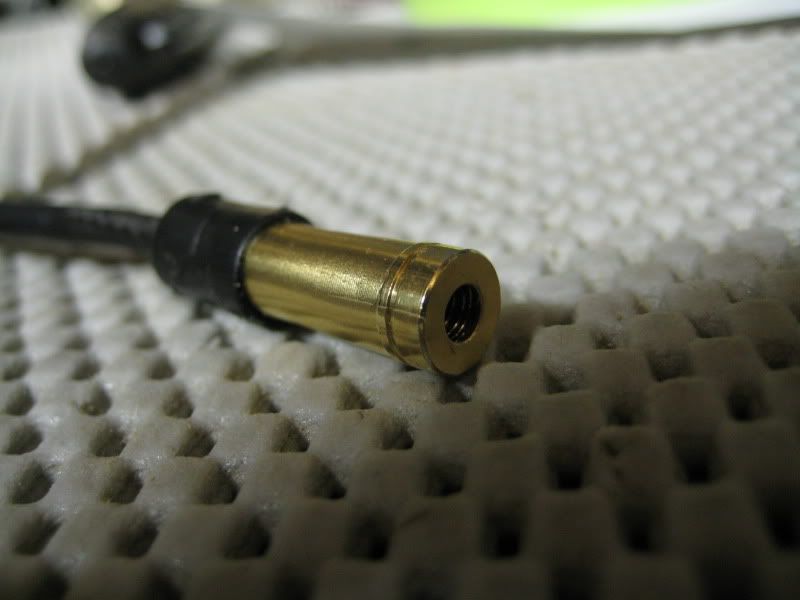
I drilled out a hole for it at the same angle everything else is.
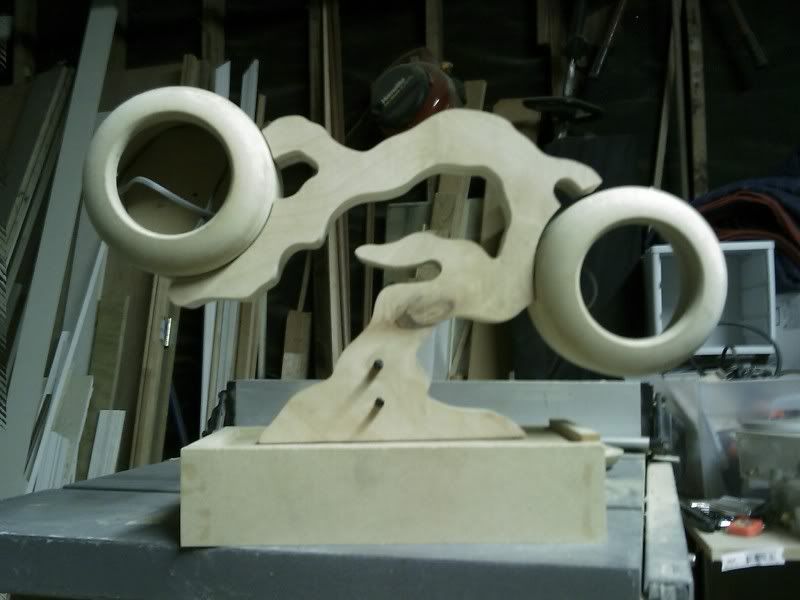
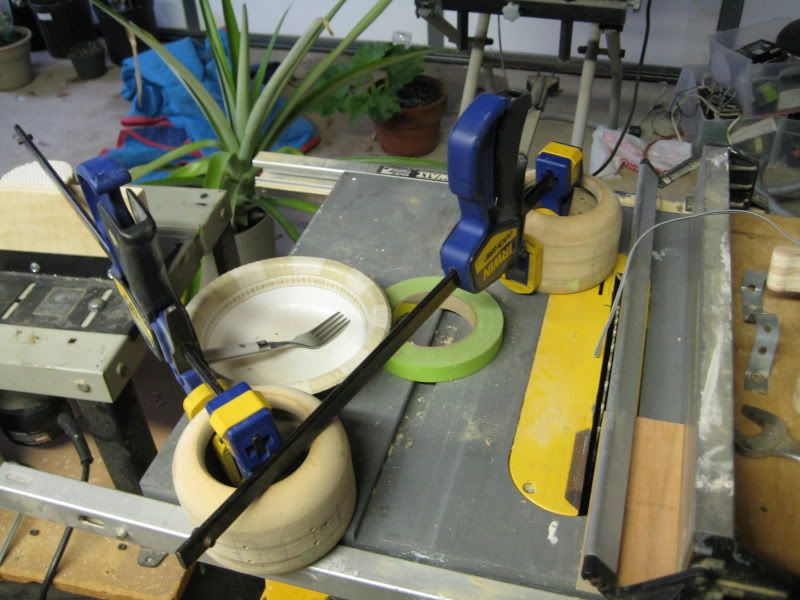
Dry fit. Pot is way too tall. Needs to be muuuuch shorter. Going to cut off as much as possible, and will have to tweak the angle on the 45s. The miter saw seems a little bit off. Or maybe it's the table saw. Who knows.
I am also still toying around with ceramic. I know someone who does ceramic classes and I may wind up casting something myself. Maybe I'll even get on the wheel. =P

I think I'm missing some pictures, but I'm not sure. Camera is mia atm, so I'm trying to work around it.
That is one unbelievably cool "bonsai" - I am looking forward to seeing the final result!!! I'd love to have one of those for my kitchen ;-)
That is one unbelievably cool "bonsai" - I am looking forward to seeing the final result!!! I'd love to have one of those for my kitchen ;-)
Thanks! It'll probably be going up for sale on Etsy once I'm done. If my girlfriend will let it go.
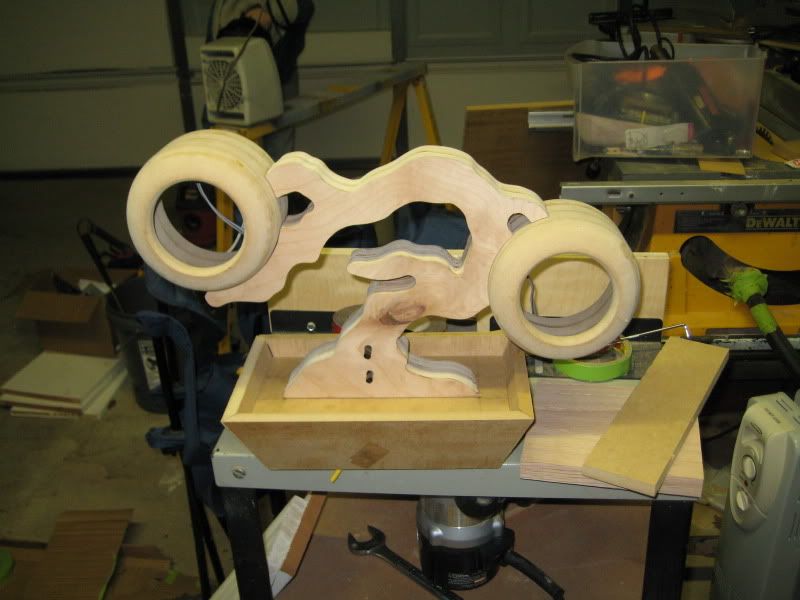
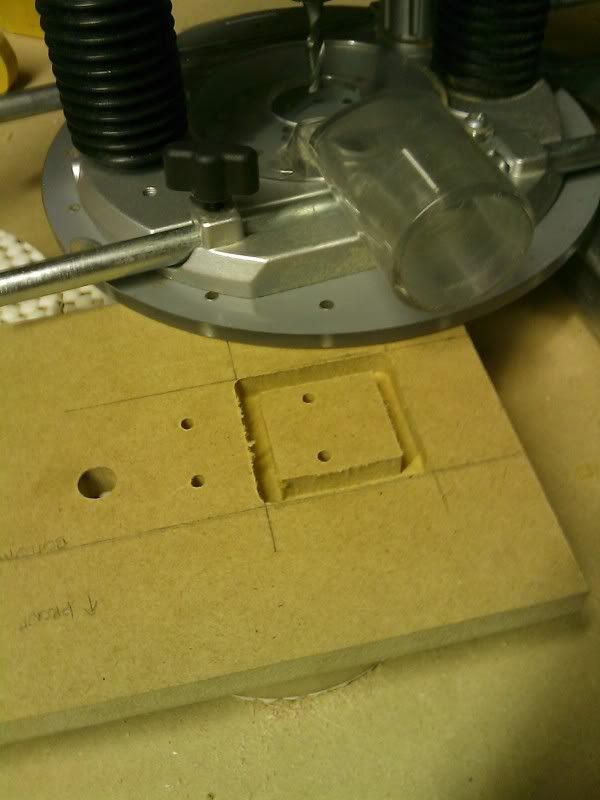
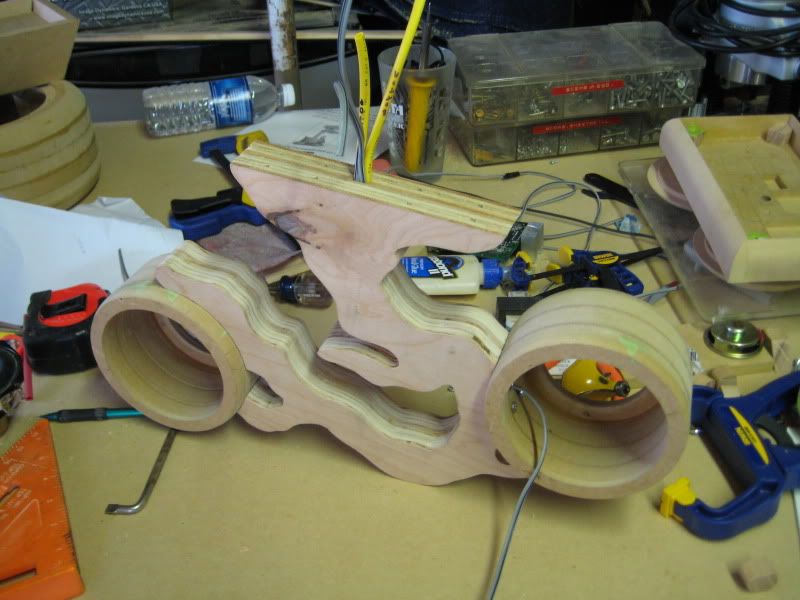
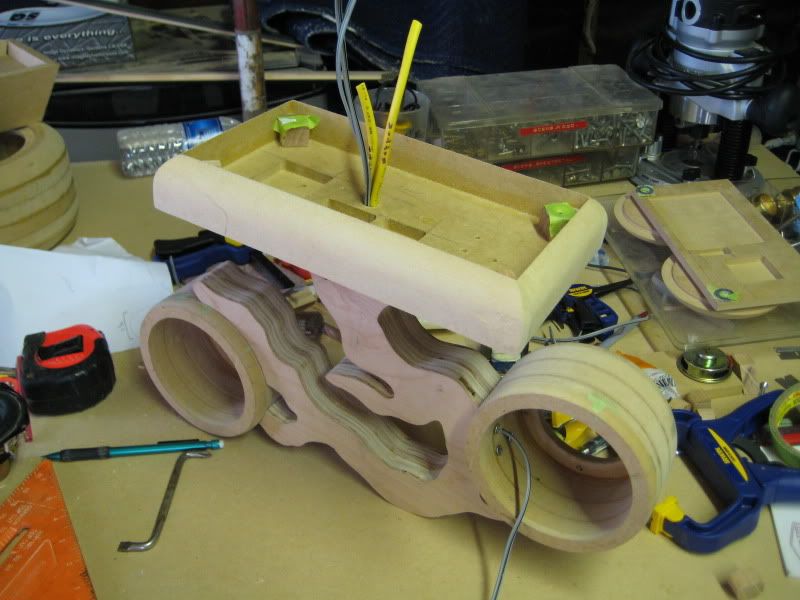
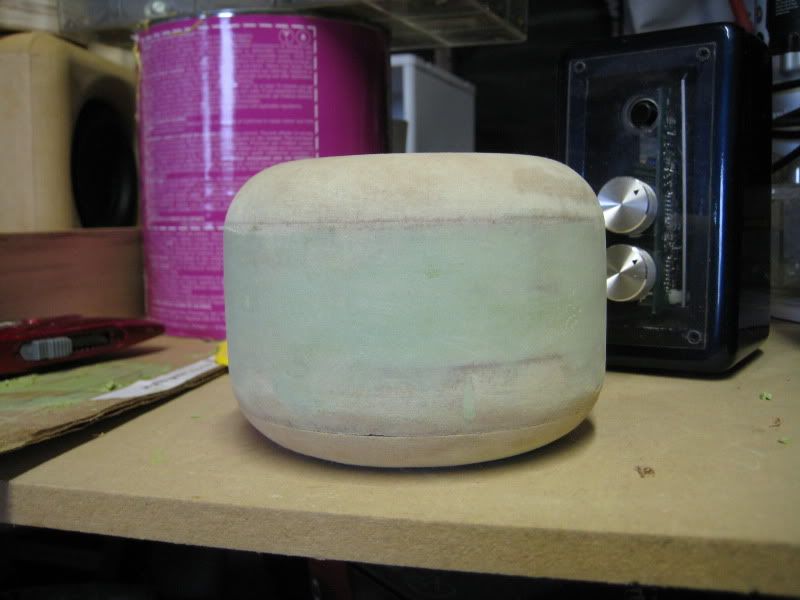
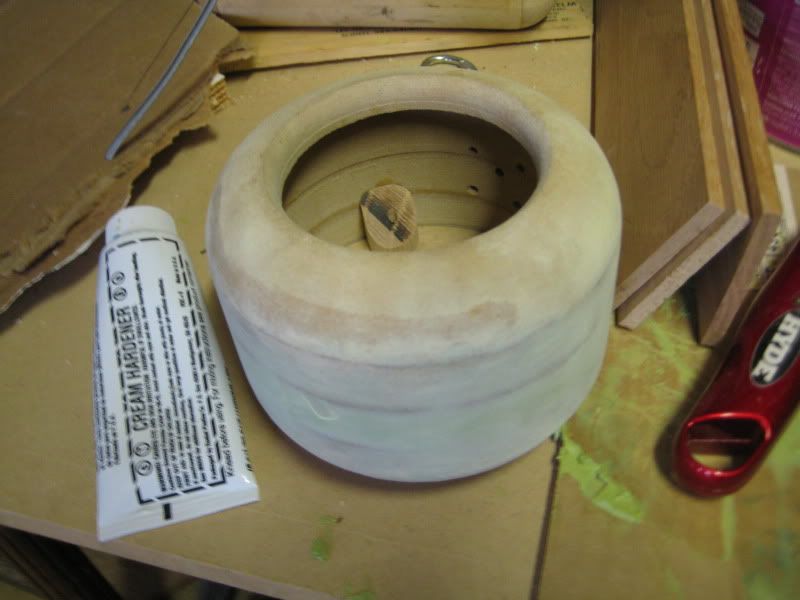
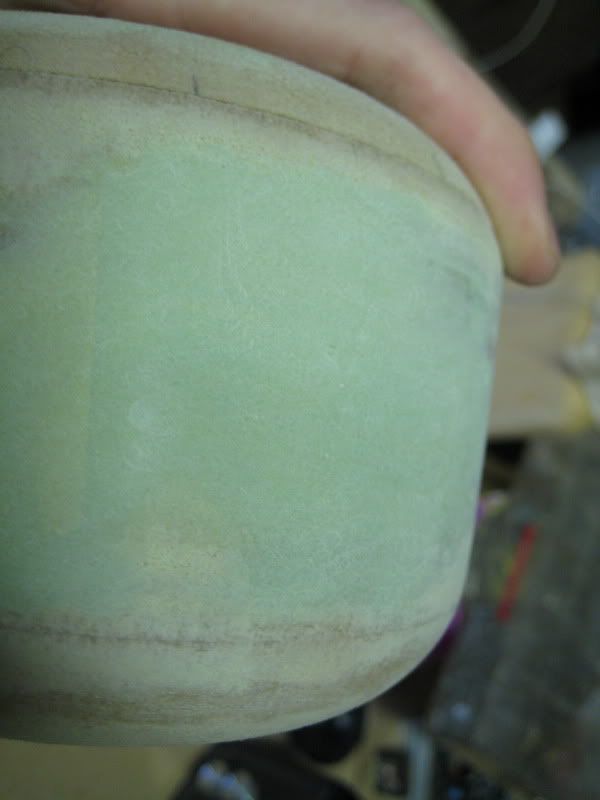
I decided to redo the base. I wasn't really liking how much work had to go into the angular sides and how iffy the final product would be, so I decided to go with a rectangular box, with all of the edges rounded over 1" except for the top. I will have the bottom panel removable, with the top completely smoothed over. I decided instead of having the lip, I'm going to continue with a soft minimalist, geometric style like with the pods, compared to the organic lines and grain of the trunk. I found a long piece that was a bit too wide, and cut it down the make the new box. I wanted to cut it down more anyway later.
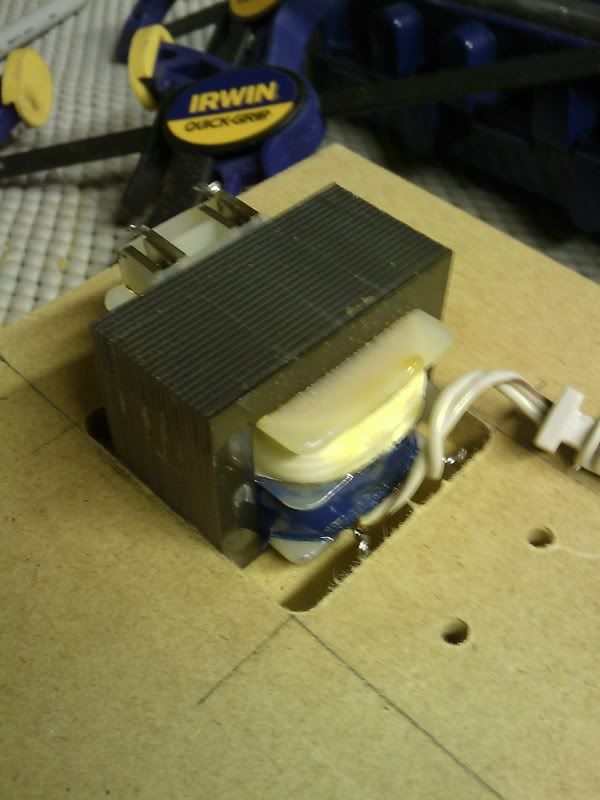
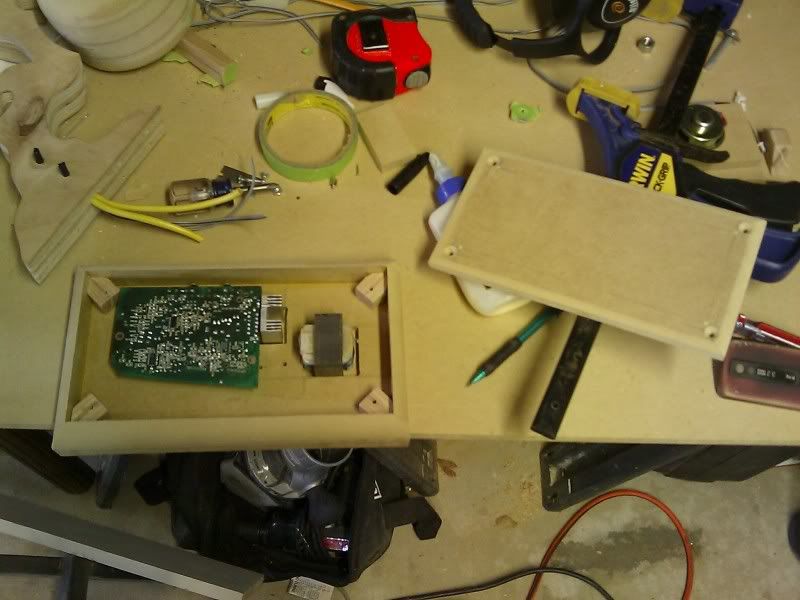
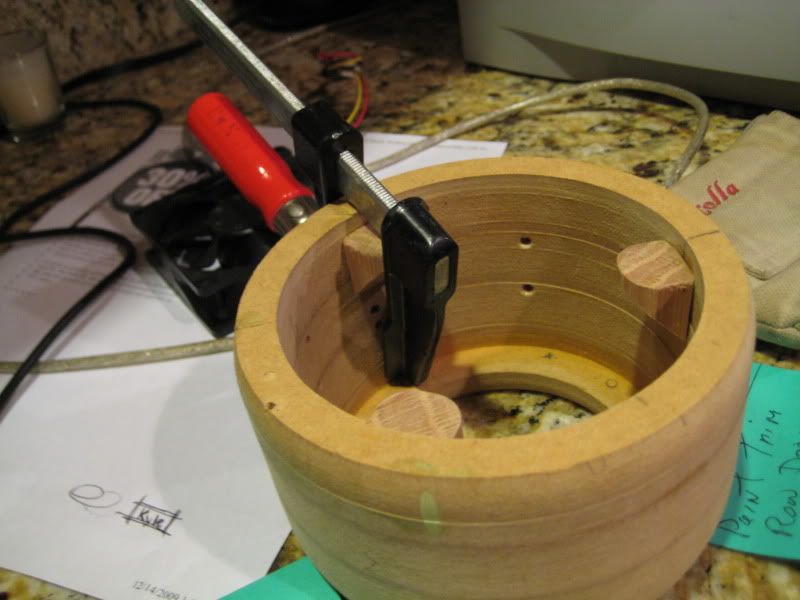
Like the other base, it was just too big, so I took some measurements and I was able to get it down to 1 9/16" thick. In the pics it's still the original size. I think around 2.25 or so. I'm going to be mounting the transformer in the case (I guess I need some shielding?), so right now that's my thickest component. The amp is not much thinner, but I could always reposition the caps. I recessed the panel to 1/8", and I'll be doing it on the bottom panel too (the components will be mounted to the top of the pot.) The board I will be mounting upside down for the sake of getting the heatsink to fit. I will be cutting one I have to fit it.
I'm not sure if I want to mount the input jack on the front or not. Right now it's easier for me to mount on the front due to the layout inside, but I'm worried about pushing the jack through the hole and cracking up the new paint job. Maybe I could mask it and install it beforehand. Thoughts?
Ok, well, time for pics. No captions, so I hope you get the idea.


Input Jack
You could use a removable plate made of metal or plastic for the input jack. That way they could be reconfigured at a later date if need be. Or, if you are using one, an Ipod dock at the front/bottom of the base could be added.
Great project. You have got mine, and many others', idea dreaming caps spinning!
Dry fit. Pot is way too tall. Needs to be muuuuch shorter. Going to cut off as much as possible, and will have to tweak the angle on the 45s. The miter saw seems a little bit off. Or maybe it's the table saw. Who knows.
That's because you have a compound angle and a 45 degree angle is not what is needed there.
-Josh
That's because you have a compound angle and a 45 degree angle is not what is needed there.
-Josh
They aren't quite 45s, as they were cut on a compound mitre saw. I set one angle at 45 while the other was set at the taper of the box (15*). I think it was just a matter of the angle gauge being a bit off. Unless there's something else I'm missing?
Sounds like it should work.They aren't quite 45s, as they were cut on a compound mitre saw. I set one angle at 45 while the other was set at the taper of the box (15*). I think it was just a matter of the angle gauge being a bit off. Unless there's something else I'm missing?

I used to have a spreadsheet I found online for calculating compound angles but I can't remember where I put it.
I know I'll have to deal with them when I get around to building my Klipschorns though.😱
-Josh
I used to have a spreadsheet I found online for calculating compound angles but I can't remember where I put it.
I'd love to get my hands on that... or better yet the underlying math.
dave
Dave,
It looks like there is one here that will work if both of your pieces require the same angle such as the base to the bonsai tree.
Which with an 85 degree angle from flat(15 degrees from vertical) would need,
Crosscut (miter guage) angle: 4.98
Blade Tilt Angle: 44.782385
Woodcentral's Badger Pond Article Archives
But this is the one I was thinking of that has some other formulas and such that seem useful.
http://www.woodweb.com/software_downloads/formulas_spreadsheet.xls
-Josh
Indeed! Although I may wind up not using the angled base at all 😛 I'm really liking how this "practice" box is turning out.
Wood is the new black. 🙂


Wood is the new black. 🙂

Kartoffelfrosch (well, that *is* your nickname in German), they look elephantastic.
Haha I did not this! It's not every day that one learns their username equivalent in German. And thanks!
I finally got back out to the garage today. I ran out of smokables last week and haven't really wanted to work on it. I guess I know where my inspiration comes from now =P
I dry-fit the trunk, base, and pods to make sure everything lined up right, and it turns out that the whole thing feels pretty solid with screws alone.

I also started on the blocks to hold the backs on the pods. I used some more of the oak that I used in the base, and rounded over the inside edges and cut off just enough of the outer edges to match the contour of the pods.
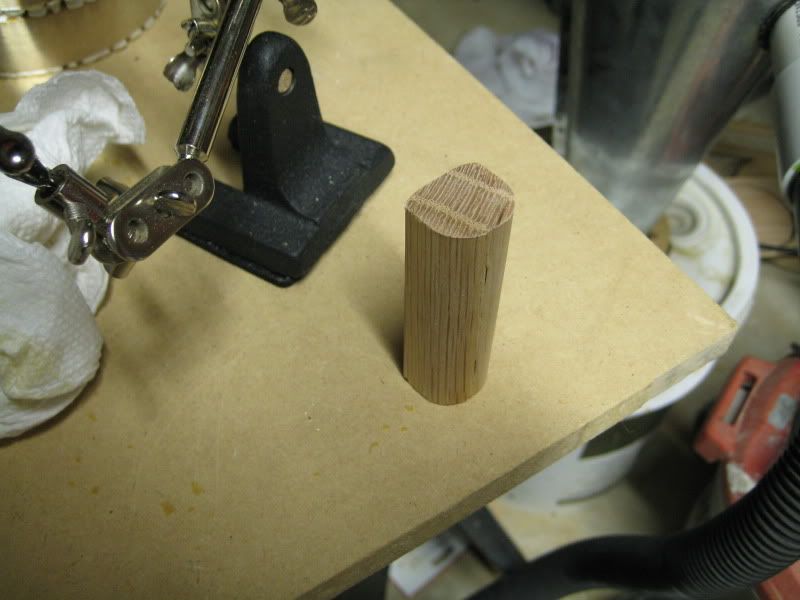
The first ones I cut were just slices of this shape, and after getting them all glued in, I found out that the drivers weren't able to clear them. Luckily it wasn't very hard to snap them out, and I sanded down the glue that was still left.
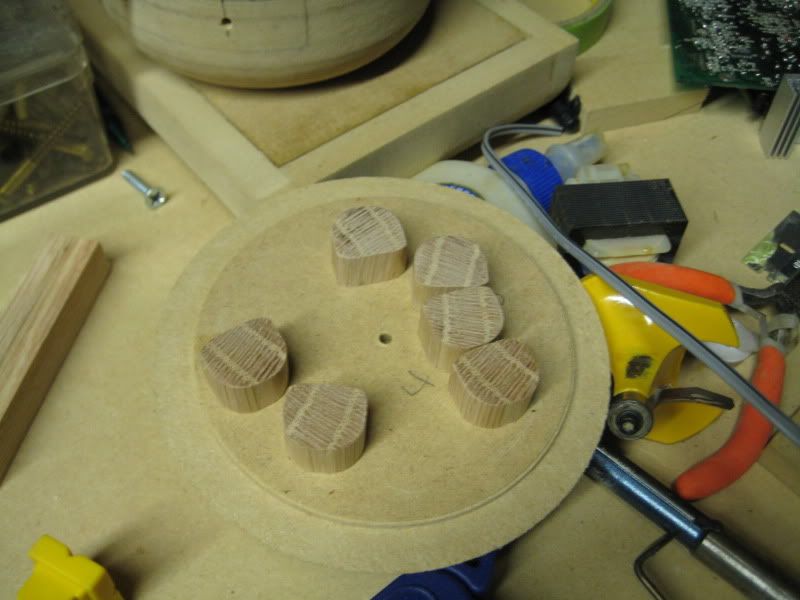
After this I decided to cut the new ones at an angle, and although they were a bit more difficult to clamp, they worked out and the drivers slipped right in.

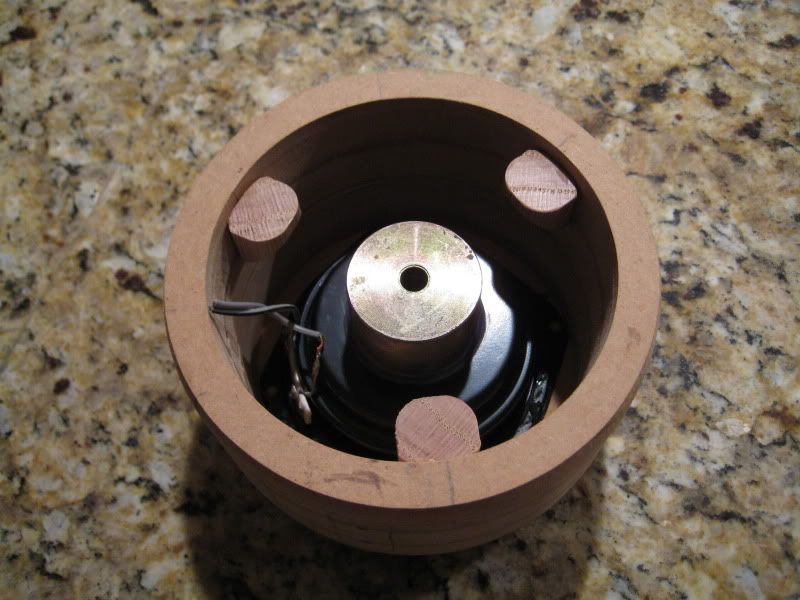
I traced the blocks on the inside of the back panels and drilled out the screw holes. I'll use those hole to drill out the blocks once I'm sure they are dry and solid, and I'll countersink the holes on the back of the panel. Once those are done, it'll be time for bondo! But that's all I've got for tonight.
I managed to finally get outside in a bit of nice weather and lay down/sand the first bondo layer on the mdf pieces. It's a bit wavy in spots on the pods, but it should even out when I put a second batch on for more coverage. I've dealt with too many ugly glue joints in the past to let any of them show through the bondo. Hopefully it'll stop them, but who knows. If I can visibly see them through the primer I may go with something flat instead of glossy.


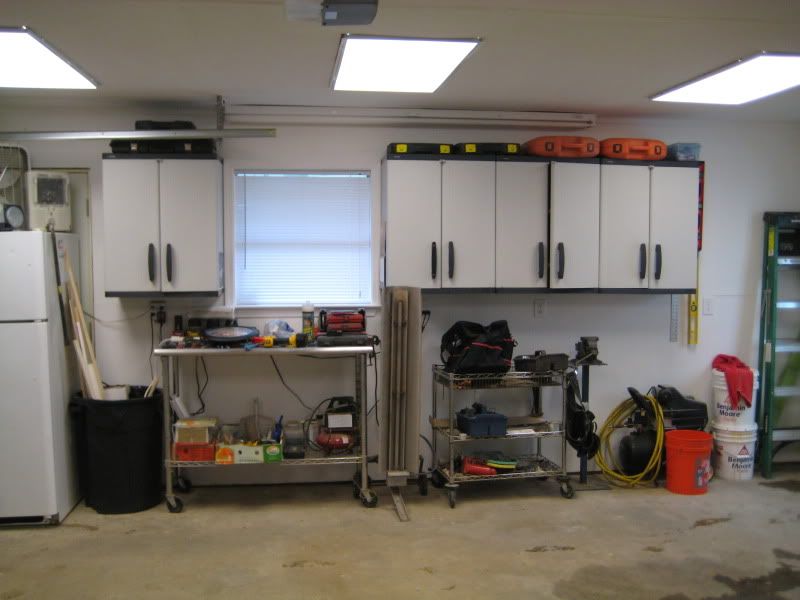
The other garage is also insulated/painted/finished now, so I have someplace warm to work in.
From this

To this

The other garage is also insulated/painted/finished now, so I have someplace warm to work in.
From this
To this
- Status
- Not open for further replies.
- Home
- Loudspeakers
- Full Range
- "Bonsai" decorative Ipod system