Bang & Olufsen Beovox 5700, classic vintage loudspeakers restoration, renewal, repair
I acquired these speakers a while back.
The speakers looked terrible, they were scratched and smeared with white muck / paint, dusty and very dirty and sticky. At the top were circles in the wood of lime/water that had leaked from flower pots or something. The foam dust caps in the woofers were completely perished. The pieces of foam fell out when I removed the front.
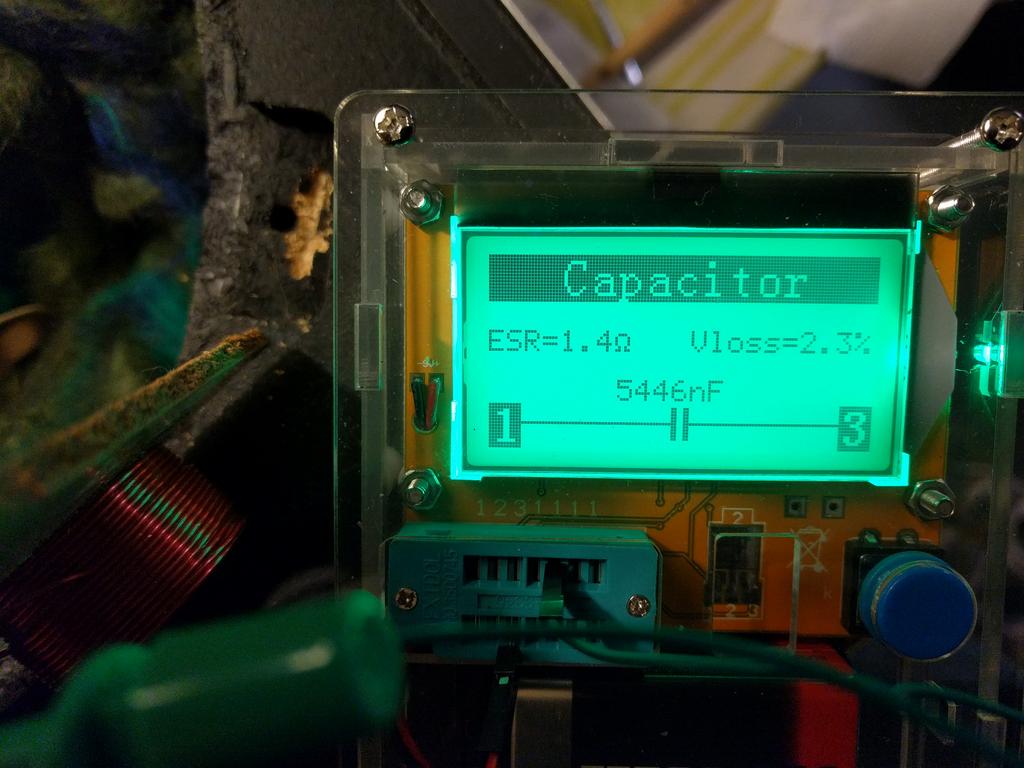
One of the resistors in the filter of a loudspeaker was completely burned out. Most electrolytic capacitors had wrong values and / or had an ESR of 1 to about 2 Ohm.
What have I done?
They play excellent again, these are really fine speakers!
Any opinions or remarks?
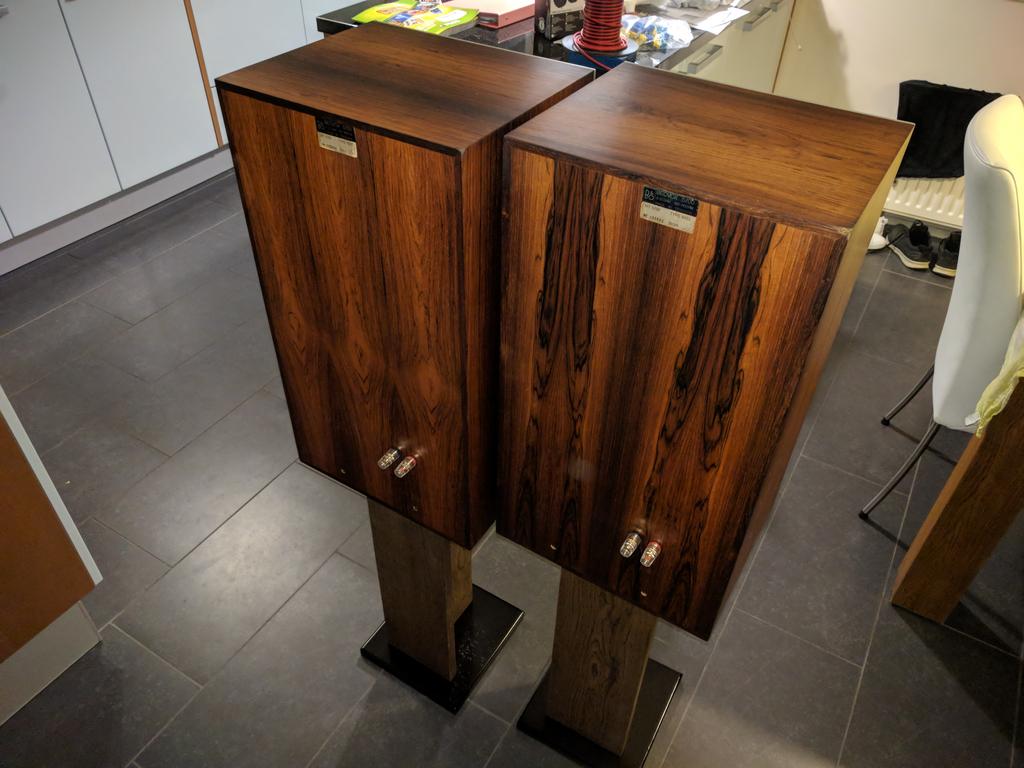
These were the most expensive speakers of Bang & Olufsen at the time.
The specifications:
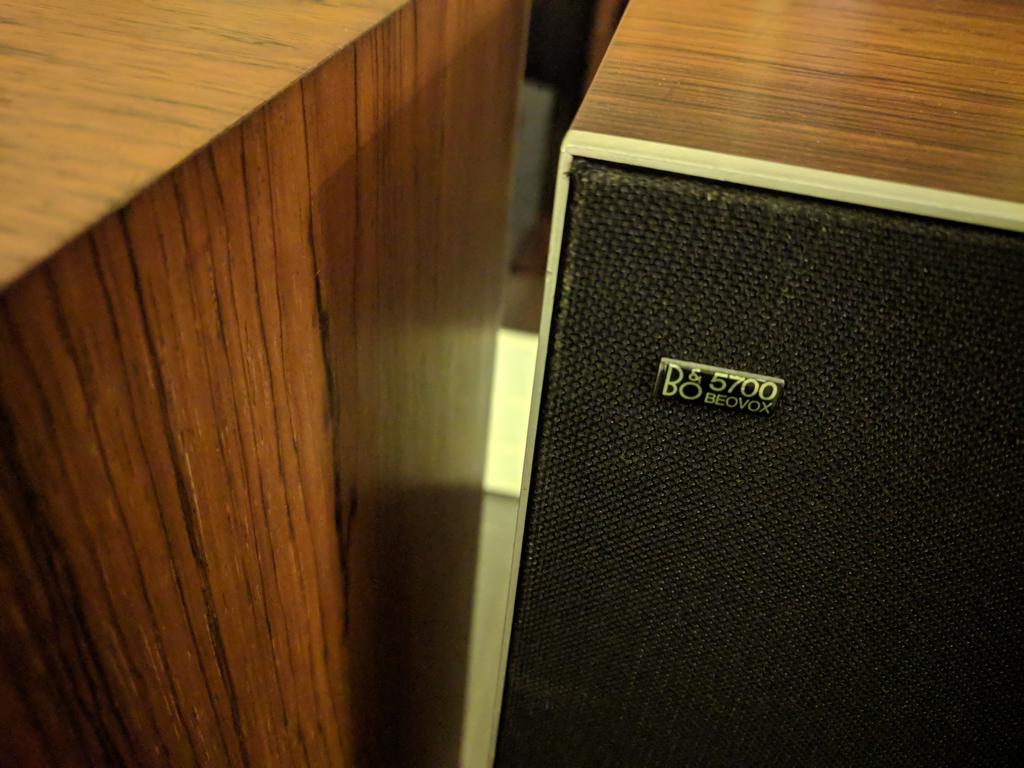
B & O, Bang and Olufsen, Beovox 5700, HT 5700, type 6253
100 Watt max. Power
impedance: 4 ohms
Frequency range: 35 - 20,000 Hz
max. harmonic distortion: <1%
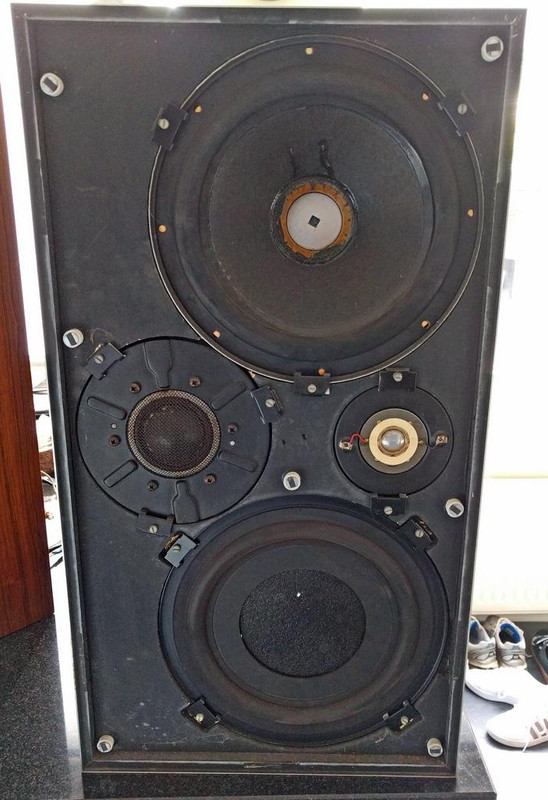
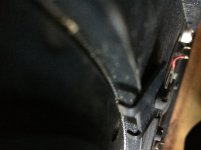
woofer: 22.5cm Philips AD 1056 / W8
mid tone: Celestion MF 500
tweeter: Celestion HF 2000
passive radiator 25cm
crossover frequencies 600 - 6000 Hz
dimensions: 36 x 66 x 30 cm
weight: 22.5 kg
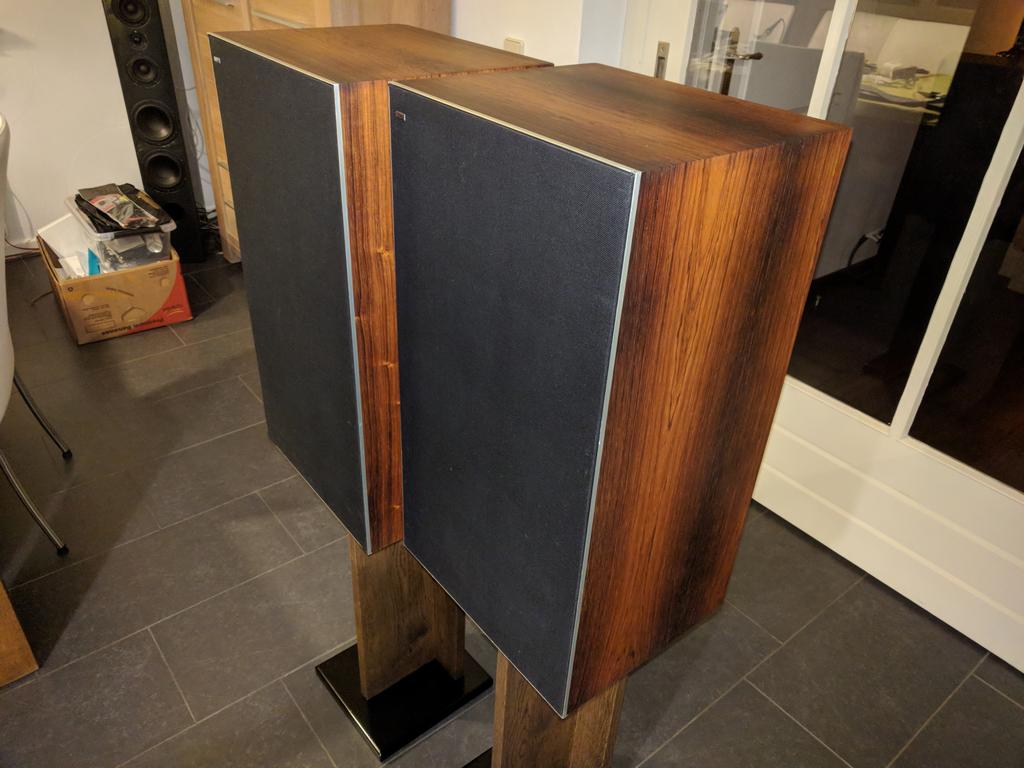
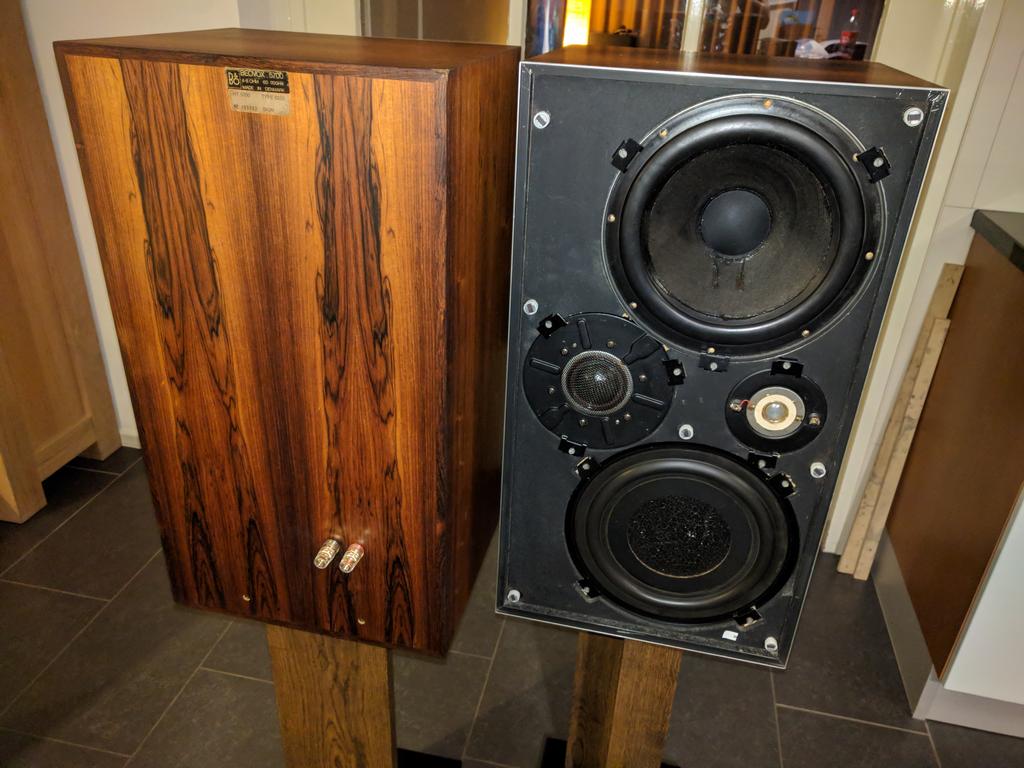
version in rosewood / rosewood veneer


Philips alnico woofer AD 1056 / W8
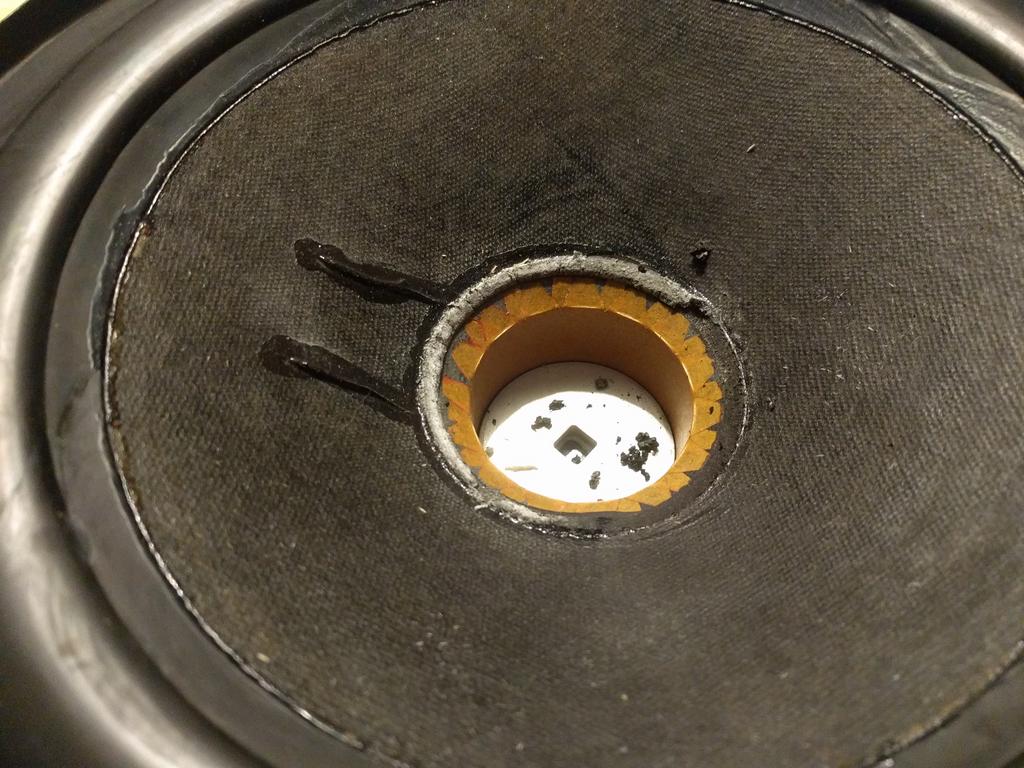
The philips AD 1056 / W8 woofer, the foam dust cover remnants for removal
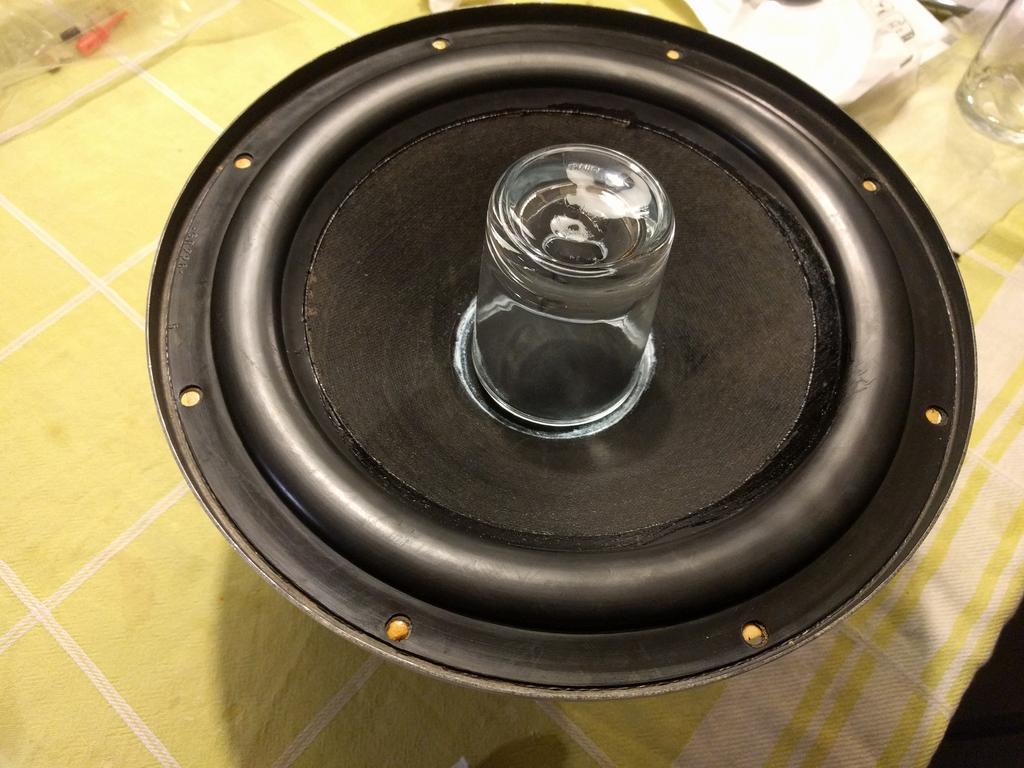
New linen dust cover glued in, temporarily fixed and weighted with a glass
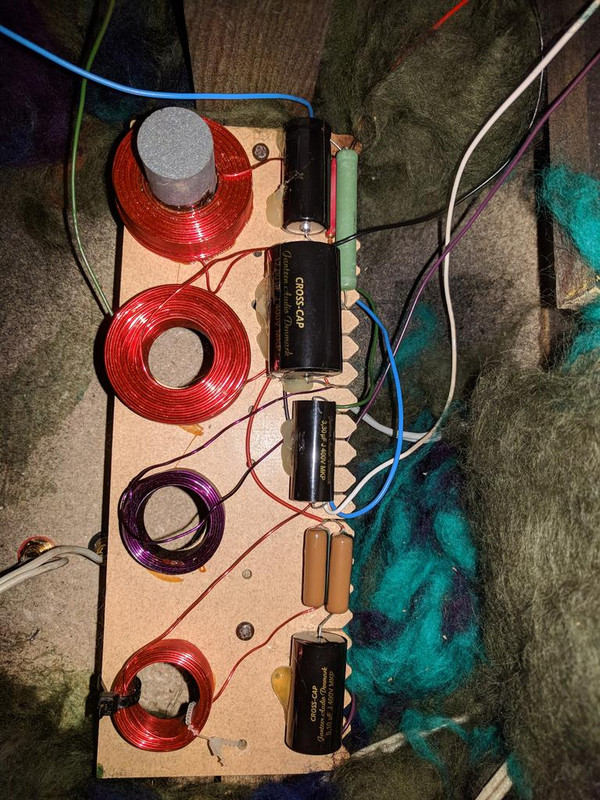
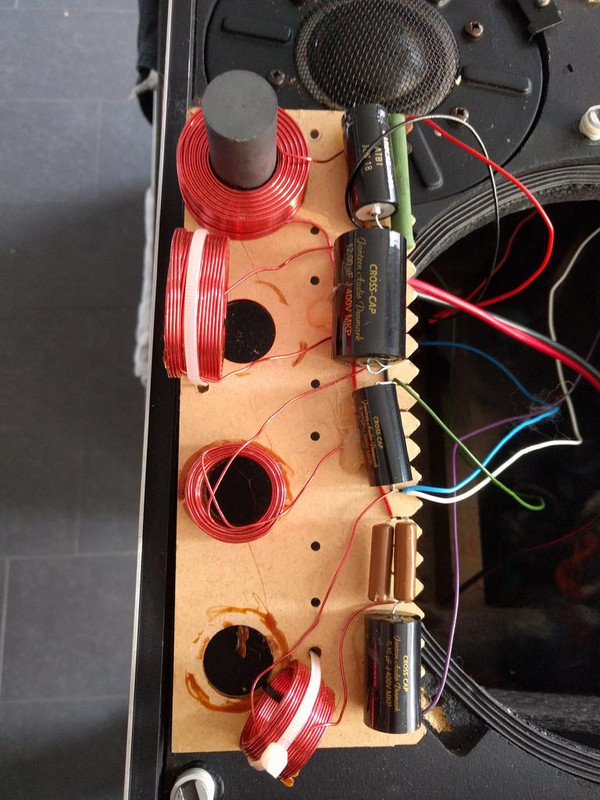
The crossover filter after upgrading with Jantzen Audio cross-cap MKP capacitors. The coils are rotated to minimize mutual crosstalk through the generated electromagnetic fields.
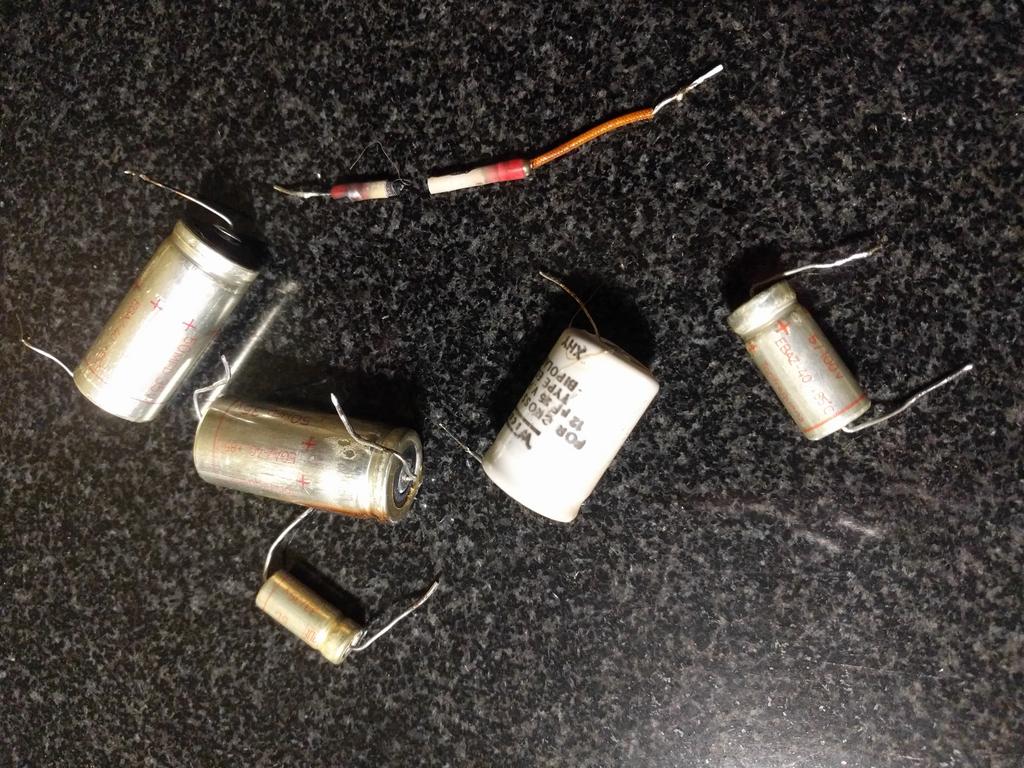
The old components, with the burnt-out / broken resistor of 22 ohms
Above review of the speakers from the American magazine: stereo review, number 3 from 1972
I acquired these speakers a while back.
The speakers looked terrible, they were scratched and smeared with white muck / paint, dusty and very dirty and sticky. At the top were circles in the wood of lime/water that had leaked from flower pots or something. The foam dust caps in the woofers were completely perished. The pieces of foam fell out when I removed the front.
One of the resistors in the filter of a loudspeaker was completely burned out. Most electrolytic capacitors had wrong values and / or had an ESR of 1 to about 2 Ohm.
What have I done?
- Crossover filters largely renewed / upgraded, all wrong value electrolytics capacitators of 44 years old off and replaced by Jantzen audio MKP capacitors that virtually do not age, and have much better specs (especially much lower ESR).
- The orientation of the coils adjusted to reduce crosstalk. To my surprise, Bang en Olufsen had not paid attention to this at the time of manufacturing.
- The Rosewood veneer completely refurbished, all stains and the scratches and dirt removed, sanded and then oiled again. Sanded with grit 180 and grit 240, sanding only in the longitudinal direction of the wood grain! Treated the surface with hard wax oil from Rubio Monocoat.
- All units airtight fitted with new sealing tape.
- Mounted decent speaker terminals at the back, instead of the loose wires through a hole from the speaker.
They play excellent again, these are really fine speakers!
Any opinions or remarks?
These were the most expensive speakers of Bang & Olufsen at the time.
The specifications:
B & O, Bang and Olufsen, Beovox 5700, HT 5700, type 6253
100 Watt max. Power
impedance: 4 ohms
Frequency range: 35 - 20,000 Hz
max. harmonic distortion: <1%
woofer: 22.5cm Philips AD 1056 / W8
mid tone: Celestion MF 500
tweeter: Celestion HF 2000
passive radiator 25cm
crossover frequencies 600 - 6000 Hz
dimensions: 36 x 66 x 30 cm
weight: 22.5 kg
version in rosewood / rosewood veneer
Philips alnico woofer AD 1056 / W8
The philips AD 1056 / W8 woofer, the foam dust cover remnants for removal
New linen dust cover glued in, temporarily fixed and weighted with a glass
The crossover filter after upgrading with Jantzen Audio cross-cap MKP capacitors. The coils are rotated to minimize mutual crosstalk through the generated electromagnetic fields.
The old components, with the burnt-out / broken resistor of 22 ohms
Above review of the speakers from the American magazine: stereo review, number 3 from 1972
They look absolutely stunning. Would be cool to give the grills a makeover as well. One note about the electrolytic caps: the higher ESR might very well have contributed to the low end sound as well as attenuation of tweeter and mid. It might be worth considering those influences.
I am aware that the ESR can influence the filter characteristic. But they sound good. Maybe the lows may be a bit more present. But I have the 2 electroytic capacitors for the low replaced by one electroytic capacitor. Comparable ESR is then plausible and the influence on the lows is comparable to the original.
Great renovation! Enjoy that retro sound!
Nice to see those quality Philips and Celestion drivers. I've opened three 70s B&O speakers now, only to discover drivers marked 'Made in Japan' and plagued with crumbling foam surrounds or softened, misshapen rubber ones.
The method of crossover board construction (coils glued to hardboard, NP electrolytics and slim wirewound resistors) was obviously standard for B&O during that era, regardless of the retail price of the speaker.
Hi mtb123,
First of all, well done on restoring your Beovox 5700 speakers. They look incredible!
I realize the original post is fairly old but I was wondering if I may ask you a question regarding these speakers.
I was given a these exact speakers with one of them seriously lacking in midrange. The dust caps were also missing. I've since replaced those as well as the capacitors on both crossovers and they are now sounding brilliant. The state of the original resistors was frightening, burnt out and crumbling!
I still have to sort out the appearance of the speaker cabinet. Like your's, there are stains and various scratches all over the surface of both cabinets.
What I would like to know (as this is the first time I've ever undertaken a restoration of anything like this) is when you spoke of sealing the cabinets, what do you actually mean? What do you seal?
I apologize for my lack of knowledge but any assistance would be gratefully appreciated!
Thank you again for your time in this matter.
As this is an old thread, I'll submit an answer to your question.. . . when you spoke of sealing the cabinets, what do you actually mean? What do you seal?
")
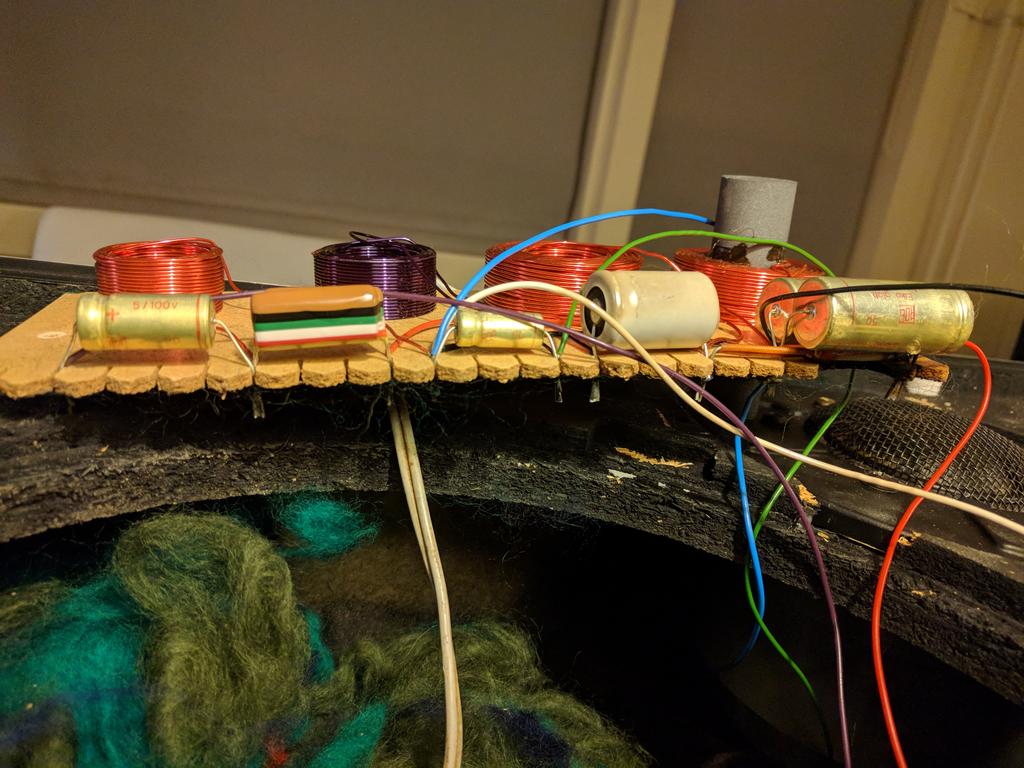
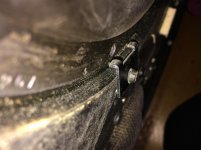
If the drivers are not sealed to the cabinet using foam sealing gaskets then nasty noises can result as air blows and sucks through the leaks.
A sealing gasket can be clearly seen in the photo of the woofer. Foam sealing tape is commercially available.
MDM-5 Speaker foam sealing tape | eBay
Thank you.
Hope your restoration of the cabinet woodwork goes smoothly!
Thank you, Galu!

Screwdriver is not a good idea. You need a glazing pry bar and always, always put something like a piece of wood between the cabinet and the pry bar. It gives you leverage and prevents damage to the cabinet. Also, if you can, run a flexible utility knife around the basket to see if you cut the sealant a bit first. If you just pry away, you can actually rip a bit of cabinet off.
The Red Devil one you see here is available in almost any hardware store.
glazing pry bar - Google Search
The Red Devil one you see here is available in almost any hardware store.
glazing pry bar - Google Search
Last edited:
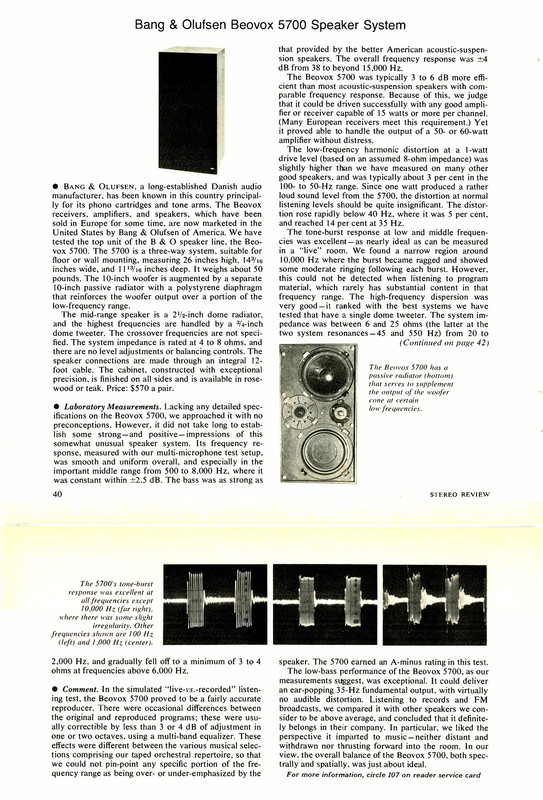
These are likely to be captive nuts which allow the bolting on of a different type of B&O stand to the one pictured earlier.Do you know what the two screws low down on the rear of the unit attach to?
These are likely to be captive nuts which allow the bolting on of a different type of B&O stand to the one pictured earlier.
Ah! Make's sense.
Screwdriver is not a good idea. You need a glazing pry bar and always, always put something like a piece of wood between the cabinet and the pry bar. It gives you leverage and prevents damage to the cabinet. Also, if you can, run a flexible utility knife around the basket to see if you cut the sealant a bit first. If you just pry away, you can actually rip a bit of cabinet off.
The Red Devil one you see here is available in almost any hardware store.
glazing pry bar - Google Search
I have a tool like this and have just tried after running a knife around but it's still not budging. The drivers are recessed into the cabinet which makes getting any kind of outwards levering force v difficult.
I've also noticed that the clamps around the woofers seem not to be making any contact with the driver itself, with no other visible mounting screws (!). Is it really possible that they've just been glued in with no other reinforcement?
Pics attached hopefully.
Attachments
For those of us who don't know any history, Bang & Olufsen were and are a Danish speaker company interested in supplying top quality units to a discerning and rich public.
TBH, this is scarcely allowed in our more modern and equal times. The most depraved Alpha Male bully from the Council Estates of England is currently considered equal to our own beloved Her Majesty. I don't buy it myself, but what do I know after 45 years in this dismal industry?
Remind me to tell you the joke about the Engineer who dies and ends up in Hell sometime...
What are we looking at here?
An ABR three-way with a dome mid. Old Celestion units. A plastic 3/4" HF2000 tweeter for one thing. A Celestion mid Dome too. I think I saw that one in the classic Celestion Ditton 66. Possibly Cobalt magnets, which are another thing of the past.
Quite a good idea, IMO. A modern take on this is done by another Dane, Mr. Troels Gravesen. SP38/13
Lot to like there. But pricey. I might consider some cheaper units to get to the same place. Vifa D75MX-41-08 Diameter 152mm
- Home
- Loudspeakers
- Multi-Way
- Bang & Olufsen Beovox 5700, classic vintage loudspeakers restoration, renewal, repair