A 2" port is more suitable. Closed or vented depends on the volume of your box. Check the recommendations here:
The Madisound Speaker Store
The Madisound Speaker Store
The design on the madisound page recommends either a sealed of .25 with an f3 of 90hz or ported that is .5 cubic feet with a 2'' port 6'' long with an F3 of 65hz (much better)
Since this will be going IN the wall, I only have 3.5'' to work with... How would I manage a 6'' long port??
Since this will be going IN the wall, I only have 3.5'' to work with... How would I manage a 6'' long port??
Since this will be going IN the wall, I only have 3.5'' to work with... How would I manage a 6'' long port??
It could be "L" shaped, either a round vent, or a slot vent with a 90 degree bend. Ir there room to go bigger than .5ft^3?
jeff
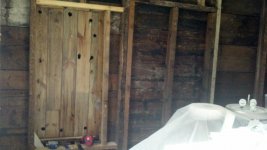
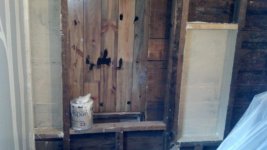
^ I've got the entire wall to work with...drywall is currently removed. I don't care HOW big the box has to be...
I will be moving some of those studs around... My computer will be mounted on the wall right where the old "window" is currently. The speakers mounted on either side. I havn't decided if I'm going to leave the wall exposed, or drywall it yet.
I will be moving some of those studs around... My computer will be mounted on the wall right where the old "window" is currently. The speakers mounted on either side. I havn't decided if I'm going to leave the wall exposed, or drywall it yet.
Attachments
Last edited:
Left is 2.067 and right is 2.045. Could I just use these, seal everything up and slap a baffle on the front??
There's really no advantage to going that big sealed, but try it to see what you think of the sound. F3@73Hz & F10@38Hz approx. You able to EQ the bass a bit?
jeff
Figuring on 1cuft after port, driver & crossover displacement I would tune to 48hz.
This will require a 2" port 2.25" long.
This will net an F3 of somewhere around 45hz or so.
With a .11 vent match I would probably run a 1/2" roundover bit inside the PVC port to give a nice flare.
This will require a 2" port 2.25" long.
This will net an F3 of somewhere around 45hz or so.
With a .11 vent match I would probably run a 1/2" roundover bit inside the PVC port to give a nice flare.
good call einric. I will definitely round out the port as it exits the baffle. I'm gonna stuff the enclosure with pollyfill, which should easily bring me back up to 1.2 cubic feet effective volume and reduce standing waves and resonance inside the box as well...at the cost of a small amount of efficiency loss.
I bought some 2'' PVC pipe. So you think I only need a 2.25'' section??
what does .11 vent match mean>?
I bought some 2'' PVC pipe. So you think I only need a 2.25'' section??
what does .11 vent match mean>?
2.25" is all you should need.
The vent match is a percentage in relation to port air velocity, I don't quite understand it yet other than you really want to keep it below .13.
I just have made it a point to flare at least one end if the port is above .10.
Only lightly stuff the enclosure.
The vent match is a percentage in relation to port air velocity, I don't quite understand it yet other than you really want to keep it below .13.
I just have made it a point to flare at least one end if the port is above .10.
Only lightly stuff the enclosure.
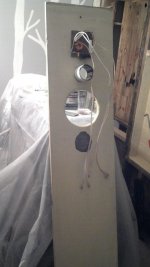
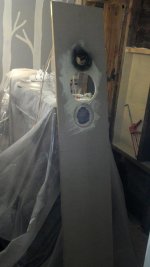
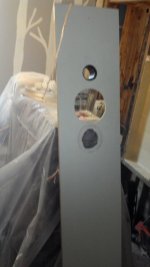
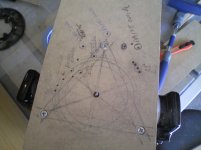
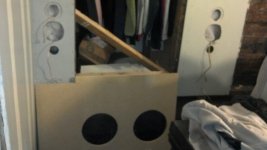
some progress.... This was my first experience using a router to cut the speaker holes. I will NOT be doing it this way again. I much prefer a Jigsaw method... I can cut a pretty much perfect line. The router on the other hand produced a result that mimics a seizure...
What bit do you guys use on the router to cut the holes out ?
also, how do you guys make the flush mount cut out? I just used a 1/2'' router flat bit and basicly "painted" it out...
What bit do you guys use on the router to cut the holes out ?
also, how do you guys make the flush mount cut out? I just used a 1/2'' router flat bit and basicly "painted" it out...
Attachments
Last edited:
Hole Cutting Jig
You should have built a hole cutting jig.
They work GREAT.
You notice every driver has a mark for inside and outside.
They make for a perfect fit.
Your holes will do the job but they do look like a Beaver cut them for you.
Wrap your drivers in cellophane and put them in the holes.
Then backfill the gaps with bondo.
Once the bondo is dry then pull the drivers out, sand it flat and paint it.
Attachments
Last edited:
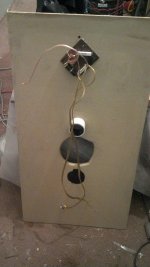
yeah no kidding. WORST speaker holes I've ever seen.....(the speaker screw holes still all line up though  )
)
I used a pivot tool that worked OK i guess.... but I was definitely using the wrong bit. What bit should I be using?
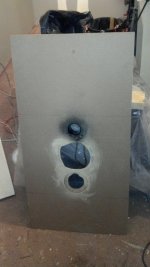
Here is the sub baffle. Cut almost perfectly with a Jig saw in litterally 1/25th the time it took me to use the router to **** up those other holes....
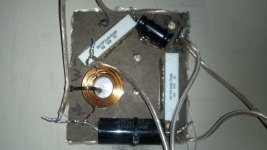
Question, I have a 2nd order low pass crossover with a simple coil and a cheapo electrolytic capacitor for my SUBS. Will I notice a difference in sound using this for my bass ?
)I used a pivot tool that worked OK i guess.... but I was definitely using the wrong bit. What bit should I be using?
Here is the sub baffle. Cut almost perfectly with a Jig saw in litterally 1/25th the time it took me to use the router to **** up those other holes....
Question, I have a 2nd order low pass crossover with a simple coil and a cheapo electrolytic capacitor for my SUBS. Will I notice a difference in sound using this for my bass ?
Attachments
Last edited:
- Status
- This old topic is closed. If you want to reopen this topic, contact a moderator using the "Report Post" button.
- Home
- Loudspeakers
- Multi-Way
- Aura NS6-255-8A with Dayton DC28F tweets