Better yet is to mount the driver by the magnet so that the driver flange is not rigidly coupled to the baffle. "Best" would probably to have a high-mass magnet mount structure decoupled from the enclosure as well, so that the vibrations from the driver moving structure simply cannot be directly transmitted to the enclosure at all, although I suspect a nearly-as-good solution would be to apply CLD to the face of the enclosure that the magnet mount is attached to (normally the rear, bottom, sides, or some combination thereof).I have some rubber well nuts, but never used them for a couple reasons. One, they require a very large diameter hole, and there usually isn't that much wood to do that. Second, while I suppose the expansion of the rubber as you tighten the bolt might provide enough force to keep the driver in place, that is not how they are meant to be used. They are meant to be used with thin sheet metal (1/8" thick at most IIRC), where the expanding rubber is BEHIND the sheet metal, so it's really a rubber clamp. That can't happen with wood.
I have thought about this in the past. I can not envision how this works without a removable rear panel or a removable front baffle. Removable panels bring a new set of problems and uncontrolled variables.Better yet is to mount the driver by the magnet so that the driver flange is not rigidly coupled to the baffle.
Am I missing something?
Yes, normally you'd be correct. However, where there is a will, there is a way.
Example 1: create a magnet mount insert adapter ("male" side, if you will) with a male thread form around the axis somewhere, either as an end-screw or a thread around the circumference of the motor. This part is then attached onto the driver motor. On the magnet mount inside the enclosure, have a matching female thread form. Screw the driver('s insert adapter) into the magnet mount until the desired torque/pre-load is achieved. How to torque the driver into final position? Well, the driver flange has holes, you just need to make a custom wrench with anywhere from 2 to 6 driving pins.
Example 2: create a magnet mount insert adapter, similarly to example 1, except instead of a screw, you have a long shaft going rear-ward along the central axis of the driver. The rear panel of the enclosure then has some sort of sleeve with a matching hole that the shaft goes through during mounting of the driver. You then tighten the sleeve to the shaft.
Example 3: this one also uses an insert adapter but also requires a relatively shallow enclosure. The insert adapter has a rear flange with screws sticking out the back side of it, arranged radially like wheel studs. The rear panel of the enclosure has matching holes. Push or drop the driver into place, such that the screws stick out the back of the enclosure. Put nuts onto the screws. The insert adapter is now bolted to the rear panel.
In all of the above examples, the magnet mount insert adapter would probably best be designed with a clamp-type "shaft collar" gripping mechanism to secure to the magnet/motor.
Last edited:
Posted 3 videos, going over bracing, box materials, and driver isolation results from my testing:
-video #part 5 needs some help (about a 3rd of it is blank).
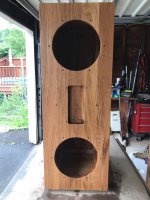
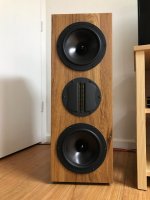
Maybe not quite as monstrous as some of the methods and materials in this thread but a little different....
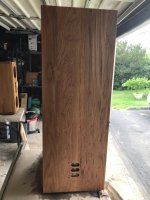
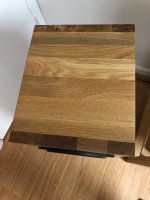
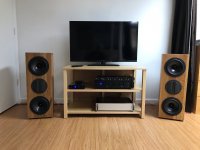
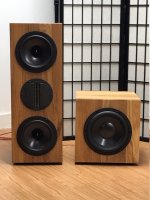
Last year I built these MTM cabinets from 1" thick laminated oak boards. The boards are sold as "stair treads" by the big box stores here in the US.
For this project I just wanted a very rigid material that didn't need bracing. The cabinets are sealed and isolated for each woofer and the tweeter is surface mounted for isolation as well. Sorry, don't have any measurements to show, but they do sound good with very little vibration felt on the outside.
Also built a pair of 10" sealed subs from the same material and have plans for more similar projects.
More info in post#3443 on page 173 in the System Pictures and Descriptions sticky thread and #204, page 11 in the Sub gallery.
Attachments
-video #part 5 needs some help (about a 3rd of it is blank).
Thanks Scott. Re-uploaded the video.
I'm going to make a video on how easy it is to make CLD panels, but I understand that not everyone wants to do that. So I tried the next best thing derived from my testing. Here we have a 3/4" plywood box, with CLD braces and Resonix applied to the walls. The combination works really well, and is easy to do. Harmonic distortion is the best of everything I've measured. Following are comparisons with a typical 3/4" plywood box with solid braces, and my full CLD box with CLD braces. Reminder: plots are good to about 250-300hz, under that environmental sounds start to come in.


The Open Baffle builds involve the room acoustics to a greater degree, for better or worse. The technical measurements generally don't include this in evaluations so interpretation of response measurements can be widely misleading.
How do all the changes in frequency response relate to changes in sound quality?
Here is the driver response and the contribution from the box, you'll have to decide if this is a problem or not:

Have you considered BBC approach of thin front wall?
I think the BBC approach of pushing resonances down and adding damping to the panels could work for a midrange, where the resonances are below the pass band of the driver. I wouldn't use it for a woofer or 2-way.
Was is not the oposite with BBC..i.e. pushing panel vibration above in the mid to avoid the around 300 hz barel resonance ?
Imo can work wirh a cld also on the front baffle with this viscoelastic glue but in a thicker layer than for the cld (here the most vibrating is the outside one decoupled from the box by the glue)
Imo can work wirh a cld also on the front baffle with this viscoelastic glue but in a thicker layer than for the cld (here the most vibrating is the outside one decoupled from the box by the glue)
BBC used thin panels and no bracing, so the resonances were lower in frequency than typical boxes.
From everything I've read on CLD, it doesn't work well with thick constrained layer. You're not isolating the panels from each other with CLD. Your connecting two panels so that as they flex differentially, stress is created in the constrained layer and the energy is dissipated by friction. This is why Geddes advocates adding microspherules to the contrained layer to maximize that friction. At least that is how I understand it.
From everything I've read on CLD, it doesn't work well with thick constrained layer. You're not isolating the panels from each other with CLD. Your connecting two panels so that as they flex differentially, stress is created in the constrained layer and the energy is dissipated by friction. This is why Geddes advocates adding microspherules to the contrained layer to maximize that friction. At least that is how I understand it.
Yes if you re read me I was not talking about cld for the front baffle...hence loosy layer of visco glue here. Goal is the opposite i.e. not transmiting vibration towards the panel behind that is the box interface.
Btw have you planned film alumin layer say 1 mm not touching the corners of the box as cld layer instead of thicker wood based panels ?
Btw have you planned film alumin layer say 1 mm not touching the corners of the box as cld layer instead of thicker wood based panels ?
I haven't tried any metal sheets attached to the inside. Next time I'm at the hardware store I'll see what they have.
- Home
- Loudspeakers
- Multi-Way
- A Monster Construction Methods Shootout Thread
