We recently had a blizzard (by Portland standards, that is, the city has no equipment to handle heavy snowfall). So I spent a week confined to places we could walk to, and spent most of it with cabin fever, playing on the internet. I ran across a new website for circuit board layout called PCBWeb.com and tried it out. For a test, I took a quick stab at a revisit of the "Spring Amplifier", a nice sounding solid state class A power amp I came up with a while ago.
This is a topology I've been obsessed with for some reason a while now. There was an article about it in Jan's "Linear Audio" magazine last year. I've since done some enhancement on the original (built largely on perfboard) and have been listening to a couple of 55W mono builds of the design for a while now.
Anyway, in about a day a schematic was entered and a board layed out -- pretty nice layout package, the pcbweb is -- I like it! The user interface can be a bit infuriating at first , but pretty easy once you figure out its oddities. I'd also had read some good things here about the pcbway.com board house, and so browsed over there out of curiousity to see what it costs to have boards like this etched. Which turns out to be a LOT less expensive than I expected, so of course before I had even given it much thought, I'd hit the button to order 10 of the main boards. Along with 10 output capacitor bank/clipping detector boards for them that I added soon after at only about a dollar each. So, without planning to, I had a project going. And it's been fired up now, so -- here's documentation about it.
Comments, corrections, suggestions, questions, wisecracks welcome!
(I notice that some of the images in the thread are a little too small to easily read. I don't know how to change viewed image sizes, and it's too late to edit most of this string of posts, anyway. But if you're curious to see more detail, you can look at them at the Gallery - http://www.diyaudio.com/forums/gallery/showgallery.php/cat/2243
 The layout started as a basic version of the enhanced Spring amp, trying for a kind of minimal, single output transistor, relatively low power setup. But once the board layout got very far along, I thought to shift to a more flexible layout, allowing for some of the enhancements I'd come up with (which could be worked around if more simplicity was still desired). So support was added for paralleled output sections for higher power, buffering for better bandwidth and linearity, a compound output for higher damping factor and lower distorton, a fancier input stage that made for still better overall performance, and a time-stretched clipping detector.
The basic Spring Amplifier is a single voltage gain stage, which drives the speaker via a unity-gain follower like this:
 The circuit all kind of hangs from the end of a feed choke or inductor, hence the name "The Spring" (pretty clever, huh? Yeah, not really I know, but it's the best name I could think of). All the audio components increase or all decrease conduction in the same direction, and the waveform is linear at every stage. If SE class A is the goal, the topology allows for respectable performance: good efficiency from the inductor feed, high damping factor from the follower output, a low but triode-like distortion profile (dominant 2nd order, with lower third and then others quite far down), no audible noise at all, output DC protected. And all using only a single high-current power supply and operating without a feedback loop. A detailed discussion about the topology can be found in the Linear Audio article. It's also a fun and inexpensive amp to build.
This is a topology I've been obsessed with for some reason a while now. There was an article about it in Jan's "Linear Audio" magazine last year. I've since done some enhancement on the original (built largely on perfboard) and have been listening to a couple of 55W mono builds of the design for a while now.
Anyway, in about a day a schematic was entered and a board layed out -- pretty nice layout package, the pcbweb is -- I like it! The user interface can be a bit infuriating at first , but pretty easy once you figure out its oddities. I'd also had read some good things here about the pcbway.com board house, and so browsed over there out of curiousity to see what it costs to have boards like this etched. Which turns out to be a LOT less expensive than I expected, so of course before I had even given it much thought, I'd hit the button to order 10 of the main boards. Along with 10 output capacitor bank/clipping detector boards for them that I added soon after at only about a dollar each. So, without planning to, I had a project going. And it's been fired up now, so -- here's documentation about it.
Comments, corrections, suggestions, questions, wisecracks welcome!
(I notice that some of the images in the thread are a little too small to easily read. I don't know how to change viewed image sizes, and it's too late to edit most of this string of posts, anyway. But if you're curious to see more detail, you can look at them at the Gallery - http://www.diyaudio.com/forums/gallery/showgallery.php/cat/2243
The basic Spring Amplifier is a single voltage gain stage, which drives the speaker via a unity-gain follower like this:
Last edited:
For any practical build of this, a way is needed to keep the output devices' idle power consumption under control, so that is watched by an integrator circuit (not shown above) which gradually steers the current source (is shown above) which controls that. The single-ended class A topology operates with constant power consumption -- what doesn't go out to the speaker gets eaten up by the output devices. Also, the output device shown above (as a PNP emitter follower for simplicity) really would like to have a beefier feed than the cascode stage alone can supply, so it would be best configured as a Darlington or as a Sziklai stage instead. I went with a Sziklai. And distortion was found to improve further by first buffering the voltage signal through a FET follower as well.
The input stage can also be configured as a Sziklai using an added PNP transistor (well worth the added 50 cents or so). And the cascode NPN transistor can be made a Darlington pair, which assures all significant signal current from the input stage is linearly transferred to the output stage -- the result does show up as improved distortion profile, and again, costs almost nothing to add.
A further change since the Spring article in Linear Audio, I separated the power supplies of the output follower stage(s) and of the input voltage stage. Power efficiency directly translates to power supply, heatskink, and chassis sizes - which coincindently also typically account for most of the expense of a power amplifier! Better power efficiency of the output stage can be had when the voltage stage can pull its drive all the way down to the output common. So the input stage sits at a somewhat lower voltage, operating off a small, very-low current, supply.
You'll also notice some other adornments in the real circuit -- grid stopper resistors on FETs, some diodes and capacitors to control the power-up behavior, capacitors to control rolloff, and clamping parts to protect sensitive circuits (utilizing the EB junction of NPN transistors as inexpensive low-leakage zeners). LEDs are also used to generate some voltage offsets, because they're convenient and can allow the same circuit to operate from a wide range of supply voltages for different output power capabilities.
 Q2, Q3, and Q7 are the NPN transistors doing duty as clamps. Q4 (optional, if removed short R5) makes Q1 be the control of a Sziklai pair. Q6 makes the cascode transistor a Darlington. Either blue or white LEDs can be used for low cost voltage references (want something with around a 3V drop).
Q8 is a current source, programmed by the voltage kept across C2 by the servo integrator. A low current supply (in the range of 11 to 20V) connects at "J3" (which is just some solder pads with matching strain-relief holes, like the other J-numbered connectors).
A single board supports a pair of output devices (each part of a Sziklai follower); addional boards can be used to add further pairs of output followers or they can be hand wired (they're only two transistors and two resistors each). The KSA1381 transistors (Q10 and Q12) should NOT be mounted on their matching NPNs, keep them off some to minimize any tendencies toward current hogging. The schematic, by the way, is of a revised layout (that I didn't get fabbed at least yet), so the reference designation may not match the picture in the first post here.
The output capacitor (and a stabilizing RC) can be remote mounted or can be done with the following Output/Clipping Detector board.
The input stage can also be configured as a Sziklai using an added PNP transistor (well worth the added 50 cents or so). And the cascode NPN transistor can be made a Darlington pair, which assures all significant signal current from the input stage is linearly transferred to the output stage -- the result does show up as improved distortion profile, and again, costs almost nothing to add.
A further change since the Spring article in Linear Audio, I separated the power supplies of the output follower stage(s) and of the input voltage stage. Power efficiency directly translates to power supply, heatskink, and chassis sizes - which coincindently also typically account for most of the expense of a power amplifier! Better power efficiency of the output stage can be had when the voltage stage can pull its drive all the way down to the output common. So the input stage sits at a somewhat lower voltage, operating off a small, very-low current, supply.
You'll also notice some other adornments in the real circuit -- grid stopper resistors on FETs, some diodes and capacitors to control the power-up behavior, capacitors to control rolloff, and clamping parts to protect sensitive circuits (utilizing the EB junction of NPN transistors as inexpensive low-leakage zeners). LEDs are also used to generate some voltage offsets, because they're convenient and can allow the same circuit to operate from a wide range of supply voltages for different output power capabilities.
Q8 is a current source, programmed by the voltage kept across C2 by the servo integrator. A low current supply (in the range of 11 to 20V) connects at "J3" (which is just some solder pads with matching strain-relief holes, like the other J-numbered connectors).
A single board supports a pair of output devices (each part of a Sziklai follower); addional boards can be used to add further pairs of output followers or they can be hand wired (they're only two transistors and two resistors each). The KSA1381 transistors (Q10 and Q12) should NOT be mounted on their matching NPNs, keep them off some to minimize any tendencies toward current hogging. The schematic, by the way, is of a revised layout (that I didn't get fabbed at least yet), so the reference designation may not match the picture in the first post here.
The output capacitor (and a stabilizing RC) can be remote mounted or can be done with the following Output/Clipping Detector board.
Output/Clipping Detector board-
 In SPICE sims and in the unit built, L1 hasn't been needed so is just a short piece of wire. It's in the layout 'just in case'. C7 and R14 might also be optional, but SPICE shows some peaking with some capacitive loads without it.
The clip detector senses even very brief output clipping by monitoring the output transistor's voltage and current. When either runs out for some microseconds, capacitor C5 discharges and lights an indicator LED (connected to J4) for about a half second afterwards so you can see that it happened -- assuming you want to know that it did. It's there for neurotic listeners like me who tend to wonder when using a limited output SE amp whether they might be clipping just a little. The LED staying dark means they're not. Though when the amp is clipped even moderately that seems hard to hear. So maybe better to NOT use the indicator? Another option.
Being a Single Ended power amplifier, a Spring amp will usually clip asymmetrically. We don't get a linear transition to class AB and higher power like push-pull type class A amps might give under lower impedance loading. The asymmetry depends on the load impedance. With higher than designed-for load impedance, the voltage on the output (capacitor side) can swing more positive than the supply's magnitude, but it's peak can't ever swing more negative than the nominal. With lower than designed-for load impedance, the output current's negative peak can be stronger the amp's idle current, but the positive current peak can't ever be more than the idle current. So when clipping with real speaker loads, the output power envelope usually can continue to vary, though with some distortion, past the clip point. Maybe that helps hide audible effects of clipping until it gets more egregious, or maybe it has to do with the less sudden onset of distortion (compared to higher feedback amplifiers) near clipping.
The parts that cost money (though not too bad in this design) --
The amp needs heat sinks good for at least 2 1/4 times the maximum unclipped output power (and more like 3 1/4 times, if making lower power or lower impedance targeted designs) . I've been using some inexpensive ("hobby-justifiable") amplifier chassis -- google "2412B Full Aluminum Enclosure" at aliexpress. They include pretty good heat sinks, are well made, and look good. Shipping is about as much as the chassis costs, though! The nice big-heatsinked chassis at the diyAudio store are worth considering, particularly if you are going for higher power (the 2412B is good for a stereo 18W/ch amplifier, or a mono amp of 50W+ but running pretty hot).

 The power level also determines the size (and cost) of the Spring inductors (chokes) needed. Things to watch for are the inductance (more is better, need at least 25mH) and the max unsaturated currrent rating. These are going to be relatively big gapped-core inductors. I started laying out the board planning on the inexpensive ($14 at the moment) Triad C-56U inductors, 35mH at 2A. By pushing the current a little (the inductance seems to still be dropping only smoothly even at aout 2.5A at least for the ones I have) I get about 16W into 8 ohms out of these. Two channels using those will fit in the 2412B chassis -barely!- along with a small switching power supply -- google "120W 24V 5A Little Switching Power Supply", at all of about $12 shipped.
By the way, a high frequency switching type supply is a very good choice for Spring type amps. They're silly inexpensive (look for ones made for LED lighting), regulated, somewhat voltage adjustable, have very little low frequency ripple, and in this amp there's a mondo big inductor that sits between the supply and the audio signal path-- high frequency ripple is just NOT going to get through. I could of course have used a big "linear" (in other words, 60Hz switching!) supply instead if I had either the parts for it or the money waiting to be used. With an unregulated "linear" supply, the filter caps should be substantial though, because the spring inductor won't prove a lot of ripple isolation at power line frequencies. The lower current supply (good for 30mA or so) could also be either "linear" or a small switching module, since the power supply rejection ratio of the amp is pretty good for that over the audio range. I used a switcher, but followed by a three-terminal linear regulator 'just in case'.... the neurotic listener thing, again.
Some inductors that could work with these amplifiers are listed below. Lower resistance ones help to improve efficiency a little (but don't much affect heatsinking). With higher load impedances, particularly if operating into low bass, higher inductance values are advised. There's a vendor at eBay at the moment selling off some used Signal CH-4 and CH-6 inductors at good prices.

Going to higher power affects heatsinking, power supply voltage and current capability, the number of output devices and the inductors. Here's a table estimating supply and output set (and heatsink) needs. I haven't done more than about 60W so far in a Spring amp, but I expect versions to 100W, maybe more, should be doable. But with voltages over 36V, a higher voltage part for the cascode might be advised.

The amp needs heat sinks good for at least 2 1/4 times the maximum unclipped output power (and more like 3 1/4 times, if making lower power or lower impedance targeted designs) . I've been using some inexpensive ("hobby-justifiable") amplifier chassis -- google "2412B Full Aluminum Enclosure" at aliexpress. They include pretty good heat sinks, are well made, and look good. Shipping is about as much as the chassis costs, though! The nice big-heatsinked chassis at the diyAudio store are worth considering, particularly if you are going for higher power (the 2412B is good for a stereo 18W/ch amplifier, or a mono amp of 50W+ but running pretty hot).
By the way, a high frequency switching type supply is a very good choice for Spring type amps. They're silly inexpensive (look for ones made for LED lighting), regulated, somewhat voltage adjustable, have very little low frequency ripple, and in this amp there's a mondo big inductor that sits between the supply and the audio signal path-- high frequency ripple is just NOT going to get through. I could of course have used a big "linear" (in other words, 60Hz switching!) supply instead if I had either the parts for it or the money waiting to be used. With an unregulated "linear" supply, the filter caps should be substantial though, because the spring inductor won't prove a lot of ripple isolation at power line frequencies. The lower current supply (good for 30mA or so) could also be either "linear" or a small switching module, since the power supply rejection ratio of the amp is pretty good for that over the audio range. I used a switcher, but followed by a three-terminal linear regulator 'just in case'.... the neurotic listener thing, again.
Some inductors that could work with these amplifiers are listed below. Lower resistance ones help to improve efficiency a little (but don't much affect heatsinking). With higher load impedances, particularly if operating into low bass, higher inductance values are advised. There's a vendor at eBay at the moment selling off some used Signal CH-4 and CH-6 inductors at good prices.
Going to higher power affects heatsinking, power supply voltage and current capability, the number of output devices and the inductors. Here's a table estimating supply and output set (and heatsink) needs. I haven't done more than about 60W so far in a Spring amp, but I expect versions to 100W, maybe more, should be doable. But with voltages over 36V, a higher voltage part for the cascode might be advised.
Here are some measurements made for a version configured for operation (where the clip light just goes on) to around 15W -
 Frequency Response:
 Harmonic Distortion vs. Power level:
An assumed benefit of SE class A amplifiers is that the distortion continues to drop as power level drops, and that the distortion products are primarily low 2nd and 3rd order. So it seemed worthwhile to try to check that and to see what the effects of "large inductor" vs. "smaller inductor" might be. So I did that for both the Triad C56-U (35mH, 2 Amp) and the Signal C-4 (70mH, 4 Amp ). For both cases, the operating idle current was 2.2ADC.
I'm measuring using a USB sound card (TASCAM U2-2) based FFT, which is supposed to run at 24bit -- but apparently the Windows 10 MME driver for it only works at 16bits 🙁 . Also, distortion products (particularly 3rd and 5th order) tended to get a erratic at lower levels, which will be in part due to resolution and partly to distortion generated by the analog audio stages of the equipment. Some of the curvatures at low levels probably indicate some cancellation or summing with those added harmonic generation effects. I made a "twin-T" notch filter and a passive RC lowpass filter for measurement near 1kHz to minimize sound card linearity effects and be able to look lower in level with better confidence, so the 1kHz curves are the ones here that are most likely to be reliable. Too lazy to do that for all test frequencies, though.
 All distortion levels are respectably low, though there is something strange going on at low frequencies + lower power levels + odd harmonics using the small sized C56-U choke. Also, the obtainable output power with it at 41Hz was several dB shy because its reactance and operating current is too small to generate full positive output swing.
Here is how the distortion increases when the circuit is driven into clipping. For (my) convenience, both curves are at 8 ohms load and with the CH-4 inductor. The blue curve is with 2.2A bias (so that the clipping occurs with negative input peaks, from running out of current and having a supply voltage a little higher than needed) and the red curve is with the bias increased to 3.26A (so that current clipping doesn't occur and the amp instead clips when it runs out of supply voltage range). The blue and red dashed vertical lines indicate where the clip indicator light fires. With sufficient bias current, the amp can do over 20W/ch with a 23.2V supply (which is as low as the 24V switcher's voltage would easily adjust down to). For around 16W, a slightly lower supply voltage and a little more current would be more optimum. Though, speaker impedances being the varying things they are in real life, I don't get too focused on getting the current and voltage exactly on.

An assumed benefit of SE class A amplifiers is that the distortion continues to drop as power level drops, and that the distortion products are primarily low 2nd and 3rd order. So it seemed worthwhile to try to check that and to see what the effects of "large inductor" vs. "smaller inductor" might be. So I did that for both the Triad C56-U (35mH, 2 Amp) and the Signal C-4 (70mH, 4 Amp ). For both cases, the operating idle current was 2.2ADC.
I'm measuring using a USB sound card (TASCAM U2-2) based FFT, which is supposed to run at 24bit -- but apparently the Windows 10 MME driver for it only works at 16bits 🙁 . Also, distortion products (particularly 3rd and 5th order) tended to get a erratic at lower levels, which will be in part due to resolution and partly to distortion generated by the analog audio stages of the equipment. Some of the curvatures at low levels probably indicate some cancellation or summing with those added harmonic generation effects. I made a "twin-T" notch filter and a passive RC lowpass filter for measurement near 1kHz to minimize sound card linearity effects and be able to look lower in level with better confidence, so the 1kHz curves are the ones here that are most likely to be reliable. Too lazy to do that for all test frequencies, though.
Here is how the distortion increases when the circuit is driven into clipping. For (my) convenience, both curves are at 8 ohms load and with the CH-4 inductor. The blue curve is with 2.2A bias (so that the clipping occurs with negative input peaks, from running out of current and having a supply voltage a little higher than needed) and the red curve is with the bias increased to 3.26A (so that current clipping doesn't occur and the amp instead clips when it runs out of supply voltage range). The blue and red dashed vertical lines indicate where the clip indicator light fires. With sufficient bias current, the amp can do over 20W/ch with a 23.2V supply (which is as low as the 24V switcher's voltage would easily adjust down to). For around 16W, a slightly lower supply voltage and a little more current would be more optimum. Though, speaker impedances being the varying things they are in real life, I don't get too focused on getting the current and voltage exactly on.
circuit board files, published at and downloadable from pcbweb (Gerbers can be easily generated from there)--
(These aren't copyrighted, and are free use, but are also supplied with understanding that I assume no liability for what anyone might do with them!)
Revised versions:


The amp board layout could be made as a single-layer also. There are three obvious jumpers that would need to be added on the top. I flooded the excess area on both sides just because it was easy and free to do, but the copper on the top side isn't really necessary. The output/clip detect board is just single layer. The "busy" sides of the boards with all the traces is the bottom, BTW.
The revisions in the new layout are minor, mostly fixing up holes sizes that are too big for wires and transistor leads. Most important change is to put the four mounting holes of the amp board on isolated flooded planes. On the original, I put them on too-small isolated pads flooded in circuit connections (which should NOT connect to chassis or heatsink) -- too easy for a screw or standoff to break through the solder mask and short out. I also added some more strain-relieved "connectors" to help ease expansion to more output sets and connection to the clip detector. And fixed the polarity (A, K) of the clip indicator LED which was backwards on the v1.0 version.
(These aren't copyrighted, and are free use, but are also supplied with understanding that I assume no liability for what anyone might do with them!)
Revised versions:
2nd Spring Amp board (v1.1) PCBWeb - Second Spring DblSided Flood v1_1
Output and clip detector board (v1.1) PCBWeb - Output and ClipDet Board v1_1
The amp board layout could be made as a single-layer also. There are three obvious jumpers that would need to be added on the top. I flooded the excess area on both sides just because it was easy and free to do, but the copper on the top side isn't really necessary. The output/clip detect board is just single layer. The "busy" sides of the boards with all the traces is the bottom, BTW.
The revisions in the new layout are minor, mostly fixing up holes sizes that are too big for wires and transistor leads. Most important change is to put the four mounting holes of the amp board on isolated flooded planes. On the original, I put them on too-small isolated pads flooded in circuit connections (which should NOT connect to chassis or heatsink) -- too easy for a screw or standoff to break through the solder mask and short out. I also added some more strain-relieved "connectors" to help ease expansion to more output sets and connection to the clip detector. And fixed the polarity (A, K) of the clip indicator LED which was backwards on the v1.0 version.
Last edited:
For anyone who might've managed to read this far: I have 3 sets (6 channels) of spare boards of the first version. Version 1.0 boards ar free while they last, one set per request, just PM me here with your address. (The revised version, above, hasn't been sent to the board house, and may not ever get sent. I already have more amps than I'll ever use!).
Here are the files of first version (the one built) boards --

Here are the files of first version (the one built) boards --
LTSpice models -- see attched zip file (for a 55W version). It includes the needed .lib files for the active parts, you can just unzip it to a folder and open it in LTSpice from there.
Overall wiring diagram --

The additional Amp board (if used for more output devices) is populated only with Q10-13 and R20-23.
Overall wiring diagram --
The additional Amp board (if used for more output devices) is populated only with Q10-13 and R20-23.
Attachments
A (crummy) closeup of the board assembly as tested. One of the power devices is covered by the output/clip detect board.

I just noticed -- in the diagram in post 8, there should be a connection from "12ret" to chassis/heatsink ground! It will work without it, but the amp won't provide much shield then.
Last edited:
There is a lot to like in this amp! The LA article is very interesting, I'de love to hear this amp, I may well end up but;ding one, especially now that boards are available!
I revised the connection diagram to make the twisted pair wiring more clear, and changed routing to improve current sharing (when making higher power versions with additional output devises).

Also, here's a bigger pic to see the teeny little distortion component plots a little better --

Also, here's a bigger pic to see the teeny little distortion component plots a little better --
Last edited:
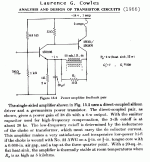
I just read a thread started a few years ago by member Elvee. He shows a way to adapt old power transformers to make power chokes (for use in a Spring amp, you'd use the primary winding). See -- http://www.diyaudio.com/forums/power-supplies/249630-gapped-power-transformer-choke.html
Dang, missed the edit window..... I forgot to add the Chassis Ground connection to 12ret, so here it is in another revised diagram:

Thanks for that link, PRR, I'd not seen that. That topology though looks like it would have high output impedance (little damping factor).
> though looks like it would have high output impedance
I actually had not looked at it in years. Yes, the notional Zout is infinity. Or in buzz-word, "current source". And the input impedance is quite low. And there is a Volt of DC on the speaker.
In fact the bass impedance is 50mH (confirmation for your 35-200mH suggestions) which suggests "slight" damping for typical speaker bass resonances. At 50Hz, 50mH is 16 Ohms which is larger than nominal 10 Ohms but not "Large". DF~~0.6?
AT higher freqs it just rises. A 2N301 may have a collector impedance near 100 Ohms, but this varied a lot. The choke rings and goes capacitive at some high frequency in the broad area of 20KHz. This and speaker-rise may explain the 30uFd "compensation cap".
It mentions "hi-fi". At the time, there would be many "hi-fi" speakers suitable for pentodes with little NFB, so would not be majorly upset by small damping.
A hasty sim with wrong-parts suggests >5%THD mostly 2nd. While tolerable with the right speaker as a very small hi-fi, it may shine as a guitar amp?
Your design, OTOH, looks like point-oh-oh everything and >100 DF.
Ha ha. Actually, mine is only .00stuff at small power levels, about .1 (mostly 2nd harmonic) at 'full' power. And output impedance is about 0.2ohms, so damping is only about 40.
- Status
- Not open for further replies.
- Home
- Amplifiers
- Solid State
- 2nd Spring -- another stab at the SE choke-fed Class A Power Amp