There's a lot of build blogs etc, but they're mostly folk with big workshops and all the tools they need.
I'm building these in my cramped garage with basic tools and minimal experience, as and when I get time...
So far so good if I'm honest and I thought I'd share my experience.
Got my 2 sheets of 18mm ply from Wickes (UK) and whilst the quality is probably not the best, it's all I can afford to spend.
In the absence of a table saw, I've actually splashed out on a track saw. I figured it was the next best thing. I used a normal circular saw last time I built speakers and even then, I struggled to get perfectly straight and equal cuts. A pain when it came to glueing up the cabinets.
The track saw has proved to be a big help.
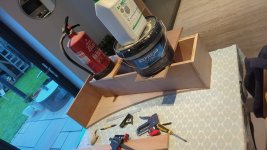
This is where I'm up to....
I'm building these in my cramped garage with basic tools and minimal experience, as and when I get time...
So far so good if I'm honest and I thought I'd share my experience.
Got my 2 sheets of 18mm ply from Wickes (UK) and whilst the quality is probably not the best, it's all I can afford to spend.
In the absence of a table saw, I've actually splashed out on a track saw. I figured it was the next best thing. I used a normal circular saw last time I built speakers and even then, I struggled to get perfectly straight and equal cuts. A pain when it came to glueing up the cabinets.
The track saw has proved to be a big help.
This is where I'm up to....
Attachments

Thanks, I'm finding I'm overcoming problems that one might not find with a workshop etc. The main one being clamping panels up when gluing.
The key here is patience. Although I'm desperate to get them finished, I have to glue one panel at a time and be patient. My clamps won't fit round the whole thing so I am using strategically placed weights and scrap wood as you can see. Where I have to glue 2 joins at the same time, I'm using the white plastic right angle blocks as a temporary hold until the glue is set..

The key here is patience. Although I'm desperate to get them finished, I have to glue one panel at a time and be patient. My clamps won't fit round the whole thing so I am using strategically placed weights and scrap wood as you can see. Where I have to glue 2 joins at the same time, I'm using the white plastic right angle blocks as a temporary hold until the glue is set..
those blocks are brilliant.
in the old days constructors would use 1x1" cleats, glued and screwed... and leave them in.
in the old days constructors would use 1x1" cleats, glued and screwed... and leave them in.
Following it up, and wishing all the best! Please keep sharing your daily (weekly or monthly) progress, and the more important: Have fun!!!
Borats Baby,
Good to see the progress on the FH-XL cabinets.
What drivers are you planning to put in?
Good to see the progress on the FH-XL cabinets.
What drivers are you planning to put in?
I have a pair of Mark Audio MAOP 10.2 which will be going in these.Borats Baby,
Good to see the progress on the FH-XL cabinets.
What drivers are you planning to put in?
Yes, if you read reviews of table saws, the cheap ones are inaccurate, the good ones are too small and a good one for the size of project we do is expensive and bigger than a lot of us in Europe can place. I chose a track saw as well. YouTuber Peter Millard has good tips and one quote stuck with me: "Track saws are basically as accurate as you are." That's exactly what a hobbyist can do, we're not on the clock and can take our time to get things right.
In the build notes for this cabinet, it says additional poly fluff should be added in the front section depending on which driver one is using, however it doesn't specify which drivers.
Anyone any ideas?
Anyone any ideas?
Borats Baby,
You are planning to use the MAOP 10.2 - this one will probably need some poly fluff under the driver in the front section. The poly fill material tends to fall down - you might as well fix some netting material 18" below the driver so that the material does not fall down to the bottom.
You are planning to use the MAOP 10.2 - this one will probably need some poly fluff under the driver in the front section. The poly fill material tends to fall down - you might as well fix some netting material 18" below the driver so that the material does not fall down to the bottom.
Thanks, zman.
Do you know why certain drivers need this extra poly fluff?
What is it about the maop 10.2?
Do you know why certain drivers need this extra poly fluff?
What is it about the maop 10.2?
Borats Baby,
My understanding is that the additional poly fill in the front section will help reduce some of the excess bass generated by certain drivers; if I am not wrong, the MAOP 10.2 is based on the Alpair 10.2, which is possibly the most bass capable unit on the Alpair 10.x range. Hence my assumption that the MAOP 10.2 is likely to need some poly fill in the front section.
Perhaps Dave and Scott can chime in.
I've stuffed the extra filling in anyway. I figured it can easily be taken out through the speaker driver hole if needed.
I've finished one cabinet now except for sanding and finishing.
I wanted the binding posts to be lower down on the cabinet than most folk seem to have them. I've recessed a nice little aluminium plate and fitted the posts to that for a nice look. I'm pleased.
Also worth mentioning, I made the chamfer cut on the bottom of the back piece with an electric plane and just took off 0.5mm shavings at a time and at a complete guess of an angle lol. It worked for me.
Arrrrgh, I'm fuming with myself.
Due to a slight misalignment in panels (the sides were about 1.5mm higher than the front and back panels), I thought I'd carefully plane the offending 1.5mm of a quarter of a mm each pass.
You know where this is going don't you.
Bloody great chunk has come off and splintered all over the show.
I can't even show you because I couldn't bring myself to take a pic.
I've pulled the chunk out inc splinters and filled with wood filler, I'll sand when dry and see what it looks like.
I was planning on painting them anyway so the grain isn't important but still....
Even with all the clamps that I have at my disposal, gluing can still be frustrating if I have missed something or mis clamped it to bring a box out of square. As you have undoubtedly found, a seemingly small error at one end of a board is exaggerated at the other end.
- Home
- Loudspeakers
- Full Range
- Frugel-Horn XL, A Novice Build in Progress...