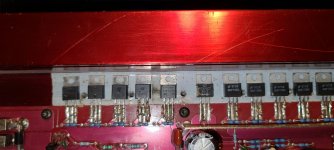
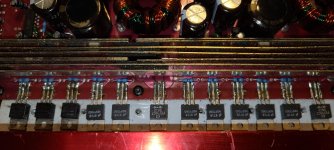
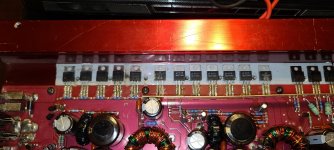
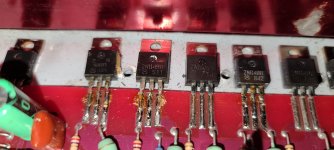
orion hcca 150 pop top blowing fuses, open up to look inside i notice power supply fets are all IRF48v but 2, those are 50n06v . it looks like they where all replaced dont know why 2 are 50n06v. any one knows the correct original fets or whats a better upgrade . also notice on the output fets there's a 2n6490 in place of a 2n6491
I don't have any information on that amp but similar amps have the 2SK1542 as the originals.
The ones in the amp (if not mixed) would be similar.
The ones in the amp (if not mixed) would be similar.
I also see some NDP7060
Attachments
Last edited:
Have you ever done any repair work on amps?
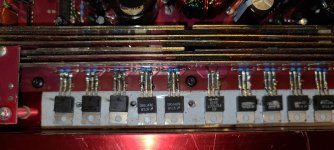
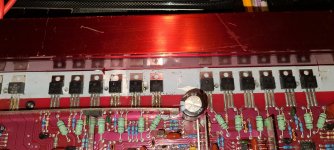
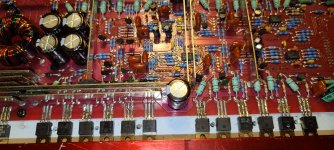
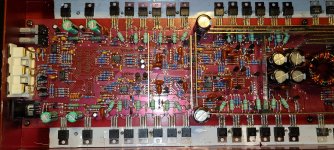
Post a photo of the entire board.
There is a LOT of bad work there. To make it reliable, it will require the replacement of many components.
Please (and this applies to anyone who needs repair help) use your sig line to list all equipment you have, editing it as equipment changes. Include the model numbers.
Top of page, menu USER CP >> EDIT SIGNATURE
Oscilloscope (yes or no)
Multimeter(s)
Type of signal source (grounded RCA shields preferred).
Soldering iron
Desoldering pump
Power supply
2 ohm current limiting resistor (hollow cylindrical ceramic 100w preferred)
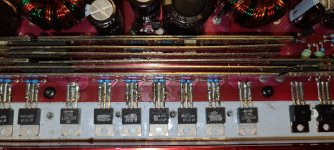
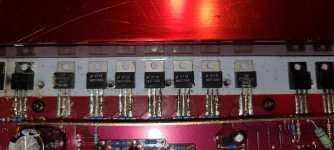
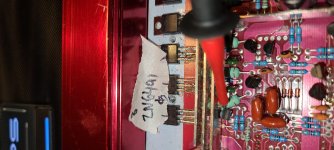
Here's more pictures
Attachments

Last edited:
No this is my first my own amp been doing lots of read on the site. So I will try to fix amp
I only have a FLUKE 87 V & for iron Weller WE 1010
I only have a FLUKE 87 V & for iron Weller WE 1010
Last edited:

Read the following page in its entirety.
bcae1.com - Car Amplifier Repair Tutorial - The Basics
I need to know what sort of equipment you have for the repair.
bcae1.com - Car Amplifier Repair Tutorial - The Basics
I need to know what sort of equipment you have for the repair.
When you need to remove the transistors along the heatsink, apply enough new solder so that you can heat all 3 legs at once and when all of the solder is molten, wipe the transistor off of the board.
After reading that page, post whatever questions that weren't answered there.
After reading that page, post whatever questions that weren't answered there.
Remove the 6 large transistors and check them out of the circuit. It's likely that only 2 are shorted. No need to remove all if you find the ones actually shorted before you remove all of them.
With the 87v, you may be able to find the shorted one (lowest resistance) if you set the meter to read at high resolution.
With the 87v, you may be able to find the shorted one (lowest resistance) if you set the meter to read at high resolution.
The 2nd 2n6491 from the 3 in line is the shorted one. the 1st and 3rd are good now and the A56 good too
What's a good solder ? Also looks like I'm going to need solder remover wick what type and size? Sorry for all these questions just want to do it right
Last edited:
- Home
- General Interest
- Car Audio
- Orion HCCA 150 Pop top amp