Hello
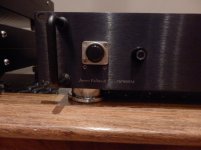
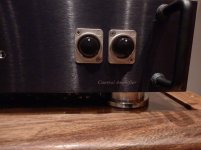
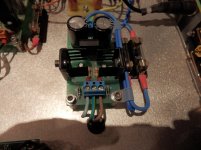
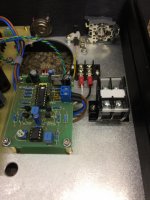
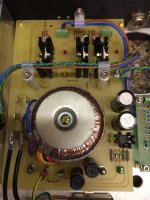
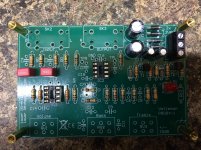
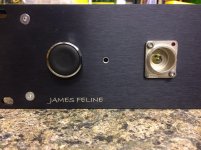
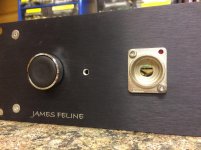
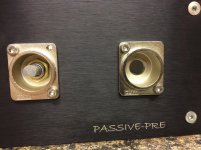
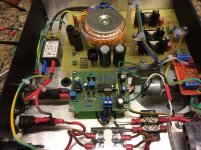
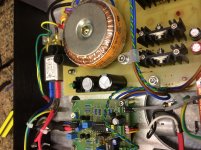
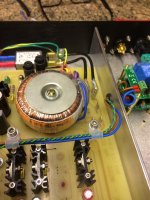
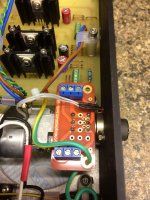
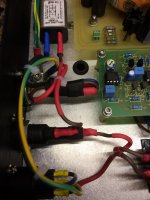
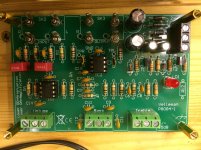
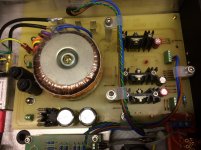
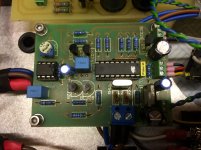
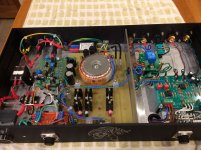
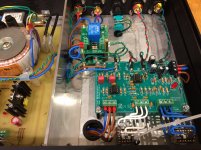
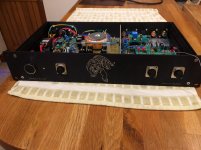
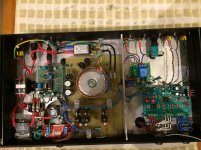
Well I have finally completed my little test project, this is my take on the velleman preamp kit. I have added remote control and separate power supply's one for the preamp and one for the remote volume control.
I just wanted a simple loop in and loop out input with a single pair of outputs. The unit is extremely quiet with no hum, and sounds really good in my opinion. I have not totally finished yet as I have some mains terminal insulation to complete to make the unit 100% .. but just thought I would put up a few pics
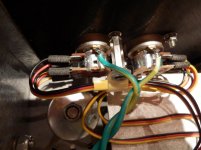
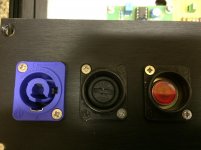
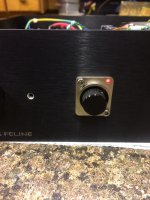
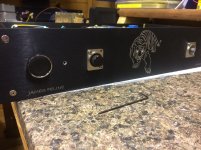
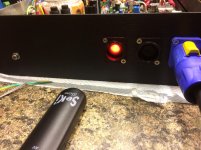
The cats eyes light up blue .. and the 2 red leds under the volume control are for mute and remote control receive signal .. what do you think ?
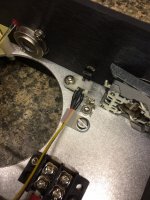
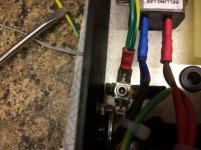
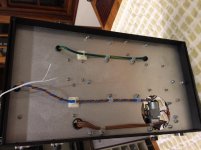
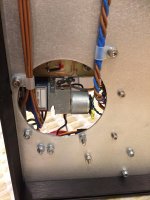
At the back there is a mains indicator led and a ground earth lift switch for possible earth loops .. but as I said still work in progress to sleeve some of the mains terminals etc .. so don't panic
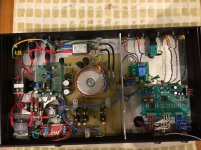
Well I have finally completed my little test project, this is my take on the velleman preamp kit. I have added remote control and separate power supply's one for the preamp and one for the remote volume control.
I just wanted a simple loop in and loop out input with a single pair of outputs. The unit is extremely quiet with no hum, and sounds really good in my opinion. I have not totally finished yet as I have some mains terminal insulation to complete to make the unit 100% .. but just thought I would put up a few pics
The cats eyes light up blue .. and the 2 red leds under the volume control are for mute and remote control receive signal .. what do you think ?
At the back there is a mains indicator led and a ground earth lift switch for possible earth loops .. but as I said still work in progress to sleeve some of the mains terminals etc .. so don't panic
Attachments
-
 PB130001.jpg337.7 KB · Views: 929
 -
 PB130002.jpg398.2 KB · Views: 893
 -
 PB130003.jpg363.7 KB · Views: 872
 -
 PB130004.jpg537.4 KB · Views: 887
 -
 PB130005.jpg543.6 KB · Views: 868
 -
 PB130006.jpg447.1 KB · Views: 402
 -
 PB130007.jpg512.4 KB · Views: 385
 -
 PB130010.jpg547.7 KB · Views: 420
 -
 PB130009.jpg431.2 KB · Views: 334
 -
 PB130008.jpg362 KB · Views: 329
Last edited:

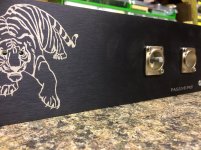
Hello forum members ... I do really like this little circuit works well and sounds good, so I have started a mark 2 version .. I know this may not be popular amongst the hard core DIY people amongst us, but may help the beginners new to the hobby
Last edited:
I'm 'feline' good about this project! 🙂
Is the P8084-1 a new version of the K8084-1?
I built a version of this preamp many years ago and it certainly worked well.
Is the P8084-1 a new version of the K8084-1?
I built a version of this preamp many years ago and it certainly worked well.
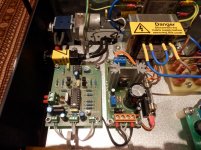
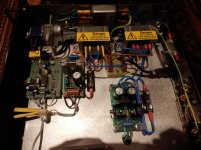
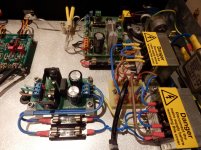
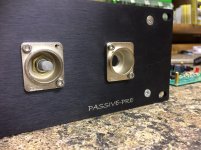
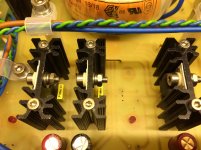
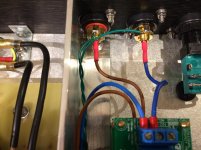
hello same PCB but different project .. have included a remote control with muting, different power supply and better enclosure, I just wanted a good no nonsense tone control for my music room ... also will add tone bypass as well, as you can see in the pictures the project was originally going to be a passive volume control but then decided to make another active unit, with better op amps etc .... anyway this project is work in progress and not fully completed so will update as the project progresses
Attachments
-
 IMG_2100.jpg603.7 KB · Views: 194
 -
 IMG_2101.jpg544.5 KB · Views: 195
 -
 IMG_2102.jpg585.2 KB · Views: 196
 -
 IMG_2105.jpg946.9 KB · Views: 209
 -
 IMG_2104.jpg542.9 KB · Views: 160
 -
 IMG_2103.jpg617.4 KB · Views: 171
 -
 IMG_2106.jpg993.2 KB · Views: 191
 -
 IMG_2107.jpg800.1 KB · Views: 158
 -
 IMG_2108.jpg793.6 KB · Views: 153
 -
 IMG_2109.jpg808.3 KB · Views: 162
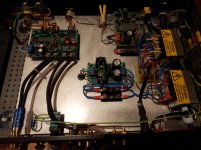
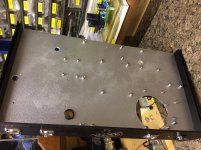
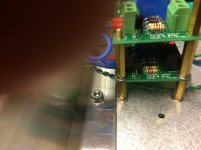
few more ... also a few pics of the internal chassis, all hole will have grommets as the project is still work in progress
Attachments
-
 IMG_2113.jpg729.9 KB · Views: 128
 -
 IMG_2112.jpg529.3 KB · Views: 138
 -
 IMG_2111.jpg509.6 KB · Views: 135
 -
 IMG_2110.jpg575.2 KB · Views: 153
 -
 IMG_2116.jpg710.4 KB · Views: 136
 -
 IMG_2115.jpg576.7 KB · Views: 147
 -
 IMG_2114.jpg620.9 KB · Views: 127
 -
 IMG_2117.jpg770.2 KB · Views: 136
 -
 IMG_2118.jpg772.8 KB · Views: 153
 -
 IMG_2119.jpg726 KB · Views: 148
Nice touch with the tiger with glowing eyes 🙂
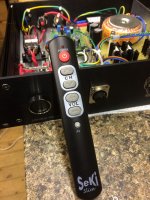
Hello .. something I was just playing around with. plus feedback from friends said they all liked it. On my power amplifiers I use tri colour leds that change from green to yellow then to red dependant on amplifier temperature . all part of the fun hobby
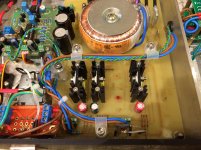
more pictures .. i tried really hard with this build to make as neat and tidy as I could, even though the project is not yet completed ... just shows you how much effort is needed, and in my eyes could be neater .. must try harder
Attachments
-
 IMG_2234.jpg584.5 KB · Views: 276
 -
 IMG_2233.jpg776.5 KB · Views: 294
 -
 IMG_2232.jpg799.6 KB · Views: 302
 -
 IMG_2235.jpg741.9 KB · Views: 273
 -
 IMG_2236.jpg485.9 KB · Views: 263
 -
 IMG_2237.jpg514.7 KB · Views: 110
 -
 IMG_2240.jpg562.8 KB · Views: 113
 -
 IMG_2239.jpg462.2 KB · Views: 109
 -
 IMG_2238.jpg729.6 KB · Views: 109
 -
 IMG_2241.jpg660 KB · Views: 137

Your effort is justified and I don't see how the work could be any neater.... just shows you how much effort is needed, and in my eyes could be neater ...
Doesn't hurt to be a perfectionist though!
Your effort is justified and I don't see how the work could be any neater.
Doesn't hurt to be a perfectionist though!
Hello Galu
Many thanks for your very kind comments .. also I remember that perfectionism is not possible .. that can lead to depression if you pursue this 😱
so just do my best and if I am happy with what I make and at a added bonus I get nice and encouraging comments from this forum then that is good enough
Last edited:
Hi JamesFeline
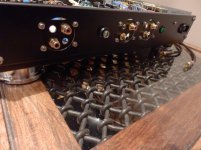
My compliments also to the build. I do like the way you have used the XLR shells to hold various controls etc.
Must try that out. 🙂
Happy listening
Mike
My compliments also to the build. I do like the way you have used the XLR shells to hold various controls etc.
Must try that out. 🙂
Happy listening
Mike
Hello
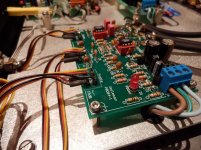
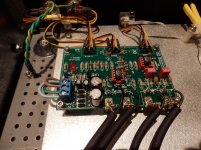
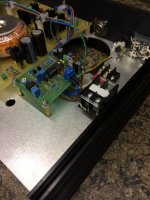
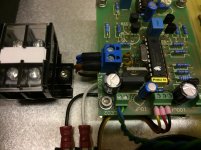
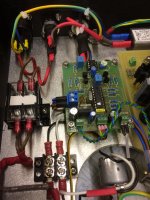
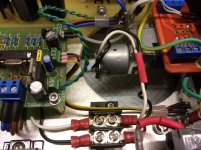
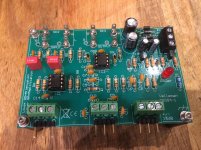
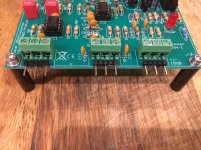
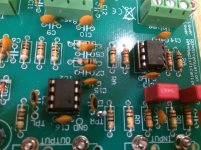
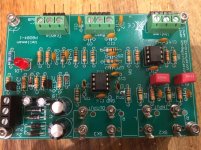
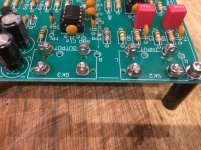
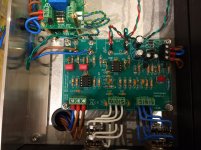
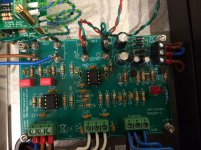
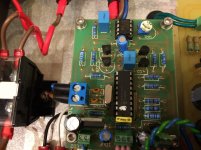
A few more pictures of the final PCB, I have made the PCB more easily removed for upgrades and tweaks etc.
Currently made with stock components but future builds will be with better components and gain adjustments and a better power supply
A few more pictures of the final PCB, I have made the PCB more easily removed for upgrades and tweaks etc.
Currently made with stock components but future builds will be with better components and gain adjustments and a better power supply
Attachments
Hello .. long time coming to complete this project
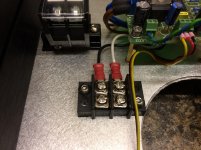
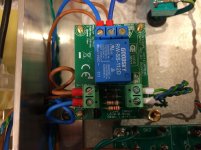
Had a quick sound check today and very pleased with the results .. have added remote control and a mute function via 2 relays ... some pictures attached
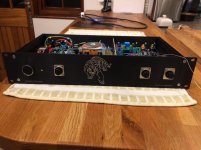
hope you like what I have done .. not 100% complete obviously, no num at all with this build 🙂
Had a quick sound check today and very pleased with the results .. have added remote control and a mute function via 2 relays ... some pictures attached
hope you like what I have done .. not 100% complete obviously, no num at all with this build 🙂
Attachments

some more pictures ....
Attachments
-
 IMG_0033.jpg536.8 KB · Views: 103
 -
 IMG_0032.jpg693 KB · Views: 100
 -
 IMG_0031.jpg617.2 KB · Views: 112
 -
 IMG_0030.jpg662.9 KB · Views: 117
 -
 IMG_0034.jpg708.1 KB · Views: 93
 -
 IMG_0035.jpg700.2 KB · Views: 95
 -
 IMG_0036.jpg616.5 KB · Views: 102
 -
 IMG_0037.jpg724.3 KB · Views: 100
 -
 IMG_0038.jpg841.2 KB · Views: 102
 -
 IMG_0039.jpg844.3 KB · Views: 104
- Home
- Amplifiers
- Solid State
- New Velleman Preamp with tone controls