Time to fire up the Table Saw.
Building a Altec 618B cabinet.
Far as I can tell the B suffix was for the 12" speaker cutout.
618 Utility Cabinets being available for 8" and 12" drivers

Here is a photo for reference of Original 618 Altec Utility Cabinets
Showing both cutouts available.

Original Cab believe was 1/2 inch or 13mm plywood baffle
5/8 inch plywood sides.
This project, not using such thin wood at all ... nope
All construction is with Oak 3/4 inch or 19mm Ply
then few extra braces added to baffle.
Well it is very much at the start.
Just got most the panels cuts done today
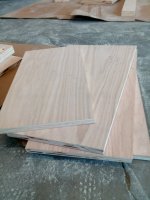
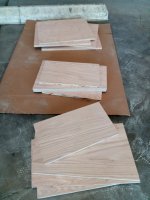
Then just started the glue up and clamping
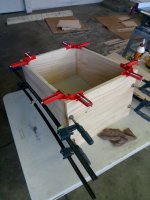
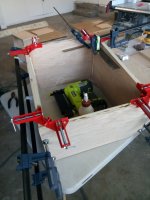
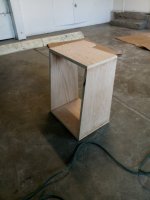
Lots of final finish and prep to go.
Cabinets will be painted like original
with Silver Hammer Tone paint.
As mentioned much thicker wood and
extra braces on the way.
Its a 1940's retro upgrade project.
Building a Altec 618B cabinet.
Far as I can tell the B suffix was for the 12" speaker cutout.
618 Utility Cabinets being available for 8" and 12" drivers
Here is a photo for reference of Original 618 Altec Utility Cabinets
Showing both cutouts available.
Original Cab believe was 1/2 inch or 13mm plywood baffle
5/8 inch plywood sides.
This project, not using such thin wood at all ... nope
All construction is with Oak 3/4 inch or 19mm Ply
then few extra braces added to baffle.
Well it is very much at the start.
Just got most the panels cuts done today


Then just started the glue up and clamping


Lots of final finish and prep to go.
Cabinets will be painted like original
with Silver Hammer Tone paint.
As mentioned much thicker wood and
extra braces on the way.
Its a 1940's retro upgrade project.
Attachments
Last edited:
8" Full Range driver.Cool project, did I miss what drivers are going in these?
Then assisted with a tweeter.
Technically a 2 Way.
The Baffle cutout will be for a 12"
And the 8" and tweet on a second baffle.
So it can be rear mounted and look original.
Been meaning to load some drawings.
Think it will make more sense in photos.
All coming soon.
Hopping on an old thread here - never saw the completed project, do you have photos of it finished and painted up?
Looking to do a 618 build myself and have some questions if you don't mind.
1. Did you use brad nails all around? Assuming as I can see no wood screws around the Ryobi in the photo.
2. How did you rear-mount? t-nut? Did you cover with wood filler or just paint right over?
Probably forgetting something but appreciate the help!
I glued the edges.
I only shoot about 2 brad nails first. To hold everything in place.
The I added squaring clamps and long clamps to get
good pressure. You can see nice even glue bead push out
when clamping force is good.
Once clamping force is good, I shoot a few more minimal brads
for assurance.
They original front baffle was 1/2" material.
Little too thin for modern approach.
But if you rear mount. A thick visible baffle edge
looks goofy.
So I routed a sunken edge on the back to just make
the mounting edge look 1/2 inch like original.
But still retain 3/4 " baffle material or 19/18mm ply
All the walls are also 3/4 inch ply.
Unlike original which was thin 5/8"
I plan on using threaded furniture inserts for mounting.
Similar to t-nuts but a cleaner mount.
Usually a short brass insert with fine threads for hardwood or ply , you
pre drill to depth. Then screw them
into the wood with a Allen wrench. Much better than hammering
in T-nuts. and shorter accurate lengths
I used plywood which had a cabinet grade veneer. So planned
on just doing many coats of paint. Thinking back
actually be much easier to just use MDF for painted finish.
I have the front baffles on and did a simple white primer coat.
still in progress. after few more coats of primer and sanding
final coat will be hammered silver
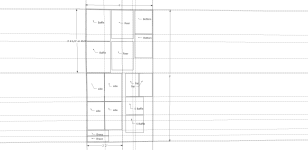
Basically one sheet for 2 cabs if you lay
out everything well on a 4'x8'
I laid it out so the sheet is first split
almost in half at 45.5"
so easier to handle 2 halfs of a sheet.
Then I can set the fence on table saw
and get sides, baffle. top all in same
straight cuts.
It is easier to make top, sides, bottom
and especially the baffle slightly larger
than needed to get the 8 degree slants cut.
I get sides top bottom cut correctly and assemble first.
then add the baffle. But make the baffle larger
at first, then trim route flush for perfect edge
once glued. The speaker cutout and rear sunken recess
cut first of course.

- Home
- Loudspeakers
- Multi-Way
- Altec 618c Cabinet Build
![IMG_20221009_164251[1].jpg IMG_20221009_164251[1].jpg](https://www.diyaudio.com/community/data/attachments/1006/1006130-ed30e50a5563f868644a1039281adc1a.jpg?hash=7TDlClVj-G)