Farrell,
as always your reply is beyond expectation. A great big thank you. Probably do this as a reference point for speakers. I am getting close, and anxious on several key parts of my parallel build. I can hardly wait for the day I push the start button on the SP-10. Appreciate all your help.
Happy holidays,
Don
Matthias,
Before I dive off the deep end on this one would you please help me with two questions,
1. Is the doc dated June 24 and referenced in your post #890 still current, and
2. How do we currently get the Augerpro circular waveguide.
thanks,
Don
Hi Don
Just take a look at the first post of this thread. Scroll down to the notes where you will flnd the links to the docs (PDF) and to the waveguide group buy.
Docs: GitHub - mbrennwa/osmcdoc: Documentation for the Open Source Monkey Coffin
Waveguide group buy: see my signature
Last edited by a moderator:
Just two minor updates:
- I recently replaced my Aleph J single-ended amp with an USSA-5 push-pull amplifier. The new amps are not more powerful, but they have tighter control over the loudspeaker. While I liked the BR ports to be on the short end with the Aleph J, I prefer them at the nominal length as described in the OSMC Manual with the with the new amps.
- Also, after a rather long time of listening to the OSMCs I figured that I preferred the sound with a tiny little bit less treble. I changed the R_T2 value from 1.0 Ohm to 1.3 Ohm in my xovers. The difference is very subtle, but I personally prefer it this way.
Last edited:
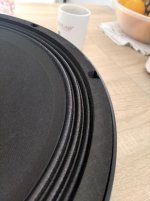
I was thinking of replacing the cardboard ring (gasket) on the Faital woofer with something prettier. I have never tried to remove the cardboard gasket, so I have no clue how easy this is, or how it's done. Has anyone removed the cardboard ring from a woofer? Is there a risk of damaging the cone/surround? Thoughts?
If you don't want to cause damage to suspension, you must use some nitro dilution or acetone. You must apply enough of the stuff for glue to soften up. Inevitably, suspension will soak up some of the stuff since it is impregnated fabric and may influence the glue that keeps surround glued to the basket. This is first step in loudspeaker repair if you need to access the voice coil to rewind it.
There is mechanical way. You use thin screwdriver (bare with me on this one) to separate the gasket as close to the surround as you can. Layer of paper from the gasket will remain glued on top of surround but it will enable you to make the trim ring you wanted and will not affect the integrity of surround and its connection to the basket.
Personally, i wouldn't touch it. I would make the front baffle 50mm thick and then route few milimeters deeper to acount for trim ring thickness.
There is mechanical way...
...route few milimeters...
Combining these comments I got the following idea: use a router to grind off most of the cardboard, but stop before reaching the suspension. It should be possible to get a nice flat surface or cardboard. Then put the pretty ring on top of this... hmmm.
We talking about the black foam bits (on mine) in between the bolts? They seem like foam to me and not cardboard—mine have "squish".
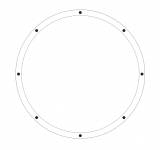
Funnily—I made the attached some time ago—inspired by Devore, priced it out in brass—$160 EACH—and I'm not sure I'd get it right on the first pass... I put it on hold for the time being. It would be very sweet—even if raised a bit from flush, however, with the foam removed would sit right inside the groove..
Funnily—I made the attached some time ago—inspired by Devore, priced it out in brass—$160 EACH—and I'm not sure I'd get it right on the first pass... I put it on hold for the time being. It would be very sweet—even if raised a bit from flush, however, with the foam removed would sit right inside the groove..
Attachments
Combining these comments I got the following idea: use a router to grind off most of the cardboard, but stop before reaching the suspension. It should be possible to get a nice flat surface or cardboard. Then put the pretty ring on top of this... hmmm.
Recone at TLHP costs about 54€ so it is not that big expense to try even if you end up ruining it.
I still think that it is possible to add a ply ring behind the woofer and then deepen the groove for the woofer basket by a few milimeters. It shouldn't affect the crossover at all.
I have glued a 100grit industrial sandpaper on a big board and grinded it down manually, placing driver upside down. No dust in magnetic gap and great exercise saving the gym fee that week!
We talking about the black foam bits (on mine) in between the bolts? They seem like foam to me and not cardboard—mine have "squish"...
You're right. I've just inspected mine. Foam indeed.

This makes things much easier. Very sharp scalpel and leveling jig.
I have glued a 100grit industrial sandpaper on a big board and grinded it down manually, placing driver upside down. No dust in magnetic gap and great exercise saving the gym fee that week!
Or this 🙂
Grinded the basket also or just foam ?
Last edited:
scalpel and careful use of googone or even very very careful use of acetone will remove the foam. They may just peel right off cleanly. Trim ring cost is the barrier (or not! ;-) I actually think if it sat a tad proud it would look good a millimeter or 2 if covering the edge of the basket was wanted. Otherwise the trim ring could be machined to fit in the groove flush with top surface, replacing the foam—which is obviously less machining to produce.... Group buy Matthias? You also have silver cones on your tweeters which I quite like—mine are black.
You're right. I've just inspected mine. Foam indeed.
View attachment 922690
This makes things much easier. Very sharp scalpel and leveling jig.
Or this 🙂
Grinded the basket also or just foam ?
In my case it was a paper ring, now I have drivers with probably abs ring, much harder work😉
We talking about the black foam bits (on mine) in between the bolts? They seem like foam to me and not cardboard—mine have "squish".
Funnily—I made the attached some time ago—inspired by Devore, priced it out in brass—$160 EACH—and I'm not sure I'd get it right on the first pass... I put it on hold for the time being. It would be very sweet—even if raised a bit from flush, however, with the foam removed would sit right inside the groove..
Am I interpreting this correctly that the trim ring would bear the force of the driver mounting bolt head.
Is this ring priced at a CNC shop or is there some magical driver ring adornment shop. 😀
That pic with the bronze finished drivers looks way cool. Definitely more finished with the ring.
Don
Thanks,
Don
It seems we all have perhaps different materials in play on the woofers that have to be dealt with since they were "designed" to be mounted from inside... I priced out a flat dimensioned trim ring that I designed to sit in the groove where the foam currently is in mine... I quickly priced it out with some guys in CA who do great laser cutting work. Large size, lots of waste and 1/8" brass came to $160 per (technically worth it, if you want it, for these lifetime speakers—but it's not cheap). Then I'd have to manually add the countersinks and get brass bolts (which can sometimes be really costly too).
Oups, from memory I thought it's cardboard, but once I looked again it sure is foam!
Mounting from the inside would solve the aesthetics, but I'd have to redo my enclosures -- no way!
Brass is cool, but I don't think it would look good on my Monkeys. I'd prefer black anodized aluminium. I could make a CNC file for Front Panel Express and share it here.
The bolts sit on on the basket, not on the foam ring. The ring does not bear the bolt force.
I guess I'll have to find the sharpest knife in the house, take a deep breath, and go for it...
You could also see about their silver anodized which I recently experimented with—non brushed—It's gorgeous and has some depth to it, like glass (see pic)—might set off your tweeter cone! I don't think FPE (great idea!) reanodizes after cutting—so unless you painted the edges you might have some silver peeking out. (I do think brass is killer with walnut and black though 😀). The face proportions of the OSMC are perfect IMHO, nothing to be lost by setting them off with a circle moment. (And FPE will do white to appease donhughes111 😀😀)
Attachments
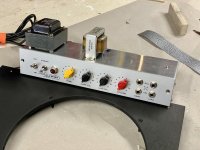
I used the clear/silver anodize for my McGyver tube amps looks pretty nice:
Der MacGyver Verstarker ist fertig aufgebaut | HiFi-Bau Brennwald
However, I don't want to introduce any new colors to my Monkey Coffins. I want black rings. Can I get Front Panel Exoress to do the anodizing AFTER machining the parts?
Der MacGyver Verstarker ist fertig aufgebaut | HiFi-Bau Brennwald
However, I don't want to introduce any new colors to my Monkey Coffins. I want black rings. Can I get Front Panel Exoress to do the anodizing AFTER machining the parts?
- Home
- Loudspeakers
- Multi-Way
- Open Source Monkey Box


