Hi,
My first post and it's a long one. Thanks in advance to any help or advice you can give me.
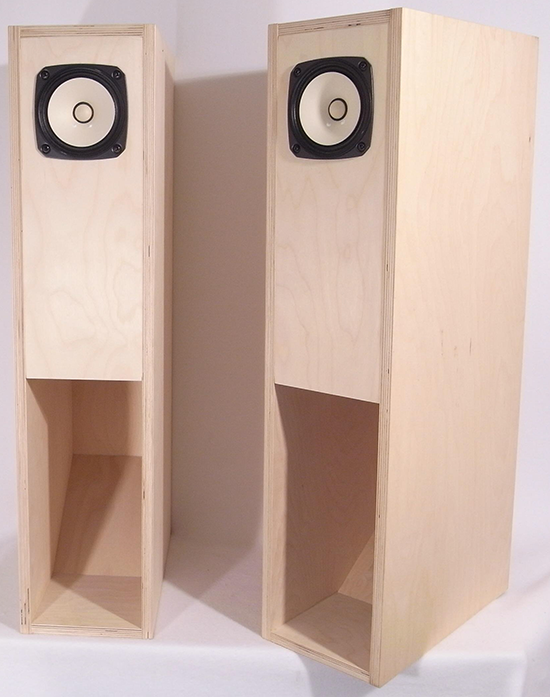
I just purchased this kit (I bought the small Foxtex-branded back-horn bookshelf kit a year ago and it's a ton of fun): Fostex BK-12m Folded Horn Kit - Pair
And of course, I need to build it! I have very basic shop skills (as in, grew up working on cars, sanding things, fixing things around the house) but I currently own no woodworking tools (as in clamps and such) or real woodworking experience, but I have a full suite of hand and power tools. I will buy what I need along the way. Of course, it is complicated with the virus and popping into Home Depot, Woodcraft, etc. isn't what it used to be.
The instructions have you glue it together one piece at a time (and dry fitting, clamping adjoining pieces to get a perfect fit). This makes sense and I plan on following these instructions. I plan on buying and assortment of clamps (instructions suggest a minimum of 2, 36" and 3, 24") and also buy a few of the ratchet strap clamps. As you can see, all of the parts are slotted and they fit together well (so well you need to sand them to loosen up to fit), so this would be a cakewalk for most of you! For me, I want to do it right vs just jumping in and regretting it later.
Suggestions on what clamps and glue I should buy?
Titebond - Glue, 16 -oz
In less detail than below, should I finish before assembly, or assemble first then finish?
*****
OK, where I am adding some complexity:
--I would like to finish the cabinets. Just something very basic. I am liking everything I see about Danish Oil in terms of the looks and ease of applying. In theory I would like to finish before assembling (to get the visible, inside areas of the horn finished), but I am not sure this is practical (having to protect all those joints from getting finish on them...bad for glue) and I would want to sand after I build to remove any slop in the joints.
https://www.homedepot.com/p/Watco-1-pt-Natural-Danish-Oil-265503/203164644
--I was considering doing a ¼" to ½" roundover on all external edges, but I don't have the tools or technique to do this (at least not well), and am planning on passing. I might try to sand off the sharp edges.
--I would like to have the driver secured with T-nuts (would be nice to easily remove to play with the stuffing in the driver chamber), but there is not a lot of room to work with. Don't think traditional T-nuts would work well with this plywood (vs. particle board). If I used these, seems like using epoxy is smart to keep them from spinning and trapping your drivers (no way to get a hand inside there). Thoughts?
Parts Express #8-32 Hurricane Nuts 50 Pcs.
I'll leave it there, as this is already too long of a post and you are too kind if you read it all and answer.
Thanks!
Ken
My first post and it's a long one. Thanks in advance to any help or advice you can give me.
I just purchased this kit (I bought the small Foxtex-branded back-horn bookshelf kit a year ago and it's a ton of fun): Fostex BK-12m Folded Horn Kit - Pair
And of course, I need to build it! I have very basic shop skills (as in, grew up working on cars, sanding things, fixing things around the house) but I currently own no woodworking tools (as in clamps and such) or real woodworking experience, but I have a full suite of hand and power tools. I will buy what I need along the way. Of course, it is complicated with the virus and popping into Home Depot, Woodcraft, etc. isn't what it used to be.
The instructions have you glue it together one piece at a time (and dry fitting, clamping adjoining pieces to get a perfect fit). This makes sense and I plan on following these instructions. I plan on buying and assortment of clamps (instructions suggest a minimum of 2, 36" and 3, 24") and also buy a few of the ratchet strap clamps. As you can see, all of the parts are slotted and they fit together well (so well you need to sand them to loosen up to fit), so this would be a cakewalk for most of you! For me, I want to do it right vs just jumping in and regretting it later.
Suggestions on what clamps and glue I should buy?
Titebond - Glue, 16 -oz
In less detail than below, should I finish before assembly, or assemble first then finish?
*****
OK, where I am adding some complexity:
--I would like to finish the cabinets. Just something very basic. I am liking everything I see about Danish Oil in terms of the looks and ease of applying. In theory I would like to finish before assembling (to get the visible, inside areas of the horn finished), but I am not sure this is practical (having to protect all those joints from getting finish on them...bad for glue) and I would want to sand after I build to remove any slop in the joints.
https://www.homedepot.com/p/Watco-1-pt-Natural-Danish-Oil-265503/203164644
--I was considering doing a ¼" to ½" roundover on all external edges, but I don't have the tools or technique to do this (at least not well), and am planning on passing. I might try to sand off the sharp edges.
--I would like to have the driver secured with T-nuts (would be nice to easily remove to play with the stuffing in the driver chamber), but there is not a lot of room to work with. Don't think traditional T-nuts would work well with this plywood (vs. particle board). If I used these, seems like using epoxy is smart to keep them from spinning and trapping your drivers (no way to get a hand inside there). Thoughts?
Parts Express #8-32 Hurricane Nuts 50 Pcs.
I'll leave it there, as this is already too long of a post and you are too kind if you read it all and answer.
Thanks!
Ken
An externally hosted image should be here but it was not working when we last tested it.
The glue isn't bad. Properly prepared and applied it can produce a joint stronger than the wood itself. Have you looked at sash clamps.. best bought in pairs. Finishing before you assemble might risk contaminating the joint surfaces and besides, you might cause damage during assembly.
Do not use T-Nuts. They won’t fall out as easily in plywood as particle board ot MDF, but you only ever have one come lose to understand why. Threaded inserts work well, but are tricky to install.
Your link to the glue does not work for me, but Titebond, or better Titebond 2 are good (white or yellow carpenters glue).
To do a significant roundover one needs a router and a router bit. You can use coarse to finer sandpaper to breal the edges.
dave
Your link to the glue does not work for me, but Titebond, or better Titebond 2 are good (white or yellow carpenters glue).
To do a significant roundover one needs a router and a router bit. You can use coarse to finer sandpaper to breal the edges.
dave
I like a larger roundover. A radius of 5" can be good if possible. A full range driver is going to have reduced higher frequency content reaching the edges to begin with, reducing the potential benefit of a smaller roundover.
Maybe consider quarter round wood products or cardboard tubes that can be split and attached to your cabinet.
Maybe consider quarter round wood products or cardboard tubes that can be split and attached to your cabinet.
A roundover will mke a difference no matter how small it is, but it does need to get to 3-4” before it is much more than cosmetic.
dave
dave
The glue isn't bad. Properly prepared and applied it can produce a joint stronger than the wood itself. Have you looked at sash clamps.. best bought in pairs. Finishing before you assemble might risk contaminating the joint surfaces and besides, you might cause damage during assembly.
I have not seen that type of clamp. Looks like a more aggressive way to apply pressure at the corners vs. a 'regular' clamp.
What do you mean by proper preparation? I would sand the glue surfaces to give it something to bite into, but anything else?
Got your view on finishing...risky do to before gluing/assembling.
Thanks!
Do not use T-Nuts. They won’t fall out as easily in plywood as particle board ot MDF, but you only ever have one come lose to understand why. Threaded inserts work well, but are tricky to install.
Your link to the glue does not work for me, but Titebond, or better Titebond 2 are good (white or yellow carpenters glue).
To do a significant roundover one needs a router and a router bit. You can use coarse to finer sandpaper to breal the edges.
dave
For a threaded metal insert, suggesting I do nothing, or something I should use? I get T-nuts are probably bad in plywood (vs. a thick, soft particle board). The ones I posted seem to make more sense, but only have small teeth and you are totally SOL if they spin (hence the comment about using epoxy to install).
Hmmm, not sure why the link doesn't work. I posted the 'plain' red label Titebond. Do you prefer the II (blue label) or III (green label) for being better for this application? All the same to be, no real price difference.
For the roundover, thinking I would sit that out until I had the tools and could practice with scrap wood. Using sandpaper to take like 1/16" off the edges just to make them 'un-sharp' might be fine for me.
I like a larger roundover. A radius of 5" can be good if possible. A full range driver is going to have reduced higher frequency content reaching the edges to begin with, reducing the potential benefit of a smaller roundover.
Maybe consider quarter round wood products or cardboard tubes that can be split and attached to your cabinet.
I'm a little confused. Where would I be able to use a 5" roundover? I am looking to 'soften' the sharp 90-degree edges of the particle board on the cabinets. For what I have, I don't need to do anything, this is just a cosmetic enhancement to the edges. Thanks!
I get T-nuts are probably bad in plywood (vs. a thick, soft particle board).
It is better than particle board or MDF. That softness means they dislodge easier, and if that happens you often have to destroy the baffle to get the driver out. This can even happen with well installed ones. A good screw works fine in plywood, certainly better than a t-nut.
(hence the comment about using epoxy to install).
Doesn’t help a whole lot.
Do you prefer the II (blue label) or III (green label) for being better for this application? All the same to be, no real price difference.
I hav eno idea the lable colour. You want the yellow carpenter’s glue, althou white works fine too. Yellow does not give you are large a latitude to put them together.
dave
I see them as capable of spanning the long dimension, and able to lay on their back like train tracks with the box sitting on them, or anything you need.Looks like a more aggressive way to apply pressure at the corners vs. a 'regular' clamp.
I don't know about the corners like that, if you need to clamp across the cabinet to attach the long sides to the back for instance, it is better to use a solid 2x4 to distribute the clamping force along its length, and use the clamps at the quarter way points, or just use more of them.
Not really, just making sure. 😉What do you mean by proper preparation? I would sand the glue surfaces to give it something to bite into, but anything else?
Oh, fair enough. It's just that rounding has multiple purposes and I just assumed. 😉this is just a cosmetic enhancement to the edges.
...more aggressive way to apply pressure at the corners vs. a 'regular' clamp.
You do not want to apply too much pressure.
dave
You do not want to apply too much pressure.
dave
Thanks. Snug, but not death grip, just enough to close any gap that's there.
BTW I hope you at least get a royalty!
I see them as capable of spanning the long dimension, and able to lay on their back like train tracks with the box sitting on them, or anything you need.
I don't know about the corners like that, if you need to clamp across the cabinet to attach the long sides to the back for instance, it is better to use a solid 2x4 to distribute the clamping force along its length, and use the clamps at the quarter way points, or just use more of them.
Not really, just making sure. 😉
Oh, fair enough. It's just that rounding has multiple purposes and I just assumed. 😉
Makes sense, thanks. I want to avoid the clamp itself touching the cabinet, just to protect the wood (cosmetically, know it would be able to handle it, but want to avoid dips in the surface).
Dave - safe to say you suggest I do NOT use T-nuts or any sort of threaded insert for this build? As long as I pre-drill the holes and don't over-tighten, just use the screws right into the cabinet? You and others here know better than me! Reality is unless I am playing with the stuffing (more/less than the 1.5 oz. the instructions suggest), I would never remove the drivers unless I was moving them to another cabinet or replacing one I blew.
Thanks!
Thanks!
You talk of pilot holes for the screws. This is something I consider mandatory for hardwood, and normal would be the diameter of the screw shank.. But with soft wood don't overdo it. Normally though if you screw straight into the mdf it piles up underneath the head. The driver mounting surface might want to sit on the hills around the screws. Alternative things you can do are to countersink before you screw, or remove the screw and use a chisel or razor in existing cases.
How you mount the driver makes a difference. Vibrations can be coupled into the cabinet walls. This may be via the mounting surface or the screws/bolts. Don't overtighten them. Use hand torquing procedures.
How you mount the driver makes a difference. Vibrations can be coupled into the cabinet walls. This may be via the mounting surface or the screws/bolts. Don't overtighten them. Use hand torquing procedures.
...or any sort of threaded insert for this build?
Threaded inserts are good if you can properly install them. Chris (who built most of our builds) had access to a special tool to install them.
Usually. The do not overtighten is important for best sonic performance. They should only be so tight as to hold a real or imaginary washer from spinning. The screws that come with the Fostex have washers, the nicer hex head ones that come with Mark Audios do not.As long as I pre-drill the holes and don't over-tighten, just use the screws right into the cabinet?
I would often substitute brass screws (w washers), if you try to tighen them up too much the head comes off and it can become difficult to fix that.
We did that alot, and almost always used screws, not bolts. No problems.Reality is unless I am playing with the stuffing … I would never remove the drivers...
dave
Thanks Dave.
My comment was your were specifically called out on the Madisound product page, assumed it was you/your product (I know it is Madisound selling, but called out as your design).
Got it on the screws. Makes sense. Is there a specific brass screw you suggest?
However I just checked and the Foxtex washers fit on the Madisound hex screws. So if I am overthinking all of this, I can just use that pairing.
Appreciate the help everyone!
Scott’s design work (Woden design/scottmoose), my drawings. We got a couple pair of A7s for the work which we were happy to do without any payment (the arrival of the drivers was a surprise). I EnABLed both pairs and sent one pair to Scott.
dave
dave
Hi, wanted to provide an update, not because I am doing anything special (quite the opposite!), but wanted to thank you for the help. Everything went super-smooth on the assembly and learning a lot (like I said, first time doing a project like this). Spent extra effort on the binding post install to make sure they would never come loose (hard to access once assembled). Taking my time and enjoying the process vs. rushing to get it done.
First cabinet is built and will sand, apply Danish Oil, install the driver, listen.

First cabinet is built and will sand, apply Danish Oil, install the driver, listen.
- Home
- Design & Build
- Construction Tips
- Willing to help a total newbie with assembly tips for Fostex horn kit?