I've just started using my tracer in a new system and I think the results are off in frequency. I just retraced in my old system and here are the files.
Thanks AllenB, I've grabbed your latest FRD/ZMA files and will play with them asap on XSim, also I will try to upload the D280Ti + LTH102 REW graph soon.🙂
VituixCAD seems like a very handy program to start learn with as well, thanks again for the valuable and useful information.😎
Regards
Hi folks, just getting some fun here now, I was just playing around with VituixCAD and I did manage to trace the D280Ti-S manufacturer FR data image since it has similar low-end response, then I started from an off-the-shelf 24db/oct LR crossover calculator and managed to get some average results on XSim with this drivers.
Between I will still make the final REW test on this driver and horn as I previously denoted, then re-try again on XSim regardless if this system will be fully active.
Regards
Between I will still make the final REW test on this driver and horn as I previously denoted, then re-try again on XSim regardless if this system will be fully active.
Regards
Attachments

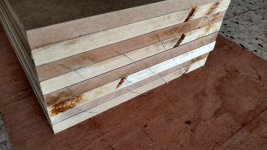
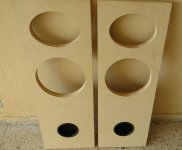
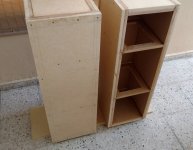
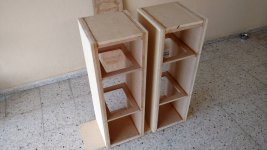
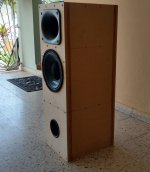
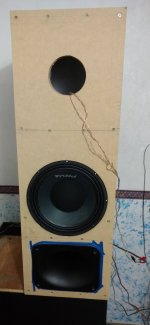
Hi, just a small update of the build progress.
As the weather was in favor today, I've started to routing the baffle holes and cutting the top, bottom and the braces in the table saw.
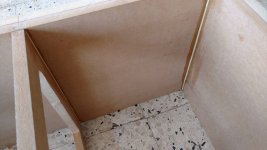
The cabinet will consist of two types of MDF material bonded together as previously denoted, the standard 16mm MDF(the yellowish colored) will be the outer, and the 15mm MDF supposedly furniture grade/pinus radiata(brown colored) in the inner of the cabinet, since it feels more like a heavy/dense cardboard, so it may be better damping material for the inner I think, also two 15mm MDF windows braces per cabinet.
The box weight ended at 60Lbs without the drivers, but more to come during the week hopefully.🙂

Regards
As the weather was in favor today, I've started to routing the baffle holes and cutting the top, bottom and the braces in the table saw.
The cabinet will consist of two types of MDF material bonded together as previously denoted, the standard 16mm MDF(the yellowish colored) will be the outer, and the 15mm MDF supposedly furniture grade/pinus radiata(brown colored) in the inner of the cabinet, since it feels more like a heavy/dense cardboard, so it may be better damping material for the inner I think, also two 15mm MDF windows braces per cabinet.
The box weight ended at 60Lbs without the drivers, but more to come during the week hopefully.🙂
Regards
Attachments
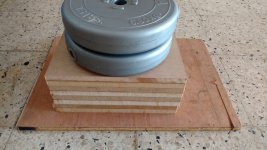

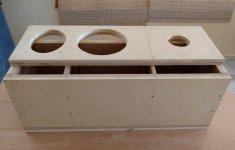
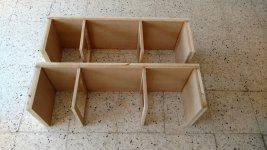
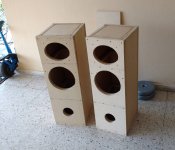
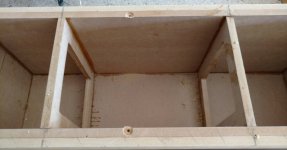
Hi there, here's an update on the build progress.
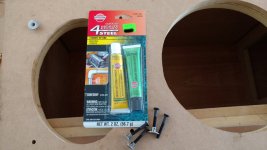
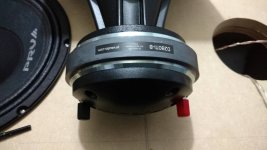
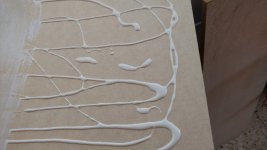
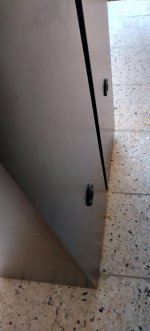
Had some time and started to assemble the boxes with Titebond III and stainless wood screws since I don't have large enough clamps, but had good results in the past with it besides the extra work drilling pilot holes countersunk etc.
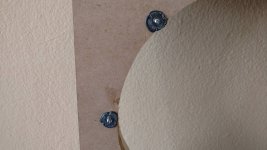
Also decided to put #10-32 Hurricane Nuts with epoxy for the LTH102 horns to bring some strength and reliability, as I'm pretty sure this is the part that I will play with more due to the upgradeitis condition.😀
P.S.
Aafter locally auditioning the PRV D290Py(polyimide diaphragm) on few tracks, I quickly started missing the HF extension, although they can go lower than the D280Ti, so I think what I like most is what some people call it crisp, or just opposed to soft/mellow, so clearly an area which boils down to personal preferences, so another lesson learned on not to buy parts based on majority users preferences.😱
Finally just bought the RPV D280Ti-B(Bolt-on version) as don't liked the idea of the adapter between the horn and driver at the end, but will keep the D280Ti-S for future Econowave style bookshelf's project.
All build progress images HERE
Here are some pictures(more soon):
Had some time and started to assemble the boxes with Titebond III and stainless wood screws since I don't have large enough clamps, but had good results in the past with it besides the extra work drilling pilot holes countersunk etc.
Also decided to put #10-32 Hurricane Nuts with epoxy for the LTH102 horns to bring some strength and reliability, as I'm pretty sure this is the part that I will play with more due to the upgradeitis condition.😀
P.S.
Aafter locally auditioning the PRV D290Py(polyimide diaphragm) on few tracks, I quickly started missing the HF extension, although they can go lower than the D280Ti, so I think what I like most is what some people call it crisp, or just opposed to soft/mellow, so clearly an area which boils down to personal preferences, so another lesson learned on not to buy parts based on majority users preferences.😱
Finally just bought the RPV D280Ti-B(Bolt-on version) as don't liked the idea of the adapter between the horn and driver at the end, but will keep the D280Ti-S for future Econowave style bookshelf's project.
All build progress images HERE
Here are some pictures(more soon):
Attachments
-
 IMG_20191008_121615703.jpg133.8 KB · Views: 91
 -
 IMG_20191006_153434765.jpg96.3 KB · Views: 95
 -
 IMG_20191006_145605760.jpg77.6 KB · Views: 97
 -
 IMG_20191006_145350907_HDR.jpg110.6 KB · Views: 82
 -
 IMG_20191006_135722396.jpg108.9 KB · Views: 90
 -
 IMG_20191006_134119164.jpg79.1 KB · Views: 97
 -
 IMG_20191005_165041934.jpg120.7 KB · Views: 89
 -
 IMG_20191004_130827885.jpg97.4 KB · Views: 80
 -
 IMG_20191004_130813725.jpg153.9 KB · Views: 94
 -
 IMG_20191004_141951436.jpg508.9 KB · Views: 97
Last edited:
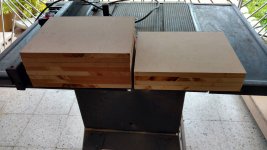
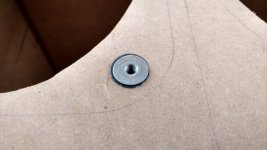
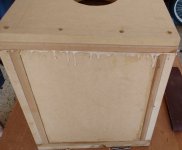
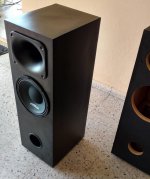
Hello, here are more images of the finally assembled enclosures.
So again since I'm a bit picky as usual, I just put #6-32 T-Nuts(with epoxy) as I can see myself testing different mid/woofers too🙄, fortunately I never use power tools to screw-in my drivers, hence I've never had any issues with either Hurricane or T-Nuts being to spin or to came out, so understand why some hate them, between my preferred ones are the T-Nuts with 2/3 hole flanges or inserts for subs.
Now the last step is the sanding and wood-filling to proceed with the laminate, hopefully they will turn out well as I'm not even close to average at terminations.😱
Regards
Attachments
-
 IMG_20191010_134702764.jpg226.2 KB · Views: 97
 -
 IMG_20191010_134755068.jpg220 KB · Views: 123
 -
 IMG_20191010_134804731_HDR.jpg193 KB · Views: 125
 -
 IMG_20191009_124213580.jpg92.2 KB · Views: 105
 -
 IMG_20191010_132917395.jpg118 KB · Views: 70
 -
 IMG_20191010_132908163.jpg141.7 KB · Views: 79
 -
 IMG_20191010_132900241.jpg164.5 KB · Views: 72
 -
 IMG_20191010_114920986.jpg111.2 KB · Views: 62
 -
 IMG_20191010_095404969.jpg80.4 KB · Views: 68
 -
 IMG_20191009_124204831.jpg157.6 KB · Views: 90
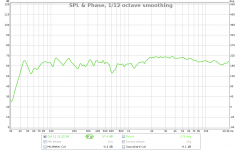
Hello, so I did take some measurements, and it looks like no matter what mid/woofer I throw/test, I will always had the hard to tame peak and valleys below around 610Hz , OTOH even with no PEQ/Delay the high frequency is a breeze to tame and flatten out with a nice extended HF.
Unfortunately there is too near stuff including a heavy subwoofer at the left side of the speaker, a bed in the back plus the rear wall at just few inches behind the speaker, so targeting flat response in this full and tiny room will be impossible.😱
I'm thinking since the speakers will be crossed between 60~80Hz most of the time, considering leaving the port at ~4" long and adding more polyfill liner, as it has nice midbass punch at the 40'ish Hz+ even it was unexpected(maybe some in-room gain), so I could use the speakers with no subs at late night listening plus the phase shift at port will be way below crossover point, but I'm up for suggestions to test.🙂
Regards
Here are some images:
, OTOH even with no PEQ/Delay the high frequency is a breeze to tame and flatten out with a nice extended HF.Unfortunately there is too near stuff including a heavy subwoofer at the left side of the speaker, a bed in the back plus the rear wall at just few inches behind the speaker, so targeting flat response in this full and tiny room will be impossible.😱
I'm thinking since the speakers will be crossed between 60~80Hz most of the time, considering leaving the port at ~4" long and adding more polyfill liner, as it has nice midbass punch at the 40'ish Hz+ even it was unexpected(maybe some in-room gain), so I could use the speakers with no subs at late night listening plus the phase shift at port will be way below crossover point, but I'm up for suggestions to test.🙂
Regards
Here are some images:
Attachments
-
 Stock-Meassure-No-EQ-No-Delay.png63.9 KB · Views: 135
 -
 Compare (copy).png102.6 KB · Views: 137
 -
 IMG_20191011_125914538.jpg320.4 KB · Views: 97
 -
 IMG_20191011_094726583.jpg260.9 KB · Views: 90
 -
 IMG_20191011_092411584.jpg86.2 KB · Views: 82
 -
 IMG_20191011_090635025.jpg67.8 KB · Views: 74
 -
 IMG_20191011_090609619.jpg78.3 KB · Views: 79
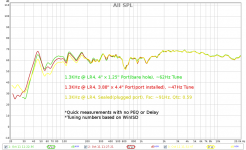
You mean like this?
Allen, sorry for the late input but I just noticed after JRiv mentioned the notch at 600Hz that your VCad import has managed to drop it to nearer 400Hz.
It looks like this may be because you seem to have started your trace from 10Hz rather than 20Hz where PRV's graph actually starts.
FWIW,
David.
Hello, so I did take some measurements, and it looks like no matter what mid/woofer I throw/test, I will always had the hard to tame peak and valleys below around 610Hz
The 610Hz dip seems to be inherent in the driver as it's clearly there in the manufacturer's own curve, so that you'll have to live with.
Generally, narrow dips are less obvious than peaks however, so you may get away with it.
Some of the other peaks may be either internal box resonances or room resonances, so if you can manage to try at least moving a speaker around for a measurement session you should be able to see if the peaks stay at the same frequencies or not. If so, they're likely box issues, if they move to different freq's, they'll be position/room related.
HTH,
David.
Hi David, thanks for the tips really appreciated, you are right about the dip around 610Hz at woofer manufacturer response curve, I though that it will go away with the speaker boxed, but indeed will need to tame it with some PEQ.
About the other peaks, it does looks like some bad room reflects due all the stuff around as you mentioned, since the speakers were upside down on top of the subwoofer first, and the measurements where much worse and more centered in the measurements response.
Then after moving the box to the floor and put 2 pillows in the floor between the mic and the speaker, the measurements looked better, also funny enough my previous box with 3/4" MDF also showed similar results with this same woofer😱.
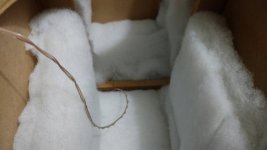
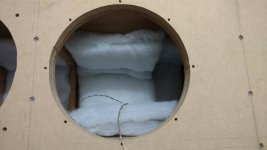
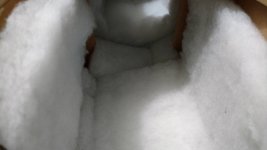
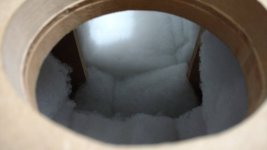
Also despite this enclosure being all 1.25" walls and braced, I'm considering put enough polyfill to minimize internal standing waves and make new measurements and see what happens.

Regards
Hello, so I did take some measurements, and it looks like no matter what mid/woofer I throw/test, I will always had the hard to tame peak and valleys below around 610Hz ................
Do not worry about it, a cabinet with a flat answer is a utopia, cabinets of great prestige (it is assumed that with a lot of R&D behind) they also do not achieve that theoretical ideal.
Here is an interesting article about it.
Stereophile
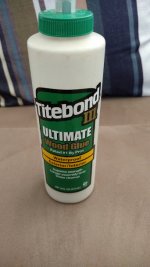
Congratulations on the construction, I liked the method of joining plates to achieve greater thicknesses of the plates, I have done this several times.🙂
Just one question, why haven't you "painted" - literally - the two faces to join?
We don't have the Titebond here, is it a non-traditional high price adhesive ? 😕
Attachments
Do not worry about it, a cabinet with a flat answer is a utopia, cabinets of great prestige (it is assumed that with a lot of R&D behind) they also do not achieve that theoretical ideal.
Here is an interesting article about it.
Stereophile
Congratulations on the construction, I liked the method of joining plates to achieve greater thicknesses of the plates, I have done this several times.🙂
Just one question, why haven't you "painted" - literally - the two faces to join?
We don't have the Titebond here, is it a non-traditional high price adhesive ? 😕
Hi academia50, thanks for the input, also great info link about "How flat is flat?" already bookmarked.🙂
Regarding on painting the faces to joint, I just use standard carpenter wood glue like Elmer's, Gorilla and the like, but after trying out the Titebond III, really liked how strong this glue turns after curing that I not only use it to joint wood, but also to seal the joint edges as well since after curing it turns like a very hard plastic, thus skipping on use silicone or caulk to seal.
Regards
Attachments


Hello, so I did take some measurements, and it looks like no matter what mid/woofer I throw/test, I will always had the hard to tame peak and valleys below around 610Hz
I wouldn't worry about the valley you mention. The tweeter does look about 10bd too hot however, that I would find tiring and would likely swamp the mids and bass making the speaker sound thin?
I wouldn't worry about the valley you mention. The tweeter does look about 10bd too hot however, that I would find tiring and would likely swamp the mids and bass making the speaker sound thin?
Hi Mazza thanks for the input, as suggested previously and you now, I will stop worrying about the peak and valleys below 600Hz, since this are the third main speakers project using similar drivers and all of them showed nearly the same results.

Also yes, this tweeters where actually way hotter indeed, and I did lower the levels on the tweeter amplifier to take quick measurements, hopefully after finish with the sanding and the laminate work, will take few more measurements with better level match and with less stuff in the room, then start with the DSP tuning.

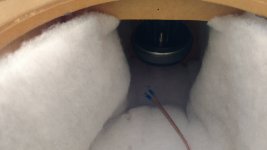
Just in case, I just added a tad more polyfill batting to help minimize internal reflections a bit.😉
Regards
Attachments


These may be due to the box (exterior). They may also be due to nearby reflections (if you haven't dealt with this). Either way, not certain you should try.. even accidentally, without more information ie polar analysis. Simply put, in this range, you could go with your ears and EQ to what sounds right while ignoring the measurement and if in doubt, put it back and leave it as it is.hard to tame peak and valleys below around 610Hz
These may be due to the box (exterior). They may also be due to nearby reflections (if you haven't dealt with this). Either way, not certain you should try.. even accidentally, without more information ie polar analysis. Simply put, in this range, you could go with your ears and EQ to what sounds right while ignoring the measurement and if in doubt, put it back and leave it as it is.
Hi AllenB, indeed makes all sense the nearby reflections, as this tiny 10' x 9' room is way bloated with many stuff around.
I've also read that adding wall thickness and mass the walls are harder to excite, thus box resonance gets higher in frequency making it less critical, but this topic seems extremely broad and has few different crowds and preferences.
Between I will start on laminate the enclosures and adding the proper driver gaskets and the CD protection capacitor, then take few more pics and basic measurements once finished, will also read more on taking polars, dg etc. to familiarize more with REW.😱
Regards
Finally an update on this build. 
Hi, since the weather has been cooperative during the week, I decided to filling and light sanding the non-uniform box areas/edges and started the laminating work.
Final build details:
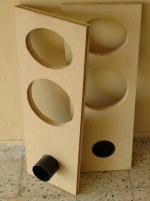
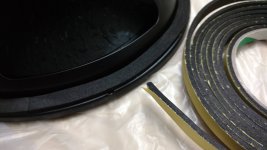
Since this was a very simple build with no flush mounted drivers, the gasket used in the horns is 5x1mm so it will be to fully sit on top of the laminate after tighten the screws, while still providing the sealing, the gasket used in the woofers and Speakon connectors is the standard 10x3mm.
As usual, I also like to apply a drop of petroleum based oil in the screw threads before placing the mounting driver screws when using Hurricane or T-Nuts, this way the screw don't bond itself with the T-Nut if there's some moisture or light corrosion happens, all screws where hand tighten.😉
After routing the laminate, did file the edges and the edge lines are barely visible if looking close enough, so I will get a nice permanent black marker and just mask them.
Conclusions:
The speakers turned out somewhat nice compared to my previous builds using poly-fiber black carpet, and much better than a poorly executed painting job, so this will be my preferred method on my next Econo style build.
As for the sound, this things actually can scream wen pushed, but does not take a lot of power to drive someone out the room, also the fast attack punchy midbass this Pro mid/woofers provides increases the overall dynamics.😎
However, I still waiting on a taller rubber feet for the boxes, then take some REW measurements and possibly record and audio sample of the speakers playing low-bass loud and clear, regardless they were designed to be accompanied with subwoofer(s).
They are crossed over to 60Hz right now as I just have a single UM18-22, but plan to cross them to about ~80Hz if I get a pair of B&C 21SW152 which luckily I can get locally, so now planning for a next build.

View the full build progress here.
Regards.
Hi, since the weather has been cooperative during the week, I decided to filling and light sanding the non-uniform box areas/edges and started the laminating work.
Final build details:
Since this was a very simple build with no flush mounted drivers, the gasket used in the horns is 5x1mm so it will be to fully sit on top of the laminate after tighten the screws, while still providing the sealing, the gasket used in the woofers and Speakon connectors is the standard 10x3mm.
As usual, I also like to apply a drop of petroleum based oil in the screw threads before placing the mounting driver screws when using Hurricane or T-Nuts, this way the screw don't bond itself with the T-Nut if there's some moisture or light corrosion happens, all screws where hand tighten.😉
After routing the laminate, did file the edges and the edge lines are barely visible if looking close enough, so I will get a nice permanent black marker and just mask them.
Conclusions:
The speakers turned out somewhat nice compared to my previous builds using poly-fiber black carpet, and much better than a poorly executed painting job, so this will be my preferred method on my next Econo style build.
As for the sound, this things actually can scream wen pushed, but does not take a lot of power to drive someone out the room, also the fast attack punchy midbass this Pro mid/woofers provides increases the overall dynamics.😎
However, I still waiting on a taller rubber feet for the boxes, then take some REW measurements and possibly record and audio sample of the speakers playing low-bass loud and clear, regardless they were designed to be accompanied with subwoofer(s).
They are crossed over to 60Hz right now as I just have a single UM18-22, but plan to cross them to about ~80Hz if I get a pair of B&C 21SW152 which luckily I can get locally, so now planning for a next build.
View the full build progress here.
Regards.
Attachments
-
 IMG_20191105_191428959.jpg361.5 KB · Views: 125
 -
 IMG_20191105_193458363.jpg236 KB · Views: 82
 -
 IMG_20191106_122113833.jpg325.9 KB · Views: 85
 -
 IMG_20191106_130712146.jpg189.8 KB · Views: 98
 -
 IMG_20191106_123439790.jpg429.4 KB · Views: 94
 -
 IMG_20191106_123211747_HDR.jpg254.2 KB · Views: 129
 -
 IMG_20191106_134520034_HDR.jpg561.3 KB · Views: 124
 -
 IMG_20191106_151122529_HDR.jpg297 KB · Views: 77
 -
 IMG_20191106_121546615.jpg263.2 KB · Views: 115
Last edited:
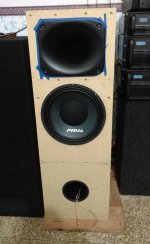
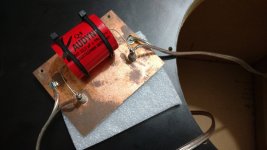
You are clearly very skilled. It looks great. I like the ground plane across the capacitor 🙂
Hi AllenB, thanks for the kind words, I still learning on this wood/speaker stuff but happy this boxes turned nice. 🙂
Yeah I have few raw single side circuit boards and stand-off solder terminals I'm using now on the audio projects instead ham radio projects lol.
Regards
- Home
- Loudspeakers
- Multi-Way
- Yet another cost effective main speakers build