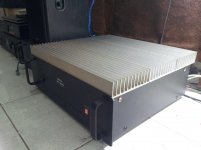
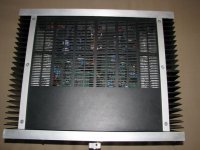
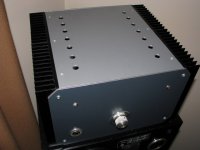
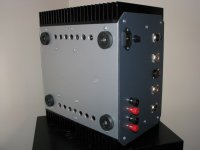
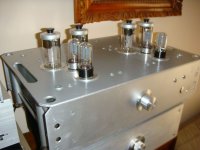
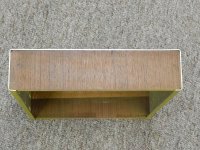
If you are looking for a low cost chassis a power amp you could use an old Hewlett Packard test equipment chassis. A new front and rear panel could fabricate with the desired controls and labels. Most chassis have a power cord connector and nice top and bottom covers. Here are some parts I assembled form several chassis.
Attachments

Last edited:

wow --that looks really neat and strong --
( my circuits are a piece of plywood with flattened copper wire 1mm -3mm -glued
Into the (printed circuit pattern) scale drawing --onto the plywood )
have also used conductive bronze "paint " to emulate a printed circuit schematic--
copper etching plate & fancy printed circuits cost forex --
so I improvise ---- ( DIY ) --necessity = mother of invention--
This is like reading morse codes.
A fabricated amp chassis would only cost us around US$10-20 so there is little point for Indonesians to make one, unless you want to be unique. Attached is one sample. However, using Cisco router chassis is also not unheard of.
A fabricated amp chassis would only cost us around US$10-20 so there is little point for Indonesians to make one, unless you want to be unique. Attached is one sample. However, using Cisco router chassis is also not unheard of.
Attachments
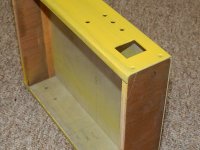
I bought a mid-sized metal card file at New-To-You resale last week for $.50, on sale from $1 because it was yellow tag week. the point to point circuits go on the NEMA CE laminate in the hinged top (now the bottom). Holes drilled in the laminate as required. Heatsink goes on a cutout in the bottom (now top), with the output transistors. Transformer goes on the bottom(top). Radio waves go into the steel case and out the ground wire, because of all metal enclosure.
Thieves walk right around this stuff because it looks like ****. The last thief in here took only a gold flash watch, worthless to me because the self wind feature wouldn't keep it running (but it looked good). They left the $600/pair speakers too; something about lifting 94 lb off the pole perhaps. No casual thief wants a Steinway piano, either.
Thieves walk right around this stuff because it looks like ****. The last thief in here took only a gold flash watch, worthless to me because the self wind feature wouldn't keep it running (but it looked good). They left the $600/pair speakers too; something about lifting 94 lb off the pole perhaps. No casual thief wants a Steinway piano, either.
Last edited:

haha, cheap chassis? i do mine from scrap aluminum materials from junkshops. Just a little patience in doing from scratch..attach some pix later...Recycle men!
Yeah, 3mm aluminium is just perfect for everything. All you need is couple of drills screw taps, screws and anglegrinder.
Save the good cardboard boxes (some are notably better than others). Paint with "White wood glue" (PVA) and wrap with aluminum kitchen foil. Now you have a very very cheap shielded box.
As a side thought, you could potentially take this further and make your own cardboard shapes potentially more interesting than stack-able boxes.
As a side thought, you could potentially take this further and make your own cardboard shapes potentially more interesting than stack-able boxes.
I have diligently been "recycling" all my cardboard to save the planet.
Do you think they will give me back some of my boxes if I ask nicely?
Do you think they will give me back some of my boxes if I ask nicely?
Aluminum is great because it's a "real metal" but can be worked with hand tools or home grade ones such as hand drills.
And since it does not rust, you do not needto paint it.
Tupperware type boxes are also available in 1000 shapes and stronger than cardboard, but you should attach some kitchen aluminum foil on the inside as owenhamburg suggests.
Usually not needed to *fully* cover them, most times a simple sheet where the "front panel" would be (so jacks and pot cases are grounded) , maybe another under some sensitive PCB, are enough.
Aluminum is great because it's a "real metal
Agree 🙂 All chassis was done from recycled materials ....... 🙂
Attachments
-
 GOLDMUND2 (1).JPG87.6 KB · Views: 1,611
 -
 A CLASS FRONT.JPG50.1 KB · Views: 1,237
 -
 A CLASS.JPG43.9 KB · Views: 1,230
 -
 ADAGIO.JPG63.5 KB · Views: 1,203
 -
 GOLDMUND2 (2).JPG45.8 KB · Views: 1,184
 -
 GROMES 260A.JPG119.5 KB · Views: 721
 -
 GU50 LAT STG.jpg72.9 KB · Views: 698
 -
 JL PREU.JPG67.7 KB · Views: 730
 -
 SARA FRONT.JPG66.7 KB · Views: 836
 -
 SARA.JPG88 KB · Views: 1,024
Agree 🙂 All chassis was done from recycled materials ....... 🙂
COOOOOLLLLLL !!!!
Very good ideas and final products.
If money is a concern, try what I did 🙂
http://www.diyaudio.com/forums/chip-amps/259723-recommend-cheap-50-amp.html#post4025752
http://www.diyaudio.com/forums/chip-amps/259723-recommend-cheap-50-amp.html#post4025752
most of the chassis i use are recycled from old "thrown away" amps, cdplayers, computers and other stuff i can get from friends and the junkyard,
if you combine parts of different chassis sometimes you've a "snug fit"
ill post some pictures tomorrow
if you combine parts of different chassis sometimes you've a "snug fit"
ill post some pictures tomorrow
I thought I'd add to this older thread rather than start a new one....
I'm always on the lookout for new styles of DIY chassis.
If you have some woodworking tools, just adding nice wood end plates to a commercial metal chassis helps.
Next step up is the standard wood frame with a flat plate (aluminum, usually) on top.
If you have some sort of metal brake (improvised or 'the real thing'), then you can bend up something like a simple 'C' and use wood end 'plugs'. Add the hardwood ends later after the metalwork is painted or polished.
Or make 'the real thing' if you have a good brake, and metalworking skills - neither of which I have.
It's easier if you plan and drill the metal before bending, if you know what you will be building.
Ideas??
Attachments
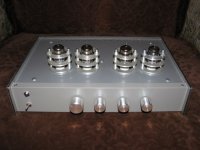
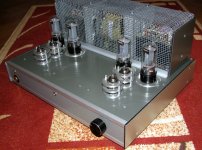
Here are a few more ideas for a low cost universal amplifier chassis.
Low cost universal amplifier chassis
Low cost universal amplifier chassis
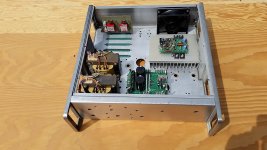
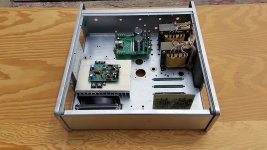
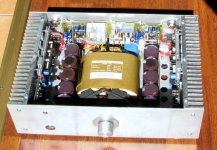
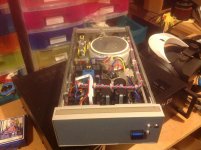
I think that recycling old equipemt chassis is great and have done it several times. HP kit in particular is very sturdy.
Here's a couple of photos from another thread where I used a HP pulse generater chassis for a Class A amp power supply - built like a tank.
Note to Mods: Could we make this thread sticky to encourage others to recycle old kit and post their photos
Regards
Mike
Here's a couple of photos from another thread where I used a HP pulse generater chassis for a Class A amp power supply - built like a tank.
Note to Mods: Could we make this thread sticky to encourage others to recycle old kit and post their photos
Regards
Mike
Attachments

- Status
- Not open for further replies.
- Home
- Design & Build
- Construction Tips
- Low Cost Amplifier Chassis Ideas