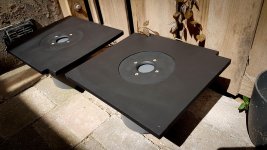
Something i would like to share with the rest of the (DIYaudio) world, is a way of making (round) waveguides.
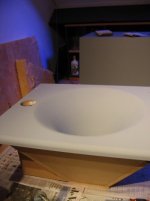
First model was a 250Hz tractrix midhorn.
And more recently an oblate spherical like 10inch hf waveguide.
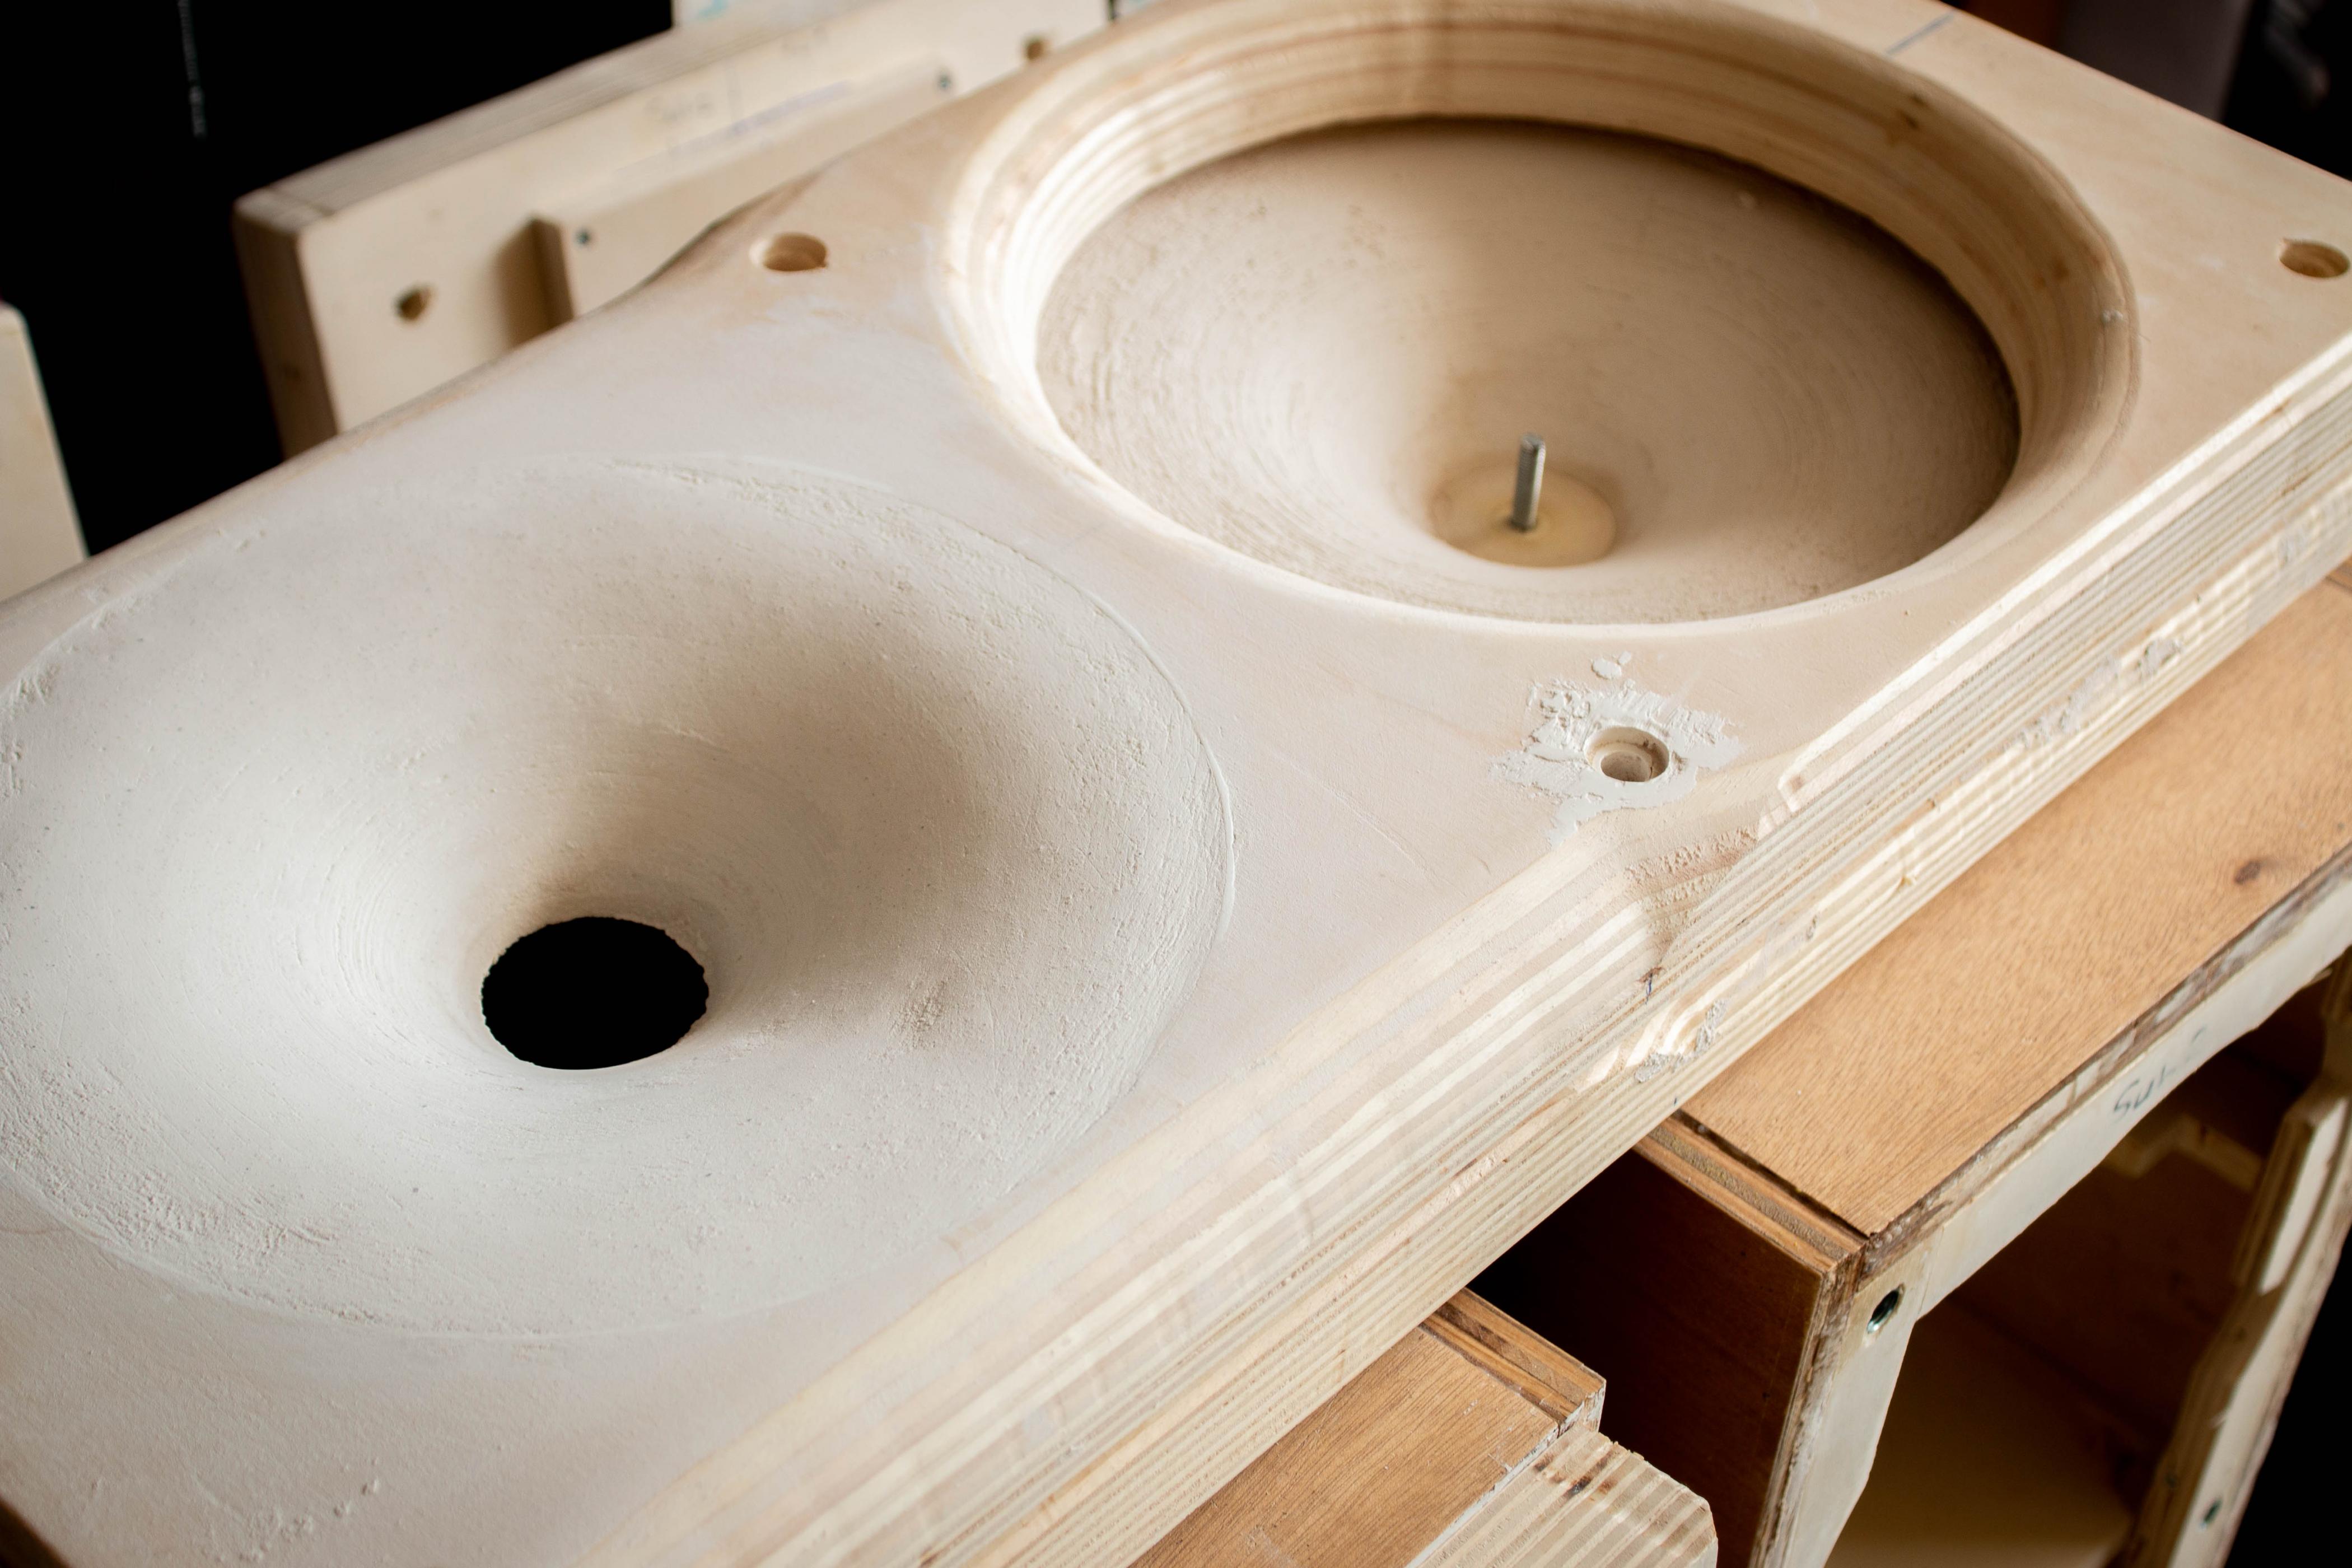
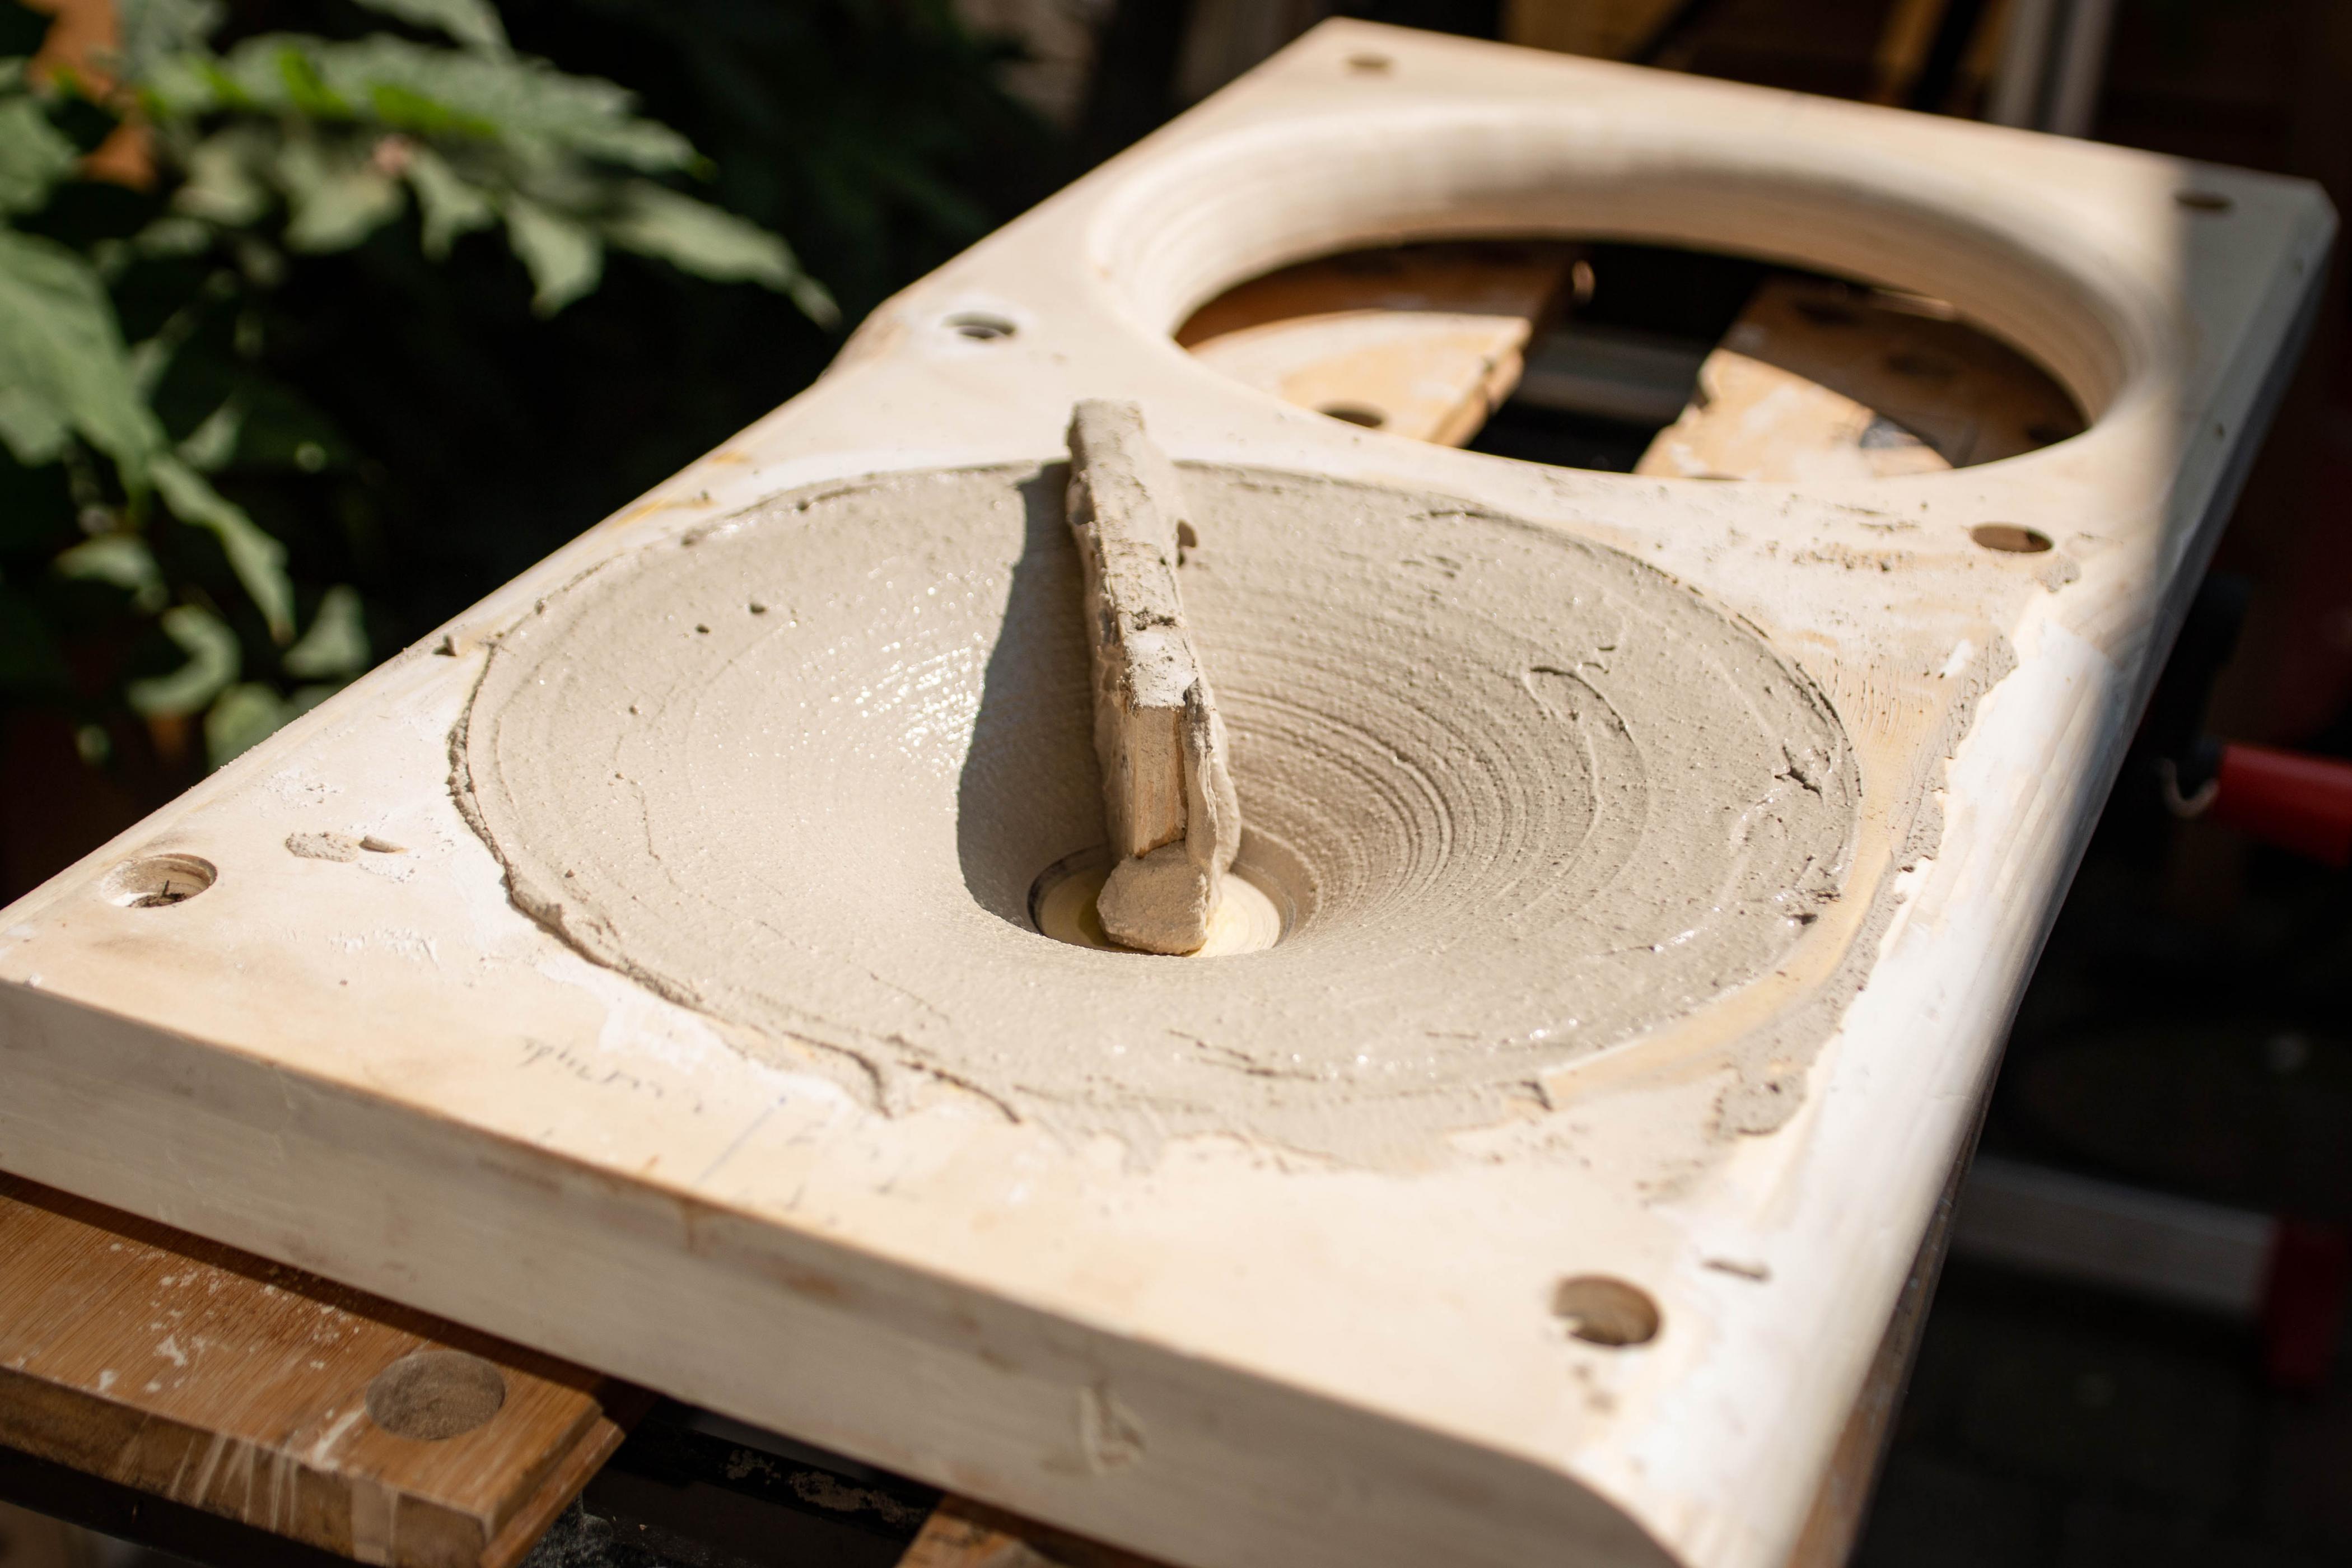
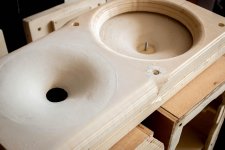
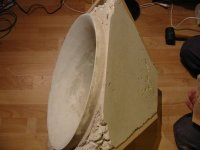
The material i use is plaster. It takes about 2 weeks to dry, depending on the thickness of course.
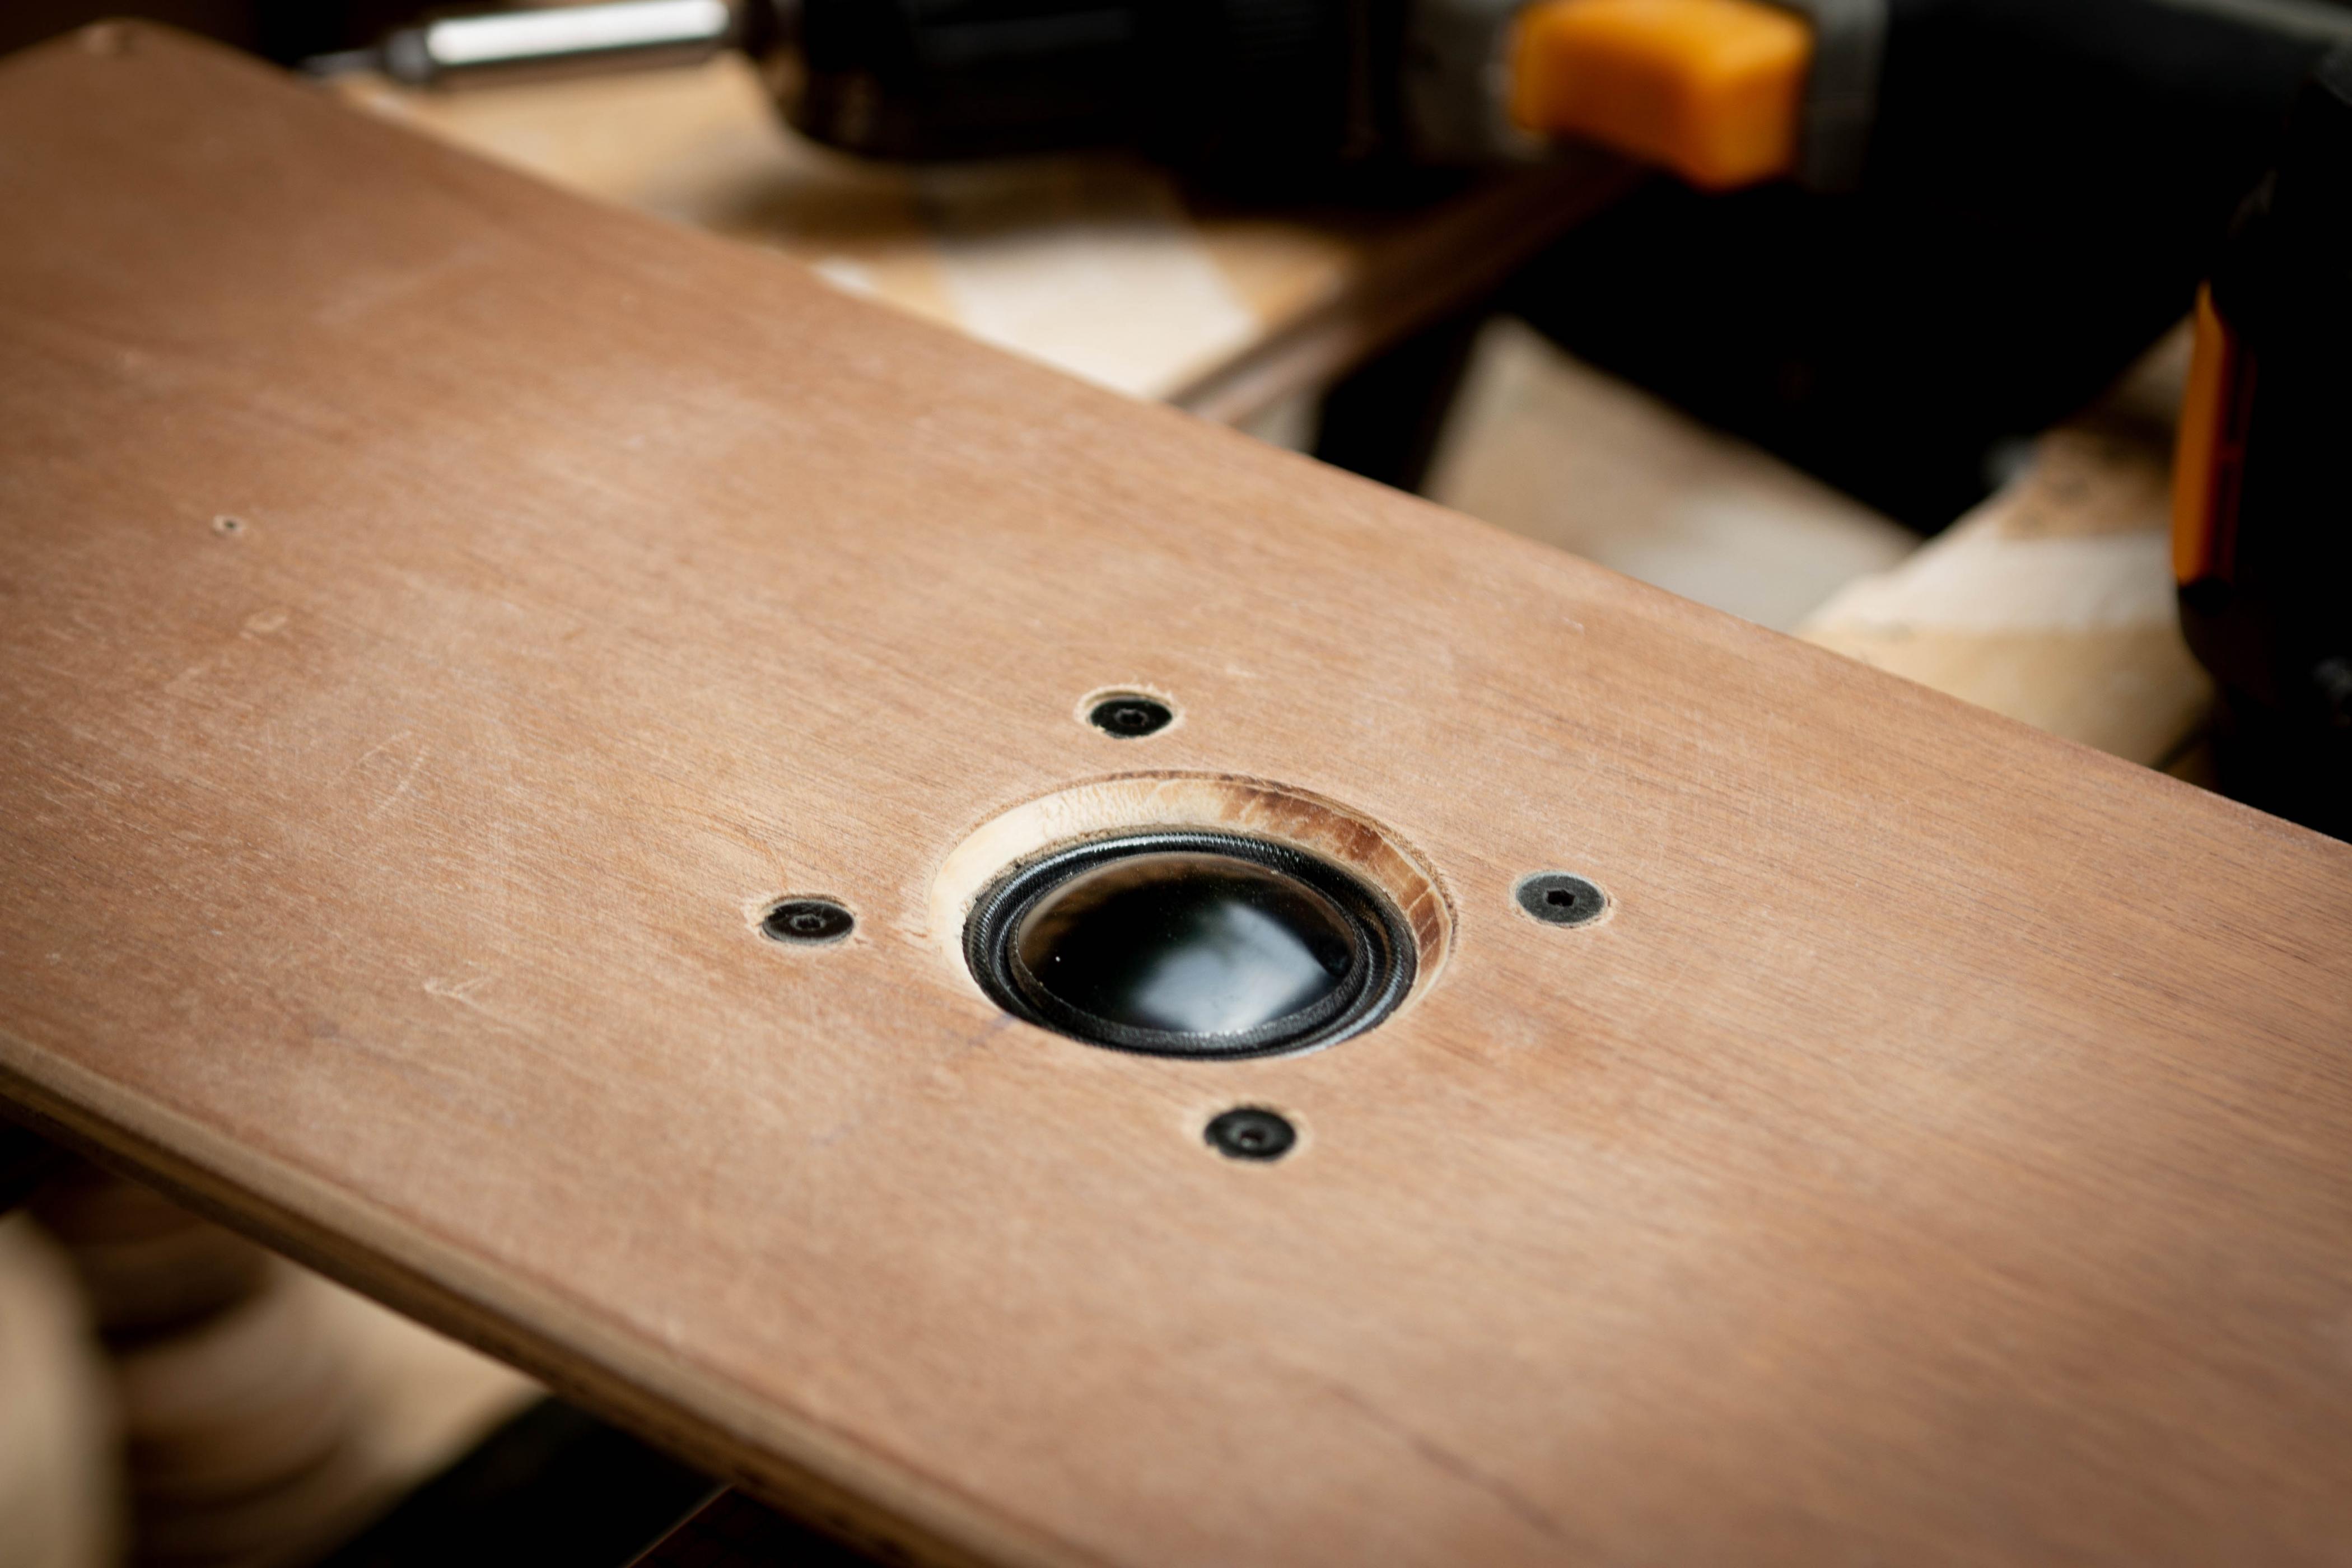
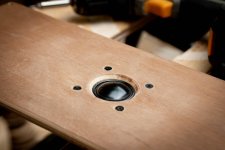
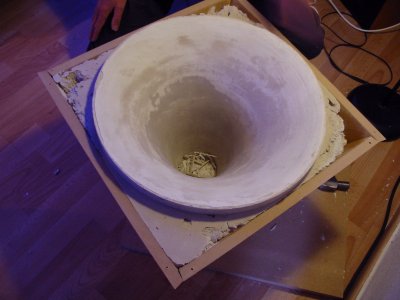
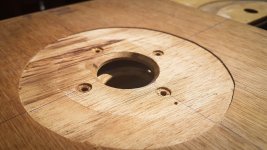
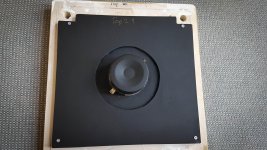
It helps to make the horn mouth out of plywood, otherwise it tends to break when you remove the back plate. For my current waveguide, i use a 45degree router bit for a 90degree opening.
First model was a 250Hz tractrix midhorn.
And more recently an oblate spherical like 10inch hf waveguide.
The material i use is plaster. It takes about 2 weeks to dry, depending on the thickness of course.
It helps to make the horn mouth out of plywood, otherwise it tends to break when you remove the back plate. For my current waveguide, i use a 45degree router bit for a 90degree opening.
Attachments


Looks nice! I like that it is well matched / finished, without being crazy fussy. What driver do you use, and what range is covered by that horn?First model was a 250Hz tractrix midhorn.
Nice. Again, what is the HF driver? It looks like a 1" dome tweeter.an oblate spherical like 10inch hf waveguide

Very clever. Thank you.
Do you have info about how you finish them? Is there any care to be taken for them lasting long time?
Last edited:
Looks nice! I like that it is well matched / finished, without being crazy fussy. What driver do you use, and what range is covered by that horn?
Nice. Again, what is the HF driver? It looks like a 1" dome tweeter.
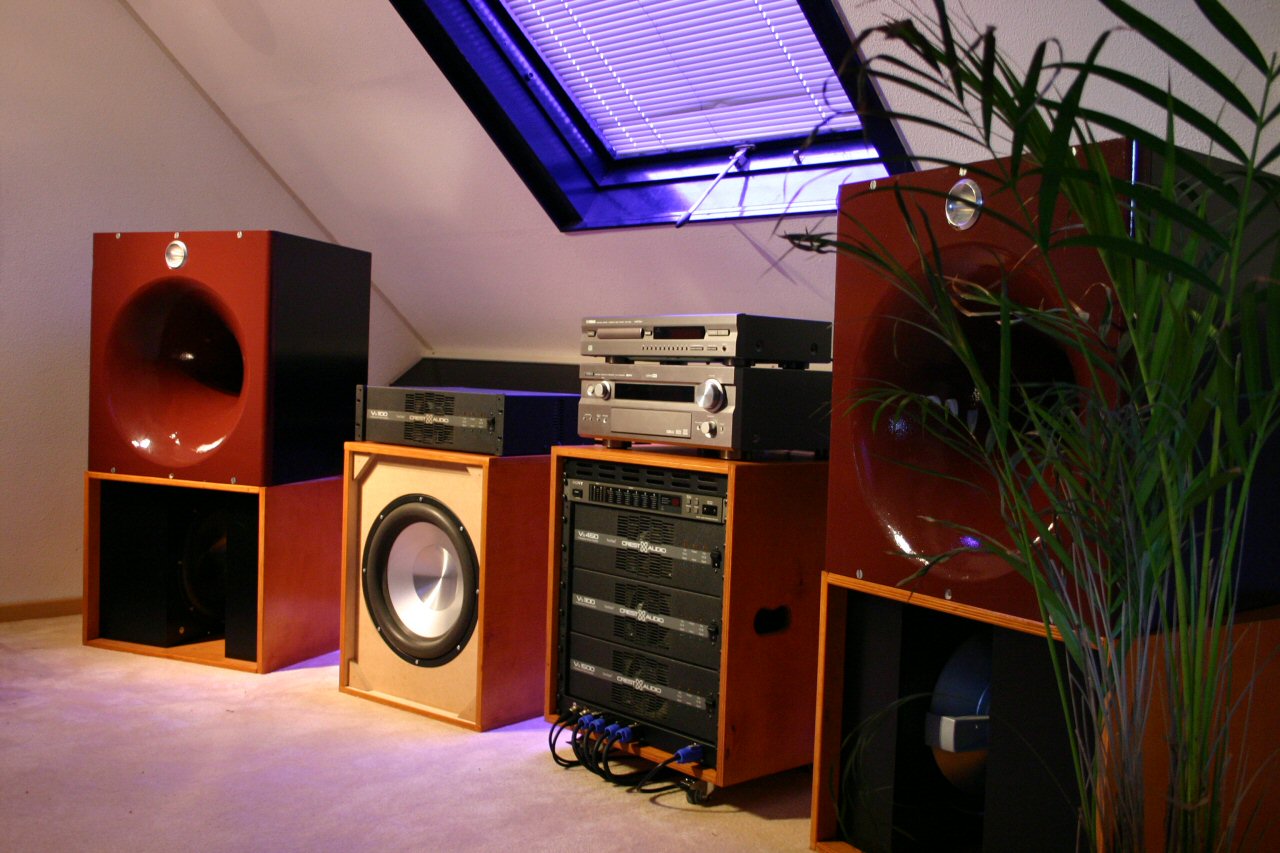
The first photograph is from my previous set (although i still have it in storage). It used a focal midrange to cover 250 - 5000Hz. It was a really massive and very heavy horn.
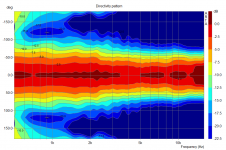
The 10" waveguide is used in my current set. It's the third version actually. You can read about it here. I changed from a B&C de250 compression driver on a dayton horn, to a DIY waveguide, to the Dayton rst-28 on a DIY waveguide (current version). Dispersion is quite even over its operating range, and about 90 degrees (-6dB).
I treat the plaster with an antiabsorbant layer first before putting on paint. Its the same what you use to treat walls which are plastered.
Very clever. Thank you.
Do you have info about how you finish them? Is there any care to be taken for them lasting long time?
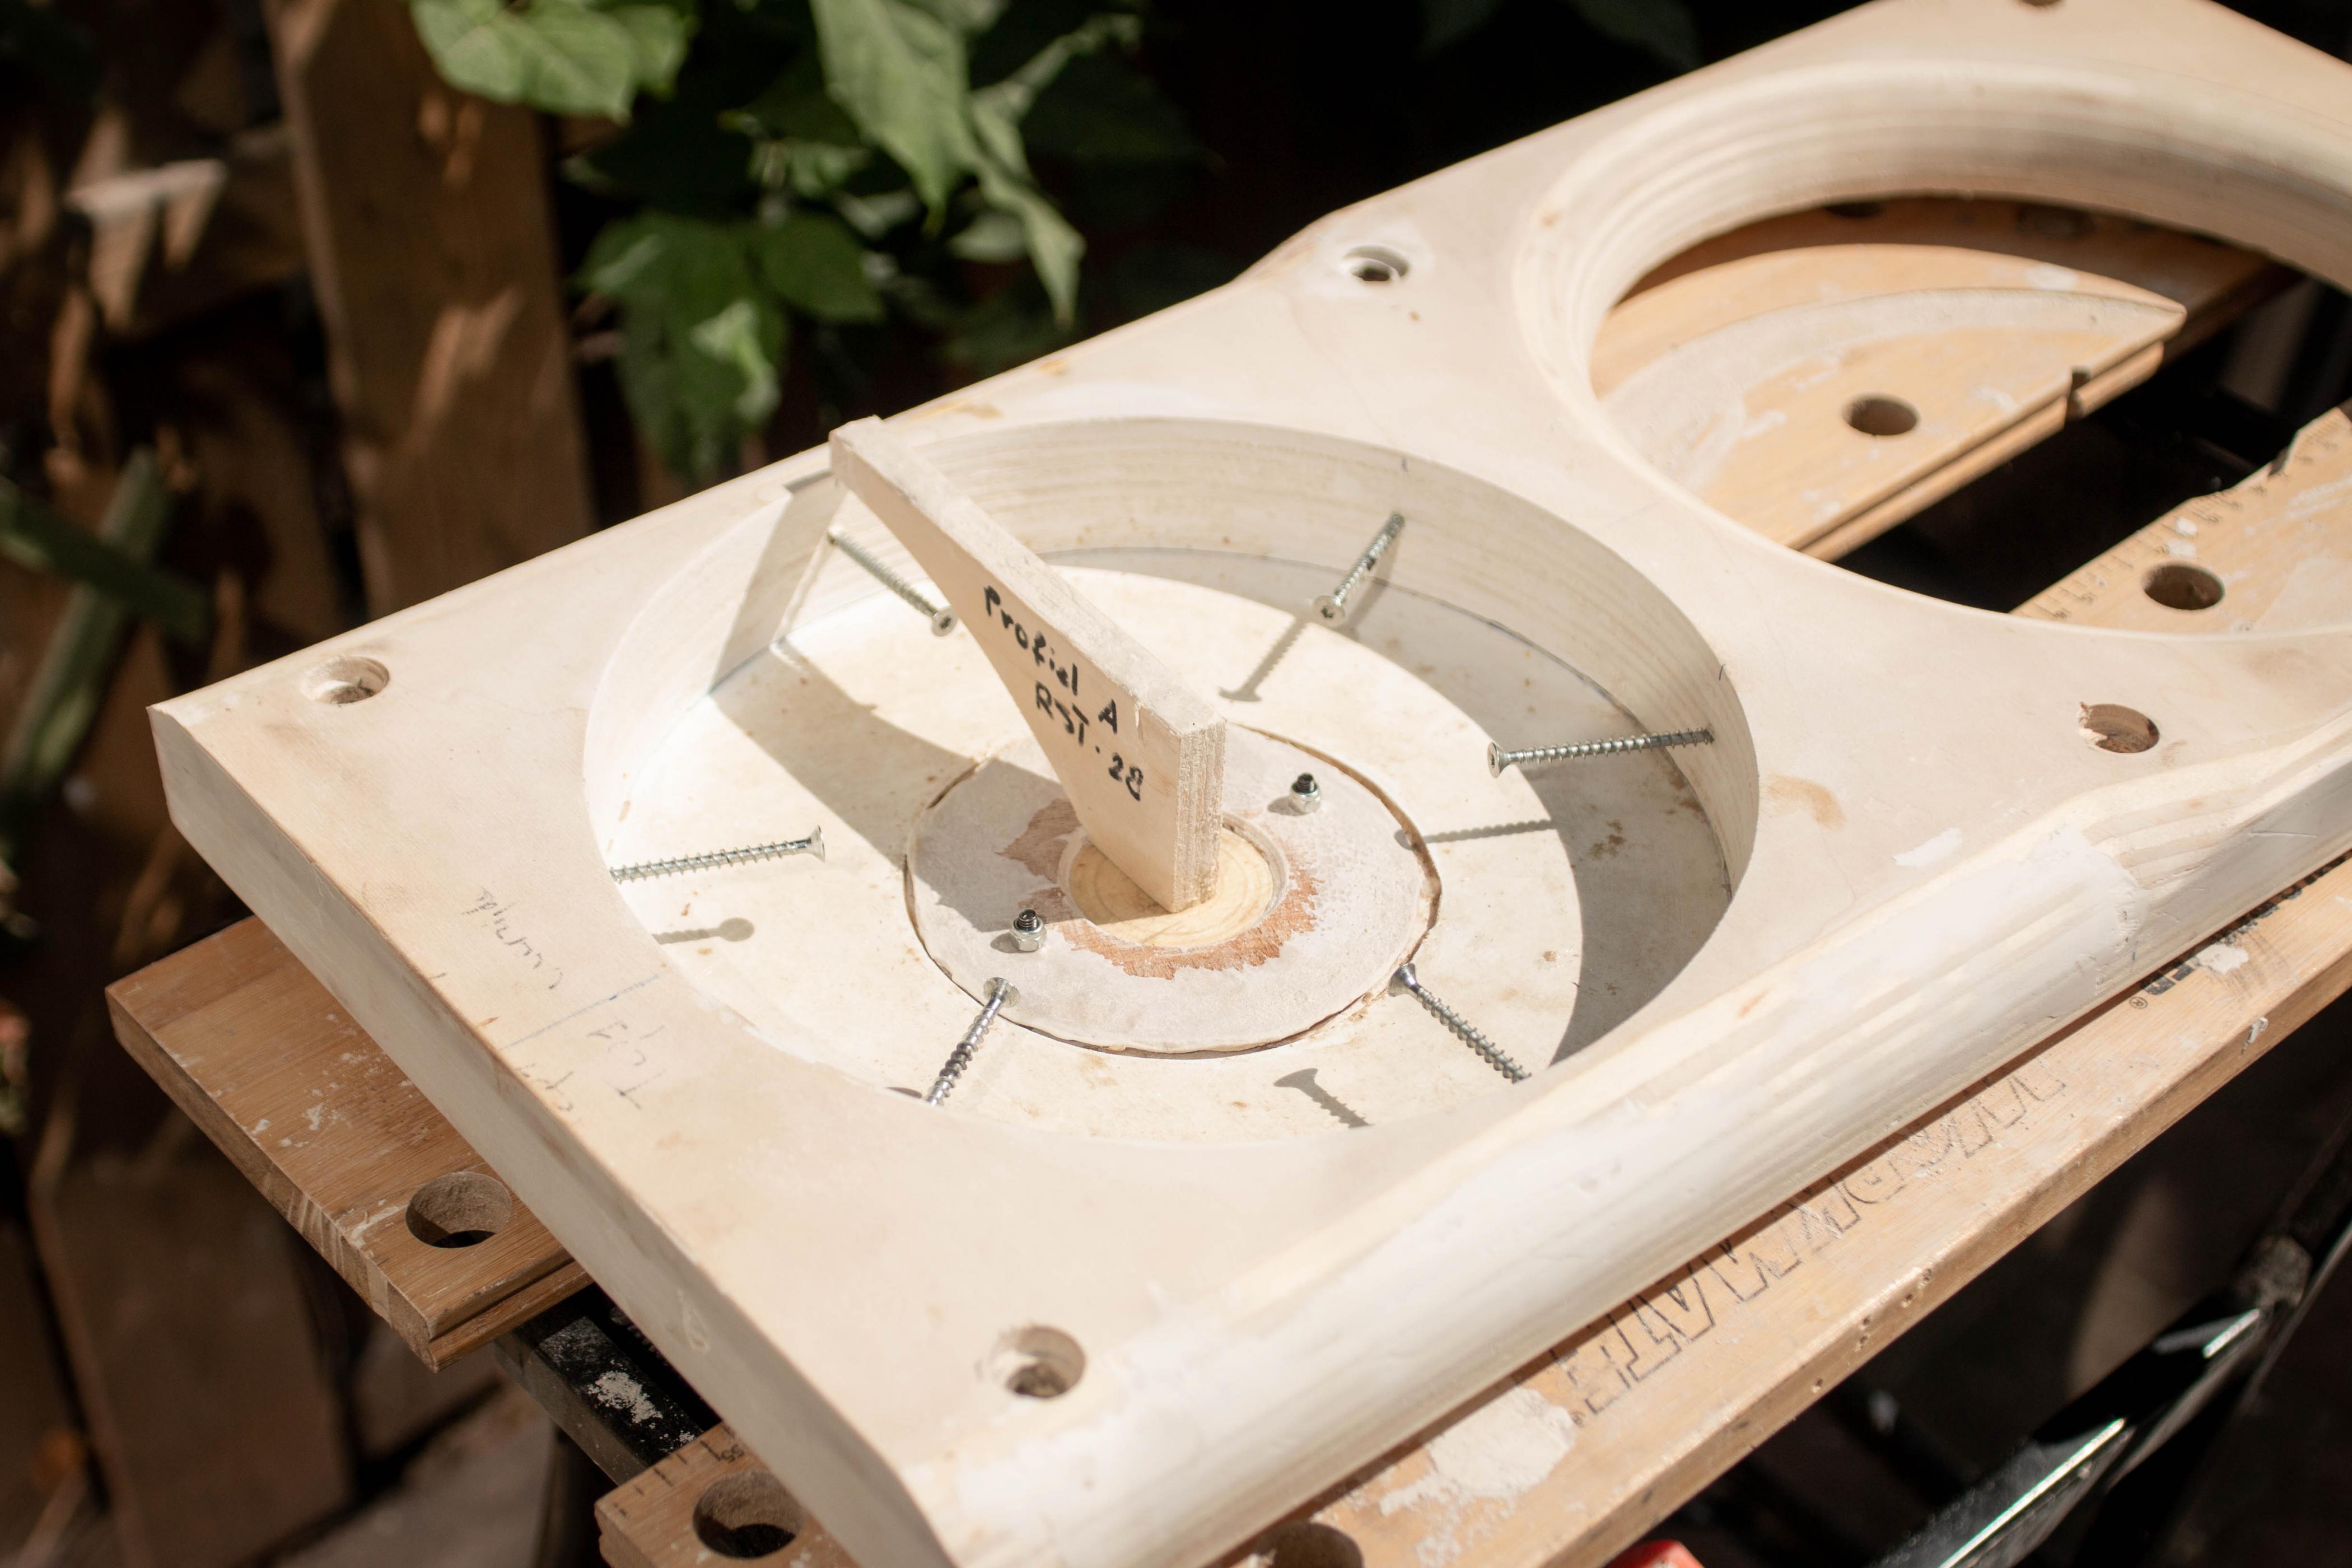
And the screws in the 3rd picture serve to support the plaster and reduce movement / cracks between plaster and baffle.
Attachments

Hello Jag,
Thanks for sharing this method.
When you tested the horns with DE250, what was the lowest crossover point that still had OK sound?
Thanks for sharing this method.
When you tested the horns with DE250, what was the lowest crossover point that still had OK sound?
Hello Jag,
Thanks for sharing this method.
When you tested the horns with DE250, what was the lowest crossover point that still had OK sound?
I'm also interested in knowing this! 🙂
The first photograph is from my previous set (although i still have it in storage). It used a focal midrange to cover 250 - 5000Hz. It was a really massive and very heavy horn.


The 10" waveguide is used in my current set. It's the third version actually. You can read about it here. I changed from a B&C de250 compression driver on a dayton horn, to a DIY waveguide, to the Dayton rst-28 on a DIY waveguide (current version). Dispersion is quite even over its operating range, and about 90 degrees (-6dB).
I treat the plaster with an antiabsorbant layer first before putting on paint. Its the same what you use to treat walls which are plastered.
And the screws in the 3rd picture serve to support the plaster and reduce movement / cracks between plaster and baffle.
this is beautiful!!!! and excellent engineering
I tried an electrical 2nd order high pass @900 hz, that was too low, resulting in excessive distortion. 1200hz was fine, probably 1100hz 4th order as well.I'm also interested in knowing this! 🙂
The Dayton tweeter is currently use, the rst28, can handle 900hz without too much distortion (of course this depends on how loud you play, but I'm not running a pa company).
Good stuff!
I had some issues with plaster and cement in the past (cracks, dents, etc). Has anyone tried a sand/epoxy mixture? I once used a layer of this stuff on the inside of a loudspeaker box. It is more durable, but it stinks.
Any experience with making smaller waveguides?
I had some issues with plaster and cement in the past (cracks, dents, etc). Has anyone tried a sand/epoxy mixture? I once used a layer of this stuff on the inside of a loudspeaker box. It is more durable, but it stinks.
Any experience with making smaller waveguides?
Last edited:
Nice work.
Did you sim the waveguide? Did I miss where you mentioned that? How did you come up with the curve?
Did you sim the waveguide? Did I miss where you mentioned that? How did you come up with the curve?
Nice work.
Did you sim the waveguide? Did I miss where you mentioned that? How did you come up with the curve?
Mostly trial and error. It boiles down to a oblate spherical profile with a very large roundover to the baffle/mouth. I tried different profiles for the throat, 45degree straight beginning worked best 🙂
- Home
- Loudspeakers
- Multi-Way
- Low budget and easy method for DIY waveguide