Mark,
Thanks for sharing the vagaries of high end audio engineering and design. Very impressive!
Best,
Anand.
Thanks for sharing the vagaries of high end audio engineering and design. Very impressive!
Best,
Anand.
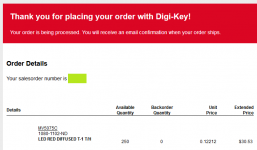
I just ordered qty=250 pieces of the MV5075C LED from an authorized distributor (DigiKey) and I'm confident these are not counterfeit. I paid USD 0.122 per piece, which is almost exactly 8 LEDs per USDollar.
These are used in the "Mountain View" input stage daughter card of the M2X amplifier.
I'd be glad to let other hobbyists have some of these at my cost, including my cost of postage and mailer envelope. If anyone wants to be a local re-distributor in parts of the world where Mouser doesn't sell the MV5075C (so far we know that Portugal and Finland are on this list), that would be a wonderful thing. Otherwise, small quantities only please. PM me with your needs and to get my PayPal info.
I estimate that shipping within the USA costs $4.50 and shipping outside the USA costs $14.50. Throw in the envelope and its 5 & 15.
~
Attachments
Last edited:
Hello,
First channel is soldered, pretty easy to work with nice layout that isn't so tight. Since this LED-episode seems to come surprisingly expensive, I soldered "Tucson" to start up with SMD opamp (Texas Instrument). This time I bought some boutique resistors, don't know is there any other reason that they look really nice. Part count is so low that wasn't expensive choice.
I don't have suitable heatsinks for this project, I'm going to make monoblock build. What is recommended size, rather little bigger than just optimal? Where to get those in EU? 300 X 40 H 210 mm 0,18 C°/W, too much oversized?
Missing parts:
- Second trafo from Toroidy.pl
- PSU caps
- Heatsinks
- Casework
So long way to working amplifier 🙂
Last edited:
Other possible option would be using two of these:
Dissipante 3U 400mm frontale 10mm NERO coperchi e retro in alluminio 3mm
Is there enough cooling capacity?
Dissipante 3U 400mm frontale 10mm NERO coperchi e retro in alluminio 3mm
Is there enough cooling capacity?
I also included (socketed) load resistors to see whether the input stage's performance degraded whe driving the ~600 ohm input impedance of the Edcor transformer + output stage components.
600ohm impedance? How did you calculate this?
more than adequate for monoblocks
you can go even smaller
Hi ZM!
Did you meant 2pcs of those deep 3u's or those 300x40x210mm's?
Thanks 🙂
post link or their article number
Dissipante 3U 400mm frontale 10mm NERO coperchi e retro in alluminio 3mm
that's the same you already posted , and I confirmed - as more than enough for one case per channel
besides , remember that "U" is industrial unit for package height , where one U=44mm
so , you can't use it to ask me about deepness , 'couse then I'm confused (well , even more than usual)
besides , remember that "U" is industrial unit for package height , where one U=44mm
so , you can't use it to ask me about deepness , 'couse then I'm confused (well , even more than usual)
ZM, yes. I had two questions about case/heatsinks in a row, other one with link. So I wasn't sure which one you meant without a quote.
oh yes , this one will be also good for one channel
Dissipante 03/300N 3U 10mm NERO
in any case , take care , when placing two output mosfets on opposite side heastinks (one per ) best to keep gate resistors close to gates
either use small pcbs for mosfet pins , pcb bolted to heatsink and place gate resistor on pcb (use veroboard for simplest solution ) or solder resistor to gate and heatshrink together pin & resistor & wire
Excuse my ignorance ZM, but if I understand correctly, is it ok in a monoblock to have amp pcb and one mosfet on one side ( one heatsink) and the other mosfet on the other side ( other heatsink) connected by wires to the pcb? That is if appropriate gate resistor is mounted close to the lone mosfet? Thus utilising both heatsinks?
oh yes , this one will be also good for one channel
Dissipante 03/300N 3U 10mm NERO
in any case , take care , when placing two output mosfets on opposite side heastinks (one per ) best to keep gate resistors close to gates
either use small pcbs for mosfet pins , pcb bolted to heatsink and place gate resistor on pcb (use veroboard for simplest solution ) or solder resistor to gate and heatshrink together pin & resistor & wire
Just to clarify for myself this monoblock issue and heatsink capacity:
while the 2 heat sinks of the 3U case are enough, one of them is NOT enough, so this cannot be accomplished with the MOSTETs soldered to PCBS that were already provided, correct?
This will require actually splitting the MOSFETs to both heat sinks by other means, right?
Thanks,
Rafa.
while the 2 heat sinks of the 3U case are enough, one of them is NOT enough, so this cannot be accomplished with the MOSTETs soldered to PCBS that were already provided, correct?
This will require actually splitting the MOSFETs to both heat sinks by other means, right?
Thanks,
Rafa.
Excuse my ignorance ZM, but if I understand correctly, is it ok in a monoblock to have amp pcb and one mosfet on one side ( one heatsink) and the other mosfet on the other side ( other heatsink) connected by wires to the pcb? That is if appropriate gate resistor is mounted close to the lone mosfet? Thus utilising both heatsinks?
I have done this once earlier on my first diy-attempt, just like ZM told, and worked like a charm.
Project | Homebuilt Hi-Fi - A user submitted image showcase of high quality home built hi-fi components.
Great, gives lots of layout options and potentially quite compact monoblocks 🙂
I have done this once earlier on my first diy-attempt, just like ZM told, and worked like a charm.
Project | Homebuilt Hi-Fi - A user submitted image showcase of high quality home built hi-fi components.
QUOTE: I also included (socketed) load resistors to see whether the input stage's performance degraded whe driving the ~600 ohm input impedance of the Edcor transformer + output stage components.
600ohm impedance? How did you calculate this?
See the third attachment to post #1, of this diyAudio thread: LINK Also see the measurements by Nelson Pass in post #27 of the same thread. The Cinemag transformer and the Jensen transformer have lower turns ratios than the Edcor, thus higher input impedances. This also results in lower "gain" (Vout/Vin).
The superdriver mention in post #20 of that thread, back in March, is now known as "Norwood" -- publicly unveiled in late April / early May.
Last edited:
- Home
- Amplifiers
- Pass Labs
- The diyAudio First Watt M2x