Platform: Ubuntu 10.04
CNC Software: EMC2 PCB CNC software
PCB CAD: Eagle PCB CAD
Gcode Translator/Generator: PCB Gcode
Construction Pics...
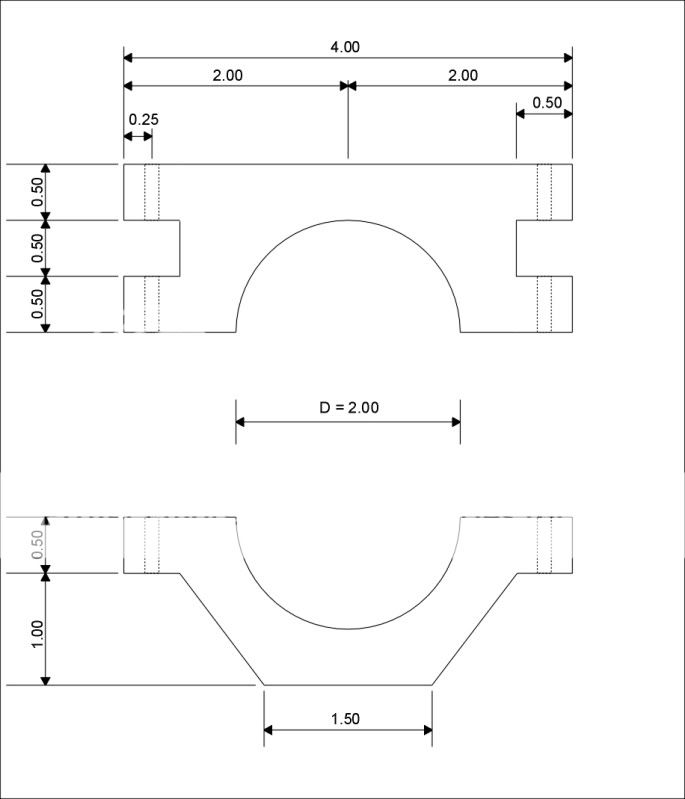
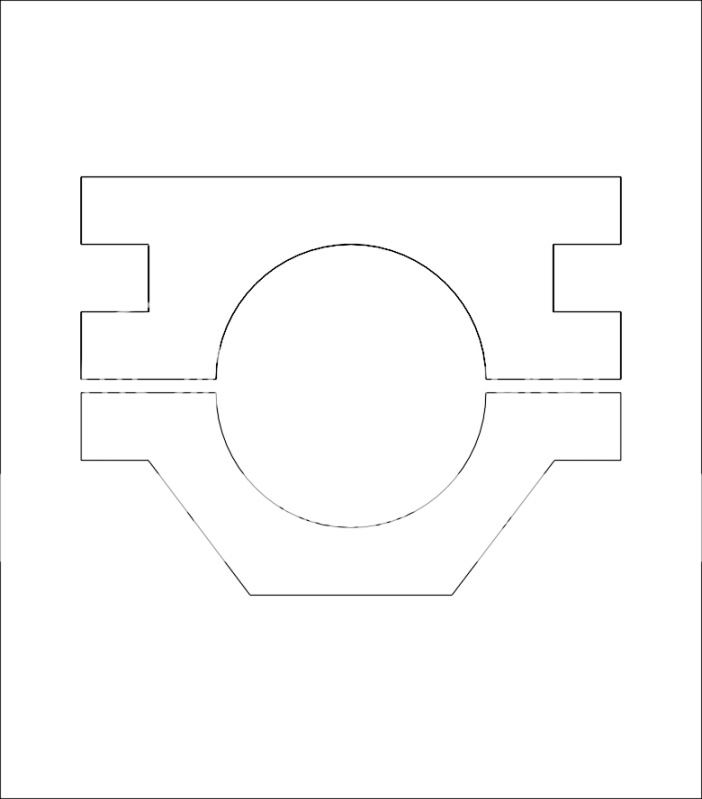
Spindle Holder design:
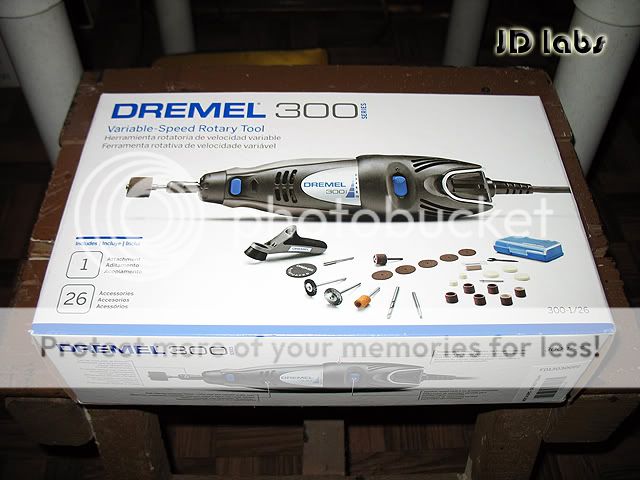
Spindle: Dremel 300
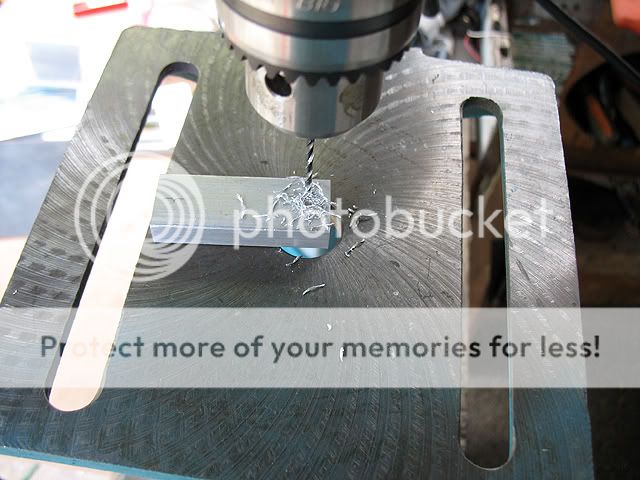
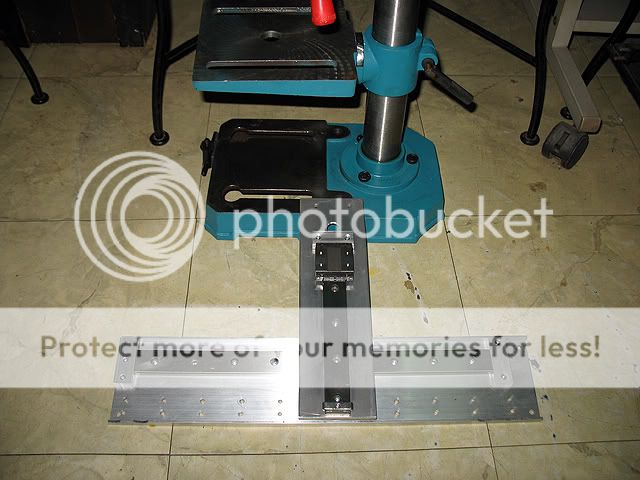
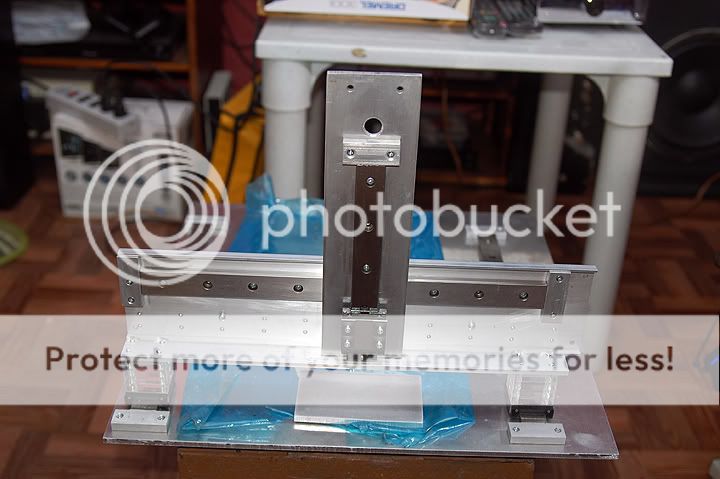
Building the base...
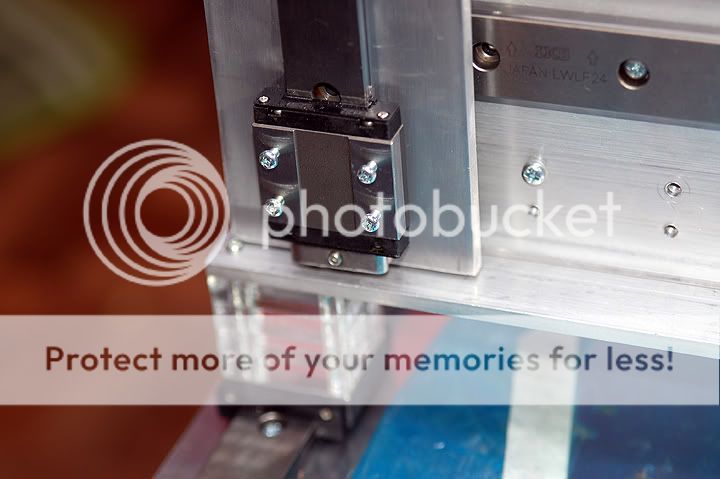
Installing the linear guides for the Y-axis...
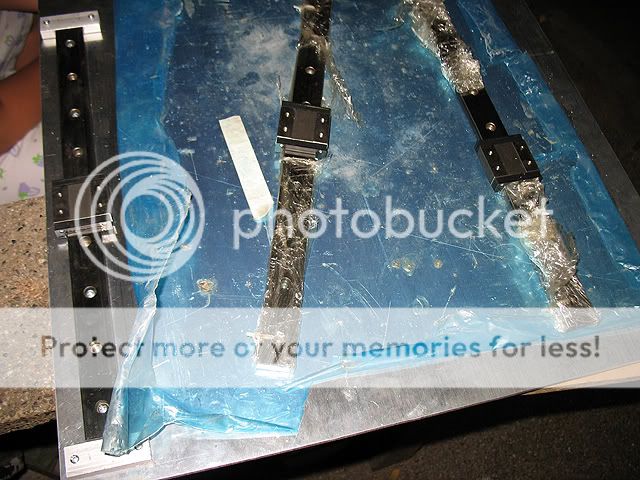
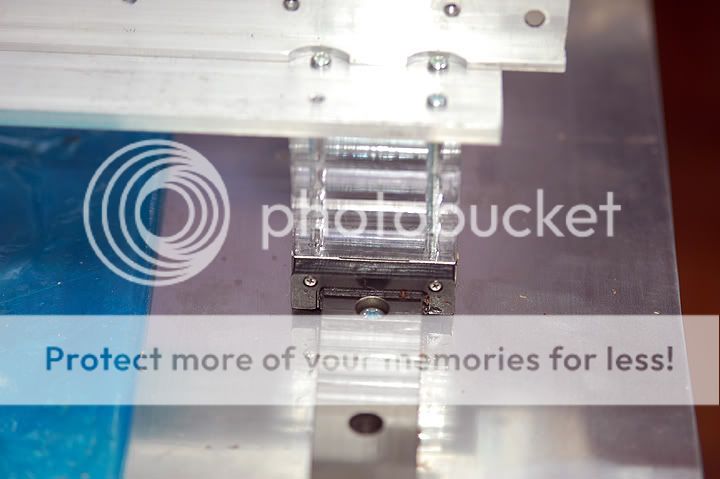
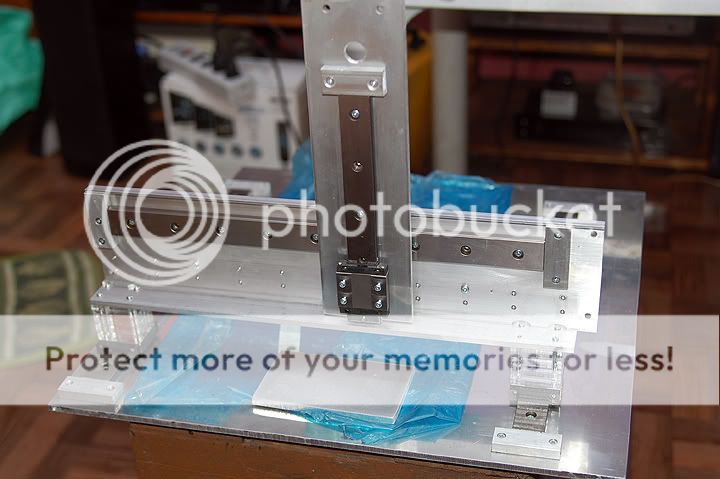
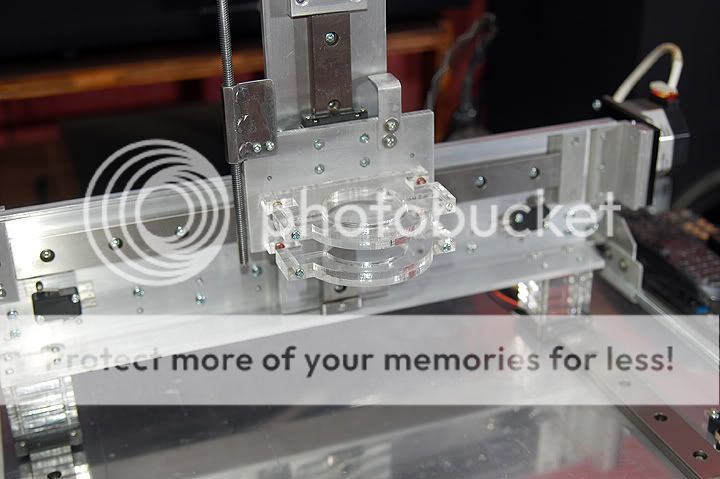
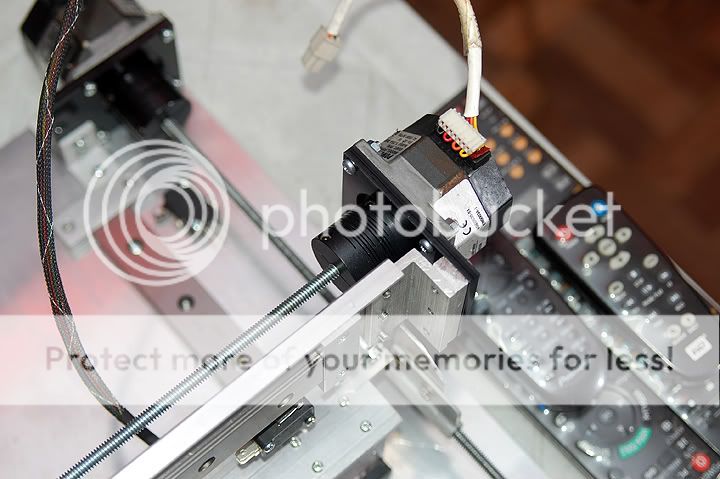
X and Z axis linear guides...
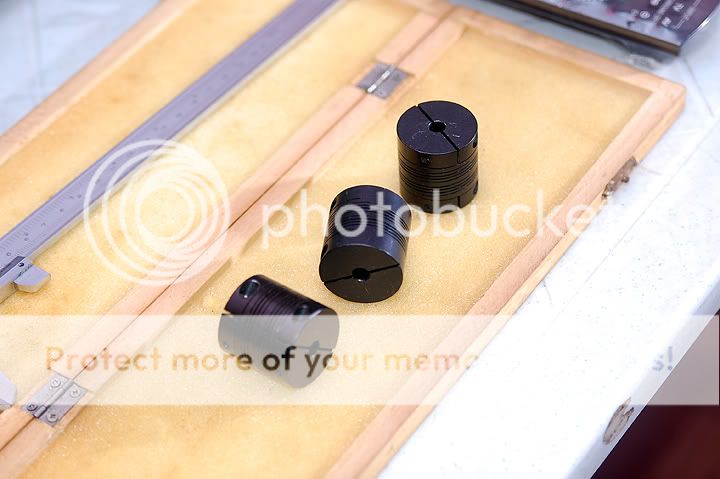
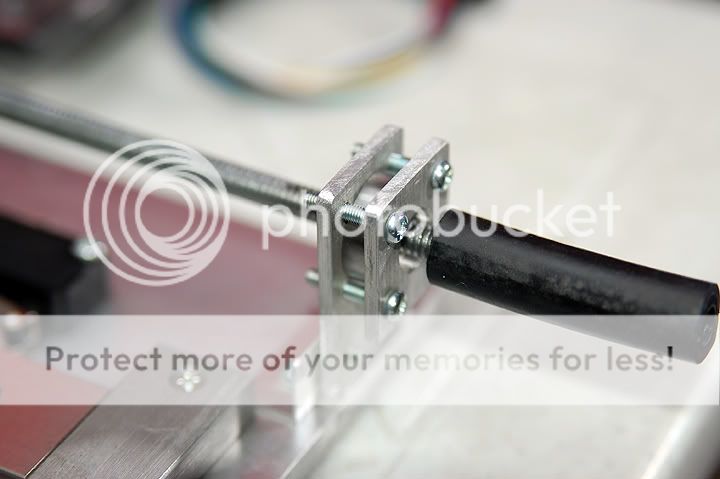
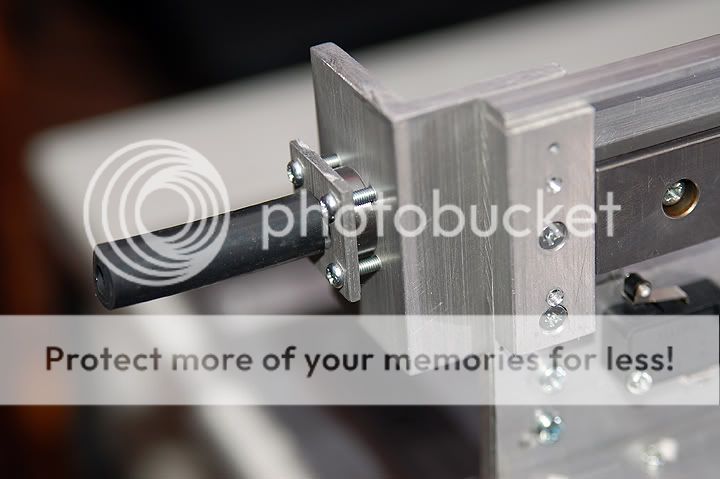
Zero backlash stepper motor couplings...
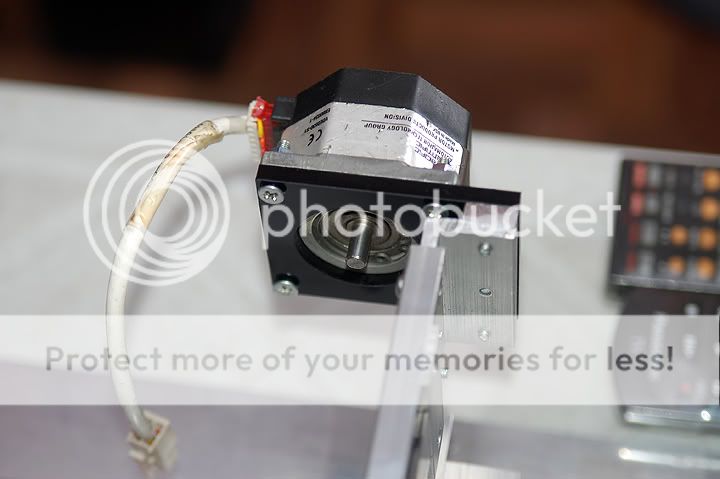
NEMA 23 stepper motor mounts...
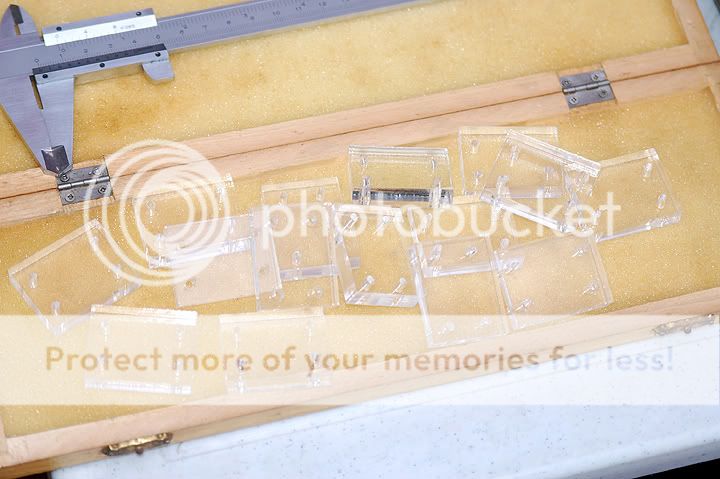
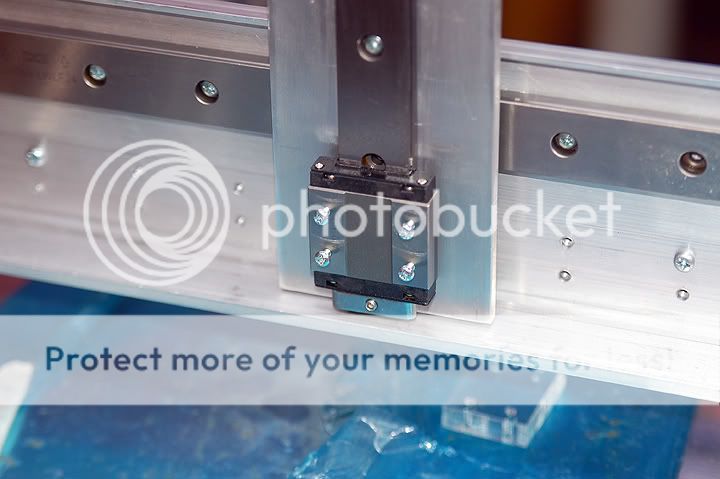
Laser cut engineering plastic spacers...

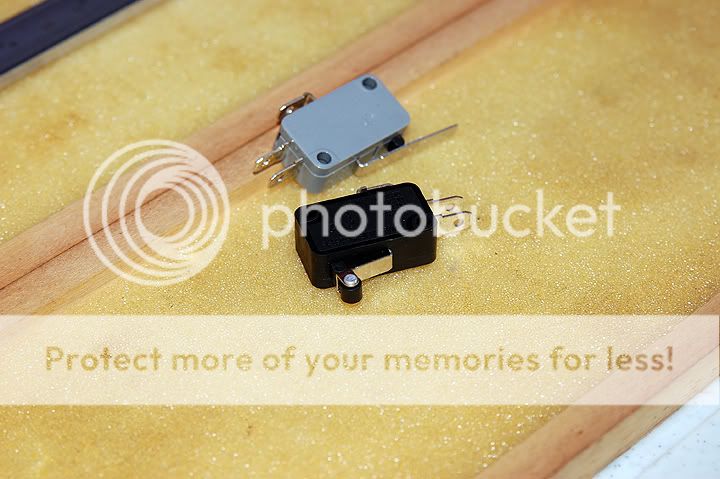
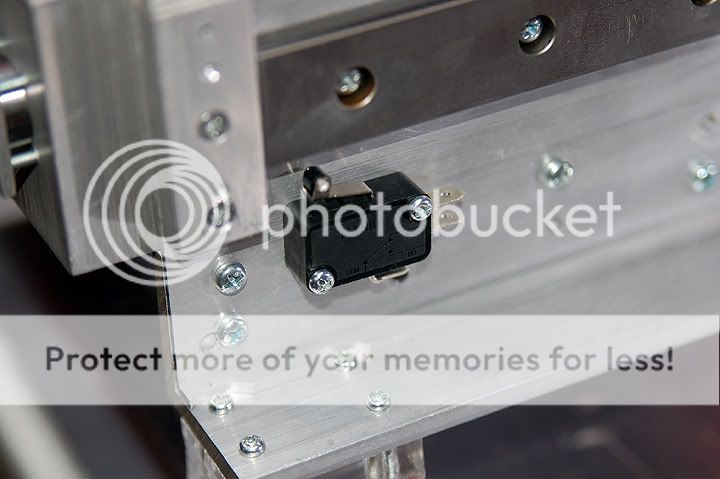
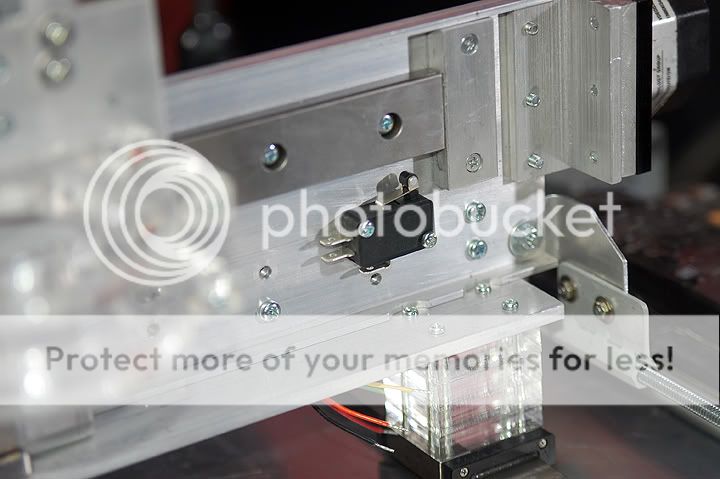
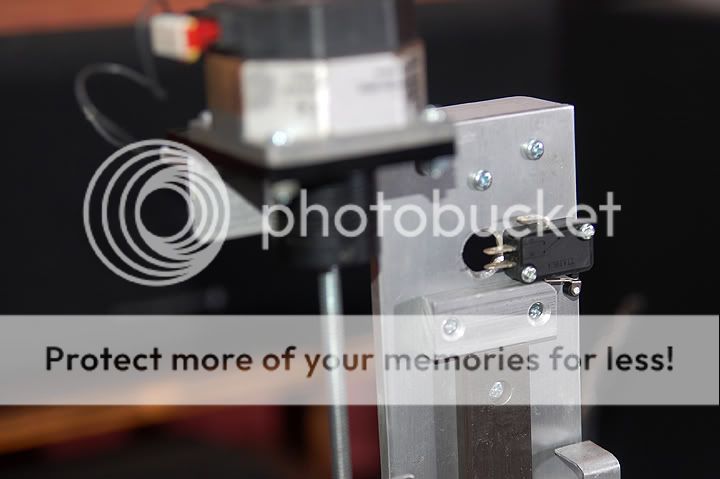
Assorted limit switches...
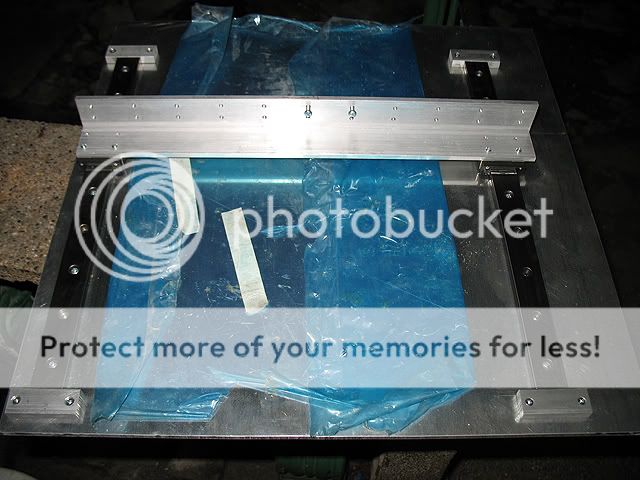
X and Y axis mounted with the spacers...
Making sure the Z-axis is perfectly squared with the X-axis...
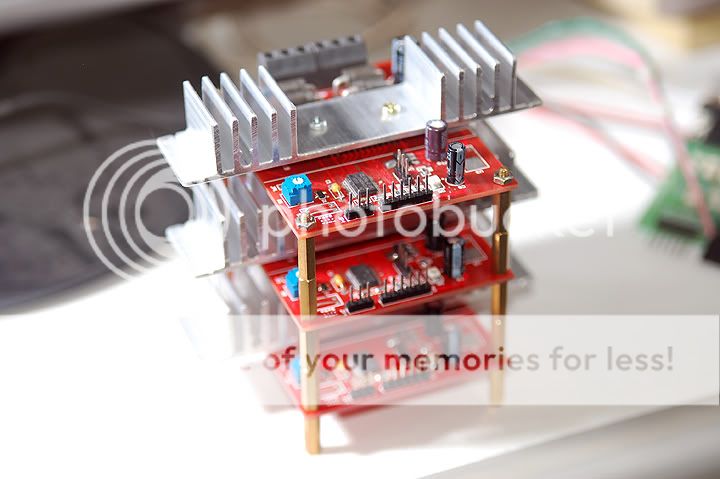
3-Axis micro-stepping stepper motor drivers...
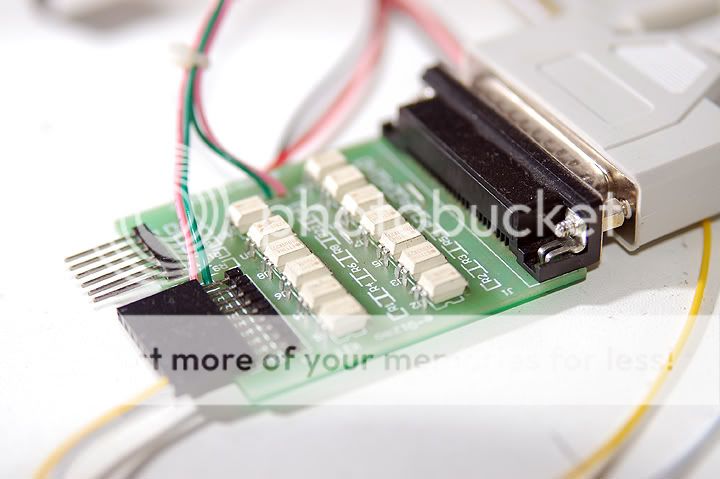
The photo-isolated parallel port breakout board...
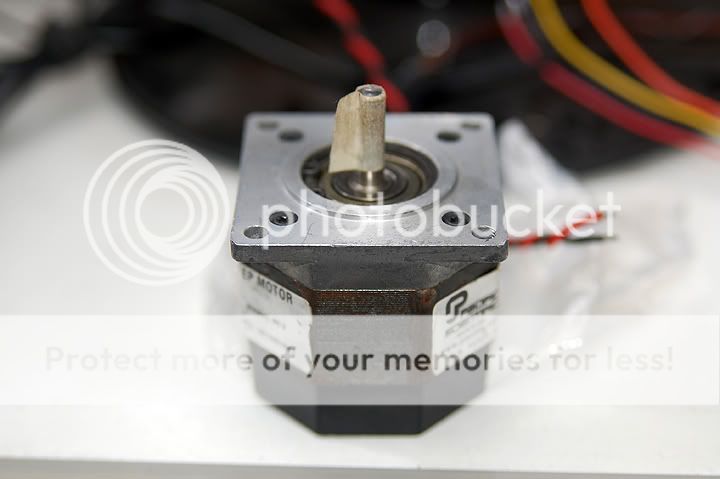
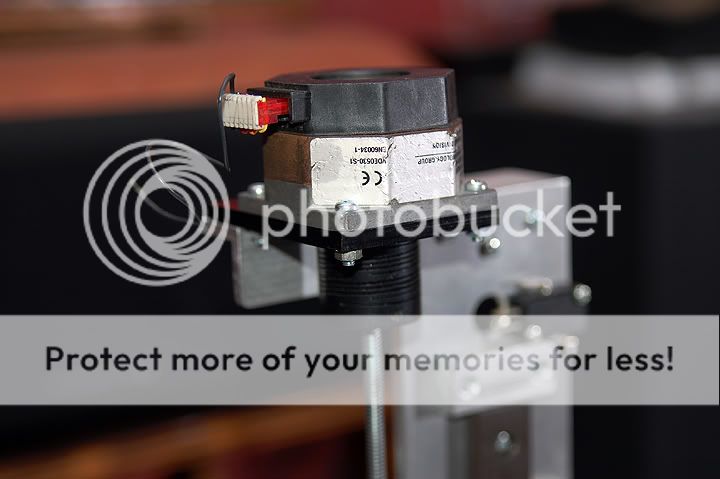
one of three NEMA 23 sized stepper motors from Pacific Scientific...
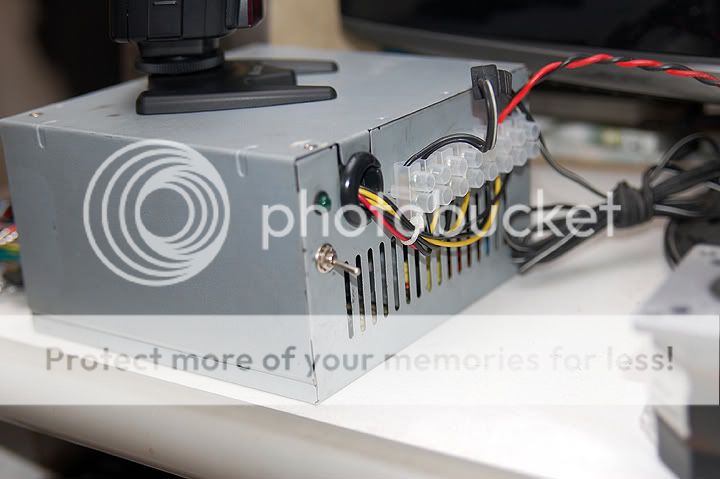
pimped and modified pc psu for 12V and 5V supply source...
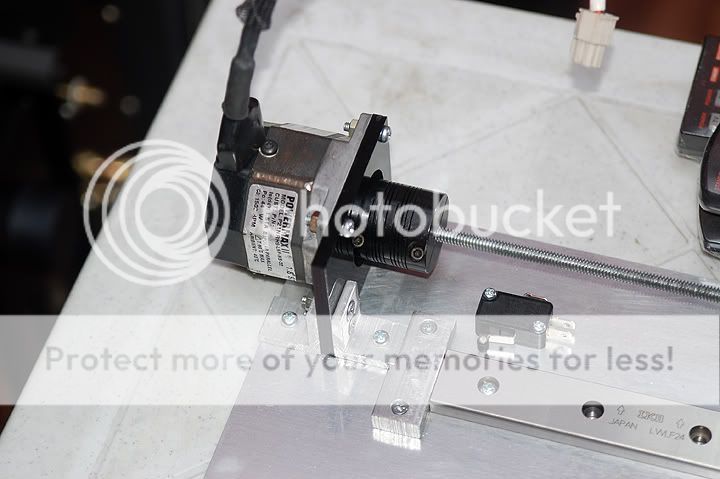
Ball bearings to prevent leadscrew end-play...

Installing the stepper motors and lead screws...

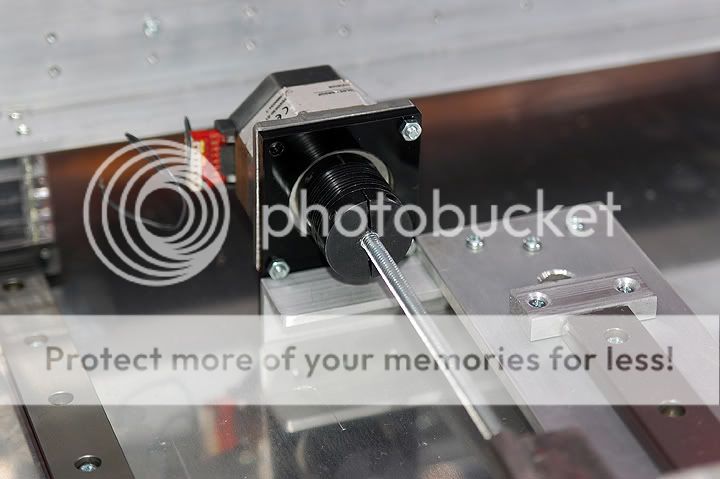
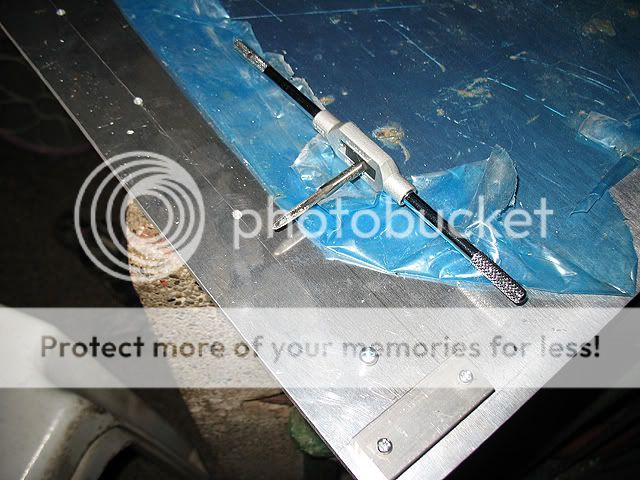
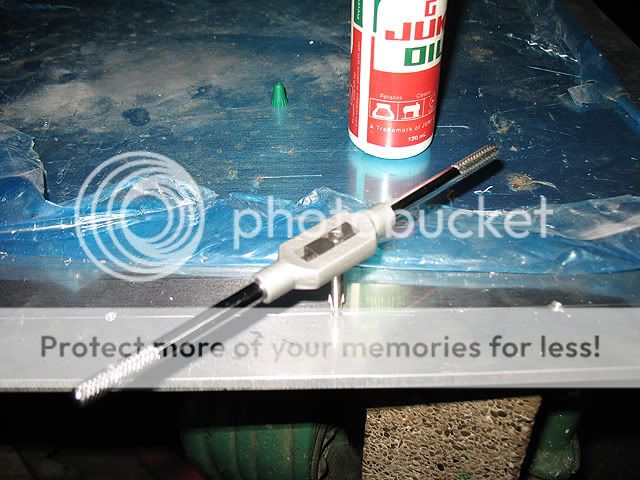
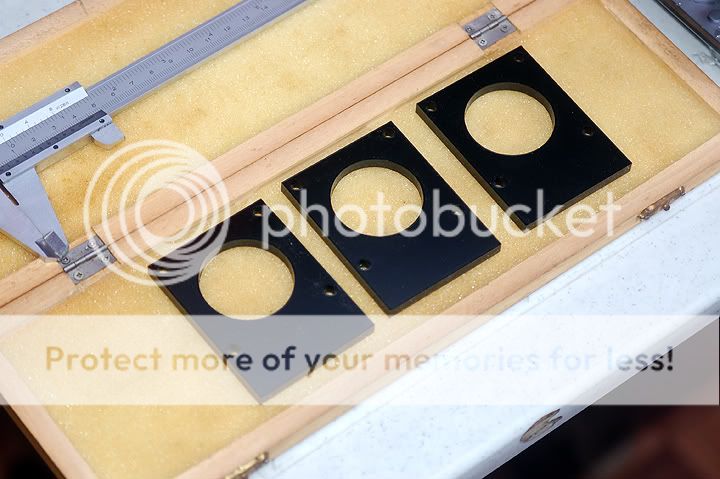
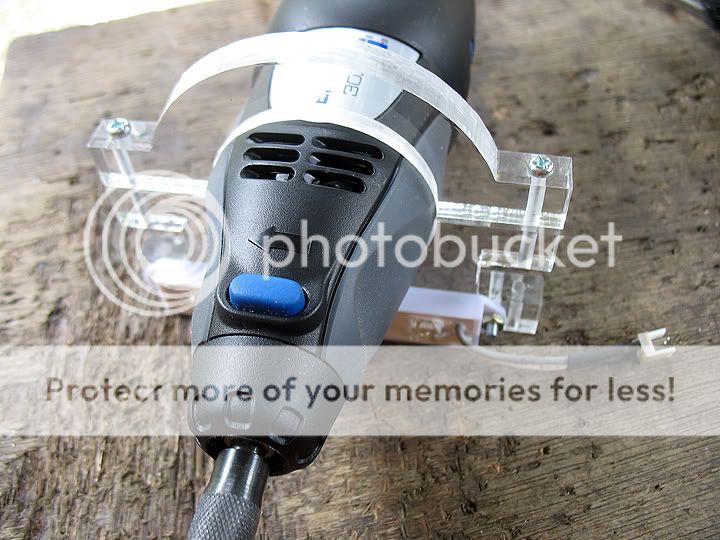
Laser cut spindle mounts...
Installed the roller bearings with a piece of aluminum as diy bushings...
Installing the limit switches...
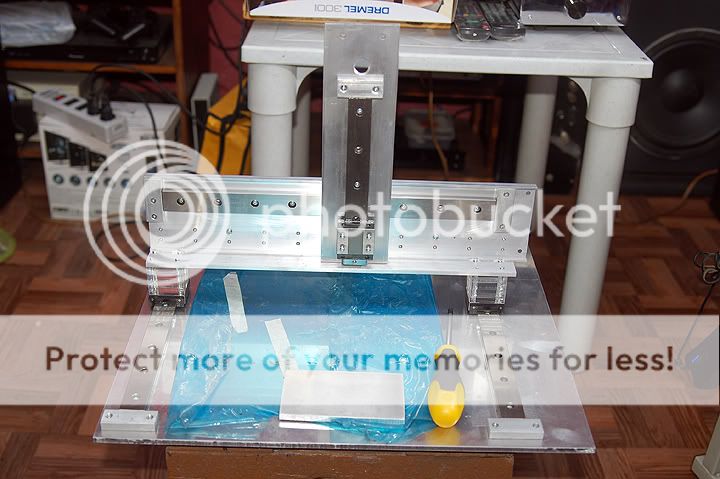
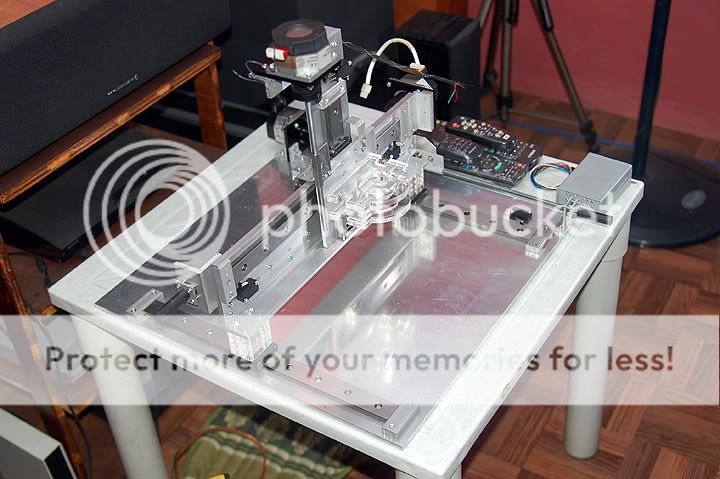
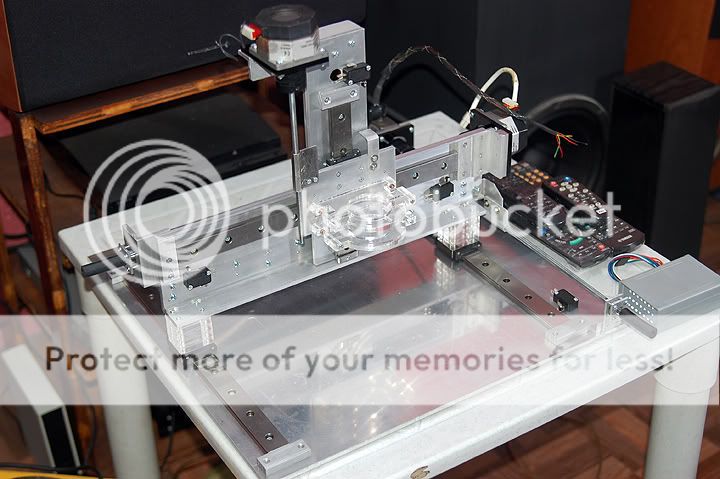
Almost there!!!
And my son inspecting the outcome of the project... ;D


CNC Software: EMC2 PCB CNC software
PCB CAD: Eagle PCB CAD
Gcode Translator/Generator: PCB Gcode
Construction Pics...
Spindle Holder design:
Spindle: Dremel 300
Building the base...
Installing the linear guides for the Y-axis...
X and Z axis linear guides...
Zero backlash stepper motor couplings...
NEMA 23 stepper motor mounts...
Laser cut engineering plastic spacers...
Assorted limit switches...
X and Y axis mounted with the spacers...
Making sure the Z-axis is perfectly squared with the X-axis...
3-Axis micro-stepping stepper motor drivers...
The photo-isolated parallel port breakout board...
one of three NEMA 23 sized stepper motors from Pacific Scientific...
pimped and modified pc psu for 12V and 5V supply source...
Ball bearings to prevent leadscrew end-play...
Installing the stepper motors and lead screws...
Laser cut spindle mounts...
Installed the roller bearings with a piece of aluminum as diy bushings...
Installing the limit switches...
Almost there!!!
And my son inspecting the outcome of the project... ;D
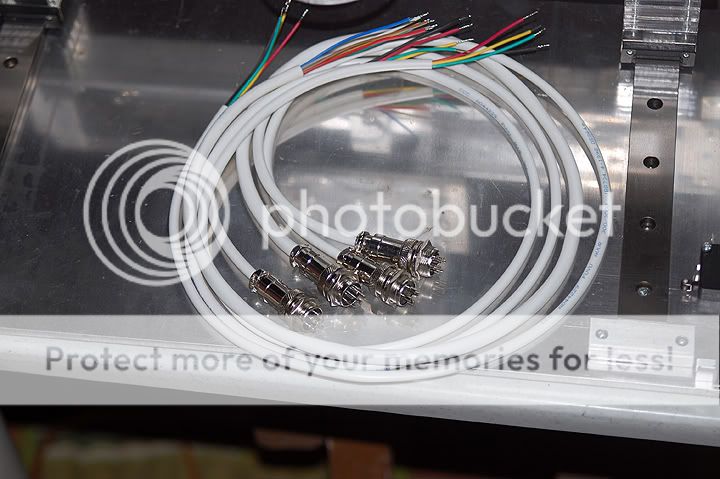
Motor wiring harness...
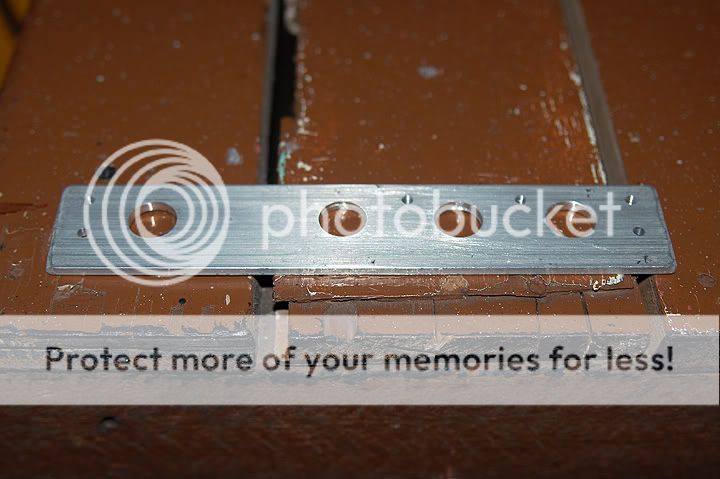
Holder for the connectors...
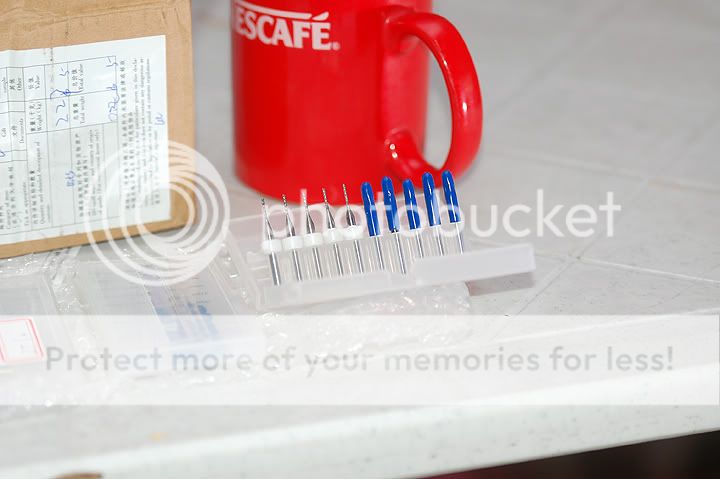
Got some endmills and drill bits from eBay...
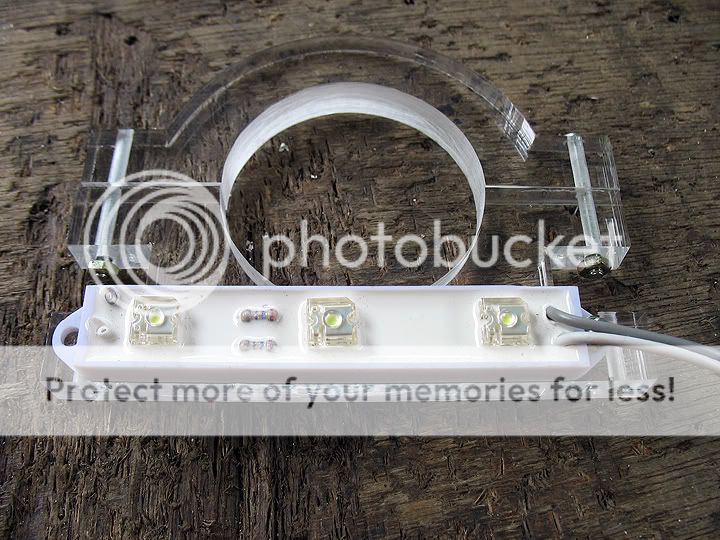
Also installed some high-bright LEDs attached on the spindle mounts to illuminate the work piece...
PCB holders and retainers from scrap aluminum...
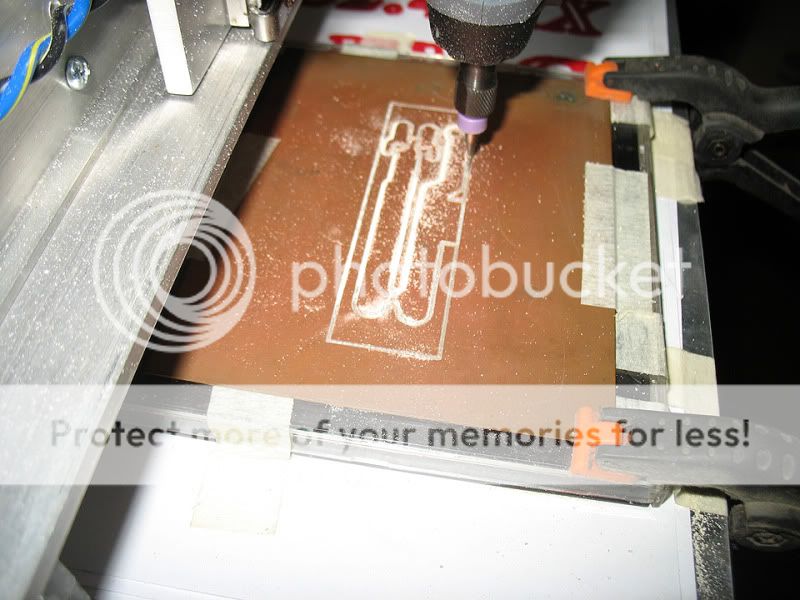
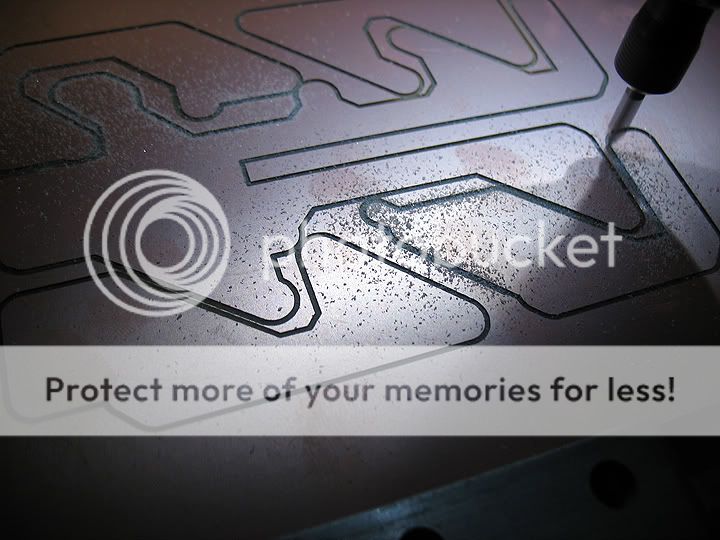
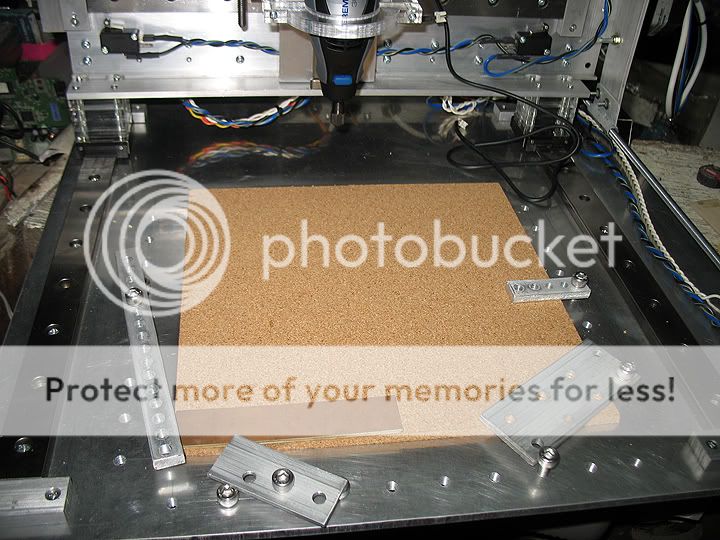
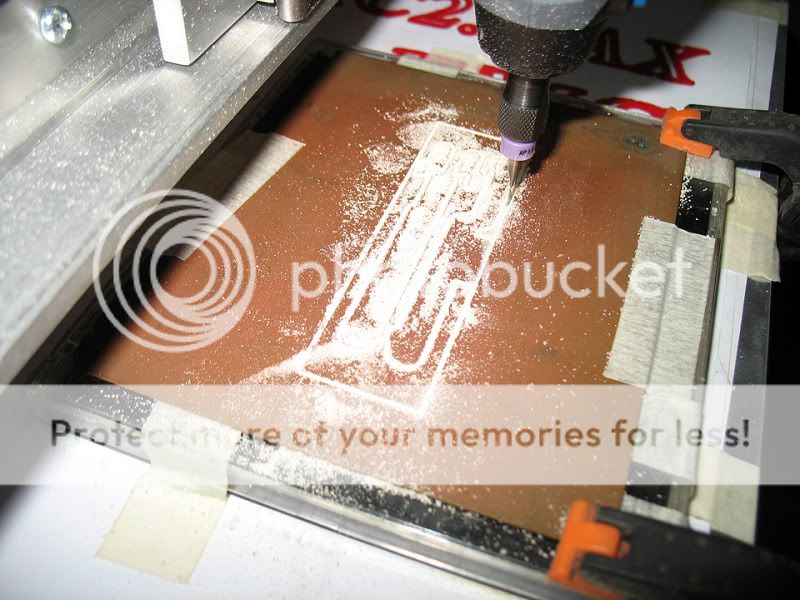
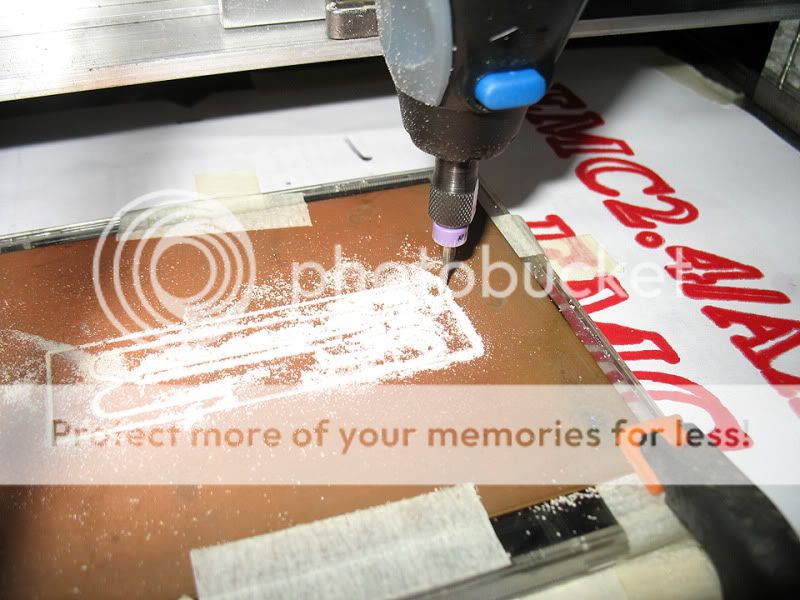
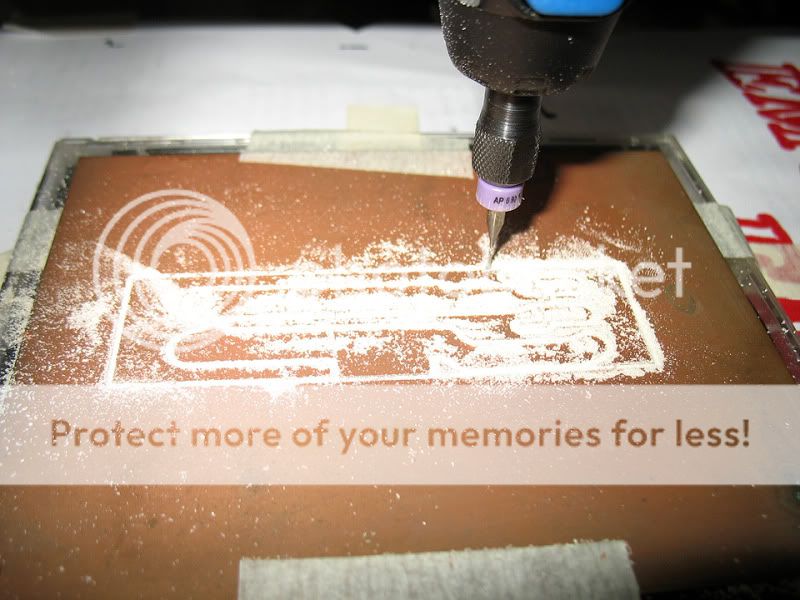
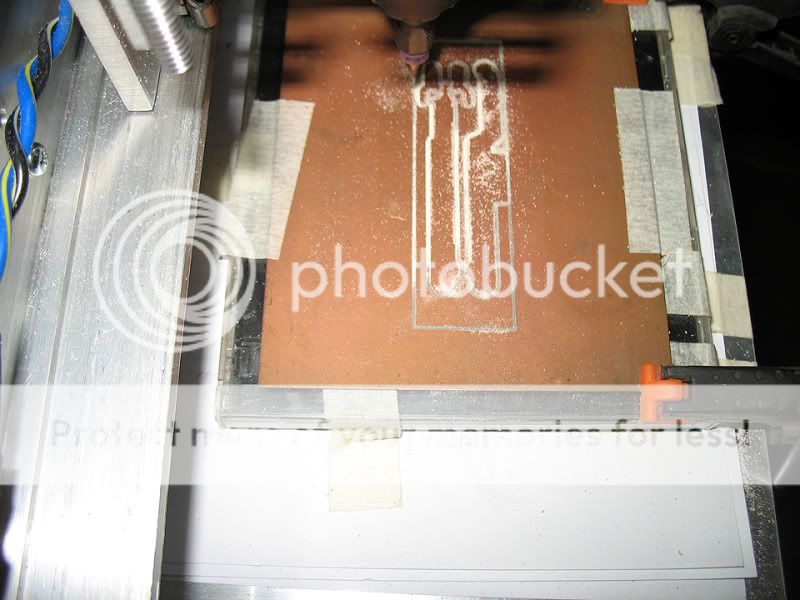
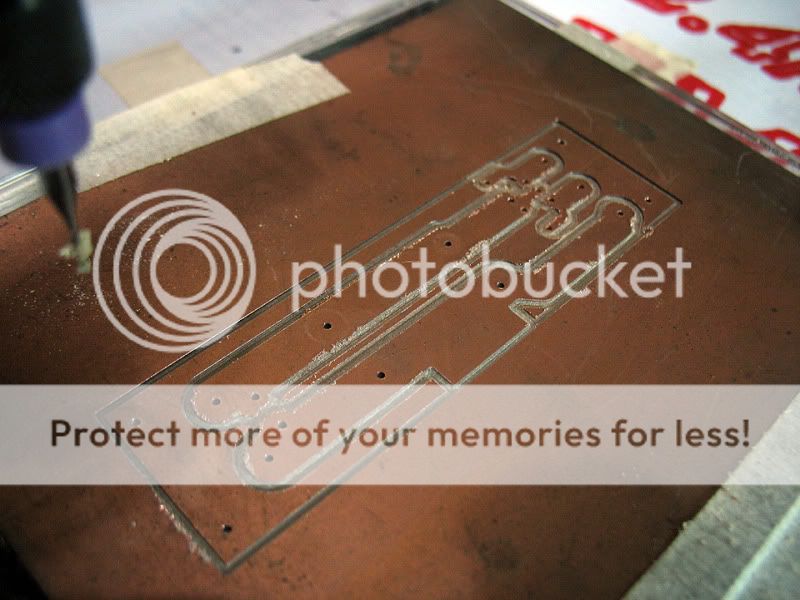
And time for some PCB Milling!!!
Here are some videos, forgive the blurry quality and poor lighting though...
Stepper Motor pre-test: http://www.youtube.com/watch?v=RTJ032-n_U0
Pen Pre-Testing: http://www.youtube.com/watch?v=X8In1cJoiPc&feature=related
Milling video 1: http://www.youtube.com/watch?v=y9kv77lQx7U
Milling video 2: http://www.youtube.com/watch?v=IdoufqYjh_E
Cheers!
An externally hosted image should be here but it was not working when we last tested it.
Holder for the connectors...
An externally hosted image should be here but it was not working when we last tested it.
Got some endmills and drill bits from eBay...
An externally hosted image should be here but it was not working when we last tested it.
An externally hosted image should be here but it was not working when we last tested it.
An externally hosted image should be here but it was not working when we last tested it.
Also installed some high-bright LEDs attached on the spindle mounts to illuminate the work piece...
An externally hosted image should be here but it was not working when we last tested it.
An externally hosted image should be here but it was not working when we last tested it.
An externally hosted image should be here but it was not working when we last tested it.
PCB holders and retainers from scrap aluminum...
An externally hosted image should be here but it was not working when we last tested it.
And time for some PCB Milling!!!
An externally hosted image should be here but it was not working when we last tested it.
An externally hosted image should be here but it was not working when we last tested it.
An externally hosted image should be here but it was not working when we last tested it.
An externally hosted image should be here but it was not working when we last tested it.
An externally hosted image should be here but it was not working when we last tested it.
Here are some videos, forgive the blurry quality and poor lighting though...
Stepper Motor pre-test: http://www.youtube.com/watch?v=RTJ032-n_U0
Pen Pre-Testing: http://www.youtube.com/watch?v=X8In1cJoiPc&feature=related
Milling video 1: http://www.youtube.com/watch?v=y9kv77lQx7U
Milling video 2: http://www.youtube.com/watch?v=IdoufqYjh_E
Cheers!
Very nice work. Watch the duty cycle on that dremel. I've toasted one before from over temp. Maybe add an overtemp system shutdown sensor touching the dremel case? LM 61's are cheap.
Just a thought.
Doc
Just a thought.
Doc
Where did you get those nice rails, I heard McMaster doesn't realy do international shipping anymore.
Sweet!
Two things...
Lucite sheet/ acrylic sheet is not dead flat and varies in thickness... fyi.
May not be significant.
It is a good idea to install a collar thingie near the cutter end of the dremel that is hooked to ur vacuum cleaner to get the dust out of the air and away from the work... there are a few different ways to implement it...
Nice job... whose controller did you use??
_-_-bear
Nice job, I have a converted Shibaura Roibot industrial X-Y arm converted that I am alsmot finished with.
Here are some videos of my machine in action running some test programs
overkillaudioinc's Channel - YouTube
Here are some videos of my machine in action running some test programs
overkillaudioinc's Channel - YouTube
AWESOME !!!
Very nice work. Watch the duty cycle on that dremel. I've toasted one before from over temp. Maybe add an overtemp system shutdown sensor touching the dremel case? LM 61's are cheap.
Just a thought.
Doc
That Dremel is a darling, only gets warm during my use. But I'll closely monitor it as you've said, I have a handheld IR temp sensor which I use to take temps of the motors, drivers, psu, etc.
Thanks!
Where did you get those nice rails, I heard McMaster doesn't realy do international shipping anymore.
Here, those can be found in junk shops, sidewalk shops selling surplus motors and stuff. I was lucky to get the size and same model rails that I needed, I guess.🙄😀
Sweet!
Two things...
Lucite sheet/ acrylic sheet is not dead flat and varies in thickness... fyi.
May not be significant.
It is a good idea to install a collar thingie near the cutter end of the dremel that is hooked to ur vacuum cleaner to get the dust out of the air and away from the work... there are a few different ways to implement it...
Nice job... whose controller did you use??
_-_-bear
Thanks for the thought, I did make thickness measurements and was very happy with an error of only 0.0015" on the caliper. I reckon that anything over 0.01 would yield an uneven pcb especially if the work piece is larger than 5" X 5".
The vacuum is an old car vacuum that I power from a bench top 12V supply. 😀
The controllers are pretty generic stepper drivers only.
Nice job, I have a converted Shibaura Roibot industrial X-Y arm converted that I am alsmot finished with.
Here are some videos of my machine in action running some test programs
overkillaudioinc's Channel - YouTube
AWESOME!
I see you are using Mach3 for Windows, how is it?
You sure those are roller bearings and not ball bearings?
My bad, those are ball bearings. Thanks for pointing it out.
What are you using for limit stops and how is that integrated to the motors and/or software?
Btw, I just picked up a nice homebrew type of table similar to yours from the local surplus place, needs a little TLC and the steppers acquired and installed, but otherwise it is all there...
_-_-bear
Btw, I just picked up a nice homebrew type of table similar to yours from the local surplus place, needs a little TLC and the steppers acquired and installed, but otherwise it is all there...
_-_-bear
Limit and home stops are connected via the parallel port inputs. These are then setup with EMC so the software knows where Home and Limits are.
Very nice!
This looks remarkably similar to an engraving machine I was offered for $1000 a year ago from an industrial surplus place. The main difference was the engraver used a motor mounted in a fixed position with a collet held like a Dremel and connected to the motor by a flexible "speedometer cable" drive.
This looks remarkably similar to an engraving machine I was offered for $1000 a year ago from an industrial surplus place. The main difference was the engraver used a motor mounted in a fixed position with a collet held like a Dremel and connected to the motor by a flexible "speedometer cable" drive.
- Status
- Not open for further replies.
- Home
- Design & Build
- Equipment & Tools
- Abacus Robot: My diy CNC PCB Milling/Drilling Project