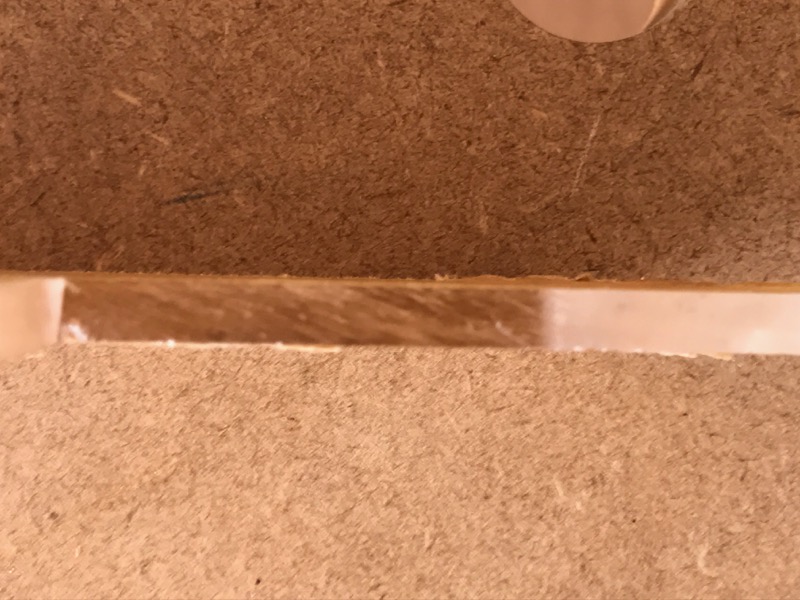
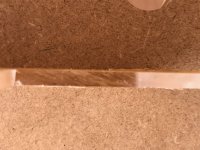
Tape would be much easier to apply in some ways but harder to get around curves. I wonder if it seals as well. The foam is probably closed cell foam so I suppose it would be fine. Worthy of testing in any case.
Drilling a bunch of holes might still be the best option. I bought all the screws, nuts, o-rings, and drill bushings and it would be a shame to waste them. And then there would be no question about them being held in place.
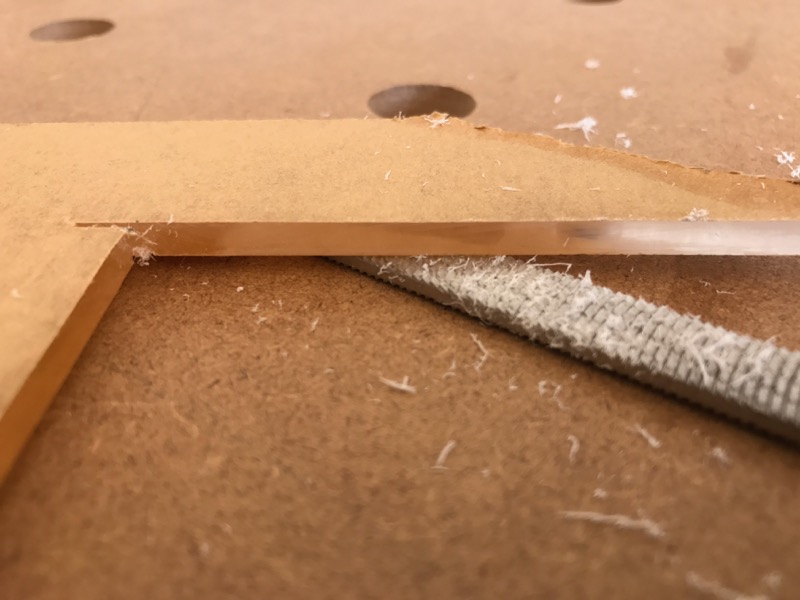
Do you think the 3" o-ring is really necessary? I feel like the foam that is there should be used as designed. And it gets the driver closer to the round over whereas the o-ring puts it 1/8" away. Whether or not that would be an measurable difference, I don't know. But it seems like an 1/8" difference in driver position would be more important that whether the driver is isolated from the baffle with an o-ring vs. the foam seal that was designed into the driver to begin with. The o-rings make more sense if mounting from the front. But mounting from the rear, I don't know. I guess I can test both and see!
Drilling a bunch of holes might still be the best option. I bought all the screws, nuts, o-rings, and drill bushings and it would be a shame to waste them. And then there would be no question about them being held in place.
Do you think the 3" o-ring is really necessary? I feel like the foam that is there should be used as designed. And it gets the driver closer to the round over whereas the o-ring puts it 1/8" away. Whether or not that would be an measurable difference, I don't know. But it seems like an 1/8" difference in driver position would be more important that whether the driver is isolated from the baffle with an o-ring vs. the foam seal that was designed into the driver to begin with. The o-rings make more sense if mounting from the front. But mounting from the rear, I don't know. I guess I can test both and see!
If the tape is only about 1/4" in width it is easy enough to form it around a curve. Cutting some small relief triangle helps with a circle the size of the TC9 though.Tape would be much easier to apply in some ways but harder to get around curves. I wonder if it seals as well. The foam is probably closed cell foam so I suppose it would be fine. Worthy of testing in any case.
Personally think that this is the most sensible option. Measure it in place and see what you have. More isolation can then be added if desired.Drilling a bunch of holes might still be the best option. I bought all the screws, nuts, o-rings, and drill bushings and it would be a shame to waste them. And then there would be no question about them being held in place.
I think unless you are willing to make a proper sandwich construction like wesayso you may as well start simple. I don't think glue or supports will get you to the same level of performance.
Do you think the 3" o-ring is really necessary? I feel like the foam that is there should be used as designed. And it gets the driver closer to the round over whereas the o-ring puts it 1/8" away. Whether or not that would be an measurable difference, I don't know. But it seems like an 1/8" difference in driver position would be more important that whether the driver is isolated from the baffle with an o-ring vs. the foam seal that was designed into the driver to begin with. The o-rings make more sense if mounting from the front. But mounting from the rear, I don't know. I guess I can test both and see!
The o ring would be good if you could cut a recess for it on the back of the baffle. You could use a router circle template to remove a small amount before the main cutout with the holesaw.
Having an 1/8" gap could create more diffraction problems and add in a little cavity effect.
The gasket on the TC9 will help to create a good seal but it will need to be held down quite tightly and it is very thin so there will be virtually no isolation.
The TC9 was designed as a TV speaker so the gasket is to make mounting in that way easier for a manufacturer. The gasket is not a super high performance part of the design. Awkward to remove on 50 or more drivers anyway.
Ooh, I like the idea of a recess. The o-rings are 3" inside diameter so I would just need a small 1/16" deep by 1/8" wide step at the driver hole edge. Easiest way to do that is probably with a router and a properly sized guide bearing. Access to a CNC router is sounding better and better! Maybe someday.

I called for a quote of 2 8' wide pieces of 1/4" aluminum. I need to get 2 12' sections since they won't sell me just to 8' sections. Total price is about $220 which is a little pricey. So I was thinking I could do narrower pieces (say 4") and make up the width with some wood sections. Perhaps use 3/4" ply with the aluminum inside a 1/4" groove that's perhaps 1/2" deep. That would be a bit cheaper... and perhaps the wood offers a little damping benefit as well. It's not as clean a look although it doesn't matter since I'll be covering with grill cloth. Maybe I'm also still holding out hope that my wife will let the baffle be displayed in all it's milled aluminum glory. With that said, I think I may have talked myself out of the idea. But any thoughts would be welcome.
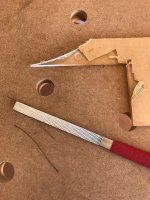
I was thinking about how to trim the drivers down a tad so I can squeeze 28 into the the baffle. I only need to trim about 0.5mm on top and bottom. Initially I was going to use a router but now I'm thinking it might be easier to just do a little hand sanding. Less risk of damaging them and probably less chance of contamination getting into the voice coil. Another idea was to just take a chisel or knife to the edge and do a little trimming. Any other ideas? Maybe I'll try the chisel/knife first, then sand paper, then router if the former methods don't seem to be working well.
I was thinking about how to trim the drivers down a tad so I can squeeze 28 into the the baffle. I only need to trim about 0.5mm on top and bottom. Initially I was going to use a router but now I'm thinking it might be easier to just do a little hand sanding. Less risk of damaging them and probably less chance of contamination getting into the voice coil. Another idea was to just take a chisel or knife to the edge and do a little trimming. Any other ideas? Maybe I'll try the chisel/knife first, then sand paper, then router if the former methods don't seem to be working well.
This is what I would use.
Japanese Milled-Tooth Files - Lee Valley Tools
or sometimes called carving files
I use these for plastic and wood, they actually work like little planes, the finish they leave is unbelievable. Takes a little practice to get the right motion but they are something I wouldn't want to be without.
If you want to use a router I would screw the driver down to a block of wood that is flat and true on one edge and then use the edging attachment on your router to gradually sneak up on it till you get the right amount.
If you had a router table or made a router table you could do a similar thing. Screw the driver down to the wood to make a sled and run it past the fence at the right distance.
Do they create dust or shavings? I'd like to create shavings to minimize risk of contamination and also hopefully to make the process both accurate and quick. Wondering if maybe a draw knife would work. Or if a file is better with that in mind.
Shavings with plastic or solid wood if you get the technique right, angle it slightly across the workpiece
they actually work like little planes, the finish they leave is unbelievable.
That's what I was trying to say here, planes take shavings. They also remove a lot of material quickly so it won't take long.
You could use a standard metal file but that will make dust and be much more effort, the shavings are much easier to clean up and keep out of the driver's innards. For your purpose you would only need a small flat one so not very expensive to try.
If I get a chance later I will take some pictures with scrap acrylic to show what they do.
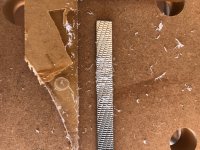
Acrylic and milled tooth file

Acrylic before, fairly smooth from a Japanese saw
Afterwards showing the shavings

This is the finish after about 5 strokes
Acrylic before, fairly smooth from a Japanese saw
Afterwards showing the shavings
This is the finish after about 5 strokes
Attachments

With all of your plans, now including the use of even more drivers, and the energy put into this effort I hope you will reconsider some game plans. You mentioned wanting to get away with cheap. If you reconsider that point of view, work hard at it and invest what is needed you'll be rewarded.
Please think about using at least a double baffle. Or a bigger one than you're planning now. They don't need to be aluminium. But the last thing you want is the baffle singing along. The thin alu baffle with holes this close isn't going to be sturdy.
Please think about using at least a double baffle. Or a bigger one than you're planning now. They don't need to be aluminium. But the last thing you want is the baffle singing along. The thin alu baffle with holes this close isn't going to be sturdy.
@fluid - is that the 8" flat one? Looks exactly like what I was hoping for in terms of result and effort.
@wesayso - as always, appreciate the perspective. I'm thinking about this as more like "optimized" vs. cheap. And also building in the option to further tweak if needed later on. Specific to double baffle, I can start with a single and then double up later on if it seems like the single isn't working for whatever reason. I'm also considering other ways to strengthen the baffle. Perhaps with some "buttresses" or other stiffeners.
@wesayso - as always, appreciate the perspective. I'm thinking about this as more like "optimized" vs. cheap. And also building in the option to further tweak if needed later on. Specific to double baffle, I can start with a single and then double up later on if it seems like the single isn't working for whatever reason. I'm also considering other ways to strengthen the baffle. Perhaps with some "buttresses" or other stiffeners.
@fluid - is that the 8" flat one? Looks exactly like what I was hoping for in terms of result and effort.
Yes it is, 'B' in the link I gave you, I have the bigger ones too but not really necessary for this job. They remove a remarkable amount of material for very little effort.
On the baffle why not consider something like you mentioned before make the back piece out of plywood and inset the thinner (cheaper) aluminium into it. Use 5/8" ply, cut your baffle holes, route out a channel to fit the edge of the surround and then route out further for your aluminium cover or use different thickness to match the step sizes you need. Use a neoprene sheet or something similar in between. You can mount the aluminium without screw holes by drilling and tapping from behind or go with the industrial look and drill straight through.
I think that sounds more optimized but still pretty cheap
")
That's not a bad idea. And it might actually be cheaper since I would need less Aluminum. I considered it but thought it might be beefy enough as is and also I was trying to maximize volume plus the fact that it would be simpler to build. But I like the concept (and the potential cost savings.)
Thx for the idea. Re: the file, do you think the fine file is the right one? Or maybe I should just buy the set.
Thx for the idea. Re: the file, do you think the fine file is the right one? Or maybe I should just buy the set.
That's not a bad idea. And it might actually be cheaper since I would need less Aluminum. I considered it but thought it might be beefy enough as is and also I was trying to maximize volume plus the fact that it would be simpler to build. But I like the concept (and the potential cost savings.)
Thx for the idea. Re: the file, do you think the fine file is the right one? Or maybe I should just buy the set.
No problem
If you can squeeze in a few more drivers then you reduce the strain on all of them. I think the extra drivers is of more benefit than a slightly bigger rear volume for less drivers. The more solid you make the front baffle the less need there will be for bracing and the more isolated you can make the drivers from the enclosure the better. The drivers are fairly heavy when combined together and a baffle with a lot of holes in it with the added weight offset to the rear does make for a pretty bendy structure.Simple is good and complexity should be avoided unless it has a benefit. I tried to make mine as simple as I could. I made up for it a little in my design by flushing the drivers completely into the baffle and adding the felt for diffraction control. Obviously the jury is yet to convene on whether I made a good choice or not!
I think the sims that Onni has made and posted in his thread and RA7's show that creating a smooth transition and avoiding diffraction can have quite an impact in the on and off axis response.
The 'B' file is 'xtra fine' it doesn't come in another grade. I think the files are great for wood and plastic and if you need to carve off a lot of material they are excellent, sometimes easier than trying to use a jigsaw or fret saw to remove the excess. I have a bit of an issue when it comes to acquiring new tools so probably best not to ask me!
Alternatively, it may be better (and easier) to just add some triangle "ribs" every four or five drivers. I can screw them to the baffle and compress neoprene between the ribs and the walls. I could do one between every driver as well at the expense of interior volume. Instead of attaching them to the baffle, I can pre-drill through holes through the ribs and have the screws that go through the baffle to the wall go through the ribs. That would actually help with guiding the screws into the walls.
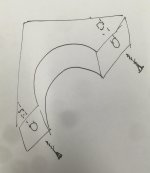
Be sure to divide the baffle into uneven pieces with these braces. That way it can't form a wave shape along it's length as easy (it will). If you break it up in even pieces you'd be clamping it on node points. So even bracing between 3, then 4 then 3 again might help there.
- Status
- This old topic is closed. If you want to reopen this topic, contact a moderator using the "Report Post" button.
- Home
- Loudspeakers
- Full Range
- "Wall-integrated" corner loaded line array with Vifa TC9 drivers