Never mind,take your time.The past couple weeks have been very busy. I haven't had a chance to pull parts for you yet. I hope to be able to do this in the next couple days though.
I hope you are very busy finalizing the" Full Featured Preamp ".
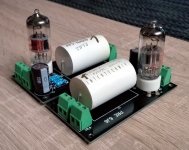
Is it one of the expected for test?
In my country we say,... go slow go better!The preamp hasn't gotten much farther. It's not in this batch. Hopefully I can make some progress on it over Christmas.
")
For those interested, my project is posted on this forum (in French but you can Google translate it).
VZaudio Amplificateur NS Modular
I'm updating it as much as I can
Thanks
Do
VZaudio Amplificateur NS Modular
I'm updating it as much as I can
Thanks
Do
Hi all,
Has anyone built the Tribute-3000? Ever since I saw it I've wondered about putting it in a Sansui chassis. I have a BA-2000 sitting here and Valery's driver board is nearly identical in size to the original . I'd just have to figure out the ops so I could use the original heatsinks. etc. Anyway I was curious if anyone had built The Tribute as drawn.
Thanks,
Evan
I'd like to wish everyone a happy new year. I hope you'll let me back after my long hiatus.
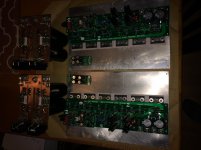
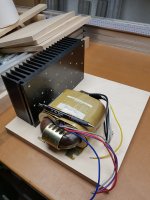
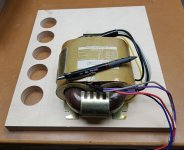
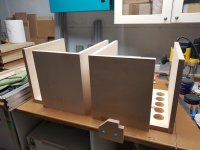
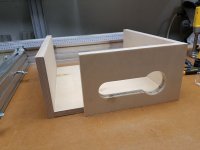
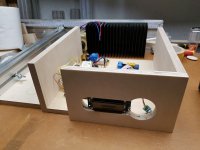
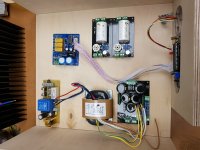
I see it's been a year that I have had these boards. Both channels worked as expected on start up. The regulator for the front end is a nice little unit I got from member OlegSh. I'll spend the next bit of time boxing the amps up. I look forward to spending some time on inside hobbies now that the cold weather has really settled in.
Evan
Attachments

Thanks Jeff. Racing this season was great. I had forgotten how much I love it. The civic consistently surprised/embarrassed cars of much higher caliber. My lap times put it mid pack in its race category but since I need it to drive to work I limit myself to open track time and not actual races.

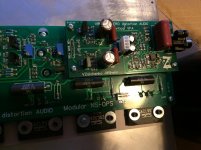
Amp construction : based on NS-OPS and TubSuMo-IPS
All Multi plywood will be veenered with walnuts veener and and non close portion will be closed with aluminium
All Multi plywood will be veenered with walnuts veener and and non close portion will be closed with aluminium
Attachments
Last edited:
The trick to soldering smt is tools, experience and technique. you need good magnification, lighting (esp for us older farts) and a steady hand. I have one of those head bans, a big eye with lamp, and a 10x jewelers loupe. Sure a nice Leica stereo microscope is the best but I can get it done without one.
The biggest issue is positioning the part.
Paste and hot air is one method.
for hand soldering i do this
rest you wrist on a solid surface, it will steady's your hand and tweezer. open the part from the carrier on the pcb. sometimes it is pita to remove plastic strip, esp from the old school paper backed carrier, but that was mostly for passivies. using small gauge solder is important. I use glow core no clean eutectic, having the lead helps. pre tin, very little solder to one pad, for sot23, do the one that is on its own, pin 3, then position the part with tweezers by sliding it over, on the pcb, to the position, reheat the pad with the pre-tinned pad to bond, then do the other pins, finally add a touch more solder to pin3, inspect with the 10x loupe to be sure = done
as for a dac, here is one option,
CS4398 DAC
I was looking at cloning this design, shrink it down to 100x100mm to make a cheap pcb' Also add the PCM2902C USB codec, since I know it works well and is a no fuss part. I will route the PCM2902C spdif to one of the 8 CS8416 i/p channels.
I found that Toshiba and Sharp opto fibre rx parts are obsolete, but Digi-key is selling the Everlight PLR135/T at a fraction of the original Toshiba cost. They run at 3V so that is a bonus. The pinout is opposite of the Sharp part.
happy new year folks
Last edited:
- Home
- Amplifiers
- Solid State
- Revisiting some "old" ideas from 1970's - IPS, OPS