Pianting
I have finally found some time to start putting some more coats on. Having a baby in the house doesn't help and that he's only one week old.
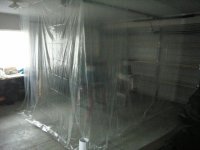
Had to put up some plastic to stop the spray going everywhere as the miss's didn't like it. Trying to wash baby clothes in the laundry tub with the smell of paint went down like a lead balloon. These drop sheets were only $3 each. Garage still smells bad though...........
I have finally found some time to start putting some more coats on. Having a baby in the house doesn't help and that he's only one week old.
Had to put up some plastic to stop the spray going everywhere as the miss's didn't like it. Trying to wash baby clothes in the laundry tub with the smell of paint went down like a lead balloon. These drop sheets were only $3 each. Garage still smells bad though...........
Attachments

feet
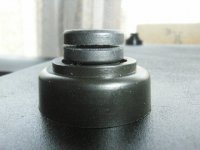
This isn't too hi tech or expensive. Just put some rubber feet on that I purchased from a surplus shop. I then glued some rubber gromets on top/bottom with some glue out my bike pepair kit, But they seem to be sticking ok. These act like little shock absorbers, they work quite well.
This isn't too hi tech or expensive. Just put some rubber feet on that I purchased from a surplus shop. I then glued some rubber gromets on top/bottom with some glue out my bike pepair kit,
But they seem to be sticking ok. These act like little shock absorbers, they work quite well.Attachments
Tone arm
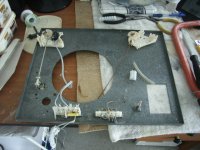
Did a little bit of work on the tone arm base today. I wasn't going to use this original base, but after I sanded it down with wet&dry, it looked much cleaner. I cut the arms back that usually lift the tonearm, as I will not be putting that mechanism into the plinth. But I wanted something for the arm to rest on. When I bought this table second hand, the rest was broken.
I may change this, but for now it stays.
Attachments
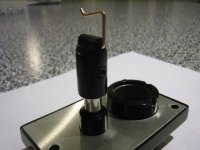
I shouldn't be showing this photo as it's bad workmanship.......
I needed the shaft so I completely munted the entire lift mechanism. Cut the whole thing up and just left the base plate. Then made up a really, really quick and nasty bracket to hold the shaft in place. It looks bad, but seems to domthe job ok....and whos going to see it anyway, once it's all together")
I needed the shaft so I completely munted the entire lift mechanism. Cut the whole thing up and just left the base plate. Then made up a really, really quick and nasty bracket to hold the shaft in place. It looks bad, but seems to domthe job ok....and whos going to see it anyway, once it's all together
Attachments
Motor
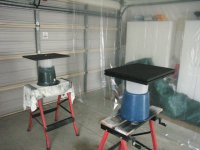
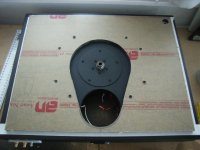
Started cuting down my motor today. I left this 10mm high as I'm going to put a perspex plate ontop of the existing plinth. In the TD160, there's a sub chassis, which the sub platter sits on. this makes the top platter sit very low down and only just above the the pinth. This is what I want as well. So I will place a plate of perspex ontop with cut-outs for the motor and the sub-platter. Hopefully then the top platter will sit nice and low.
Started cuting down my motor today. I left this 10mm high as I'm going to put a perspex plate ontop of the existing plinth. In the TD160, there's a sub chassis, which the sub platter sits on. this makes the top platter sit very low down and only just above the the pinth. This is what I want as well. So I will place a plate of perspex ontop with cut-outs for the motor and the sub-platter. Hopefully then the top platter will sit nice and low.
Attachments
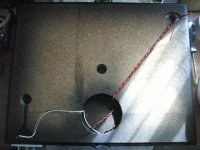
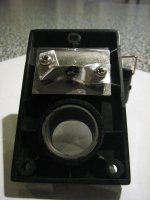
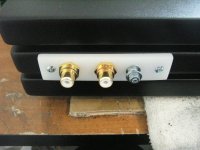
Also put the power socket in. But was dam impatient I munted the dam thing..............If you look to the right of the socket you can see where I screwed the thing up too quickly........
I thought I had pre drilled the holes enough
Hopefully no one will look around the back too often
I thought I had pre drilled the holes enough
Hopefully no one will look around the back too often
Attachments
Top plate(Yesterday)
I had to buy this one as all my perspex is clear or white. And I didn't have the correct size anyway. At least there was no cutting as this was ordered to the correct size.
I made all the marks before cutting, even the screw holes. In the past I have ben too impatient and just done enough to get the thing together. But this time I took a little more care and made sure that everything was measured three times and then checked over again, $50 NZD is a lot of baby formula..........
If only the misses new how much money I have spent on this
Attachments
Finished top plate
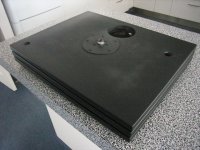
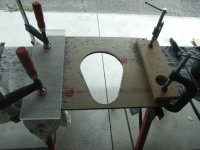
Drilled..........Cut...........Filed.............Sanded...........
Fitted the finished plate to see if it fits. I marked the holes through to the plinth so I could pre drill them later and attach it via screws.
I started sanding the sides with 240grit to remove all the file marks. Then went to 400....600....800....1000.....1200.....1500....(wet & dry) then finished it off with BRASSO, which is used for metal pollishing.
Attachments
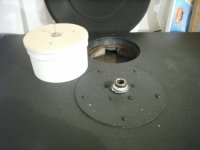
Checking motor
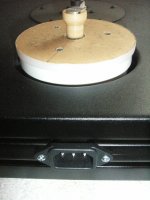
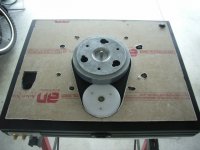
Being very careful with the sub platter, I placed it back on to check that the platter was sitting slightly higher than the motor.
I originally wanted the top plate to be 15mm thick so that the sub platter would sit lower down into it, and the top platter wouldn't sit up so much on top, but they only supply 10mm thick, so out of luck there. Just have to make do. The top platter does sit up a bit but it's not too bad...............
Anyway I'm really more interested in how this sounds.
Attachments
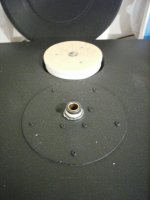
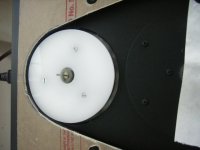
Motor/sub platter
You can see in this picture that the sub platter is just sitting over the motor. I put the top platter on as well to check that it spun ok and was not rubbing agianst the motor.
Ok so thats about it for this period of work. I am still working on my motor case made from very expensive plumbing pipe
I tried to get quite a bit done this weekend as it was my last few days off on my break, to spend it working on my turntable/....................doh, I mean help my wife with the new baby.
Attachments
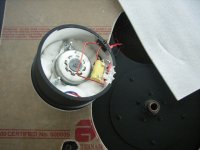
Motor
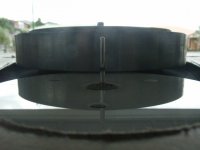
Finished cutting the motor down to the right height. Painted the outside and inserted the resistor and capacitor that was taken out of the Thorens. I then stuffed the inside around the motor with some cotton wool to reduce the noise.............and this definately worked. I didn't want to go all the way and completely fill the entire chamber as i was worried about the motor over heating. I also gave it a quick spray paint with some left over paint from the plinth.
Finished cutting the motor down to the right height. Painted the outside and inserted the resistor and capacitor that was taken out of the Thorens. I then stuffed the inside around the motor with some cotton wool to reduce the noise.............and this definately worked. I didn't want to go all the way and completely fill the entire chamber as i was worried about the motor over heating. I also gave it a quick spray paint with some left over paint from the plinth.
Attachments
- Status
- This old topic is closed. If you want to reopen this topic, contact a moderator using the "Report Post" button.
- Home
- Source & Line
- Analogue Source
- New plinth for TD160