and here is the finished top section. (except for veneer of course)


So what would I do differently so far?
I guess there is no need for three layers of 3mm mdf. I think that thinking originally came out of my having the rounded back, now that I'm going to the sharp edge I can simply make the laminations thicker and perhaps only have the one (maybe two) layers on top.
I will not be mucking about with nails anymore, and by the ease which the preformed layer goes on, it could be worth doing with contact cement rather than pva. Are there any opinions on the two methods of gluing?
Next step, negotiate the change in profile to the different slope below that piece, and I spose for rationalizing the production method I should be making the pair at once. Once the jig is set for a size it's a lot easier to cut two pieces at once than one now and later have to duplicate my settings.
I feel a little embarressed over my excitement re bending the mdf. I thought it was a significant 'discovery' hence the excitement that showed. Wish I could go and edit it out now given the lack of comment on it. You can see from my photos of myself I don't mind playing the idiot, I only get embarressed when I'm being serious and turn out to be a fool. Such is life, it's better to admit to being an idiot than trying to pretend otherwise (and all know it heh heh)
Another completely foolish idea??? Gee, you woulda thunk I'd learnt my lesson by now but hey! I'm an enthusiastic guy!! I was idly pondering how to do things differently last night, when I realised a slight modification to my procedure meant that I can actually build the boxes out of concrete!!
I'd imagine a concrete thickness of around 25-30 mm, then of course skinned with mdf for the veneer layer.
No matter what happens with advice from you guys about whether or not it's a good idea speaker box wise I just know from my nature that I will at least do an experiment to see if indeed it can be done.
So taking it as given that I will see if I'm correct by experimenting, what do you guys think??
Would a reasonably thick walled curved concrete speaker give any appreciable benefits?? ATM I feel it would be a bit easier (not that anything was hard before, perhaps a tad fiddly) and quicker to do it in concrete, but if it is a bad idea for whatever reason then I can easily stick with my original methodology.
Good idea or bad idea?????
terry j said:I feel a little embarressed over my excitement re bending the mdf. I thought it was a significant 'discovery' hence the excitement that showed. Wish I could go and edit it out now given the lack of comment on it. You can see from my photos of myself I don't mind playing the idiot, I only get embarressed when I'm being serious and turn out to be a fool. Such is life, it's better to admit to being an idiot than trying to pretend otherwise (and all know it heh heh)
Hey, Terry
You have nothing to feel embarrassed about. I applaud you efforts. I subscribed to this thread and have been following it because I found it both interesting and entertaining to read (thanks for that!). If there has been no comment, it is likely because yours is a rare (if not unique) method. I'm sure that there are many other lurkers following your antics that are simply too awe-struck to say a word
") .
.As for concrete: by all means, do it after you finish a pair of these
.Awesome work, love the frankentrick Terry. Left-field solutions I've been looking for for some time.
And no need to apologize for originality, passion and enthusiasm!
Cheers from a fellow Aussie
David
www.gattiweb.com
And no need to apologize for originality, passion and enthusiasm!
Cheers from a fellow Aussie
David
www.gattiweb.com
So there it is, the first and no doubt the last contribution I personally will be able to make to the diy community collective knowledge. The frankentrick.
I've seen whole threads here on making rounded enclosures. I don't ever recall seeing anything posted for bending MDF that worked so well. If that works for 1/2 inch thick MDF, I would say the Frankentrick is worth getting excited about.
JJ
thanks guys!! feel a lot better now heh heh, NOW I feel embaressed that I was embarressd that...oh never mind.
Moondog cheers, what's the chances THIS year of making it to the bathurst races gtg!! Gee, has it been a year?? yep.
thanks shaun, appreciate it.
And dave tah muchly, have been aware of your stuff for a while now, so to be validated by you is great.
JJ, yeah I was ahead of you on that one, got to thinking 'why bother with two or three layers of mdf, cut the rubbish and go straight to bigger sizes'
(hope these are resized)
After being nagged by a certain member on our local forum about lack of bracing (read I was pissed he thought of it and I didn't) I added a few braces internally, and up against it is a piece of 6mm mdf I bent around an old 15 l paint tin. Just tied a rope around the middle, no effort to do it equally across the whole surface.
I did that one a bit differently, brushed each side maybe four times, then wrapped it in cling wrap (or any plastic I guess would do) so that it didn't evaporate quickly, and if the ammonia was to go anywhere it would 'soak' into the middle.

Today I tried a different method again, sat the 6mm and 16 mm mdf on a wire rack and placed it into a largish frypan I guess it is, the one with a lid and you can simmer etc etc. Set it on low (to vaporize the ammonia) and just let it sit in the pan while I did other things.
maybe 45 min?
anyway, again bent the two around the paint tin and let it dry.
As I say, full strength by the time the colour gets back to normal, the 16 mm mdf is really tough and strong!

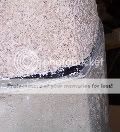
In some places where the wire rack contacted the mdf some blackening can be seen, you can make it out on the 16mm. but as it's on the inside (unless of course you're after concave) so no big deal.
Point is, it is feasible to do thicker sizes than 3mm. I imagine you could basically make a plastic bag large enough for the piece you need to bend, and as long as you raise it out of the solution I spose you could leave it out all day in the sun and achieve the same thing.
I'm sure anyone who wants to use this can nut something out quite easily. Admittedly the paint tin is quite a small radius (far smaller than anyone would want I'd say) but that also meant quite a bit of force was required to bend it. So you'd need a strong former as well.
As it is such a small radius, it must represent the worst case scenario, so it certainly looks like a feasible option for any diyers out there who want curved cabinets. The fact that it regains full strength is quite a bonus-indeed it could be argued that it is in fact much stringer as it is curved.
Ever since I thought of the concrete, ..well let's just say I have decided to go ahead with concrete.
Why? dunno, why not is as valid a question I guess. Also, to be honest, I'm easily distracted and my thinking often strays...ooh, what's that in the corner??? it's purdy...
what was I saying again? forget, oh well. boy it's been cold today heh heh
anyway, been cutting a few formers and will soon be making progress, so get back to you all then.
Moondog cheers, what's the chances THIS year of making it to the bathurst races gtg!! Gee, has it been a year?? yep.
thanks shaun, appreciate it.
And dave tah muchly, have been aware of your stuff for a while now, so to be validated by you is great.
jupiterjune said:
I've seen whole threads here on making rounded enclosures. I don't ever recall seeing anything posted for bending MDF that worked so well. If that works for 1/2 inch thick MDF, I would say the Frankentrick is worth getting excited about.
JJ
JJ, yeah I was ahead of you on that one, got to thinking 'why bother with two or three layers of mdf, cut the rubbish and go straight to bigger sizes'
(hope these are resized)
After being nagged by a certain member on our local forum about lack of bracing (read I was pissed he thought of it and I didn't) I added a few braces internally, and up against it is a piece of 6mm mdf I bent around an old 15 l paint tin. Just tied a rope around the middle, no effort to do it equally across the whole surface.
I did that one a bit differently, brushed each side maybe four times, then wrapped it in cling wrap (or any plastic I guess would do) so that it didn't evaporate quickly, and if the ammonia was to go anywhere it would 'soak' into the middle.
Today I tried a different method again, sat the 6mm and 16 mm mdf on a wire rack and placed it into a largish frypan I guess it is, the one with a lid and you can simmer etc etc. Set it on low (to vaporize the ammonia) and just let it sit in the pan while I did other things.
maybe 45 min?
anyway, again bent the two around the paint tin and let it dry.
As I say, full strength by the time the colour gets back to normal, the 16 mm mdf is really tough and strong!
An externally hosted image should be here but it was not working when we last tested it.
In some places where the wire rack contacted the mdf some blackening can be seen, you can make it out on the 16mm. but as it's on the inside (unless of course you're after concave) so no big deal.
Point is, it is feasible to do thicker sizes than 3mm. I imagine you could basically make a plastic bag large enough for the piece you need to bend, and as long as you raise it out of the solution I spose you could leave it out all day in the sun and achieve the same thing.
I'm sure anyone who wants to use this can nut something out quite easily. Admittedly the paint tin is quite a small radius (far smaller than anyone would want I'd say) but that also meant quite a bit of force was required to bend it. So you'd need a strong former as well.
As it is such a small radius, it must represent the worst case scenario, so it certainly looks like a feasible option for any diyers out there who want curved cabinets. The fact that it regains full strength is quite a bonus-indeed it could be argued that it is in fact much stringer as it is curved.
Ever since I thought of the concrete, ..well let's just say I have decided to go ahead with concrete.
Why? dunno, why not is as valid a question I guess. Also, to be honest, I'm easily distracted and my thinking often strays...ooh, what's that in the corner??? it's purdy...
what was I saying again? forget, oh well. boy it's been cold today heh heh
anyway, been cutting a few formers and will soon be making progress, so get back to you all then.
Have had no internet connection for a week or so.
Seemed to get more work done...wonder why??
OK, trying to remember what stage we were at...think I had had the brainwave of making them out of concrete hadn't I?
Yes I have. The two boxes are now done and dusted basic construction-wise.
Did the middle section of one first, in concrete. I started from scratch, basically the first one you saw with the multiple built up layers 'is no more', may it rest in peace.
As I was no longer needing the 'every fifth layer', I got away with just the top section and the bottom section. In between I could now pack a stiff mix of concrete, using the edges of the top and bottom as witness marks to 'scrape' to. Of course on the internal side of the top and bottom plates I needed something to push against and provide a form for, so I simply cut strips of 6mm mdf and nailed them inside. The end result was a concrete depth of around 30 mm.
It will be clear when you see the piccies.
As I was using mdf for the formwork, I had a bit of concern about moisture absorption, so I simply painted all the relevant parts with waterproofing.

This is the first I did, using concrete. I think I had an extra brace in the middle (ie top, bottom and middle) which on subsequent ones I went to only top and bottom. It was very easy to route the layers used to include bracing as an integral part of the structure, as you can see.
OK, well let me tell you we were going thru a cold snap when I did this, and boy did the concrete take ages to go off. Trouble with that is that due to the time taken, it slowly slumped. This meant I had to continually scrape off where it bulged out of the 'framework guides'. Of course what I removed had slowly come from above, so it needed filling to replace the lost material, and every time you 'worked' the concrete it slumped more!
It was quite aggravating.
What I was aiming for was the concrete to be a couple of mm below the witness lines, as I could put an easily worked skimcoat on top of the concrete which would both give me a smooth finish and could easily be shaped. This ruled out bog as the skimcoat, instead I went for base coat used for gyprock (hardwall?). For a while there I really got into the smoothing and forming of the skimcoat (not needed as I would be putting a frankentrick mdf layer on top) but I just loved the aesthetic nature of it. Ever see the guys forming the cars out of clay? Just delicately using a scraper etc to form it. The base coat goes a bit like that, you can work it for a few hours and using a scraper delicately shape the work. Anyway, just a bit of fun whilst I was doing it.
I decided that concrete was out for the next ones, not worth the hassle. What I did was to simply take some of the gravel I was using in the concrete, filled a measure with it then added water to it. By draining off the gravel I could get a measure of the 'airspace' between the particles (as evidenced by the amount of water) and simply used that amount of base coat as the ratio of gravel to base coat mix.
Base coat (depending on which one you buy) goes off in 45 minutes or so, a far cry from the five hours it took for the concrete. It should be roughly the same mass/density of the concrete as it is basically pure gravel with just enough binder (base coat) to fill in the spaces between the gravel grains.
You can see the at the bottom of this picture is the concrete section, on top is the gravel section. The grains of the gravel are pretty clear.
By scraping with a straight edge using the top and bottom plate as guides, we can get a pretty accurate profile. And if the top section (as in the photo) is done whilst sitting on the middles section, then in fact the bottom of the top section that I scrape to is actually the top of the middle section (confused??), all that means is that it is a common profile that the joint of the top and middle sections is scraped to. Hope you can work out what I mean, the picture will help show it.
That means we have a 'perfect' joint between the two sections. (and of course the same principle applies between the middle and bottom section).
BOY! They are tiny!! I was sure I had stuffed it up, but no, they are the right size (height)

Here is my daughter givi9ng us a sense of the height, and alongside is the three sections of the next one to be done. It's all coming together!
The seperate pieces are located with dowel pins between each section, that is needed so that they accurately position together no matter how often I need to seperate them to work on them. Remember, I need to be able to get an exact joint line when I veneer them later.
Have had a few thoughts along the way, one of them being that it's unlikely that I will frankentrick the sides as a base for the veneer. Instead I had the idea that I will use multiple layers of veneer crossing each other, rather than a layer of mdf then veneered.
If I run the grain horizontally, then 45 left and right then finally vertically, I should end up with a tailor made plywood cover. Further, as long as I lay them with a bit of forethought, the actual joint ecges will be interleaved as well, giving a very strong joint, and no concern over mdf joint creep.
Depends on the cost of doing this I spose!
Have decided on the finish. I was originally looking at nice veneer to match the house aesthetics, but realized (probably prompted by this *^%%$% antique I'm currently restoring) that a black laquer finish will fit in perfectly well, along with a couple of antique tricks that I will tell you about later. That means the expense or 'quality' of the veneer is no longer critical, and so makes my plywood idea more feasible.

An artistic shot of the speaker from the rear. I must say, they do look very nice and impressive, even is I say so myself.
In contrast, the speaker from the front is a bit of a plain jane really, had thought a heavily chamfer thick baffle would go a way to fixing that.
You may recall that I had to deepen the box from what we saw in the model, that was due to volume issues. That I got a nicer shape was just a lovely bonus.
Anyway, I always knew I was tight on my volumes, so at this stage I measured the final volume of the boxes I built. (tip, if you can, DON"T use polystyrene beads OK? heh heh, still cleaning them up!)
My current boxes are around 110 l, and even then I need to use heaps of power and eq to get the 18's down to a reasonable frequency. So I was aiming to get to within at least 10% of that volume.
They are 82l.
Oops.
No, I will not be doing them again. So what to do????
Funnily enough, I had already been pondering extending the boxes forward, and had been considering the options to do so. So really I wasn't that upset as I had already been going down that path in my head.
Basically, I can get a bit of that volume back depending on how I build my baffles (they will have to be deep baffles), and as it was already apparent that from the front they are a bit plain, hopefully with a bit of lateral thinking I can not only get enough volume with the baffle but also get an interesting front appearance to boot.
My current thinking is some sort of 'Avalon' look on the front baffles, if you can picture that. Heavily chamfered 'crazy' angles type thing. That would give a complete contrast to the smooth curved back.
It will either look stunningly good....or stunningly bad!
I have cut and mocked up the angled front baffles (using tape etc), and it looks quite interesting actually! I do think it will work.
Unfortunately I don't have a photo to show just yet, overnight the tape fell off and it all went to pieces. Still, encouraging enough to forge forward.
My current problem is how to mount the tweeter, (bloody ornery french!) it is rear mounted.

Luckily for me, the mid range cutout is large enough that I can physically insert the tweeter into that and fit it from the back using wingnuts. So it will be in the midrange chamber itself. Still, a damn nuisance I can tell you.
Look, I'm sorry, I simply don't know why the pictures (some of them ) are still coming out as large! I tried reducing each of them, and one or two worked, but the others insist on coming up big.
By the way, out of curiosity I weighed the first top section made from layers of mdf. It was 12 kg. In contrast, the new top section made in 'pebblecrete' is 24 kg, the middle section is 27 kg and the bottom section (still made from layers of mdf) is 7 kg. I'm a bit surprised at how light they are, boy they feel heavier than that when you lift them!
To start from scratch, route (the now fewer) mdf pieces required and do all the formwork etc then the concreting and final coat is so very quick. I estimate that if you were doing a 9-5 job, you get to the finished stage on both boxes (as seen in the photos) easily within three days. That is a bit quicker than my original method.
Seemed to get more work done...wonder why??
OK, trying to remember what stage we were at...think I had had the brainwave of making them out of concrete hadn't I?
Yes I have. The two boxes are now done and dusted basic construction-wise.
Did the middle section of one first, in concrete. I started from scratch, basically the first one you saw with the multiple built up layers 'is no more', may it rest in peace.
As I was no longer needing the 'every fifth layer', I got away with just the top section and the bottom section. In between I could now pack a stiff mix of concrete, using the edges of the top and bottom as witness marks to 'scrape' to. Of course on the internal side of the top and bottom plates I needed something to push against and provide a form for, so I simply cut strips of 6mm mdf and nailed them inside. The end result was a concrete depth of around 30 mm.
It will be clear when you see the piccies.
As I was using mdf for the formwork, I had a bit of concern about moisture absorption, so I simply painted all the relevant parts with waterproofing.
This is the first I did, using concrete. I think I had an extra brace in the middle (ie top, bottom and middle) which on subsequent ones I went to only top and bottom. It was very easy to route the layers used to include bracing as an integral part of the structure, as you can see.
OK, well let me tell you we were going thru a cold snap when I did this, and boy did the concrete take ages to go off. Trouble with that is that due to the time taken, it slowly slumped. This meant I had to continually scrape off where it bulged out of the 'framework guides'. Of course what I removed had slowly come from above, so it needed filling to replace the lost material, and every time you 'worked' the concrete it slumped more!
It was quite aggravating.
What I was aiming for was the concrete to be a couple of mm below the witness lines, as I could put an easily worked skimcoat on top of the concrete which would both give me a smooth finish and could easily be shaped. This ruled out bog as the skimcoat, instead I went for base coat used for gyprock (hardwall?). For a while there I really got into the smoothing and forming of the skimcoat (not needed as I would be putting a frankentrick mdf layer on top) but I just loved the aesthetic nature of it. Ever see the guys forming the cars out of clay? Just delicately using a scraper etc to form it. The base coat goes a bit like that, you can work it for a few hours and using a scraper delicately shape the work. Anyway, just a bit of fun whilst I was doing it.
I decided that concrete was out for the next ones, not worth the hassle. What I did was to simply take some of the gravel I was using in the concrete, filled a measure with it then added water to it. By draining off the gravel I could get a measure of the 'airspace' between the particles (as evidenced by the amount of water) and simply used that amount of base coat as the ratio of gravel to base coat mix.
Base coat (depending on which one you buy) goes off in 45 minutes or so, a far cry from the five hours it took for the concrete. It should be roughly the same mass/density of the concrete as it is basically pure gravel with just enough binder (base coat) to fill in the spaces between the gravel grains.
You can see the at the bottom of this picture is the concrete section, on top is the gravel section. The grains of the gravel are pretty clear.
By scraping with a straight edge using the top and bottom plate as guides, we can get a pretty accurate profile. And if the top section (as in the photo) is done whilst sitting on the middles section, then in fact the bottom of the top section that I scrape to is actually the top of the middle section (confused??), all that means is that it is a common profile that the joint of the top and middle sections is scraped to. Hope you can work out what I mean, the picture will help show it.
That means we have a 'perfect' joint between the two sections. (and of course the same principle applies between the middle and bottom section).
BOY! They are tiny!! I was sure I had stuffed it up, but no, they are the right size (height)
Here is my daughter givi9ng us a sense of the height, and alongside is the three sections of the next one to be done. It's all coming together!
The seperate pieces are located with dowel pins between each section, that is needed so that they accurately position together no matter how often I need to seperate them to work on them. Remember, I need to be able to get an exact joint line when I veneer them later.
Have had a few thoughts along the way, one of them being that it's unlikely that I will frankentrick the sides as a base for the veneer. Instead I had the idea that I will use multiple layers of veneer crossing each other, rather than a layer of mdf then veneered.
If I run the grain horizontally, then 45 left and right then finally vertically, I should end up with a tailor made plywood cover. Further, as long as I lay them with a bit of forethought, the actual joint ecges will be interleaved as well, giving a very strong joint, and no concern over mdf joint creep.
Depends on the cost of doing this I spose!
Have decided on the finish. I was originally looking at nice veneer to match the house aesthetics, but realized (probably prompted by this *^%%$% antique I'm currently restoring) that a black laquer finish will fit in perfectly well, along with a couple of antique tricks that I will tell you about later. That means the expense or 'quality' of the veneer is no longer critical, and so makes my plywood idea more feasible.
An artistic shot of the speaker from the rear. I must say, they do look very nice and impressive, even is I say so myself.
In contrast, the speaker from the front is a bit of a plain jane really, had thought a heavily chamfer thick baffle would go a way to fixing that.
You may recall that I had to deepen the box from what we saw in the model, that was due to volume issues. That I got a nicer shape was just a lovely bonus.
Anyway, I always knew I was tight on my volumes, so at this stage I measured the final volume of the boxes I built. (tip, if you can, DON"T use polystyrene beads OK? heh heh, still cleaning them up!)
My current boxes are around 110 l, and even then I need to use heaps of power and eq to get the 18's down to a reasonable frequency. So I was aiming to get to within at least 10% of that volume.
They are 82l.
Oops.
No, I will not be doing them again. So what to do????
Funnily enough, I had already been pondering extending the boxes forward, and had been considering the options to do so. So really I wasn't that upset as I had already been going down that path in my head.
Basically, I can get a bit of that volume back depending on how I build my baffles (they will have to be deep baffles), and as it was already apparent that from the front they are a bit plain, hopefully with a bit of lateral thinking I can not only get enough volume with the baffle but also get an interesting front appearance to boot.
My current thinking is some sort of 'Avalon' look on the front baffles, if you can picture that. Heavily chamfered 'crazy' angles type thing. That would give a complete contrast to the smooth curved back.
It will either look stunningly good....or stunningly bad!
I have cut and mocked up the angled front baffles (using tape etc), and it looks quite interesting actually! I do think it will work.
Unfortunately I don't have a photo to show just yet, overnight the tape fell off and it all went to pieces. Still, encouraging enough to forge forward.
My current problem is how to mount the tweeter, (bloody ornery french!) it is rear mounted.
Luckily for me, the mid range cutout is large enough that I can physically insert the tweeter into that and fit it from the back using wingnuts. So it will be in the midrange chamber itself. Still, a damn nuisance I can tell you.
Look, I'm sorry, I simply don't know why the pictures (some of them ) are still coming out as large! I tried reducing each of them, and one or two worked, but the others insist on coming up big.
By the way, out of curiosity I weighed the first top section made from layers of mdf. It was 12 kg. In contrast, the new top section made in 'pebblecrete' is 24 kg, the middle section is 27 kg and the bottom section (still made from layers of mdf) is 7 kg. I'm a bit surprised at how light they are, boy they feel heavier than that when you lift them!
To start from scratch, route (the now fewer) mdf pieces required and do all the formwork etc then the concreting and final coat is so very quick. I estimate that if you were doing a 9-5 job, you get to the finished stage on both boxes (as seen in the photos) easily within three days. That is a bit quicker than my original method.
Hi Terry
All I can say is ****************** "WOW"
What size gravel did you use?? and did you mix with PVA to give greater strength??
The volume issue can be moderated of course with the proper stuffing.
When you were using concrete what mix were you using and did you use wire reinforcing, in low temperaturs it is normal to use an accelerator like calcium oxide to speed cure but from your description of the creep it sounds like too much water and not enough mixing time.
Most concrete and stucco is made with far too much water, its a common mistake, use less water and mix for much longer.
Stucco mixes are best worked for a minimum of 10 minutes after the mix is wet thru and if you can get fine white plasterers sand and white cement ( the high strength stuff ) it may work better.
Regards Ted
PS it beets mowing the lawn don't it???
Moondog55 said:Hi Terry
All I can say is ****************** "WOW"
What size gravel did you use?? and did you mix with PVA to give greater strength??
about 5mm gravel, think it's called pea gravel. No. no PVA or bondcrete mixed in. I did however coat all the surfaces with bondcrete before applying, and also fired a rack or two of nails from the inside out (and then bent them over) to give it that bit extra to become entwined with.
The volume issue can be moderated of course with the proper stuffing.
what do you mean?? the volume of the new box is way less than the vol of the old box. I know f/glass etc makes the box 'bigger' to the driver, but my aim was to duplicate the sound I have now, and I'm not sure ending up with 80% of the original volume was the way to do it, regardless of how much stuffing I throw in. Guess you can have too much stuffing as well, so would rather just 'duplicate' what I have.
Anyway, found out tonight that I can in fact gain around 30 l with my baffle idea, which brings it back into the right ballpark, which is a relief. As long as it looks good of course!
I did have a pretty dry mix, tho it could still have been too wet. Still, apart from the little headache as I did that one, no real harm done, and switching to the base coat fixed all the subsequent ones. It should be pretty well bonded to the form, what with the nails and bondcrete, and I reasoned that all I have to achieve was it not moving, ie no compression or tension (to speak of) to consider. Then with the pseudo plywood I'll be building on top of it, well it's a bit like stuffing sand into a coffee tin, there is a stage where you simply cannot get more in and it stays put.
PS it beets mowing the lawn don't it???
It does, especially when it's sixteen acres you have to mow! (darn, it's getting back to that time of the year again...)
56oval said:Hello Terry .
Excellent work there ,what finish are you looking at .Have you had a look at finishes from Porters Paint.
Cheers
hey 56, thanks. Glad you mentioned it, I forgot this morning to give my current thinking.
As I say, the curved rear will be basically a gloss piano finish. The little trick inspired by the antique I'm doing up is to have a thin (1mm or so) brass shim between each section, gently filed and smoothed back to ,match the profile. So a strip between the base and middle and top sections.
Am currently frantically looking for a suitable motif (some sort of musical one) that I can also inlay a brass design into the rear 'panel' of the tops sections. Have in my head some sort of 'lyre of orpheus' type thingy. Very hard to find an image off the web just yet, the number of different word combinations I've typed in!!
May just end up with a abstract design if I can't find a suitable musical thing. A bass clef etc is just a tad too obvious methinks.
If anyone comes across something like that please post it here for my perusal..thanks.
The front baffle...a bit tricky really. I still have not got a photo to illustrate, but unfortunately the 'avalon bevels' I have mocked up are not of a 'plane nature', they have a spiral twist to them. Additionally the depth (both to give sufficient extra volume to make up for my boo boo and to 'balance the looks') is such that I cant, for example, stretch leather or vinyl or whatnot over it. (I assume)
So that did leave me pondering what to do for a while.
Now please don't laugh m'k? (at least until you see it, then who knows I may even be laughing with you!) but I'm very much leaning toward a textured paint finish, you know, the ones that have sand-like stuff mixed in with it. Thinking along the lines of a deep/dark grey. A bit darker than shinobiwans.
That will at least have the 'family' colour scheme of shins, yet with the piano gloss back contrasted with the rough texture on the baffle. This will further reinforce the contrast of the graceful curved back with the angular front baffle.
I'm even toying with the idea (will do a test piece to see) of 'dimpling' the baffle before I paint it, bit like a golf ball. Dunno if that's necessary, but hey let's have a look eh?
For a while there I thought about dark felt, felt is sposed to be good for the driver response ain't it? Well how about doing the whole baffle in it? Gone off that idea a bit tho, mainly because of the difficulty in getting a nice cut on all the angles, plus I can just see the cats enjoying their new scratching post!
EDIT hey, what do you know! The pictures have gone to the smaller size I cut them down to, hmm, they were still big this morning when I posted. Maybe it takes photobucket a bit of time to put the changes thru the system?? Anyway, no need to scroll across the screen which is good.
How to mount the tweeter?
Not sure if I'm misunderstanding your fixing problem here but... could you glue (obviously very strongly) nuts to the back of the mount holes allowing a bolt to come through from the front without being secured from behind and pull the surround into the back of the baffle?
Very impressed by the figure it out as I go along problem solving, always the most fun, if a little frustrating sometimes
Re: How to mount the tweeter?
you know, I never thought of that! Thanks.
Have always had it in my head that all you will see is the driver and it's surround.
Now that I have sorted the rear mounting I do think I will go with that approach and see 'nothing'.
Hah hah, let's pretend that the figure it out as I go is a virtue and not related to poor planning eh? Actually it is not that frustrating really, I always do enjoy the solving part of things.
What I find frustrating is the ten minutes I spend looking for the pencil I had only a minute ago.
I really should learn to work in a tidy workspace, but figure it's been nigh on 50 years now so little hope of any change in that area. Sigh.
Not much more I can do at the moment till I get the veneer, that way I can start to marry the baffle to the finished box shape and continue on, not to mention the completion of the boxes themselves. I hopefully get an answer today if I can source the veneer locally at a reasonable price, else it will have to wait till late next week to get it from the big smoke.
doogyscoot said:Not sure if I'm misunderstanding your fixing problem here but... could you glue (obviously very strongly) nuts to the back of the mount holes allowing a bolt to come through from the front without being secured from behind and pull the surround into the back of the baffle?
Very impressed by the figure it out as I go along problem solving, always the most fun, if a little frustrating sometimes
you know, I never thought of that! Thanks.
Have always had it in my head that all you will see is the driver and it's surround.
Now that I have sorted the rear mounting I do think I will go with that approach and see 'nothing'.
Hah hah, let's pretend that the figure it out as I go is a virtue and not related to poor planning eh? Actually it is not that frustrating really, I always do enjoy the solving part of things.
What I find frustrating is the ten minutes I spend looking for the pencil I had only a minute ago.
I really should learn to work in a tidy workspace, but figure it's been nigh on 50 years now so little hope of any change in that area. Sigh.
Not much more I can do at the moment till I get the veneer, that way I can start to marry the baffle to the finished box shape and continue on, not to mention the completion of the boxes themselves. I hopefully get an answer today if I can source the veneer locally at a reasonable price, else it will have to wait till late next week to get it from the big smoke.
Moondog55 said:Has it been a year already??
Not much chance of coming up this year either, Cecile has to go to the USA for the first grandchilds birth and I'm looking for a job again.
About the lawn;-0 Get some sheep
yeah time flies don't it!
Umm, with the wife gone would that not make it easier?? And IIRC last year it was sudden work commitments that stopped you...again a bit easier now?
It's only a weekend....can't do much job hunting then can you? You could possibly hitch a ride with some of the melb boys coming up, so even cheaper.
Re livestock, trouble is they eat the damn trees etc that we are growing in the middle of the drought. Heck, at times we get a neighbours cow that gets free and wanders in...trees smashed and destroyed...and we've kept the bloody things alive and growing in spite of the drought only for some buggers animal to come in and smash them down.
Boy, does that make us angry!!!
Truthfully we'd both love to come.
I know what you mean with the drought; we've had real rain for the last week and if I dig down 300mm it's as dry as death.
So much water gets wasted here in Oz, especially in the cities and the politicians won't do anything about sensible recycling of sewage.
Sorry Terry bit OT there.
I know what you mean with the drought; we've had real rain for the last week and if I dig down 300mm it's as dry as death.
So much water gets wasted here in Oz, especially in the cities and the politicians won't do anything about sensible recycling of sewage.
Sorry Terry bit OT there.
Oh well, looks like it's back to the frankentrick for the cover.
Just got the price for the veneer, mixed species mind and nothing flash...$490!!! Can get it a bit cheaper in Syd, all up about $320 mailed out, was hoping the local guy by going thru his scrap pile (no need to match etc) would have come in under the syd price. nope.
As it is a gloss finish, I gain on the smoothness of the mdf surface, but potentially lose on the exposed joint. Have just started a few experiments on the old top section first presented to see if I can get a handle on the joint. Probably the smartest trick will be to simply apply one piece of veneer (any old rubbish from the h/w store) on the back and use that to provide a cover for the exposed mdf joint, and give it plenty of time to harden up before sanding.
Maybe have some nice veneer on the baffle? Will have to have a look see as the 'twist' in the chamfer may look odd, or it may not.
rob323 said:I can't picture in my feeble mind why you can't use leather for the baffle Terry. Leather will form to compound shapes miles better than veneer ever will.
that's encouraging. wait till I post a pic and then let me know what you reckon then ok?
would be nice if it can, but I wonder if it may be too much black. would solve a lot of problems tho.
- Status
- This old topic is closed. If you want to reopen this topic, contact a moderator using the "Report Post" button.
- Home
- Loudspeakers
- Multi-Way
- Frankenstein becomes cindarella..I hope!