Also how would you recommend joining the panels together.
Given the depth of the cabinets, what we would do, is brace 1: full height from the front baffle to the back, bracing the woofers and baffle to 3 panels, braces 2 & 3 each in 2 pieces from the main brace to the sides. You could get fancy and interlock them but that is even more fiddly.
dave
I don't want to spend to much on materials, just what I can get hold of locally.
That leaves, MDF, Marine and Birch Ply as the options.
Do you have access to Uptons, Bunnings etc?
As I said before, formply has the same F17 strength rating as the fancy stuff, but costs ~the same as MDF.
The baffle dimensions given by Selah Audio are 228.6mm (9in) x 558.8m (22in).
Volume most be 1ft^3 (28.32L).
As said before, the crossover design 'expects' these front panel dimensions, so don't change them too much.
...but don't forget to oversize the box slightly to account for your bracing and any other space fillers.
I admittedly am still a bit confused over just what to do and whether the current design of my cabinet is good enough. At this stage I think I'll settle on 18mm sides and 25mm thick front. Most likely from ply.
(1) I'm going to reiterate what I said in post 2: Your original plan is totally fine.
All the suggestions that have followed are either marginal improvements or just natter (flirting / hair splitting / bickering). Just pick the low-hanging fruit (the easy improvements) and get building.
e.g. Dave (planet 10) suggested mounting the crossover as far from the woofer magnet as you can. That's easy to do. It makes sense. It costs nothing, and might be an improvement.
(2) Don't overthink the bracing. It would sound fine with no bracing. Just think of it as a way of using up all of your offcuts. That's easy to do. It makes sense. It costs nothing and might be an improvement.
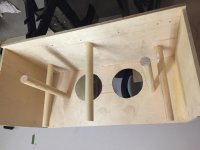
I've attached another example to show how simple / humble it can be.
What to buy...
It sounds like you have 90% of what you need, and the wood is the major decision. Just get a hunk 'o' ply and don't worry too much. You only need one sheet, so the cost can't really get out of hand.
Take a look at the products and FAQ of Plyco (Melbourne). I think they make ply in house. Of specific interest: They offer 18mm birch ply faced with native veneers, and they also do CNC cutting and delivery.
Maybe you could get them to make your front panels from this material (cutouts, rebates, everything)? It might be worth paying a bit to get the most finicky bit done perfectly. You could do the rest of the box with (any) base layer and a veneer of the same species.
Can anyone located in Australia, point me towards some good damping materials to use.
I already have some speaker stuffing from jaycar.
Terminology:
Stuffing = fluff to fill the void. Use what you already have. Or an op shop wool jumper.
Damping = heavy rubbery stuff, to deaden cabinet walls - the heavier the better. You can get stuff like bitumen panels in car shops. Or use lead + glue. Or floor mats. Or whatever. IMO: not really worth it in a strongly-built cabinet, unless you're going for total over engineering and 100kg cabinets.
Dave (Planet 10), can you link your Plasticine tweak? That to me look like the best application of damping.
Attachments
Dave (Planet 10), can you link your Plasticine tweak?
Ductseal. Speaker Tweeks -- Puzzlecoat & Ductseal
dave
Ok thanks for that, I'll get start hopefully next week.
That formply stuff is 11 ply vs the 13 ply for the more expensive marine/birch ply I can also get.
I do have Bunnings and Upton's in my area.
Is it worth spending a lot more for the 13ply or is the 11 ply formply good enough.
That formply stuff is 11 ply vs the 13 ply for the more expensive marine/birch ply I can also get.
I do have Bunnings and Upton's in my area.
Is it worth spending a lot more for the 13ply or is the 11 ply formply good enough.
Is it worth spending a lot more for the 13ply or is the 11 ply formply good enough.
OK, so it is superior to what I'm using - and what I'm using is better than MDF.
If the stress rating of the 11-layer hardwood formply is the same as that of the premium ply (F17), I think the main reason to want a higher ply count (for a speaker box) is for aesthetics and/or detailed stuff like finger joins. Since you're veneering, that seems moot.
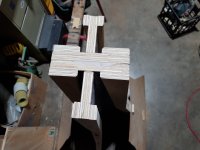
The photo shows my 17mm formply & some regular 12mm stuff (I think the latter is from Bunnings, what they call "Premium Grade Radiata plywood"). This photo was taken halfway through a session with a sanding block - I was grinding this section flat, to make up for my dodgy workmanship earlier.
It is easy to work with, get a good clean edge, don't have any voids.
The main drawback to formply is that you can't join it face-to face with PVA - nothing water-based will stick to the face. Dado joins would work fine, though.
I suggest you compare a bit of it vs the premium stuff with 13 layers. See if they have any offcuts lying about. If the formply seems less stiff, or cuts less cleanly, or the edge grain shows any voids, pay $100 extra for the fancy stuff.
If you do buy it from Bunnings, try to go there at an off peak time. The big stores will cut the sheets up for you, for free.
Attachments
Is it worth spending a lot more for the 13ply or is the 11 ply formply good enough.
The more plies in general, the better, but here very small. But it is not the only part of the story. It is probably next to moot.
dave
Thanks for that, with regards to the Formply stuff:
Specrite Formply F17 1800 x 1200 17mm Plywood | Bunnings Warehouse
It appears to only come in 17mm thick sheets, this would be fine for the sides right, but I imagine the front baffle would need to be a bit thicker.
What should I do about it, or should I laminate 2 17mm thick layers of plywood for a 34mm thick front baffle.
With regards to the damping, I'd rather stick with things I can get locally, I should be able to get hold of those bitumen panels/pads pretty easily, what thickness should I be looking at?.
Can get hold of that Mod Podge stuff locally, but the woofer I'm using is an aluminium cone, mids are ceramic and tweeter is an Aluminium ribbon.
Sounds very good. WRT damping.. Doing this using a well damped adhesive (polyurethane, for example is marshmallow like), if you drop a hammer on the panel you will hear a dull, short, lower pitched thump that plunges into silence straight away. After hearing this it is easy to recognise how much a single piece normally rings.should I laminate 2 17mm thick layers of plywood for a 34mm thick front baffle.
It does little (but without knowing your objectives for the bracing...). The one on the front wall also does little but is at least doing little where it might do some good. If you want to stiffen/support the front baffle then the bracing needs to be designed to do so. For example, a pair of horizontal bracing panels above and below the midwoofer would do a better job if they will fit. Keep the port mouth free.Would the brace attached to the rear cabinet wall be needed or is it a bit unnecessary?.
Yes or something better. This is significantly more important than the bracing because it dissipates the energy in the vibrating cabinet. Mass and stiffness don't do that.In Troels Gravesen Cabinet damping guide, he mentioned using bitumen pads, is this something I should also use?.
Hard to say without experimenting. Getting the right amount of damping in the right place to effectively absorb the internal cabinet resonances, block midrange leakage through the port while not blocking the air moving in and out of the port is likely to need some work to get right.Would it also be worth changing the Jaycar Acrylic Speaker Damping material for something better/different, like pink Fiberglass batting sheets.
The speaker consists of extremely expensive drivers, an unknown passive crossover and a modest prebuilt MDF cabinet. It is a slightly odd combination in terms of where the money has gone.How does this design compare to the Dayton Audio MTMC-1.0, used in the pre-built version of my speakers.
The prebuilt cabinet cannot use bracing panels to support the front baffle because the location of the drivers is unknown. The mounting arrangement of the front baffle looks to have been designed for convenience rather than performance. It has no damping.
I would suggest looking at removing all the current bracing panels and replacing them with two horizontal panels with holes in just above and below the midwoofer. This will support the 4 panels that need it most and in particular the front. Perhaps it won't fit and you would need to consider something else.There is relatively, little space on the rear of the front baffle to attach a horizontal brace.
Would it be better if I change the horizontal brace, so that it runs across the length of the front baffle instead of just the edges.
Also how would you recommend joining the panels together.
I was thinking about using dado joints.
It seems a bit odd asking about the worth of decent plywood when it is to be used with three of the most expensive drivers one can buy. You probably ought to be using Panzerholz.Is it worth spending a lot more for the 13ply or is the 11 ply formply good enough.
Hi Ken98, I recently had to build a large pair of floor standers for a customer and rather than do all the cutting of material myself I got the sheet material from http://www.specialtyveneers.com.au/panels/ , I used Tas blackwood on MDF but i think they can put the veneer on ply if required, and i got Timber - Xanderware Laser Cutting and CNC Routing to cut the panels and holes with their CNC router.
cheers, Arthur.
cheers, Arthur.
Good grief. It might be wise to have a bit ponder about how you might check the quality of some of the advice you are receiving.Can get hold of that Mod Podge stuff locally, but the woofer I'm using is an aluminium cone, mids are ceramic and tweeter is an Aluminium ribbon.
Was the crossover designed for the aluminium cone or the more common paper cone? If the latter it will be wholly unsuitable for the aluminium cone.
I'm not aware of that product being available in Australia.
2 Crossovers needed per speaker, If I change the bracing how would I mount the crossovers. I'll take a lot at your suggestions and try adding to horizontal braces below and above the midwoofer, running the length of the cabinet interior.
Woofer is the 4ohm aluminum cone version, it is what the crossover's where designed for.
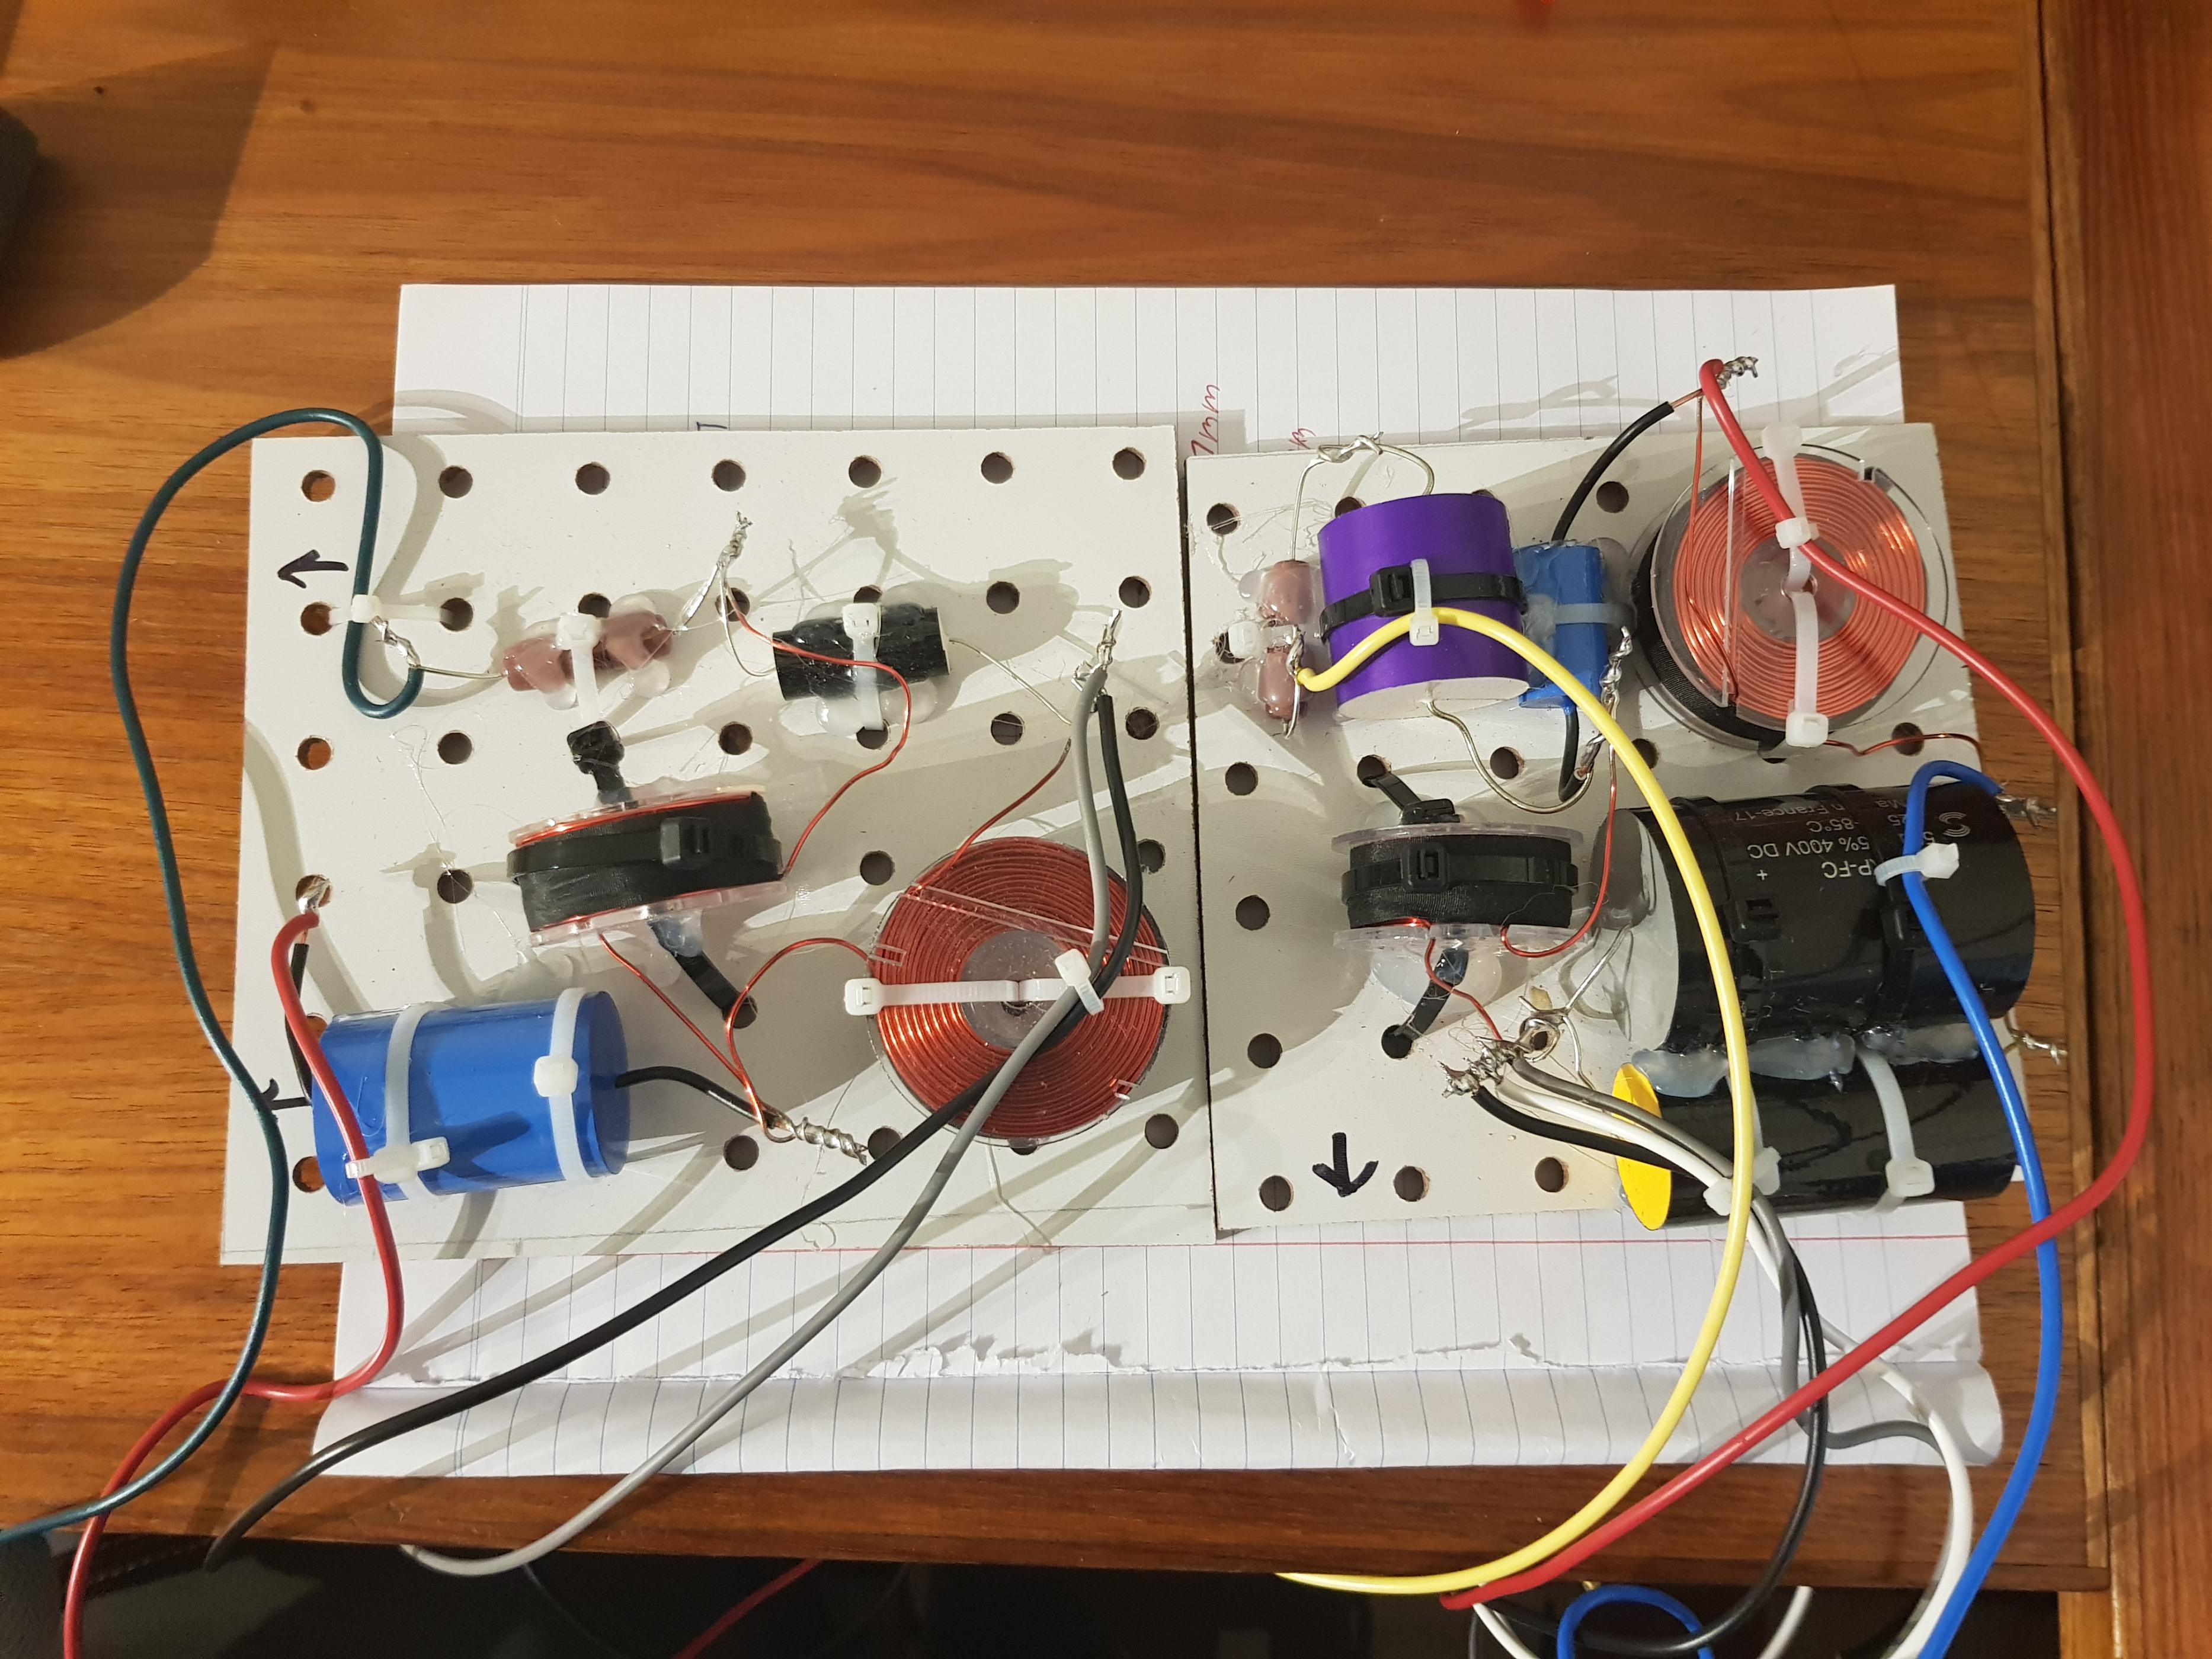
Here are a picture of the crossovers. The wires coming off it are around 50cm long.
2 Crossovers needed per speaker, If I change the bracing how would I mount the crossovers. I'll take a lot at your suggestions and try adding to horizontal braces below and above the midwoofer, running the length of the cabinet interior.
Woofer is the 4ohm aluminum cone version, it is what the crossover's where designed for.
Here are a picture of the crossovers. The wires coming off it are around 50cm long.
Attachments

Last edited:
The surprise was that you would consider adding gloop to your very expensive carefully designed and manufactured $400 midwoofers rather than saying hang on this doesn't seem particularly sensible.I'm not aware of that product being available in Australia.
Is there a lack of space?2 Crossovers needed per speaker, If I change the bracing how would I mount the crossovers.
I think others suggested something similar above.I'll take a lot at your suggestions and try adding to horizontal braces below and above the midwoofer, running the length of the cabinet interior.
In your position I would be tempted to consider a cabinet more in line with the cost of the drivers. For example, something more like the cabinets here. These are constructed by gluing stacks of MDF or plywood that have been CNCed into complex shapes to include curved sides, bracing, pockets for crossovers,... It may need an extra sheet of wood, time on the computer designing the stacks, CNC costs and then hand finishing. There are quite a few examples around.
Woofer is the 4ohm aluminum cone version, it is what the crossover's where designed for.
Good. Just checking.
Did you build the crossovers or were they done for you?Here are a picture of the crossovers. The wires coming off it are around 50cm long.
Crossovers came pre-assembled.
I have heard a bit about Vapor Audio and their high quality, bomb proof speaker cabinets.
I don't have the time, experience and resources to build a cabinet as good as those used by Vapor Audio.
I don't want to overthink this thing to much, I'll just have to settle for what I'm able to do myself.
I'll fiddle around on Autodesk Inventor when I have the time and try to use a horizontal brace of some sort. I guess the crossovers can be mounted on that instead of the middle brace I had before hand.
Sticking some dowels and glue onto a stack of panels and then putting a weight on top is likely to be easier than messing about with clamps and conventional cabinet assembly. The finishing is likely to be more time consuming though but I wouldn't expect it to be significantly more difficult.I don't want to overthink this thing to much, I'll just have to settle for what I'm able to do myself.
A basic cabinet with very expensive drivers just seems a bit unbalanced to me. Then again you could always repeat the exercise later if your first attempt niggles away at you. Mine did.
Is there a reason for wanting to mount the crossover on a panel brace?I'll fiddle around on Autodesk Inventor when I have the time and try to use a horizontal brace of some sort. I guess the crossovers can be mounted on that instead of the middle brace I had before hand.
Can get hold of that Mod Podge stuff locally...
The link was not for the ModPodge but the Ductseal part.
dave
Can get, either 13 ply marine or Birch Plywood locally.
for 18mm thick, prices are ~$136 for Marine and ~190 for Birch.
Veneer sheets vary in cost depending on the species/wood type used.
The veneers I'm most interested in vary in price from ~$140-$220.
Alternatively I could also save some money and go with the cheaper 17mm thick formply from my nearest hardware store (bunnings).
Most of the suppliers in my area only sell in set predetermined sheet sizes, 2440x1220 being the most common. It would be uneconomical for me to purchase 2 sheets one being 25mm and one being 18mm, since the front baffle only requires a small amount.
At this stage, I will most likely laminate 2 layers together, giving the baffle a width of 36mm (or 34mm if using cheaper formply).
- Status
- This old topic is closed. If you want to reopen this topic, contact a moderator using the "Report Post" button.
- Home
- Loudspeakers
- Multi-Way
- First Time Speaker Build, Cabinet Advice