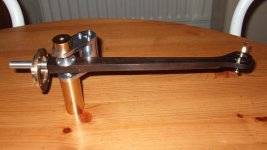
Hi I found it simpler especialy as regards mounting to position the mounting pillar directly below the lower magnet, much simpler to mount as in a conventional tonearm,
as opposed to the offset arrangement on the original Schroeder, which on some TTs sits really far back and on occasion overhangs the rear of the TT.
Some tonearm data here:| Tonearm Mounting Distance and Alignment Information | Vinyl Engine
as opposed to the offset arrangement on the original Schroeder, which on some TTs sits really far back and on occasion overhangs the rear of the TT.
Some tonearm data here:| Tonearm Mounting Distance and Alignment Information | Vinyl Engine
Attachments
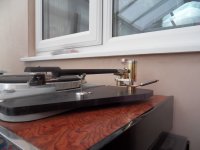
sweet! and nice deck!
Not withstanding just how good these sound, but the satisfaction one gets for knowing it was with ones own hands it was done.
And personally I have to just re-confirm thanks the Herr Scroeder for the help and guidence.
JD
Not withstanding just how good these sound, but the satisfaction one gets for knowing it was with ones own hands it was done.
And personally I have to just re-confirm thanks the Herr Scroeder for the help and guidence.
JD
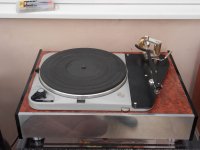
hi i'm a new lad here. i would like to show you my schroeder clone that i have almost completed. i am about to rewire it and make a new arm board. all my own work sounds great to with a G1042.
schroeder clone
hi bins and all of you, the tone arm lifter spindle was made in three parts on the lathe and it is basically a cam action which pushes the verticle spindle up it must be done to close tolerances to keep any play to a minimum. i reamed my holes to ensure this.here are a couple of pictures. i've still got a few jobs until i'm completely happy with it. it sounds fab. with a bow to herr Schroeder. regards Sean
hi bins and all of you, the tone arm lifter spindle was made in three parts on the lathe and it is basically a cam action which pushes the verticle spindle up it must be done to close tolerances to keep any play to a minimum. i reamed my holes to ensure this.here are a couple of pictures. i've still got a few jobs until i'm completely happy with it. it sounds fab. with a bow to herr Schroeder. regards Sean
Attachments
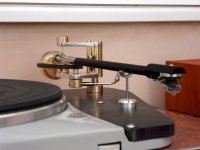
hi all, the arm is ebony. For the hole down the centre i cut it in half down the centre then put a small groove down both sides with a router before gluing it back together. After the glue had set i put a long drill down it to clear any glue out. it worked well.Having a hole either side allowed me to turn it between centres on the lathe.The effective length of the arm (pivot to stylus tip) is 285 mm and the turntable is a Thorens td-124 series 2. nice to hear from you and best wishes Sean

I have a good bit of the raw work done, and have been working on the cocobolo armtube gradually. I roughed it out round from a 1 1/4 sq block of musical grade cocbolo, then used an gun drill to bore a 8mm hole all the way up through it. So I've had that inside the house for the last oh, month or so, just letting it settle. Hopefully it will be stable when finished. I will have a CF shaft running up the middle of that cocobolo which should also help stability. That leaves me with 4mm or so for the wiring. That should be more than enough for the ultra thin wiring I use - its less than hair thickness and sounds very good. You need to be careful handling it as it will break easily, but once installed is fine.
I'm working on the headshell right now. So I will have an alu headshell, and it will be one of that type where the cart is mounted on a plate that can swivel a la the clearaudio arms. It seems a simple way to get the angle right. I also plan on making it so I can adjust azimuth.
Fran
I'm working on the headshell right now. So I will have an alu headshell, and it will be one of that type where the cart is mounted on a plate that can swivel a la the clearaudio arms. It seems a simple way to get the angle right. I also plan on making it so I can adjust azimuth.
Fran
hi all, Fran my arm is ebony which is only 10 mm dia. with a 3 mm hole down it. it doesn't need any reinforcing it is rock solid and their is plenty of room for the wire you mention. i also have a round plate to mount the cart as you say it is a lot easier to set up. Sean
The hole is only 3-4mm or so diameter.... and I'm hoping that the constrained layer of wood-epoxy-CF should help with the resonances.
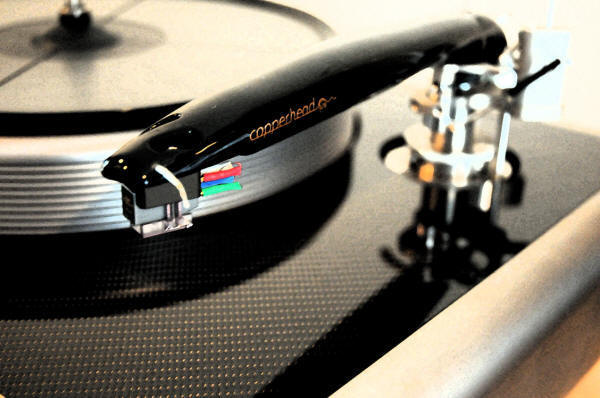
Truth is, if I think it somehow degrades the sound then I can always knock up another armtube. I have some more cocobolo, african blackwood, ebony, pau amarelllo and box here. All of those should sound excellent I think. The other thing I thought of doing was to make the armtube thicker in the middle. I understand that the high end copperhead tonearm does this and they reckon its a benefit.
Hoping to get the headshell done tomorrow - I'll post some pics then as well.
Can I ask a "string" question: How did you all attach the string to the arm? Just tie a knot big enough that it won't pull through the hole, or something more complicated?
Also, how did you all work out the antiskate twist? I was thinking of using a M4 grubscrew inside the height adjuster, but theres no way of attaching the string to one of those? Exactly how did you all do this?
(I don't mind working it out, but no point in re-inventing the wheel and perhaps with more rough edges!)
Fran
Last edited:
- Home
- Source & Line
- Analogue Source
- DIY Schroeder Tonearm???