JeroenR said:Can you describe the difference?
It is largely a matter of how the material applies. Glossy is just easier to use & provides a slightly smoother surface.
dave
planet10 said:
It is largely a matter of how the material applies. Glossy is just easier to use & provides a slightly smoother surface.
dave
Ah, I was afraid of a diff in sound. I will now get the gloss version.
Ok, last question : how much do you dilute the mod podge?
Thanks,
Jeroen
JeroenR said:Ok, last question : how much do you dilute the mod podge?
That is a question i've been struggling with. 1st off what you get out of the jar can be different, and certainly as you go thru the jar it thickens up.
I add water (tiny bits at a time) until it feels right. Someone told me, after sampling a batch, that it was about the same as transmission fluid.
You don't want it too watery as you don't want it to soak thru, but not so thick that it is a "struggle" to apply it thinnly & evenly.
The 2nd coat is easier than the 1st.
dave
planet10 said:
That is a question i've been struggling with. 1st off what you get out of the jar can be different, and certainly as you go thru the jar it thickens up.
I add water (tiny bits at a time) until it feels right. Someone told me, after sampling a batch, that it was about the same as transmission fluid.
You don't want it too watery as you don't want it to soak thru, but not so thick that it is a "struggle" to apply it thinnly & evenly.
The 2nd coat is easier than the 1st.
dave
Transmission fluid, that is a long long time ago when I last saw that...

I will experiment a bit, your clues should suffice.
Thanks for all the quick responses!! My next mail is hopefully a picture of the finished drivers.
Thanks,
Jeroen
Ok, no finished drivers yet but more a sort of status report...
The drivers are now Mod Podged. I diluted the Mod Podge a little (5%), first a had too much water and then the stuff dried way too quick to apply. With too little water it is just too glue like (wood glue) and that makes it hard too apply a even thin layer. The first layer was a struggle. Not sure what was right and the dry paper makes you want to apply more then you should (I think), The second layer is more easy.
I tried to apply realy thin layers. My thought was that a little help is ok but too much might give the opposite result because of too much added mass/stiffness. And... I am afraid of loosing the top end (read that somewhere).
I took some pics but it is hard to capture the finish as it is not that apparent.
Those wooden cones look great btw. Thanks Dave!!
Jeroen
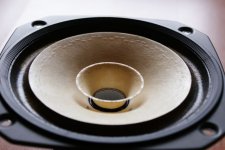
Attachments
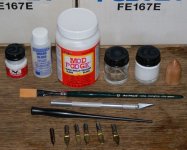
Perhaps nice as reference... here is the kit I'm using.
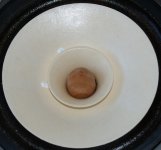
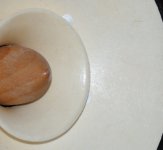
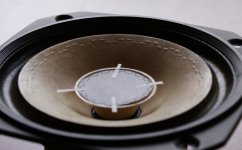
The little jar on the right with white content is the diluted Mod Podge. The empty one is for the diluted gloss finish. The knife proved the perfect tool for removing the dustcap, with light up and downward movements it cut through the paper like... well, not butter of course but still easy.
The little jar on the right with white content is the diluted Mod Podge. The empty one is for the diluted gloss finish. The knife proved the perfect tool for removing the dustcap, with light up and downward movements it cut through the paper like... well, not butter of course but still easy.
Attachments
I can imagine how hard it must be to describe the process in words with still pictures.
If you can continue posting pictures and say what you do that would be great.
Your finish of the Mod Podge looks outstanding. A simple sacrifice speaker I used for that had brush strokes and just looked gloppy.
If you can continue posting pictures and say what you do that would be great.
Your finish of the Mod Podge looks outstanding. A simple sacrifice speaker I used for that had brush strokes and just looked gloppy.
JeroenR said:I took some pics but it is hard to capture the finish as it is not that apparent.
That looks just about right. Anymore and it would be really glossy (which it will get with the gloss coats).
dave
Thanks for the encouraging posts!!
This morning I took a stab at the pattern. First I experimented with the pens but that definately did not work for me. I was not able to create an evenly paint-distributed line with it. I did not try it on the cone but on normal paper, so perhaps it would have behaved differently on the pretreated cone... but I did not dare that after the unsuccesfull try-out. The paint from the kit is also very watery.
So I got a very small brush and hat worked much better. I painted small models when I was younger so perhaps that practise helped.
I printed and cut out the template from another thread and attached it with scotsch tape to the cone. Then very carefully.....
After the first round the pattern was almost invisible so I gave the dots a second brush, now the seems to be "lifted" a bit more.
Ok, one pattern done, seven to go....
Jeroen
Attachments
planet10 said:Is the grey cone colour an artifact of the lighting?
...
dave
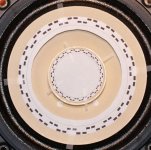
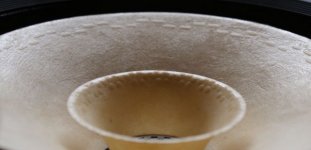
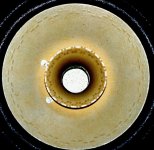
I had to play a bit with the light/shadow to bring out the pattern. There is no grey on the cone.
The top whizzer pattern is very hard to do. I did not manage to create small lines and ended up with a dot pattern, still need to finish it.
I makes me worry a bit about the realy small patterns. The inside/bottom whizzer pattern looks still possible with a very small brush or something similar. But the "on the cone under the whizzer" pattern looks like a certain road to chaos for me... How much would I miss out on sound when one of the smaller patterns is omitted (under or in whizzer)?
Thanks,
Jeroen
JeroenR said:I makes me worry a bit about the realy small patterns. The inside/bottom whizzer pattern looks still possible with a very small brush or something similar. But the "on the cone under the whizzer" pattern looks like a certain road to chaos for me... How much would I miss out on sound when one of the smaller patterns is omitted (under or in whizzer)?
The pattern at the voice coil can be just a set of spots. Doing under the whizzer is not easy. I use an A4 nib and even with lots of practise it is usually not all that neat (but is still effective)
I've just finished some FE167, when i get downstairs i'll take some pictures.
dave
loninappleton said:
...
Have you made any sample listenings with this?
...
No, I want to avoid soldering the divers too often. First I'm going to complete the enabl and paint the cabinet. Then a long listen without touching them...
Of course I will report. Although... I have no high-end gear, just a diy 6v6set and a Thorens td160. I am not an expert, I do this for fun.
- Status
- This old topic is closed. If you want to reopen this topic, contact a moderator using the "Report Post" button.
- Home
- Loudspeakers
- Full Range
- Coating+phase plugs to FE167