Ah, sorry, I didn't see that the new image tags prevented me from linking to the gallery. Here is the link:
http://picasaweb.google.com/theatilla/Ampy
Very nice.
")
PS: Try a 100uF Tantalum in feedback
This is my first Chip Amp using LM3886
Hi
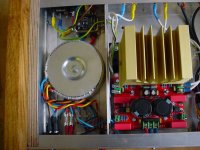
This is my first Chip Amp. I bought an assembled PSB from ebay with twin LM3886 Chips + rectifiers, voltage stabilizer and op-amp input, for £11.99 I could not resist. I have read poor report of this board but the parts I am sure are genuine. There is no hum whatsoever and the sound through an old pair of MS 10’s is remarkable–well compared to my existing Marantz amp. I originally built it for my son as an ipod amp and he wanted me to use with huge gold anodised heat sink from an de-funked car bass-amp. It get barely warm even running very loud, a big improvement on the slab of aluminium it was initially bolted to. I’m very pleased with it. Thus inspired I have just bought a chipamp.com LM3886 kit which I intend to build as Mono Blocks inside IKEA stainless steel cutlery drainers, a chassis and case for £2.50. I can’t wait to hear how good that will sound.
Here are some pictures.
http://s628.photobucket.com/albums/uu8/dugo_photo/
Hi
This is my first Chip Amp. I bought an assembled PSB from ebay with twin LM3886 Chips + rectifiers, voltage stabilizer and op-amp input, for £11.99 I could not resist. I have read poor report of this board but the parts I am sure are genuine. There is no hum whatsoever and the sound through an old pair of MS 10’s is remarkable–well compared to my existing Marantz amp. I originally built it for my son as an ipod amp and he wanted me to use with huge gold anodised heat sink from an de-funked car bass-amp. It get barely warm even running very loud, a big improvement on the slab of aluminium it was initially bolted to. I’m very pleased with it. Thus inspired I have just bought a chipamp.com LM3886 kit which I intend to build as Mono Blocks inside IKEA stainless steel cutlery drainers, a chassis and case for £2.50. I can’t wait to hear how good that will sound.
Here are some pictures.
http://s628.photobucket.com/albums/uu8/dugo_photo/
WOW!Mono Blocks inside IKEA stainless steel cutlery drainers, a chassis and case for £2.50.
seems to be veeeery interesting solution!(also because i live 20mins far away from the biggest Ikea in Italy..
)can you provide links and/or photos?
thanks in advance!
IKEA Cutlery Drainers
Hi
The plan is to build a passive Preamp or Buffer Stage with motorised volume control in one stainless steel drainer and 2 mono block in 2 more. Utilising the metal drainer as part of the heat sink. I am using a chip amp.com kit and it all fits.
The PSU will be in a ventilated concrete block. The drainers will be on stainless steel studding set in concrete. I love using concrete.
I am building the amps on a sub chassis with a Yew wood and aluminium front. The inputs at the rear and speaker terminals below front. They will slide into the drainers when they have been assembled.
I will post photos when I stated the build.
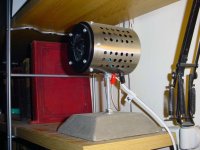
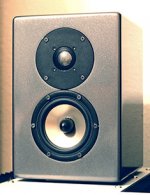
They will probable look something like this pair of Super Tweeters. A project I built last year when the idea first struck me. The IKEA drainers are very simple, beautiful and cheap.
dh
Hi
The plan is to build a passive Preamp or Buffer Stage with motorised volume control in one stainless steel drainer and 2 mono block in 2 more. Utilising the metal drainer as part of the heat sink. I am using a chip amp.com kit and it all fits.
The PSU will be in a ventilated concrete block. The drainers will be on stainless steel studding set in concrete. I love using concrete.
I am building the amps on a sub chassis with a Yew wood and aluminium front. The inputs at the rear and speaker terminals below front. They will slide into the drainers when they have been assembled.
I will post photos when I stated the build.
They will probable look something like this pair of Super Tweeters. A project I built last year when the idea first struck me. The IKEA drainers are very simple, beautiful and cheap.
dh
Attachments

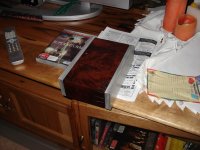
Here's a shot of my PIMETA build. I actually finished this before my Gainclone, but it always needed a few finishing touches here or there, so it took a while to get in the final shape.
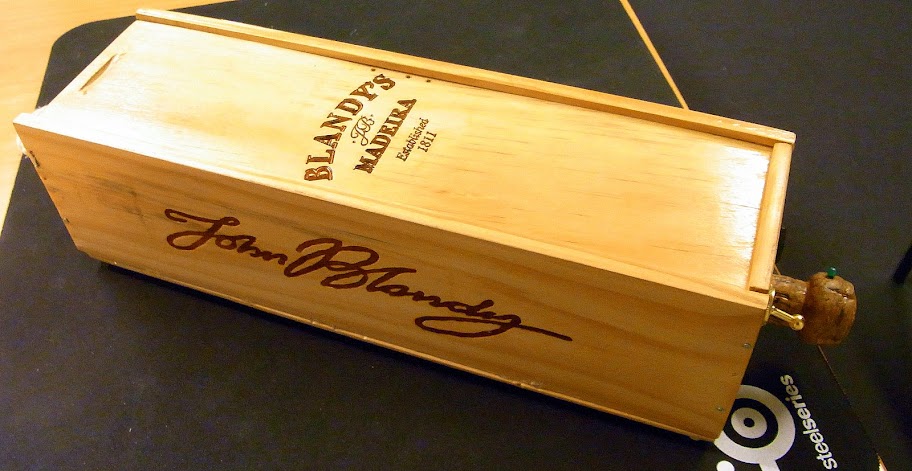
The transformer I cut off a full-sized circuit board from an old modem. Literally - with a Dremel tool. It's a very good pwoer source. Then I've got a Tangent TREAD supply, v1 PIMETA board, and a Linkwitz crossfeed at the input.
The case is the funniest part - it's a box that used to hold a bottle of premium Madeira once upon a time and it looked like it's going to be wide enough for the boards. It was. The woodwork is not perfect, but with some sanding and some laquor it looks awesome IRL. i hope Mr. Blandy doesn't mind his unusual product range expansion.
More shots here :
http://picasaweb.google.com/theatilla/Blandy#
The knob is made from a dried, sanded and laquored champagne cork. I've got a few more in the making that'll look better than this one. Awesome for wooden cases The feet are also from a bottle cork.
The transformer I cut off a full-sized circuit board from an old modem. Literally - with a Dremel tool. It's a very good pwoer source. Then I've got a Tangent TREAD supply, v1 PIMETA board, and a Linkwitz crossfeed at the input.
The case is the funniest part - it's a box that used to hold a bottle of premium Madeira once upon a time and it looked like it's going to be wide enough for the boards. It was
. The woodwork is not perfect, but with some sanding and some laquor it looks awesome IRL. i hope Mr. Blandy doesn't mind his unusual product range expansion. More shots here :
http://picasaweb.google.com/theatilla/Blandy#
The knob is made from a dried, sanded and laquored champagne cork. I've got a few more in the making that'll look better than this one. Awesome for wooden cases
The feet are also from a bottle cork.
Celtic that's sexy business. Love the plexiglass.
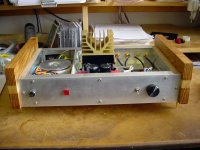
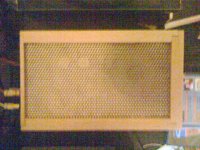
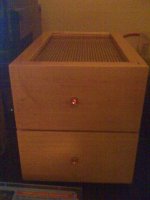
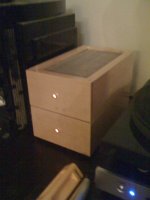
Here's my lastest. (sorry for the iPhone pictures, can't find the wife's camera. I'll update with better pics and internals later.)
Case Is Clear Maple, no stain just eight coats of gloss lacquer.
Single piece aluminum chassis and the heatsinks are hacksawed from Yamaha home theatre amp.
Also I bought some ultra bright water clear orange leds, then ran them with 220k resistors, they look remarkably like the old neon bulbs! (Like the ones on my busted old stove)
Attachments
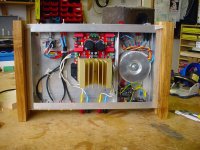
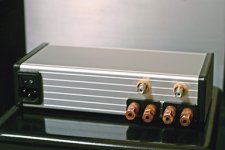
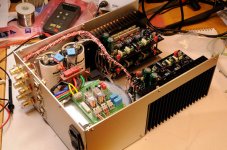
I was aiming for something compact at only 9x4x2.5 inches.
The transformer fills half the case, the LM3875's attach to a block of copper with the PSU on the other side. It's more than enough for the HATT 3.
The transformer fills half the case, the LM3875's attach to a block of copper with the PSU on the other side. It's more than enough for the HATT 3.
Attachments
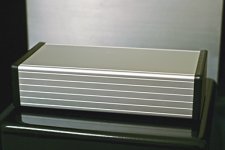
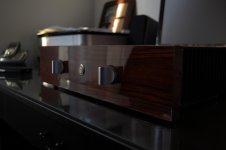
LM4780 Chip amp
This is the enclosure of one of my LM amps. Ive made 4 Panasonic chip amps so far. 1 LM3875 and 1 LM 4780 Peter Daniels amps, 1 LM3886 airboard and 1 LM4780 airboard.
Ill post some pics of the others as they come to hand.
This one was inspired by the chunky amp enclosures that Peter does so well.
The timber is Jarrah burl sourced from near to my house in 'the hills' Perth WA
Attachments
Last edited:
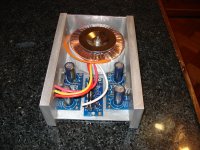
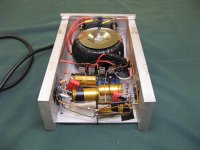
Here is a Gainclone, LM3886 'airboarded' for fun and CHEAP!
The torroid came from a Sony sound system that had been trashed and left out during a verge collection week. The chips were $20 and the rest of the components came to under $20. Magnet wire scavenged from old discarded power units (inductors) and a spare power board from another kit that didnt get used.
The power cable is (safely) jury rigged for testing and will be properly attached.
Just a bit of fun
Attachments
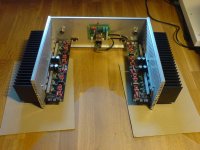
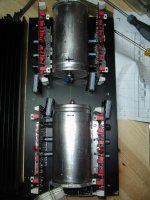
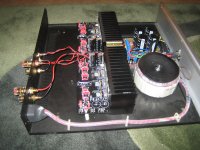
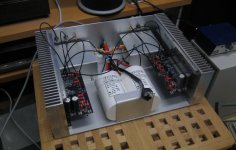
I arranged a group-buy on a Swedish forum a year ago for a PCB i made with 3 x LM3886 in parallel with DC-servo. Here are some photos from some forum-members.
I'm currently working on version 3 that has some small changes, 5 pcs of 1R, 0.6W resistors instead of one 0.2R 2W. Cheaper and more easy to buy. On board decoupling caps, more space between elyt-caps and other practical changes.
The board from the last group-buy works great, no issues with hum, buzz or so, and the one who had bought them are very pleased.
Attachments
- Home
- Amplifiers
- Chip Amps
- Chip Amp Photo Gallery