cable ties can help
cable ties work wonders securing the heavy stuff... augmented with adhesive
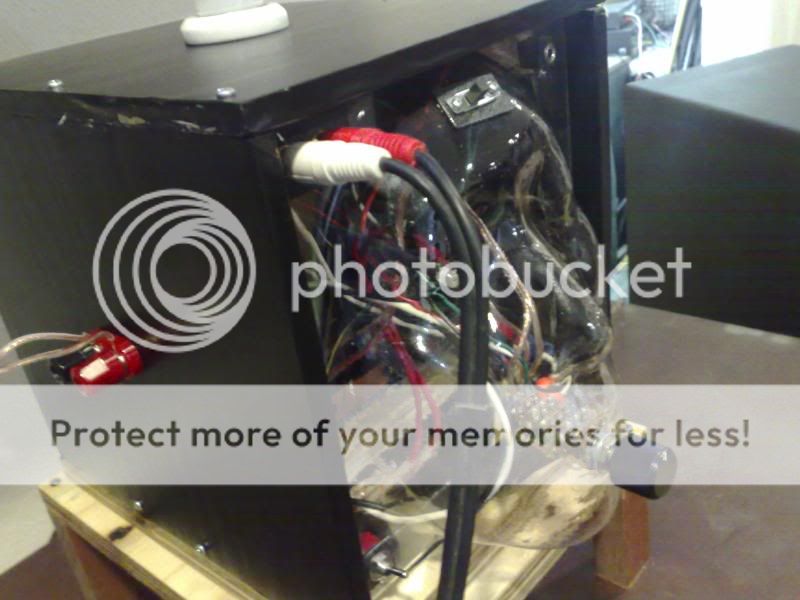
breadboard
finished version
John L.
cable ties work wonders securing the heavy stuff... augmented with adhesive
breadboard
An externally hosted image should be here but it was not working when we last tested it.
finished version
An externally hosted image should be here but it was not working when we last tested it.
An externally hosted image should be here but it was not working when we last tested it.
John L.
If you do a quick prep on the MDF surface (rough sanding & wipe clean), then you should have excellent adhesion. I'm not surprised that there would be issues on a smooth MDF surface though.
It's true that the the hot-melt is a thermoplastic that will soften with reheating, but I would be surprised to hear about melting if used in a home environment (that would be quite a party!). Outside (or pro-audio) could be a different story.
It's true that the the hot-melt is a thermoplastic that will soften with reheating, but I would be surprised to hear about melting if used in a home environment (that would be quite a party!). Outside (or pro-audio) could be a different story.
There are lots of different hot melt glues of all sorts some hold great others are worthless. I use hot melt on mine - because I change the parts so much. It holds just enough, but can be removed if required. Roughing helps. Inductors have been a problem and some form of mechanical bond is suggested as I have seen these come off far too often. You definately CAN'T hot melt the inductors. Resisters and caps no problem.
You do good work - want to build crossovers for me? I just can't get excited about making something that gets closed up inside of the box look pretty.
Do be careful with some forms of adhesive as many contain acid to help adhesion. When sealed inside of a closed box this acid will atack everything - with some pretty bad consequences (been there - done that). Hot melt and poly glue are safe. I don't know about latex, but I can tell you that all silicones do have acid in them.
y8s said:
There are places that can do single pull molds for a lot less than 50,000 dollars. You could probably have your waveguide molded for under 10k in the US as long as you weren't going to make more than a few thousand parts. Which you just implied above was the case.
They can even put the fancy texture on there--not that you want it.
case in point: www.protomold.com though they can only do 3" deep parts I believe. Still, there are others out there.
brings down the break even point fast.
Matt
I'm not sure that you guys realize that injection molding is a hydraulic process. Once the parts get bigger in surface area than a few square inches the cost goes up really fast because the part can not be injected on a small machine. And the die becomes large so it can withstand the hydraulic pressures. For a part the size of the Nathan waveguide built to high (for injection molding) tolerances the toolings costs would be high. 10k is completely unrealistic.
Just as a quick estimate I would say that there is at least 200-300 square inches of surface area on the outer surface of that horn. So if we have to injection mold at say 80-120 psi we can see the die must withstand as much as 36,000 pounds of force with every cycle of the machine. No supports can be made in the cavity and to hold a tight tolerance the die must be very large so that it won't flex or break. We could approach or exceed 10k just in material costs for a die this large not even including the hundreds of hours of engineering and machining time. And since for dies this large scrapping material is a big deal. Engineering costs will not be cheap.
There is a reason Promold has a 3 inch limit.
I didn't see the need to say this, but its all true - you see we priced this out in Thailand, which is much cheaper, and it was not viable. Even making only the waveguide was cost prohibitive.
Thanks for the data.
One other thing that I have now noticed. I checked the mold for the fiberglass waveguides - the 15" ones - and it is perfect, and yet when done, the throat is not dimensionally correct. Apparantly when the part is pulled off of the form it continues to contract, not much, but just enough to be out of spec. I had not realized this before, but it explains a lot. Hence, I need to grind out the throats even on the fiberglass parts and recast them in poly - just like I did on the parts that Brett rejected. When cast in poly, they are very accurate - just like Brett's. Things are never as easy as they seem that they should be.
The 12" baffles are extremely hard to cast because of the large volume of material - it gets very hot and is hard to mix properly. Doing a 15" in this process is would never work and I may even reject it for the 12" models and go back to fiberglass. The 10" will stay poly as the size is just about right for casting.
I now have six of the 10" waveguides if anybody is interested.
Glassfiber laminate shrinks
If you take it out of the mold too early it may even get out of shape and even loose smoothness
Smooth layers and proper evenly laminate thickness is important
The working pace influence this
Thats with polyesther
Epoxy may be different as it hardens slowly, and is "softer"
If you take it out of the mold too early it may even get out of shape and even loose smoothness
Smooth layers and proper evenly laminate thickness is important
The working pace influence this
Thats with polyesther
Epoxy may be different as it hardens slowly, and is "softer"
I find this thread fascinating! I made a set of cast polyester speakers years ago. I was very happy with the results - but what a smell! lol
If you are interested in reading about the heat issues and other things Dr. Geddes is talking about you can find an excellent article here: http://users.lmi.net/drewid/resin_faq.html
Keep up the good work everyone it's great reading!
If you are interested in reading about the heat issues and other things Dr. Geddes is talking about you can find an excellent article here: http://users.lmi.net/drewid/resin_faq.html
Keep up the good work everyone it's great reading!
wrong process
So don't injection mold it. For folks that claim to have such superior knowledge of everything that is, u'all sure seem to be clueless.
Then again, since my methodology has been dismissed as irrelevant and a dead end, i guess I'll just go EF some waveguides with a thin metal skin on an EF'd mandrel made from a high tolerance "one-up" waveguide. Not that I believe "waveguide" speakers are the answer to the universal questionmind you, but I am curious as to the sound. Tolerance is a non-issue in electroforming... but I guess you folks just don't "get it". Once you've "amortized" the equipment with high priced JPL, NASA, etc. projects... the process is pretty cheap... runs at roomtemp and tolerances are as good as the original mandrel.
Your loss...
Hezz said:
I'm not sure that you guys realize that injection molding is a hydraulic process. Once the parts get bigger in surface area than a few square inches the cost goes up really fast because the part can not be injected on a small machine. And the die becomes large so it can withstand the hydraulic pressures. For a part the size of the Nathan waveguide built to high (for injection molding) tolerances the toolings costs would be high. 10k is completely unrealistic.
Just as a quick estimate I would say that there is at least 200-300 square inches of surface area on the outer surface of that horn. So if we have to injection mold at say 80-120 psi we can see the die must withstand as much as 36,000 pounds of force with every cycle of the machine. No supports can be made in the cavity and to hold a tight tolerance the die must be very large so that it won't flex or break. We could approach or exceed 10k just in material costs for a die this large not even including the hundreds of hours of engineering and machining time. And since for dies this large scrapping material is a big deal. Engineering costs will not be cheap.
There is a reason Promold has a 3 inch limit.
So don't injection mold it. For folks that claim to have such superior knowledge of everything that is, u'all sure seem to be clueless.
Then again, since my methodology has been dismissed as irrelevant and a dead end, i guess I'll just go EF some waveguides with a thin metal skin on an EF'd mandrel made from a high tolerance "one-up" waveguide. Not that I believe "waveguide" speakers are the answer to the universal questionmind you, but I am curious as to the sound. Tolerance is a non-issue in electroforming... but I guess you folks just don't "get it". Once you've "amortized" the equipment with high priced JPL, NASA, etc. projects... the process is pretty cheap... runs at roomtemp and tolerances are as good as the original mandrel.
Your loss...
")
markus76 said:auplater, we're all just waiting for you to finish the first electroformed horn and the pictures of it...
Best, Markus
Really? That's the first response I believe I've seen showing any interest whatsoever in the methodology... other than outright dismissal by Dr. geddes
As for producing a waveguide for DIY'ers, I'll paraphrase Dr. Gedde's typical response... "What's in it for me?"
Do you want to send me a waveguide to clone... or would you settle for a $20 PE waveguide as "proof of principal"? I don't have the desire to "do the math" to make the original OB, so the original mandrel would have to be supplied (preferably conductive, tho that's not really a problem).
lest you think this is trolling or a sham..here are EF examples I've made over the last 20+ years for well under the prices quoted here, and these are high precision one-up waveguides and such... with 24K gold interior surfaces, silver, etc...

from upper left, clockwise... DOD trophy cup for Order Of Daedalians, cloned from original to produce 2 duplicates for display at the appropo Airforce bases where the LANTIRN project was completed.. oh, that's the project responsible for night precision flight and targeting in the original IRAQ war.. developed at WPAFB... made from wax copy in silver.
Circular to rectangular tansition at K-band, if I recall for microwave transmission at the VLA in New Mexico
Ortho mode transducer being finished on the lathe for Arecibo Radio telescope
Corrugated feedhorn mandrel with incorporated electroformed
circular to rectangular (mode transducer)
If anyone's truly interested in pursuing this sort of technology, lemme know...
John L.
Hi guys.
I'm sorry to interject in what looks like a very long and interesting thread. I have not had time to read all 29 pages. Just from listening in on the last page and then looking to the first page...the injection molding of the wave guide caught my eye. The wave guide is the white round cone(ish) shaped thing at the top?
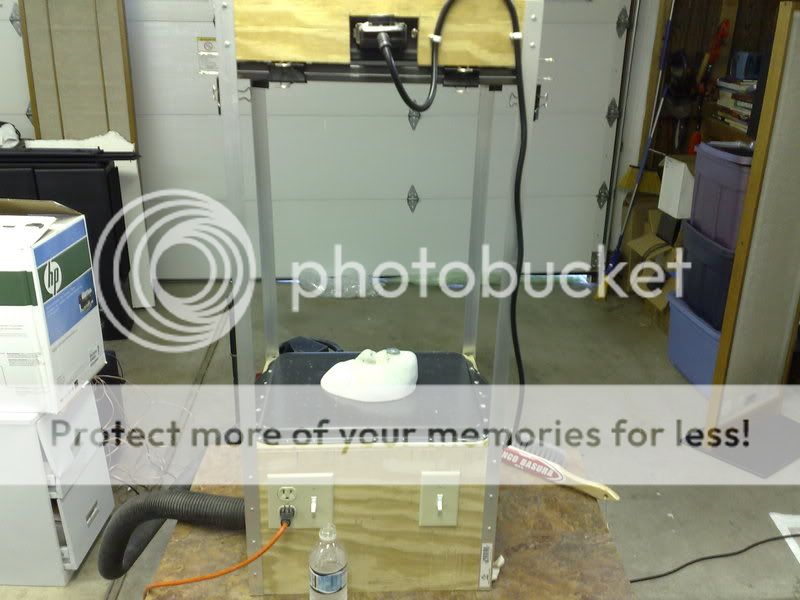
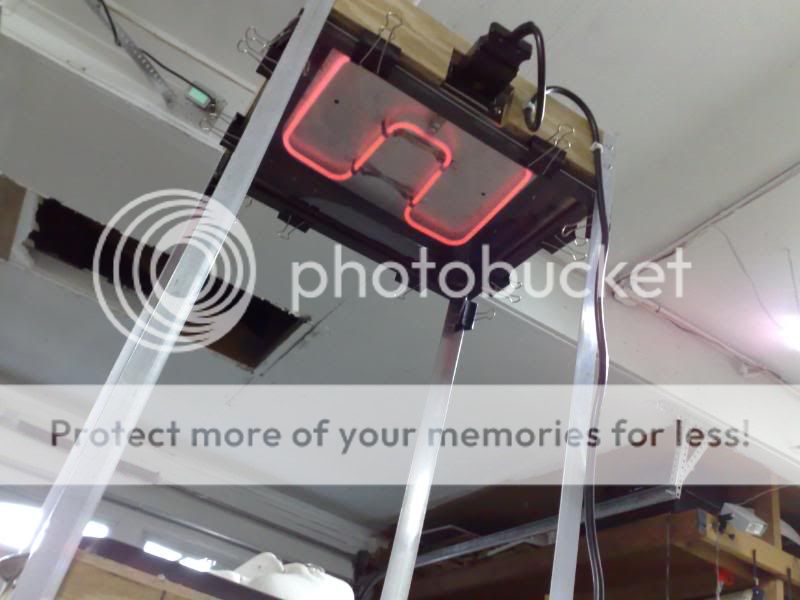
At the very real risk of being really stupid, this part looks perfect for vacuum forming. I have a small vacuum former that I assembled for about $30 and fits anything up to about 10-13 inches.
Once you form the shape from plastic you could easily reinforce it with fiberglass resin , maybe add a sound deadener to it.
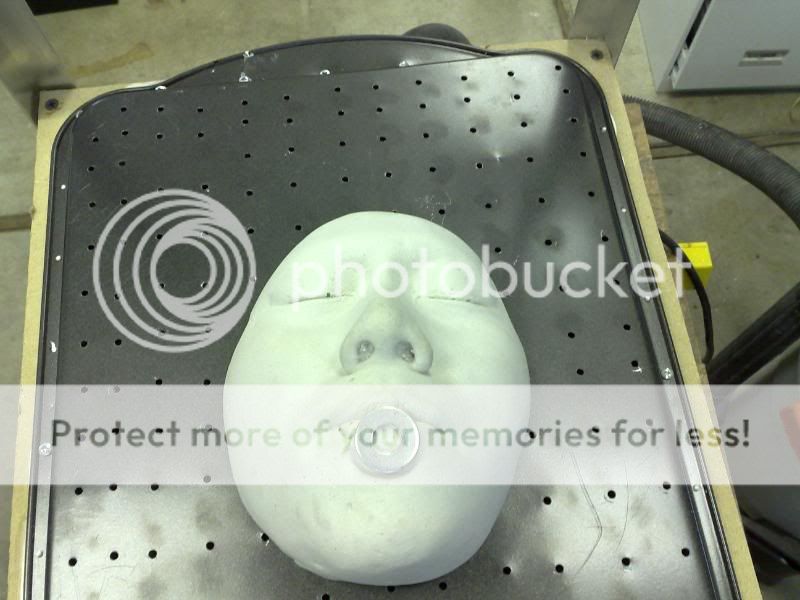
Here are some pictures. I made a face mask with plaster and cast a positive off it, then vacuum formed a "face" plate for my amplifier...ha ha. Get it, a FACE plate! ha ha ha...(crickets chirping)
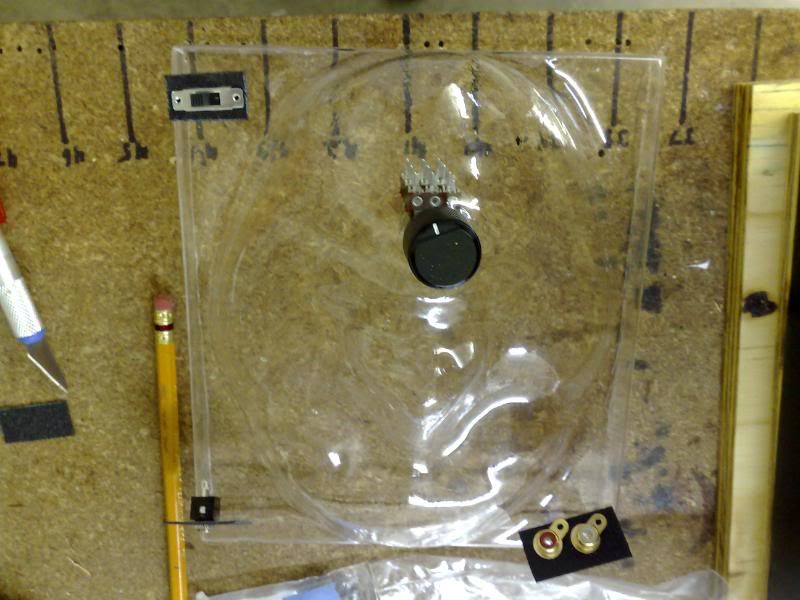
I told my partner, Jimmy, that I always wanted a volume control for his mouth...now I got one! Ha ha ha.. ba da dum!
Of course I'm probably missing the gist of the conversation, having skipped all but 2 of the 29 pages.
Sorry if this is totally unhelpful.
-Spencer
I'm sorry to interject in what looks like a very long and interesting thread. I have not had time to read all 29 pages. Just from listening in on the last page and then looking to the first page...the injection molding of the wave guide caught my eye. The wave guide is the white round cone(ish) shaped thing at the top?
At the very real risk of being really stupid, this part looks perfect for vacuum forming. I have a small vacuum former that I assembled for about $30 and fits anything up to about 10-13 inches.
Once you form the shape from plastic you could easily reinforce it with fiberglass resin , maybe add a sound deadener to it.
Here are some pictures. I made a face mask with plaster and cast a positive off it, then vacuum formed a "face" plate for my amplifier...ha ha. Get it, a FACE plate! ha ha ha...(crickets chirping)
I told my partner, Jimmy, that I always wanted a volume control for his mouth...now I got one! Ha ha ha.. ba da dum!
Of course I'm probably missing the gist of the conversation, having skipped all but 2 of the 29 pages.
Sorry if this is totally unhelpful.
-Spencer
EmergencyDpt said:Hi guys.
I'm sorry to interject in what looks like a very long and interesting thread. I have not had time to read all 29 pages. Just from listening in on the last page and then looking to the first page...the injection molding of the wave guide caught my eye. The wave guide is the white round cone(ish) shaped thing at the top?
At the very real risk of being really stupid, this part looks perfect for vacuum forming. I have a small vacuum former that I assembled for about $30 and fits anything up to about 10-13 inches.
Once you form the shape from plastic you could easily reinforce it with fiberglass resin , maybe add a sound deadener to it.
Here are some pictures. I made a face mask with plaster and cast a positive off it, then vacuum formed a "face" plate for my amplifier...ha ha. Get it, a FACE plate! ha ha ha...(crickets chirping)
<snip>
Of course I'm probably missing the gist of the conversation, having skipped all but 2 of the 29 pages.
Sorry if this is totally unhelpful.
-Spencer
EXACTLY! Couldn't have said it better myself. Maybe even cheaper than EF. Looks like a winner. I was gonna suggest vacuum forming (it's how instrument panels in cars are made) but those involve the dreaded electroforming, so I kept mum.
I believe you're onto something there..
John L.
mpmarino said:(actually, all this probably belongs over in the waveguide building thread ?)
I would agree as I don't see what any of this has to do with building a Nathan.
Drilled pilot holes for the mounting plate in the waveguide while glue on the crossover is curing. Mark orientation of the mounting plate for each speaker for best accuracy (you should have done that for the back board as well).
Mount the compression driver:
Applied some of the vinyl caulking around the throat (take care not to get in contact with the compression drivers grill cloth as you won't be able to remove the vinyl later on):
This is how it looks from the front (the excess is cut off when the caulk has cured):
Drill pilot holes for the woofer. You can do that with the woofer in place (only for the brave) or after marking the holes with the woofer in place and removing it for drilling.
Install the drive-in nuts. This is how I do it:
Apply gasketing tape around the woofer and mount it. I could have used the vinyl caulk as well but removing the woofer afterwards would be very hard.
Different diameters of the woofer cut outs catched my eye while mounting the woofers. One is exactly 27 cm the other is 26.6 cm. This time tears only (instead of blood, sweat and tears). Hopefully Earl announces CNC cut parts shortly...
Best, Markus
An externally hosted image should be here but it was not working when we last tested it.
Mount the compression driver:
An externally hosted image should be here but it was not working when we last tested it.
Applied some of the vinyl caulking around the throat (take care not to get in contact with the compression drivers grill cloth as you won't be able to remove the vinyl later on):
An externally hosted image should be here but it was not working when we last tested it.
This is how it looks from the front (the excess is cut off when the caulk has cured):
An externally hosted image should be here but it was not working when we last tested it.
Drill pilot holes for the woofer. You can do that with the woofer in place (only for the brave) or after marking the holes with the woofer in place and removing it for drilling.
An externally hosted image should be here but it was not working when we last tested it.
Install the drive-in nuts. This is how I do it:
An externally hosted image should be here but it was not working when we last tested it.
An externally hosted image should be here but it was not working when we last tested it.
Apply gasketing tape around the woofer and mount it. I could have used the vinyl caulk as well but removing the woofer afterwards would be very hard.
Different diameters of the woofer cut outs catched my eye while mounting the woofers. One is exactly 27 cm the other is 26.6 cm. This time tears only (instead of blood, sweat and tears). Hopefully Earl announces CNC cut parts shortly...
Best, Markus
Markus
I thought that the instructions were clear about mounting the compression driver. You need to remove the "bug screen" because the crossover is designed that way and the screen has a significant effect. The screen does not cut out well after installation. So you need to remove the driver and cut out the screen, then remount the driver. You will now find a gap between the driver and the mounting plate (because the DE250 phase plug does not go all the way to the throat edge) that you will not be able to see with the screen left on. You must fill this gap.
Then apply some of the supplied gasket material to mounting plate and cut of the center hole with a sharp knife. Now mount the compression driver to the waveguide.
You will not get a very good fit doing it the way that you are doing it which will seriously affect the response of the system.
I also would not use a hardening caulk and I don't like the sound of "vinyl" caulk. I don't know what "vinyl" caulk is exactly, but I would be very concerned with any outgassing of acidic elements from the cure process as these could get down the throat and attack the diaphragm etc. I have suggested clay several times and I continue to suggest its use as it neither hardens nor outgasses and in more than five years of usage we have not seen a single problem.
- Status
- This old topic is closed. If you want to reopen this topic, contact a moderator using the "Report Post" button.
- Home
- Loudspeakers
- Multi-Way
- Building the Nathan 10