carpet pad scraps
Surely, someone is building new housing near you. Go there, look for the one with the carpet installer's truck in the street. they're usually disreputable looking panel vans with big rolls of carpet hanging out the back ( HA, HA ).
Seriously, they might give you what you need if you explain what it's for. Or, wait till they leave, and check out the scrap pile, generally they probably waste enough on each job to supply your needs.
John
Re: carpet pad scraps
Last I heard, Markham is the fastest growing city in North America...Thousands and thousands of houses being built.
Shouldn't be hard to find a scrap of carpet pad.")
mightym said:Surely, someone is building new housing near you.
Last I heard, Markham is the fastest growing city in North America...Thousands and thousands of houses being built.
Shouldn't be hard to find a scrap of carpet pad.
cyberspyder said:OK maybe I should get some pre-stain treatment first...
Hi,
If you find the stain is going too dark and the wood is soaking up too much, "paint" it with varsol (mineral spirits) first. This will saturate the wood and make it less absorbent.
Another thing: how smooth did you sand? For stain, I give a good sanding with 400 grit disk in the random orbit sander. Smoother = less stain absorption.
cyberspyder said:
so I'll try the 600. I know nothing about staining, as I've always varnished...
Hi,
600 will be too fine. It will burnish the wood - that is close the pores completely and it will not stain well at all. Take my word on it.
Every plywood from the factory needs sanding, but the finest you should go is 400 grit.
cyberspyder said:No, no, I do have a 3/4" roundover...just that it kinds looks boring, as all other speakers have roundovers...
MJL21193 said:
Yours would have the plywoods laminations showing, some would say that looks exciting.
Here's something exciting for this... Google for "colorply"
Cheers!
Thanks for the advice guys...
April 15, 2008
-OHHHH I'M PISSED. The forstner bit I'm using (1 3/8") is a millimeter TOO SMALL FOR MY RETARDED TWEETERS. Whoever made the tweeter must like to torture people. The hole is fine for my port, but it looks like I'll have to sand/file off the excess by hand or a drum sander...(*!@&(^!$#(^!#(^$(
ARRRG!!!!!! GET IN THE HOLE YOU STUPID POS!!!
That is all...
Brendan
April 15, 2008
-OHHHH I'M PISSED. The forstner bit I'm using (1 3/8") is a millimeter TOO SMALL FOR MY RETARDED TWEETERS. Whoever made the tweeter must like to torture people. The hole is fine for my port, but it looks like I'll have to sand/file off the excess by hand or a drum sander...(*!@&(^!$#(^!#(^$(
An externally hosted image should be here but it was not working when we last tested it.
An externally hosted image should be here but it was not working when we last tested it.
An externally hosted image should be here but it was not working when we last tested it.
An externally hosted image should be here but it was not working when we last tested it.
ARRRG!!!!!! GET IN THE HOLE YOU STUPID POS!!!
An externally hosted image should be here but it was not working when we last tested it.
An externally hosted image should be here but it was not working when we last tested it.
That is all...
Brendan
Brendan
Take a piece of 3/8 inch dowel and split the end of it on a band saw. Fold a 4 inch square piece 100 grit sandpaper so it's about 1 inch wide, insert it into the slit in the dowel and mount the dowel in a hand drill. Insert this in the hole for the tweeter and hone out the hole until the tweeter fits.
Bob
Bob2 said:Brendan
Take a piece of 3/8 inch dowel and split the end ...
Or, buy one of these:
Attachments

I'm really impressed by this as your first build, what other projects have you made in your time?
I'm surprised that you worked out a very precise crossover for your speakers - have you done loads of research.
I'm asking because I did a similar thing by building a speaker for my technology project and had to spent a ton of time working out all of the new terminology and complicated electronics.
Just wondering what the specifications of that JBL mini amplifier are because I could do with something like that for my project. How much did it cost you?
Good luck on finishing!
For the tweeter hole couldn't you used an adjustable drill bit to take a little extra off the hole?
Coating?...
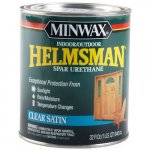
Hello cyberspyder, It would appear your standards are high, nice work! I wanted to suggest a coating that you may want to experiment with(buy a small can). I have enjoyed the appearence of Spar Urethane. It adds a slight amber color, so keep that in mind. It offers a very durable, UV resistant finish. I like to apply 3-4 light coats(sanding between coats even better) using thinned material for the first. The finish is very deep and with a well defined grain(even without between coat sanding). I prefer the Spar over the standard Urethane, as the UV inhibitors will help prevent washing of the finish should either of your speakers get exposed to much sunlight. Something to think about.
-discreteouts
PS Home Depot sells this.
Attachments
Hi, Nice looking project. My grandfather was a professional finisher doing very high end custom work for over 40yrs.
Here are his easy "novice" steps for a consistant finish that have worked well for me on several different types of wood.
1. Sand to 220 grit for soft wood and 280 for hardwoods
2. Wipe down the project. First with dry rag to get rid of the majority of the dust, then use a rag damp with minerial spirits (Turpinetine)
3. Never use miniwax products...they also appear blotchy. He recommended Cabot and/or Zar wood stains for ready mixed stains. I personally think that Cabot goes on nice and even and is easiest to control the penetration.
4. Paint the stain with a cheap brush. Wait a minute or two and wipe it off with rags or paper towels.
5. If the stain looks a little too dark poor mineral spirits on to a rag and wipe the stain down until you get the color you need.
Hole size, DOH'
Too bad, I know I've read somewhere else about those PE Tweets being 1mm to small/ or big, or something.....
Not to worry, you've come this far now it's time to McGyver it.
I went back to your early postings and looked at the shop hoping to spy an oscillating spindle sander, but no such luck. ( Someone really should let the school board know of the sad condition of the school's under tooled wood shop, Tsk, Tsk. ( said with tongue firmly in cheek))
I did however, see a drill press, surely the instructor has a drum sanding attachment squirrelled away somewhere?
Another alternative to the remedy's already mentioned that I like, is to use a bit of Duro, spray on glue to attach sandpaper ( grit of your choice ) to a profile ( again of your choice, though for this problem, I'd use a cut off from a broom handle ) and clearance the hole calmly, and carefully.....
I find that these profile sanding sticks are a lifesaver in my shop.
keep up the good work,
John
- Status
- This old topic is closed. If you want to reopen this topic, contact a moderator using the "Report Post" button.
- Home
- Loudspeakers
- Multi-Way
- Beginning of some DIY speakers