<returns from the shed scratching head>...!
Two questions for Mr DaveD. How deep into the cabinet does the internal vent piece go? There's no dimension on that piece and I'm all like "dried on glue", AKA stuck")
2nd question, 'note 2' states vents are 5mm ... but the plans show 15mm. Oooo... engage disaster avoidance measures... project comes to a grinding halt with a squeal o' brakes and a worried looking driver peering out the drivers window!
Your's in the soggy UK.
DTB
Two questions for Mr DaveD. How deep into the cabinet does the internal vent piece go? There's no dimension on that piece and I'm all like "dried on glue", AKA stuck
2nd question, 'note 2' states vents are 5mm ... but the plans show 15mm. Oooo... engage disaster avoidance measures... project comes to a grinding halt with a squeal o' brakes and a worried looking driver peering out the drivers window!
Your's in the soggy UK.
DTB
I popped down to the local B+Q todays and bought a sheet of 18mm BP. Helpful instore cutting service accurately managed to convert a 4' x 8' sheet into 16 little bits for DaveD FE167DTB cabinet x 2.
Whahey, lets do some maths...
Take these...
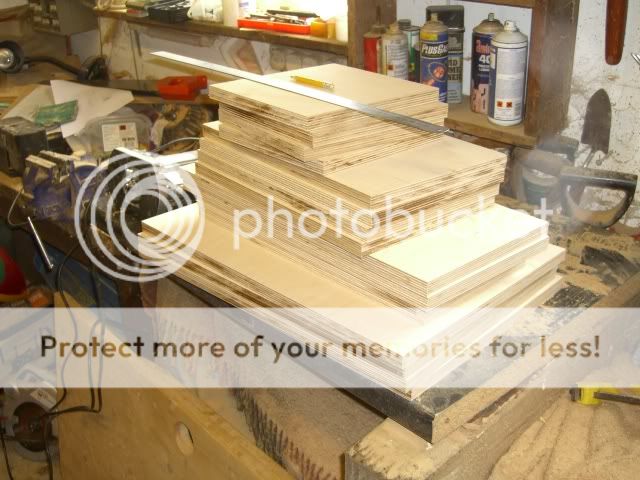
..and add them to this...
..allow and hour and half of careful routing equals...
Ta dah! <jazz hands>
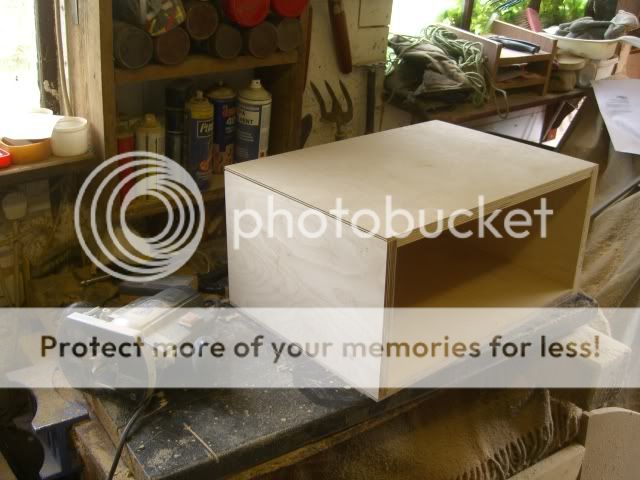
Oooh, nice and strong...
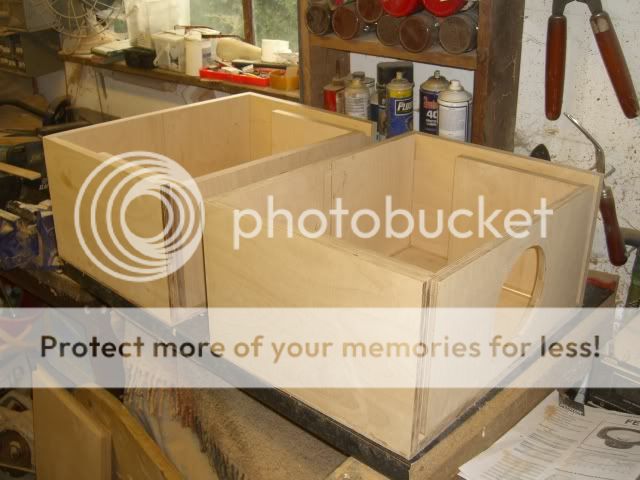
And a bit of PVA later and a bit of clamping...
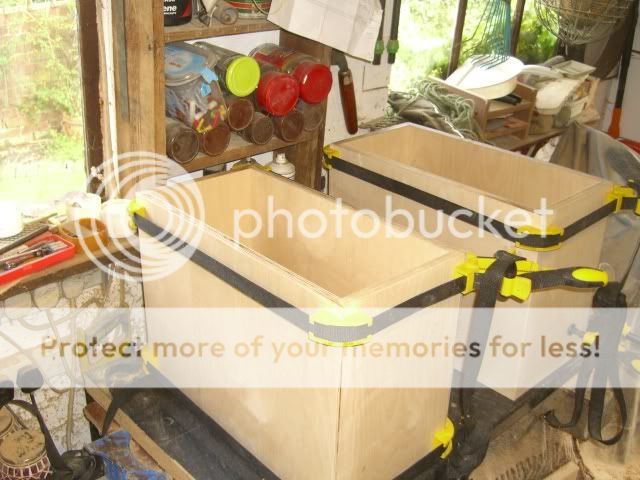
Not bad for half a days work. Bottom, sides and back are glued + clamped and drying overnight. Top panel only in position to help hold the whole caboodle square whilst the glue dries...
Tomorrow the baffle will have the driver hole cut and the internal chamfer done and all the vent pieces will then get glued in. The Rt. reverend Holy Brace will be made up next to butt up against the driver basket and not forgetting the associated chamfered holy holes and offset positioning. Do both sides of the holy brace need covering in 1/2" wool felt too?
Looking good so far.
DTB
Whahey, lets do some maths...
Take these...
..and add them to this...
..allow and hour and half of careful routing equals...
Ta dah! <jazz hands>
Oooh, nice and strong...
And a bit of PVA later and a bit of clamping...
Not bad for half a days work. Bottom, sides and back are glued + clamped and drying overnight. Top panel only in position to help hold the whole caboodle square whilst the glue dries...
Tomorrow the baffle will have the driver hole cut and the internal chamfer done and all the vent pieces will then get glued in. The Rt. reverend Holy Brace will be made up next to butt up against the driver basket and not forgetting the associated chamfered holy holes and offset positioning. Do both sides of the holy brace need covering in 1/2" wool felt too?
Looking good so far.
DTB
. Do both sides of the holy brace need covering in 1/2" wool felt too?
Looking good so far.
DTB
just the one that will place the felt at centre-line
I popped down to the local B+Q todays and bought a sheet of 18mm BP. Helpful instore cutting service accurately managed to convert a 4' x 8' sheet into 16 little bits for DaveD FE167DTB cabinet x 2.
if you don't mind me asking, how much did that set you back at B&Q? they've never got any nice plywood in when i go, and when i ask they seem a bit clueless and say they can order it in, they think.
£62.98 for an 8x4 sheet of 18mm Birch Ply Mr Henderson. They do (much cheaper) 18mm Spruce ply 8x4 too but it looks a bit manky TBH. We're lucky maybe in that we've got one of those hooooge B+Q Warehouse's in our town and they carry a good range of ply in stock. Quality does vary as you've seen, probably depends on who they use to supply themselves and I've left more than a few times without buying what's on offer. When I built the Sab's I went down during a weekday evening so I knew it'd be quiet took time to sift through about a dozen sheets to get the 2 that I liked the look of. I'm fussy. It was only £50 a sheet then too, prices have gone up a lot.
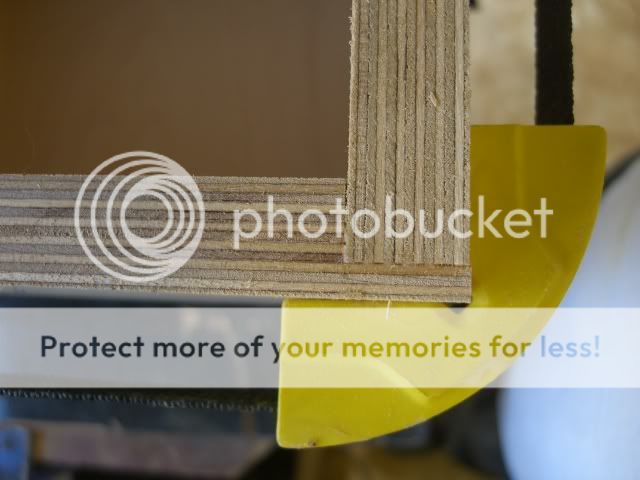
You have to pay for it 1st then go back through the store to get it cut! If you explain to Mr Wall-Saw-Operator-Man that you need the cuts bang on to size and smile nicely they oblige with very accurate cutting and don't charge anymore for the service, used to a limit of 4 'convenience' cuts. Yesterday I had 20.... I spent the morning making up a cutting plan and went down armed with it! I like to rout 2/3's into the thickness of the wall external pieces to help make a very rigid cabinet but you have to work out all your panel dimensions making allowances for the routs.
Breakfast time, off to the shed afterwards.
DTB
You have to pay for it 1st then go back through the store to get it cut! If you explain to Mr Wall-Saw-Operator-Man that you need the cuts bang on to size and smile nicely they oblige with very accurate cutting and don't charge anymore for the service, used to a limit of 4 'convenience' cuts. Yesterday I had 20....
I spent the morning making up a cutting plan and went down armed with it! I like to rout 2/3's into the thickness of the wall external pieces to help make a very rigid cabinet but you have to work out all your panel dimensions making allowances for the routs. Breakfast time, off to the shed afterwards.
DTB
Last edited:
Loadsa progress today.
Left the cabs drying last night after sides and back were glued and clamped to bottom panels.
next up was to make the baffles...
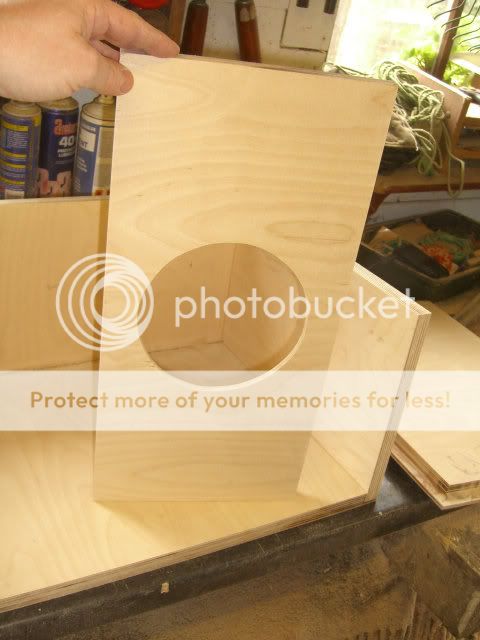
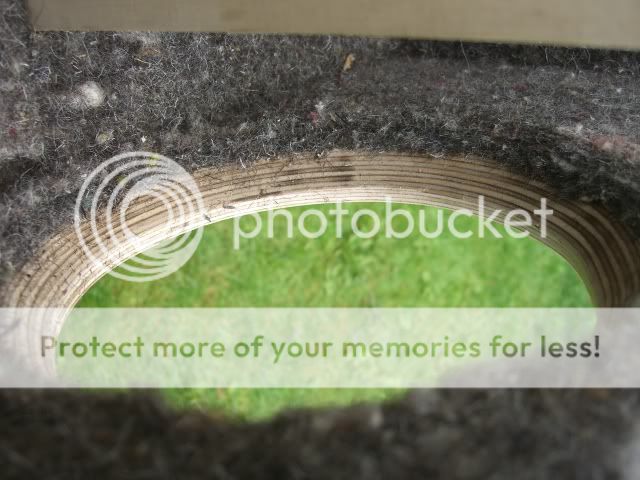
...and the chamfer (in)side...

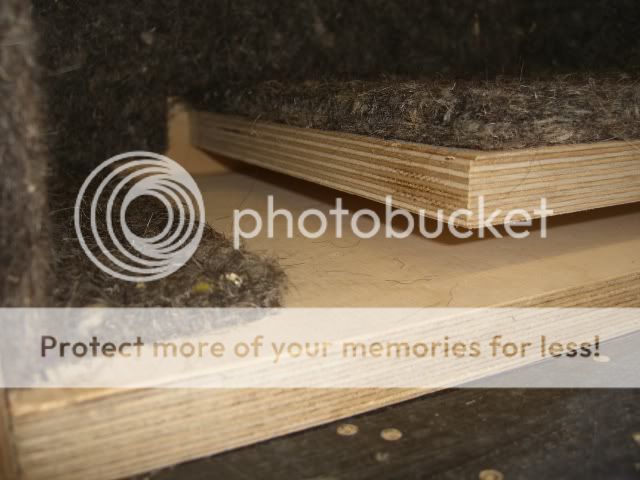
Obligatory chamfer shot...

...cos plys are cool!
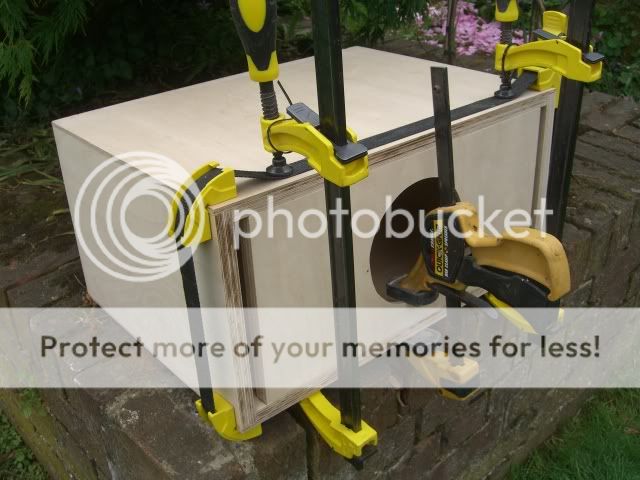
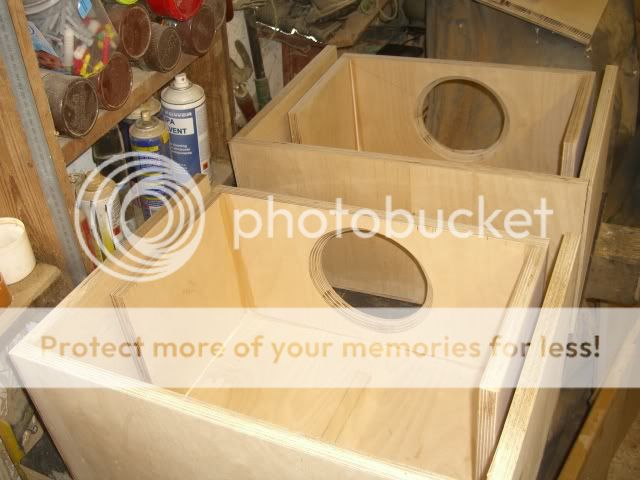
Next up was to get the 2 baffles glued and clamped in position...
...then glue in the inner vent pieces and fit the driver ahead of making up the driver brace with the FE167 insitu...
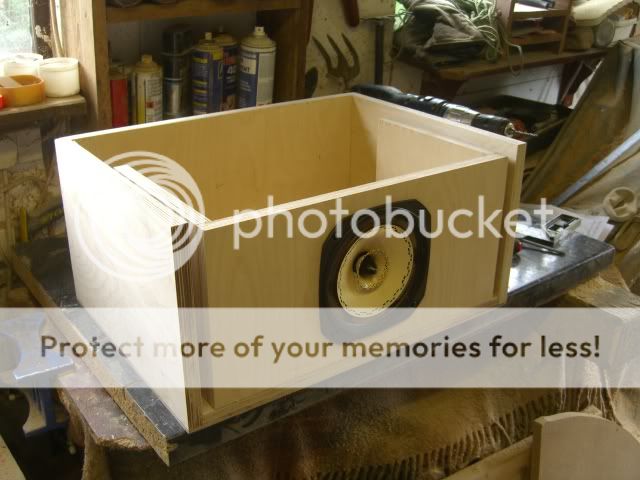
...the Rt. Rev. Holy Brace ...
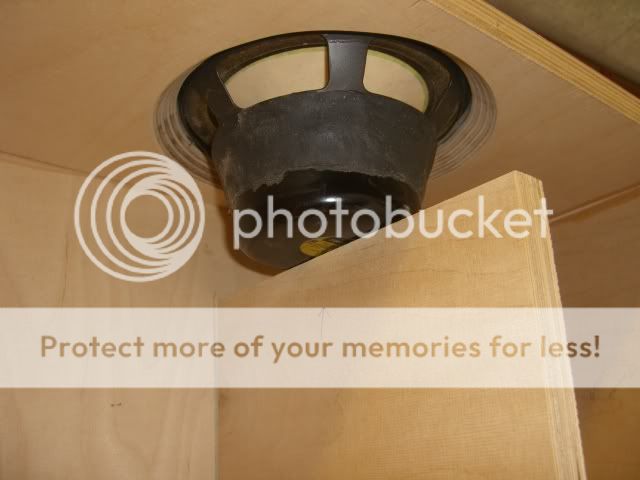
...a fine upstanding and supportive member of the (loudspeaker) community..

Next up is to 'holerize' the driver braces by 30-40%.
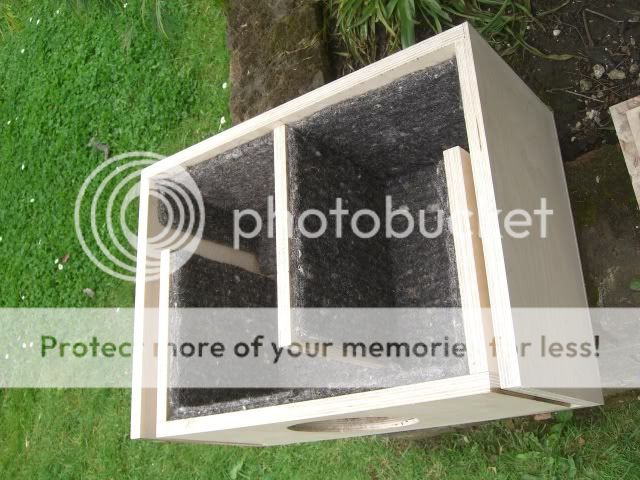
At the close of today's play, the cab's look like this...
Not bad at all.
Back to work tomorrow, meh!
DTB
Left the cabs drying last night after sides and back were glued and clamped to bottom panels.
next up was to make the baffles...
...and the chamfer (in)side...
Obligatory chamfer shot...
...cos plys are cool!
Next up was to get the 2 baffles glued and clamped in position...
...then glue in the inner vent pieces and fit the driver ahead of making up the driver brace with the FE167 insitu...
...the Rt. Rev. Holy Brace ...
...a fine upstanding and supportive member of the (loudspeaker) community..
Next up is to 'holerize' the driver braces by 30-40%.
At the close of today's play, the cab's look like this...
Not bad at all.
Back to work tomorrow, meh!
DTB
if you don't mind me asking, how much did that set you back at B&Q? they've never got any nice plywood in when i go, and when i ask they seem a bit clueless and say they can order it in, they think.
around 60quid in my experience for B n Q 'BEST' birch ply, it isnt however THAT good quality and does have voids and plugs on one side. I wouldve liked to get better ply if i could, but i had to settle for B n Q
thanks for the photos Dave, now I have a clue on how to build these fancy things I see you guys talking about
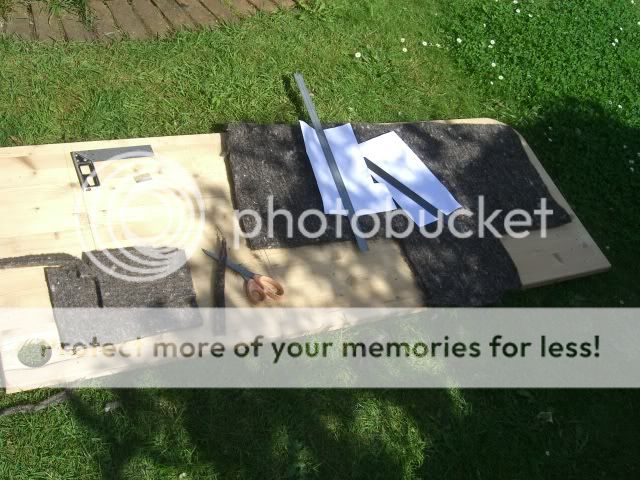
and having the garden shears nearby makes quick work of snipping the batting to size - not having to borrow the wife's sewing scissors and then forgetting them is priceless
enjoy
and having the garden shears nearby makes quick work of snipping the batting to size - not having to borrow the wife's sewing scissors and then forgetting them is priceless
enjoy
thanks for the photos Dave, now I have a clue on how to build these fancy things I see you guys talking about
Geddaway widja!
Yup, Shears are always handy, as are the trimming axe and 'finishing secateurs'.
Lump o' concrete for sanding purposes natch!
DTB
Loadsa progress today.
Left the cabs drying last night after sides and back were glued and clamped to bottom panels.
...and the chamfer (in)side...
Not bad at all.
Back to work tomorrow, meh!
DTB
I hope you have not yet glued the baffle in yet since you might want to redo those.
You do not want to have the chamfer all the way round in the inside since it does not leave much material for the fasterners to grip - I always leave a little standing where the fasteners for the drivers go.
You do not want to have the chamfer all the way round in the inside since it does not leave much material for the fasterners to grip
He'll be fine.
dave
I hope you have not yet glued the baffle in yet since you might want to redo those.
Yup, understood, but I'm very accurate with my marking-out, rest-assured there's lots of area left for the driver fixings Mr Mozart.
He'll be fine.
dave
You're right, I am!
DTB
OK, is this OK as regards to hole placement on the (Rt. Rev.) Holy Brace? I've tried to keep clear of the structural path between the driver and the back of the cabinet. Driver 'kisses' the left hand side and the right hand side will be bonded to the back panel. Top and bottom side of the brace will be bonded to top and bottom panels of the cabinet naturally.
I'll tidy up (maybe chamfer) each hole when I get back down the shed this weekend.
DTB
I'll tidy up (maybe chamfer) each hole when I get back down the shed this weekend.
DTB
Last edited:
I hope you have not yet glued the baffle in yet since you might want to redo those.
You do not want to have the chamfer all the way round in the inside since it does not leave much material for the fasterners to grip - I always leave a little standing where the fasteners for the drivers go.
He'll be fine.
dave
Yup, understood, but I'm very accurate with my marking-out, rest-assured there's lots of area left for the driver fixings Mr Mozart.
You're right, I am!
DTB
the pin cushion shape of the Fostex mounting flange puts the screw locations well outside of the chamfered area, particularly on the 6 & 8" models - now if this was an Alpair CHR70, there'd be reasons for concern
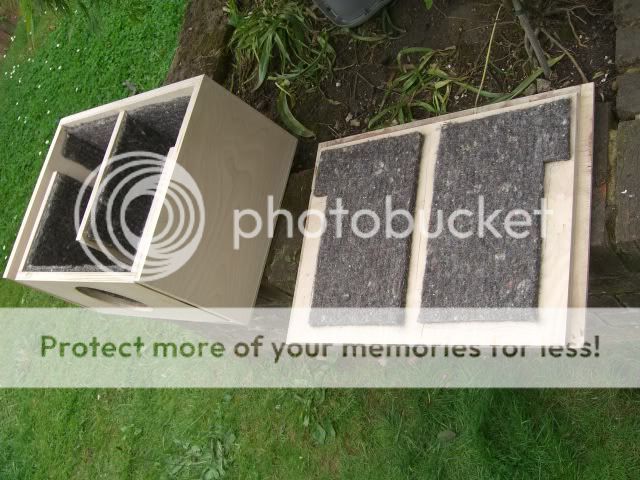
So... in goes the holy brace and 1/2" of lush proper woolfelt all round...
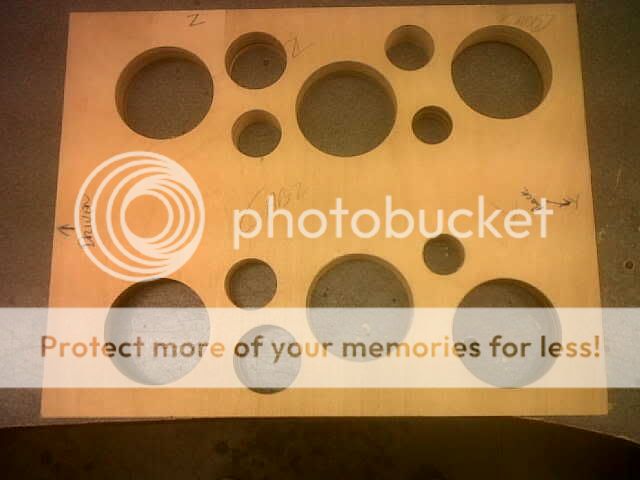
The Template and woolfelt 'cutting zone'...
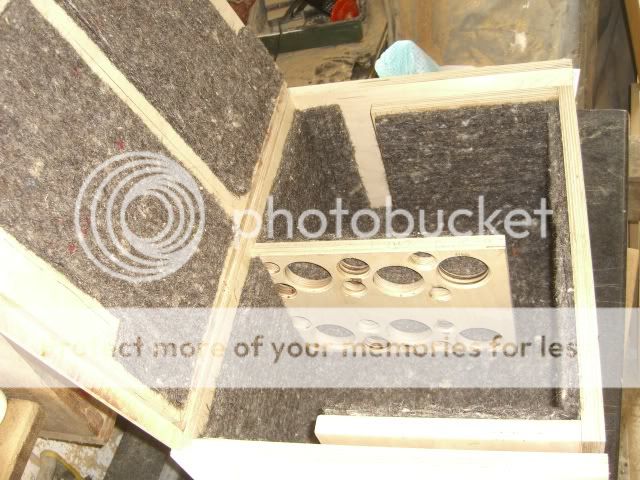
...but remembering ChrisB's wise words to avoid vent blockage...
Leaving the cab's lined like this...
with a neat sculpted haircut around the driver area...
Lid lined too, just need to perform final glue-up..
Gather all my clamps and Bailey box braces and hey presto...
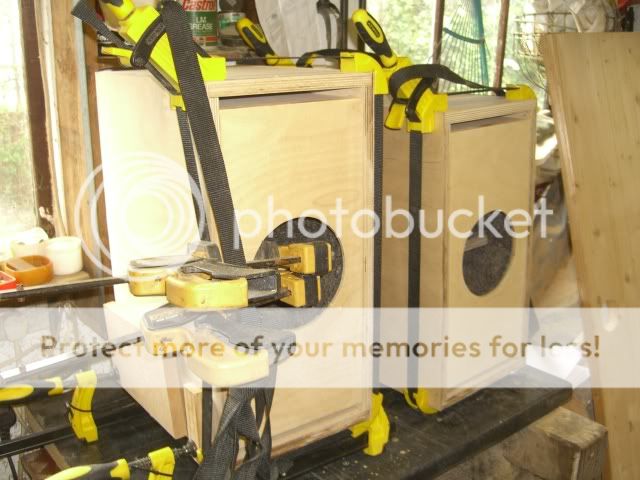
2 cabs fully glued and fully clamped. They'll stay like this for 24hrs whilst the glue dries.
Getting there.
DTB
The Template and woolfelt 'cutting zone'...
...but remembering ChrisB's wise words to avoid vent blockage...
Leaving the cab's lined like this...
with a neat sculpted haircut around the driver area...
Lid lined too, just need to perform final glue-up..
Gather all my clamps and Bailey box braces and hey presto...
2 cabs fully glued and fully clamped. They'll stay like this for 24hrs whilst the glue dries.
Getting there.
DTB
- Status
- This old topic is closed. If you want to reopen this topic, contact a moderator using the "Report Post" button.
- Home
- Loudspeakers
- Full Range
- Any Fostex FE167En smallish Cabinet recommendations?