Its also possible to have the hard coat bult up thicker than normal. They can leave it in the tanks longer with a tad bit more current flowing but there is a limit as to how much thickness will actually build up. If I were to do this for heat sinks I would consult with who ever you are going to have do the hard coating and see what they are capable if, the thicker the better. Also, there cannot be any high spots that would cause a pin hole effect for a short circuit to occur so that means either polishing the mounting area or better yet lapping it perfectly flat, just milling it flat is not sufficient. Heat transfer efficiency from the device mounted this way would be phenominal!!
Mark
Mark
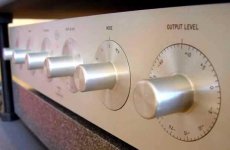
This panel will be grey, definitly !!!
Grtz
Nick
An externally hosted image should be here but it was not working when we last tested it.
Grtz
Nick
Hi Nick,
the front panel looks great.
It resembles Mark Levinson's Cello Encore preamp, your internetprovider's name is Chello.
Putting a Levinson style front panel on a Pass preamp is ironic, hence the joke, no pun intended.
Wish i had your machineshop, the quality of your projects is at least on the level of the pro's.
Btw, i built a ML lookalike pre, between the knobs and the front plate i placed Teflon washers, turning the knobs was as smooth as baby skin.
Attachments
Aha, that's what you meant.
I thought you referred to those korean guys from DIYMANIA .
I really like that BoSoZ of them. That one is also shown in the gallery at the PASSDIY site.
But when the Aleph5 and BoSoZ are finished, i'll try to go digital. That means a new pre with a unbalanced to balanced driver and digital volume control, all based on an Atmel ucontroller. (yep all samples") )
)
Finally a remote has to be on it. But reading some of my previous post you an see that this will be a 2005 or 2006 project
So for now, lets wait for the anodising results. I'll post them asap.
Grtz,
Nick
I thought you referred to those korean guys from DIYMANIA .
I really like that BoSoZ of them. That one is also shown in the gallery at the PASSDIY site.
But when the Aleph5 and BoSoZ are finished, i'll try to go digital. That means a new pre with a unbalanced to balanced driver and digital volume control, all based on an Atmel ucontroller. (yep all samples
)Finally a remote has to be on it. But reading some of my previous post you an see that this will be a 2005 or 2006 project
So for now, lets wait for the anodising results. I'll post them asap.
Grtz,
Nick
Well, i got the panels back from anodizing. All that's left is laser engraving the black panels. But here's a preview :
Note that the blue led is already on
The black panel in the last picture will be the remote controlled pre with :
- an Atmel ucontroller with RC5 compatibillty
- a 2 x 20 character VFD display (Noritake)
- an active unbanlanced -> balanced convertor (National)
- digital volume control (BurrBrown)
but you'll have to wait several months for those final results .....
And yes, i'll have to visit the "chip-amp" forum for this one (sorry for that)
Grtz,
Nick
An externally hosted image should be here but it was not working when we last tested it.
Note that the blue led is already on
An externally hosted image should be here but it was not working when we last tested it.
An externally hosted image should be here but it was not working when we last tested it.
An externally hosted image should be here but it was not working when we last tested it.
An externally hosted image should be here but it was not working when we last tested it.
An externally hosted image should be here but it was not working when we last tested it.
The black panel in the last picture will be the remote controlled pre with :
- an Atmel ucontroller with RC5 compatibillty
- a 2 x 20 character VFD display (Noritake)
- an active unbanlanced -> balanced convertor (National)
- digital volume control (BurrBrown)
but you'll have to wait several months for those final results .....
And yes, i'll have to visit the "chip-amp" forum for this one (sorry for that)
Grtz,
Nick
Btw - preamp plate - is it laser engraved or what?? And did you made it with router or CNC machine??
You mean the grey panel ?
Well, i used those "rub-on" letters from Seno. The same as used for making proto-PCB's. After the letters were put on, i used some clear spray paint .
I used sanding paper on a piece of wood. The aluminium is critical in brushing. So i used a kind of "guiding" rail.I like the brushed look!!
Grtz,
Nick
Yes, I had grey panel in mind ...
Aaah- so the grey panel isn't eloxated - it's just brushed and coated with spray ...
Because I had a little bit unpleasent surprise with eloxation of my GC - I wanted it to look "rough" - similar to your plate - so I brushed it that way - but no one told me that with eloxation proces "eats" a little of the surface - so it came out pretty smooth ...
No no, they grey panel was also anodised, but the wrong color
That guy told me that it depends on the sort of aluminium ?!?!?
I did not wanted to wait again, so i cleaned it and sprayed alu-paint over it.
And yes, the acid used before anodising is agressive and smooths out tiny scratches. But with a grain 40 sanding paper.... those brushed grooves stay in
Grtz,
Nick
Well, a friend of mine works at a place where they make "precision" tools. So i asked him for milling the panels, they have a company that does all their anodising, so a few pieces of aluminium more wouldn't hurt 'em.jacco vermeulen said:Do you mind telling who did the anodising, they did a fine job ?
I only use "samples"jacco vermeulen said:btw: did you notice the BB digital volume ic's offered regularly on the marketplace.nl ?
Only "Conrad Electronic" doesn't believe i'm a hard working student
I bought 'em at Conrad Electronic, order nr is 519456.Originally posted by Taco
Where did you bought these Seno "rub-on" letters?
The sinks came from an old 19" cabinet. They wanted to throw it away. (really !)Originally posted by ilusionxx
may i ask what heatsinks you used. I´m looking for sinks like this. Where did you buy them and for what price?

(BTW : there were only 2 pieces....) I think Fisher Electronic has the same heatsinks, only a bit bigger than 19" format.
I'll have to look it up.....
Grtz
Nick
Electro-Nick said:Well, a friend of mine works at a place where they make "precision" tools.
I figured as much, i grew in such a place.

Hello.
Your amp is very beautifull
Where can I find those kind of cabinet / chassis ?
I want a cabinet for a big amp and another for a smaller one.
The small could have this style:
I think that I will build a Mr. Pass amplifier......
Can any one give directions where to find the parts? (board and chips. The rest I can buy it here)
Thanks.
Best regards,
Nelson Gracias.
Your amp is very beautifull
Where can I find those kind of cabinet / chassis ?
I want a cabinet for a big amp and another for a smaller one.
The small could have this style:
An externally hosted image should be here but it was not working when we last tested it.
I think that I will build a Mr. Pass amplifier......
Can any one give directions where to find the parts? (board and chips. The rest I can buy it here)
Thanks.
Best regards,
Nelson Gracias.
Well, the laser engraving is ready. I like it
Grtz
Nick
An externally hosted image should be here but it was not working when we last tested it.
Grtz
Nick
- Status
- This old topic is closed. If you want to reopen this topic, contact a moderator using the "Report Post" button.
- Home
- Amplifiers
- Pass Labs
- Anodising Alep5 : what color ???