The port size is used for tuning the line and, as such, compromises are made between output and frequency, when adjusted.Thanks for the clarifications 👍
By the way, as my driver is a 3" TB W3, should I use a smaller port, smaller than 10cm x 1.6cm ?
@yngvejos
May be a shallow taper would do !
If I've got it correct:
Larger= more output, sacrificed low end extension
Smaller= less output, extended low end
sent from my mobile look-at device
I, too, used a 4" driver and experienced the lack of material to the sides on the baffle.
If your driver recess is substantial enough, the chamfer wouldn't be necessary anyway as you would be approaching 12mm at the point on the baffle where the driver is mounted.
sent from my mobile look-at device
Thanks. There will be around 16mm of material left after doing the recess for flush mount. I guess I can take away some material from the back to get it down to 12mm around the driver.
I played around a bit with sketchup. Does my dimmensions look correct?
All boards are 19mm thick. The center line marked inside the vent is 97mm long.
The front baffle is 792mm long and the driver center are 203mm from the top.
I left out the top panel on purpose.
All boards are 19mm thick. The center line marked inside the vent is 97mm long.
The front baffle is 792mm long and the driver center are 203mm from the top.
I left out the top panel on purpose.
Attachments
Last edited:
The port size is used for tuning the line and, as such, compromises are made between output and frequency, when adjusted.
If I've got it correct:
Larger= more output, sacrificed low end extension
Smaller= less output, extended low end
sent from my mobile look-at device
Thanks for the heads-up
@yngvejos
I think your port dimensions are a little bit off (the port length should be 9.7cm and its cutting dimension should be 100 x 1.6 cm) but I'm a n00b when it comes to TABAQ. So, let the experts comment on it.
I played around a bit with sketchup. Does my dimensions look correct?
All boards are 19mm thick. The center line marked inside the vent is 97mm long.
The front baffle is 792mm long and the driver center are 203mm from the top.
I left out the top panel on purpose.
With 19mm material vs 12mm, baffle length should be 792 + 7mm. As the 43mm part intrudes 7mm further "up". Sides and back panel also longer by 7mm.
It's a minor thing..... stuffing, BSC and placement in room will have a greater effect.
Thanks, didn't think about that. I'll make new drawings with corrected height.
Eljoantonyn: the port is 16 mm high and 100mm wide. Is it wrong to measure port length from the center of the port?
Not the most accurate according to some "studies".
Example: Horn Folding - a brief study of the centerline vs advanced centerline method - AVS Forum | Home Theater Discussions And Reviews
As I stated earlier, "quantity" of bass is going to be linked more to enclosure stuffing, BSC and speaker placement in the room.
J.
J.
Thanks, didn't think about that. I'll make new drawings with corrected height.
Eljoantonyn: the port is 16 mm high and 100mm wide. Is it wrong to measure port length from the center of the port?
Sorry to say, I still can't "get" Bjorn's drawing
May be I'm used to well prepared engineering drawings all my life and just couldn't digest this one
Anyway, I did one more drawing and I hope this one is correct.
Please comment !!
Attachments
Port length is still off, you need to take the "shelf" height into account. 97mm is the full length if you draw a folded line through the center of the port. If using 15mm material the imaginary line should be 23mm (vertical, 15mm + 16mm/2) + 74mm (horizontal).
Thanks for spotting the mistake !
So, the horizontal distance should be (distance from front of the box to the port center) = 74mm
And the Port top to port center= 23mm ?
So, how about this drawing ?
Attachments
I don't mean to split hairs here, but the chamfer in the drawing is actually a bevel as it leaves no parallel material on the radius face. While this may not generally be an issue, with these smaller drivers, you may run short on material for a mounting screw to bite into. You may want to consider allowing the chamfer to end further away from the front face so as to leave ~8mm of parallel surface material on the radius face (hope that makes sense). This would also allow you to use a steeper chamfer angle and not risk a "blow out" of the screw hole (which should be pilot drilled, of course).Thanks for spotting the mistake !
So, the horizontal distance should be (distance from front of the box to the port center) = 74mm
And the Port top to port center= 23mm ?
So, how about this drawing ?
sent from my mobile look-at device
Guys,
You're making this look so hard, but in fact, the TABAQ is one of the easiest build to attempt.
It's a rectangular box with a port at the bottom. It's not complicated. Yet, it works very well.
Chamfering is nice, just leave the space behind the screws full so they can grab.
Really, just start cutting wood and glue. You'll see, it's fast, easy and rewarding.
Guys,
You're making this look so hard, but in fact, the TABAQ is one of the easiest build to attempt.
It's a rectangular box with a port at the bottom. It's not complicated. Yet, it works very well.
Chamfering is nice, just leave the space behind the screws full so they can grab.
Really, just start cutting wood and glue. You'll see, it's fast, easy and rewarding.
My problem is that I'm on a offshore drilling rig in the north sea, so all I can do is planning. Can't wait to get home and cut some wood.
Guys,
You're making this look so hard, but in fact, the TABAQ is one of the easiest build to attempt.
It's a rectangular box with a port at the bottom. It's not complicated. Yet, it works very well.
Chamfering is nice, just leave the space behind the screws full so they can grab.
Really, just start cutting wood and glue. You'll see, it's fast, easy and rewarding.
Re: Chamfering...
Paul Carmody's - SPEEDSTER build thread - Techtalk Speaker Building, Audio, Video Discussion Forum
Something like that leaves room for T-nuts to be glued behind the baffle. if not wanting to use screws. Note the careful marking out and routing to leave enough material behind.
I'd use a guided chamfer bit and possibly guided rebate cutter if extra clearance is needed.
Guys,
You're making this look so hard, but in fact, the TABAQ is one of the easiest build to attempt.
It's a rectangular box with a port at the bottom. It's not complicated. Yet, it works very.
My thoughts exactly. I cut the parts for two speakers on my table saw in about fifteen minutes. Routed the speaker holes and chamfered the driver relief in about ten minutes.
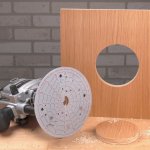
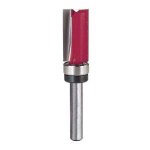
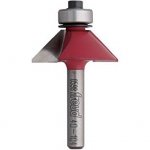
I made a template for cutting my driver holes using a Jasper 400 circle jig to cut a 3-1/16" hole in a scrap of plexiglass. I hot-glued my template to the mdf and used a top bearing router bit to cut the holes for my drivers. Then I used a 45 degree chamfer bit to cut the relief for my drivers.


Sent from my iPhone using Tapatalk
Last edited:
To mount the drivers in the front baffle, I drilled 3mm holes using the driver frame to mark the hole locations. I mounted the drivers using 3mm metric button head hex screws. For drivers this small I don't use t-nuts, I cut threads in the mdf using the screw. Just don't go all "ape" tightening the screws and you'll be fine. You can even drizzle some polyurethane into the holes and let it dry before running the screws in again. The poly will strengthen the mdf--just give it time to dry first.
Sent from my iPhone using Tapatalk
Sent from my iPhone using Tapatalk
The 75mm hole with chamfered edges shown in the drawing are just for indicative purpose ! The 3" TB driver I have doesn't need a 75mm hole.I don't mean to split hairs here, but the chamfer in the drawing is actually a bevel as it leaves no parallel material on the radius face. While this may not generally be an issue, with these smaller drivers, you may run short on material for a mounting screw to bite into. You may want to consider allowing the chamfer to end further away from the front face so as to leave ~8mm of parallel surface material on the radius face (hope that makes sense). This would also allow you to use a steeper chamfer angle and not risk a "blow out" of the screw hole (which should be pilot drilled, of course).
sent from my mobile look-at device
IIRC, its mounting holes are at 72mm PCD. So, if I had cut a 75mm hole in there, the driver would...
Anyway, thanks for head up
Guys,
You're making this look so hard, but in fact, the TABAQ is one of the easiest build to attempt.
It's a rectangular box with a port at the bottom. It's not complicated. Yet, it works very well.
Chamfering is nice, just leave the space behind the screws full so they can grab.
Really, just start cutting wood and glue. You'll see, it's fast, easy and rewarding.
BTW, here is the status of my build !
1. Drivers (TB W3-1053SC) are here and they are breaking in fine !
2. Next up is the MDF. Gonna buy "Green Panelmax" brand but they have a lot of different designs ! Anyway, I'm gonna buy it today itself !
Oh btw, your help would be very much appreciated in ending the confusion regarding which type of MDF I should get !
i. Exterior v interior MDF, which should I select ?
ii. Laminated or non-laminated ?
iii. Suede vs matte finish (I'm going for matte)
iv. Class 1 to 4, which one
3. Gonna use silicone sealant and wood glue with wood screws to fasten the box.
Do you guys recommend any particular brand ?
4. Not gonna do anything fancy with the speaker connectors but I would be visiting our local electronics components shop today to check them out.
5. Next up is building the thing !
I have already enlisted a friend of mine to help and lets see how it goes.
- Home
- Loudspeakers
- Full Range
- TABAQ TL for Tangband


