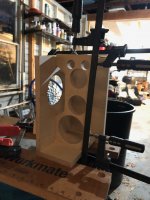
I'm part way through a build of the Classic Golden Ratio Fonken for FE103Sol. Tomorrow I'll cut the internal brace holes and will then apply damping material (wool batting) to the interior walls.
Should damping material go on the front baffle? In the Baby Labs plans it doesn't, but this one has more surface area and the instructions give no particulars on that.
Also, for the thinner polyester batting that goes on the center side of the brace, should I cut it out where the holes are or just lay it over the whole thing, covering the holes? There was some debate about that in a fonken build thread involving Chris but I can't find it right now.
Attachments

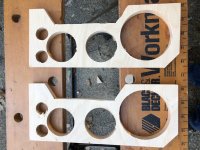
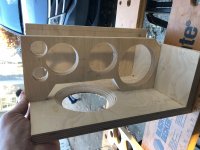
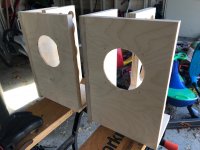
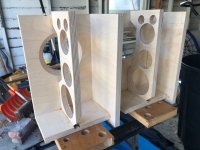
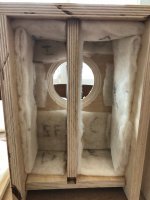
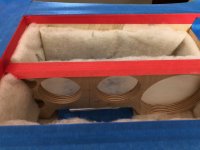
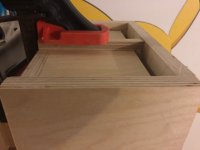
Managed to cut the brace holes and driver cutouts yesterday, and will glue the brace today. Using a jigsaw, I was unable to fit the cutouts exactly to the back of the driver, so I'll have to insert paper shims.
The holes are 1", 2 1/4", and 3 1/2", cut with a router and circle jig, following the plan as close as possible. Would there be any advantage with a roundover on the hole edges (or at least those that are far enough apart)?
Also, I plan to line the interior front baffle with wool batting, unless you think that's too much.
The CGR build has already been good practice for the trapezoidal mFonken.
Attachments
I’m watching and will be pinching your pictures.
Yes, dsmping on the baffle (but not such that it gets in the way of the back of the driver). Do not cut out the holes in the damping on the holey braces. It is over the holes that we really want it — the peak of any side-to-side standing wave is in the exact centre, so the most effective place for the damping is right there.
dave
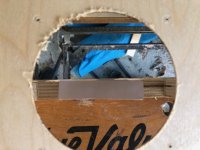
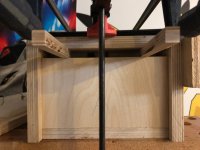
I glued the baffle, shelf, brace, and one side of the second speaker, and then fitted paper shims to each brace.
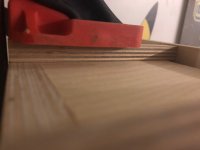
For each shim, I cut a piece of computer printer paper 3 3/4" wide to allow for up to six folds that match the 5/8" brace thickness, and 3" long to more-than-cover the contact length of the back of the driver. I then placed them on the brace and slid in the drivers, removing one fold-layer at a time until the bezel met flush with the baffle and had a tight enough pressure on the paper to make it difficult to pull out. One enclosure required five fold-layers and the other only two because of the slight variations in my hand-cut diver cutouts (I have allocated a specific driver to each enclosure for consistency, just in case).
When I make the driver cutouts in the brace of the mFonken103SolT, I'll be sure to clamp on a fence to guide the jigsaw, to ensure a good parallel contact with the back of the driver. Though it appears what I've done for the CGR will work fine.
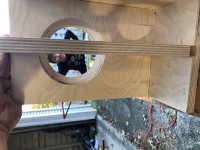
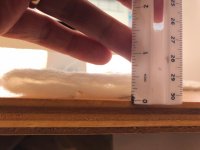
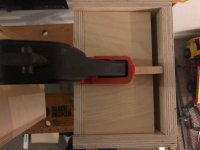
Question: I have the foam inserts for the driver bezels, but might it be worth putting Blu-Tak or some similar kind of putty in that groove near the circular opening of the bezel? (See my finger in attached pic.) I thought it might help to get an airtight seal and also tamp vibrations.
For each shim, I cut a piece of computer printer paper 3 3/4" wide to allow for up to six folds that match the 5/8" brace thickness, and 3" long to more-than-cover the contact length of the back of the driver. I then placed them on the brace and slid in the drivers, removing one fold-layer at a time until the bezel met flush with the baffle and had a tight enough pressure on the paper to make it difficult to pull out. One enclosure required five fold-layers and the other only two because of the slight variations in my hand-cut diver cutouts (I have allocated a specific driver to each enclosure for consistency, just in case).
When I make the driver cutouts in the brace of the mFonken103SolT, I'll be sure to clamp on a fence to guide the jigsaw, to ensure a good parallel contact with the back of the driver. Though it appears what I've done for the CGR will work fine.
Question: I have the foam inserts for the driver bezels, but might it be worth putting Blu-Tak or some similar kind of putty in that groove near the circular opening of the bezel? (See my finger in attached pic.) I thought it might help to get an airtight seal and also tamp vibrations.
Attachments
-
 IMG_3378.jpg224.6 KB · Views: 134
 -
 IMG_3375.jpg227.6 KB · Views: 135
 -
 IMG_3368.jpg187.5 KB · Views: 116
 -
 IMG_3367.jpg232.2 KB · Views: 142
 -
 IMG_3365.jpg238.7 KB · Views: 127
 -
 IMG_3363.jpg276.4 KB · Views: 129
 -
 IMG_3347.jpg224.3 KB · Views: 146
 -
 IMG_3341.jpg270.9 KB · Views: 250
 -
 IMG_3336.jpg404.1 KB · Views: 155
Last edited:
Question: I have the foam inserts for the driver bezels, but might it be worth putting Blu-Tak or some similar kind of putty in that groove near the circular opening of the bezel?
Foam gaskets. We used to fill the cavity in the bezel with a liquid boat damping compound that turns hard. But once the driver is clamped tp the baffle there is only a really small difference and it was a lot of messy work to do it, so we quit. Ductsel or blueTac would not hurt, just not so much it imedes mounting the driver.
Remember: screws only so tight that the washer no longer spins. Screws are all too often too tight.
dave
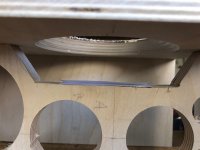
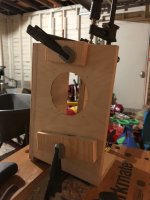
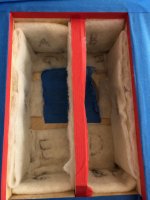
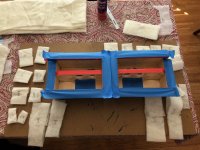
Thanks for that, David. The weather is warming up, so now that I can work outside again I thought I'd apply the lining. I'm using the wool batting that I posted above. When doubled over, it's 1/2 thick as indicated in the plans. However, it's also very light and loose, not as dense as the cotton denim lining that used to be available from CSS.
Does this seem OK, or do you think it'd be worth tripling the layers (or more)?
Does this seem OK, or do you think it'd be worth tripling the layers (or more)?
Attachments
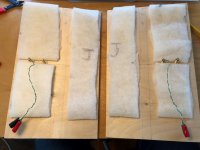
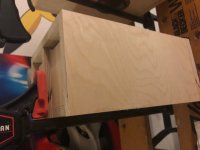
Today I installed the lining, soldered the wires (24 AWG solid copper CAT5E) and quick disconnects, and glued on the back panel of speaker A. I used painting tape to cover the driver openings, all the edges that will take wood glue, and to to protect from over spray.
I cut the wool batting strips for twice the length of coverage, and then folded them under so that the ends meet in the middle where they adhere to interior wall. That way they adhere securely while having double thickness for 1/2" indicated in the plans. It looks to be a good depth and sounds totally silent when I stick an ear into it.
When gluing the back panel, I used the 12mm thick spacers to keep the rear opening at the correct depth.
Also, while working with the wool batting, I noticed that the material in the middle of the sheet seemed thicker and fluffier than the material at the periphery. When I make the mFonken103SolT I'll use material from the middle.
Attachments
Last edited:
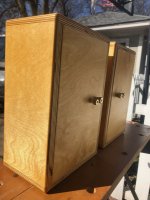
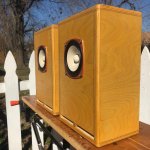
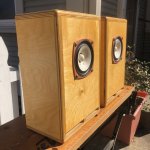
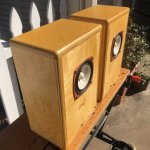
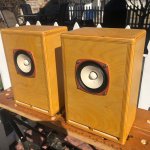
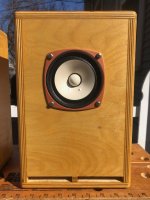
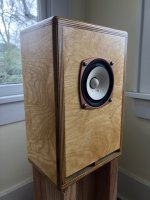
Vent spacers under clamps right now. In a few hours I'll glue the bottoms in place. Then the internal battle over whether to listen tonight or complete the finishing steps first.
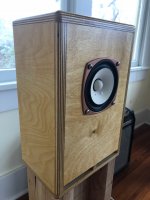
These are going to be trimmed and sanded, with a 3/8" roundover on all edges, sanded glass-smooth, a coat or two of Watco Golden Oak Danish Oil, and possibly a coat of satin polyurethane.
If anyone has tips on finishing baltic birch plywood, I'd appreciate it. Here's the procedure I usually follow, but I'm very open to trying something new:
* Sand at 80 grit
* Sand at 120 grit
* Raise the grain with water and let dry
* Sand at 220 grit
* First coat of oil, wipe at manufacturer-recommended time interval
* Wait 24 hours and sand at 400 grit
* Second coat of oil (and then sand at 400 grit and reapply every 24 hours if additional coats desired)
* Let cure for 3 days
* One coat of polyurethane
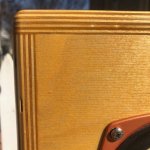
This procedure looks great from a couple feet away, with a rich color and nice pearlescence, but close inspection often reveals streaks of the golden color that are visible in the grain or in those shallow straight-line cracks that seem to be a result of the baltic birch manufacturing process. If anyone has suggestions on preventing that I'd appreciate it.
I thought of possibly sanding at 120 grit again after raising the grain or using a pre-stain wood conditioner first. Not sure if the pre-stain would work with Danish oil, since I think the Golden Oak pigment is actually a stain but I could be wrong.
These are going to be trimmed and sanded, with a 3/8" roundover on all edges, sanded glass-smooth, a coat or two of Watco Golden Oak Danish Oil, and possibly a coat of satin polyurethane.
If anyone has tips on finishing baltic birch plywood, I'd appreciate it. Here's the procedure I usually follow, but I'm very open to trying something new:
* Sand at 80 grit
* Sand at 120 grit
* Raise the grain with water and let dry
* Sand at 220 grit
* First coat of oil, wipe at manufacturer-recommended time interval
* Wait 24 hours and sand at 400 grit
* Second coat of oil (and then sand at 400 grit and reapply every 24 hours if additional coats desired)
* Let cure for 3 days
* One coat of polyurethane
This procedure looks great from a couple feet away, with a rich color and nice pearlescence, but close inspection often reveals streaks of the golden color that are visible in the grain or in those shallow straight-line cracks that seem to be a result of the baltic birch manufacturing process. If anyone has suggestions on preventing that I'd appreciate it.
I thought of possibly sanding at 120 grit again after raising the grain or using a pre-stain wood conditioner first. Not sure if the pre-stain would work with Danish oil, since I think the Golden Oak pigment is actually a stain but I could be wrong.
Attachments
Last edited:

First impressions are very good. These speakers have a lot of control and detail. However, since I've only had about an hour to listen to them, I spent most of it experimenting with room placement so that I can form a better impression.
The room is 7' 9.5" W x 18.5' L x 9.25' H, with the speakers along a short wall.
I'd appreciate any suggestions for placement.
I tried the golden ratio placement (why not, right?). Nice sound stage but a bit lacking in bass extension, probably owing to distance from the wall behind them (~42"). So I left them at that width (25.81" from side walls and 41.875" apart from each other) and shoved them back so that the driver face is 26" from the wall behind. Better bass but some notable room reflections in that location, so I'll keep tweaking.
I was used to the Shrikes, which have a markedly different signature, so I'll spend time getting used to the CGRs before passing judgment. The CGRs have a more forward sound and give really nice body to single instruments, especially piano and voice. I think the wider front baffle helps there.
Also, I'm using 24 awg solid copper conductors from a run of CAT5E cable and suspect that they might be a bit thin for this application. Luckily the CGRs are shallow enough that I should be able to swap in some 18 awg, which works very well in the Shrikes, without too much trouble should it come to that.
I got the CGRs into a better place in the room (back of speaker 19" from back wall, sides 20" from side walls) and did some more listening last night and this morning. The CGRs just sound "right." Initially I thought they were lacking in bass extension and dynamics as compared to the Shrikes. But after A-Bing them this morning, the only advantage offered by the Shrikes (and I *love* the Shrikes) is a slight amount of further bass extension, but it's a little boomy. What the CGRs offer instead is much more accurate bass, at least as much if not more dynamics, finer accuracy/detail/control overall, and a wonderful presentation of acoustic instrument body/internal resonance. Last night I was captivated by Chopin and Schubert lieder because the piano's internal resonance was entrancing, and the voice even more so.
I'm excited to get back to work on the mFonken103SolTs today, if for no other reason than I'm so pleased with the CGRs. Seriously, you can't go wrong with these and it's a straightforward build because of the right angles.
Also, I don't know what an under- or over-damped cabinet would sound like, but my ears tell me that the wool batting I used works just fine and will employ it in the mFonken103SolT's without hesitation.
Last edited:
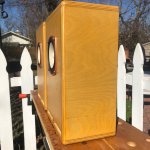
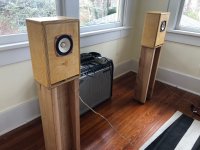
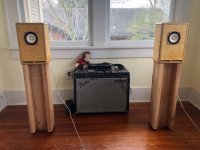
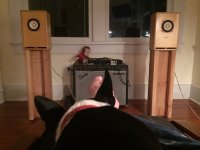
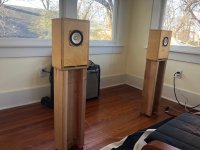
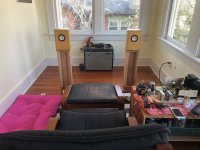
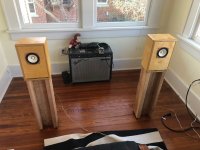
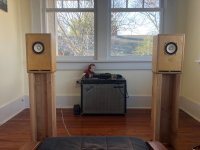
For some reason, the pics I posted above look excessively yellow. In real life they look like a more natural birch. Here are some pics in situ. First few show the golden ratio placement, last few show the current location, where they sound better (and soothe the savage beast).
Also pictured is the breadboarded 7C5 amp I've been designing.
Also pictured is the breadboarded 7C5 amp I've been designing.
Attachments
-
 IMG_3912.jpg250.1 KB · Views: 120
 -
 IMG_3909.jpg288.4 KB · Views: 114
 -
 IMG_3907.jpg305 KB · Views: 117
 -
 IMG_3906.jpg275.9 KB · Views: 105
 -
 IMG_3904.jpg241.7 KB · Views: 110
 -
 IMG_3883.jpg244.2 KB · Views: 104
 -
 IMG_3882.jpg303.1 KB · Views: 110
 -
 IMG_3878.jpg286.3 KB · Views: 115
 -
 IMG_3879.jpg249.3 KB · Views: 123
 -
 IMG_3913.jpg269.2 KB · Views: 114
Last edited:
- Status
- This old topic is closed. If you want to reopen this topic, contact a moderator using the "Report Post" button.
- Home
- More Vendors...
- Planet 10 hifi
- CGR mFonken103Sol