My first complete speaker build with very few tools in a very small apartment. Thank you all for the inspiration.
I think the DeVore Orangutans are beautiful but I don't have Orangutan money. I also don't have a table saw.
I do have a couple of things going for me though. Orangutans are partially made of 3/4" 10 ply Baltic Birch and have dimensions of 10"D x 15"W x 35.5"H.
Rockler sells 3/4" 10 ply Baltic Birch in 12"x30" sheets. Thats pretty darn close to 80% of 15"W x 35.5"H. Then I saw a very nice pair of 8" woofers on ebay. That's 80% of the diameter of the Orangutan woofer.
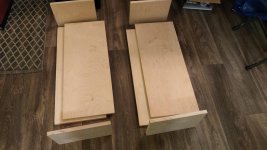
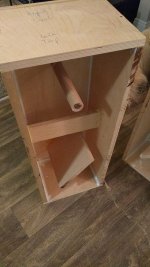
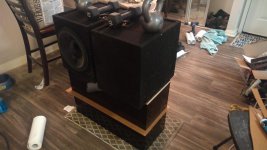
Which brings me to today. I threw down a tarp and made four straight cuts for the tops and bottoms. I squared up them up and glued/screwed them to the backs.
This build will be finished in two weeks and require me make straight cuts on top of my dinner table twelve times. I'll post the finished product on Youtube. They'll be beautiful.
I think the DeVore Orangutans are beautiful but I don't have Orangutan money. I also don't have a table saw.
I do have a couple of things going for me though. Orangutans are partially made of 3/4" 10 ply Baltic Birch and have dimensions of 10"D x 15"W x 35.5"H.
Rockler sells 3/4" 10 ply Baltic Birch in 12"x30" sheets. Thats pretty darn close to 80% of 15"W x 35.5"H. Then I saw a very nice pair of 8" woofers on ebay. That's 80% of the diameter of the Orangutan woofer.
Which brings me to today. I threw down a tarp and made four straight cuts for the tops and bottoms. I squared up them up and glued/screwed them to the backs.
This build will be finished in two weeks and require me make straight cuts on top of my dinner table twelve times. I'll post the finished product on Youtube. They'll be beautiful.
Attachments
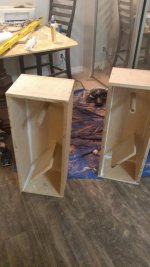
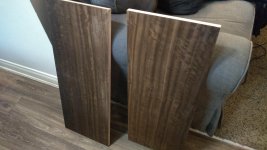
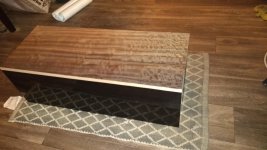
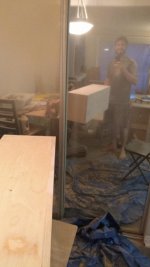
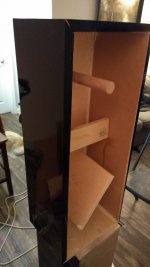
Boxes are mostly constructed and braced. Cut the corner off my dinner table  . Harbor freight blade is already dull from just this build. Gahbage. I had to use some MDF since Rockler didn't have enough Plywood. "Fumed" Eucalyptus Veneer is mounted on the fronts. Thankfully I bought a test sheet of the veneer since I had to practice applying and finishing it. My initial practice pieces look awful.
Next step is bondo and sanding the box. Lacquer the back. Then vinyl wrap the sides. Mount the front panel, cut the holes, sand, shellac, sand, shellac, sand, shellac. Install the terminals, wires, drivers.
Finally, set the crossovers, levels, Phase with REW, Dirac, EQ, and integrate subs.
. Harbor freight blade is already dull from just this build. Gahbage. I had to use some MDF since Rockler didn't have enough Plywood. "Fumed" Eucalyptus Veneer is mounted on the fronts. Thankfully I bought a test sheet of the veneer since I had to practice applying and finishing it. My initial practice pieces look awful.Next step is bondo and sanding the box. Lacquer the back. Then vinyl wrap the sides. Mount the front panel, cut the holes, sand, shellac, sand, shellac, sand, shellac. Install the terminals, wires, drivers.
Finally, set the crossovers, levels, Phase with REW, Dirac, EQ, and integrate subs.
Attachments

Great DIY spirit. Thanks for sharing. I love the look of the Orangutan too. I've been mulling over a close to wall, non-resonant version. Good luck with the final product. How about a close up of the corner of the dinner table...?
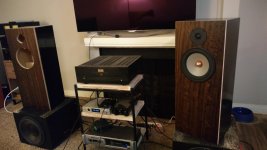
Thanks guys. Astrojet- These are intended to live close to walls. I'm not porting them for that reason. One of the things I like about this style is they're wider and less deep than many newer designs. I hope that means they'll sound good further from the couch.
Pete- The woofers are 8" Seas Excel W22EX001, tweeters are Seas Prestige 27TDC.
The bass will come from two 12" Dayton Audio Reference RSS315HF-4 in sealed 1.5cuft boxes.
Pete- The woofers are 8" Seas Excel W22EX001, tweeters are Seas Prestige 27TDC.
The bass will come from two 12" Dayton Audio Reference RSS315HF-4 in sealed 1.5cuft boxes.
My first complete speaker build with very few tools in a very small apartment.
I love these ghetto builds. Well done!
From Wikipedia: "Creative limitation is the concept of how purposely limiting oneself can actually drive creativity."
Great DIY spirit. Thanks for sharing. I love the look of the Orangutan too. I've been mulling over a close to wall, non-resonant version. Good luck with the final product. How about a close up of the corner of the dinner table...?
Ha ha, you can see it in the first photo of Post #2. Good one Ryan.
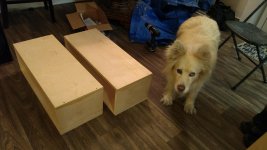
All you need for real DIY is dog fur stuffing!
Not a bad idea, my dogs could use haircuts😀
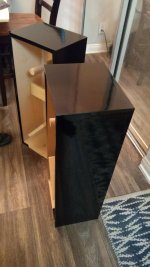
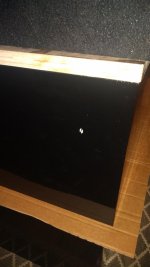
I bondo-ed, sanded and tackpapered 2x down to 220 grit but the vinyl wrap has a fisheye texture anyway (pic 1). That left me on the fence about vinyl. Then I bumped a chair into it (pic 2) and ripped a dang hole on the top! 😱No more vinyl for me! Oh well, if you want to make an omelet...
Pic 3 making do without wood clamps
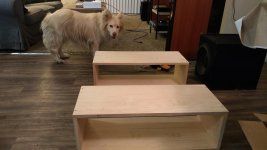
Pic 4 trial fit to see how it'll look
I bondo-ed, sanded and tackpapered 2x down to 220 grit but the vinyl wrap has a fisheye texture anyway (pic 1). That left me on the fence about vinyl. Then I bumped a chair into it (pic 2) and ripped a dang hole on the top! 😱No more vinyl for me! Oh well, if you want to make an omelet...
Pic 3 making do without wood clamps
Pic 4 trial fit to see how it'll look
Attachments
Just finished one speaker and I couldn't help but give it a test run. Crossed it over at 2000 and they are much clearer than my Klipsch RP-260Fs!😀😀😀 Lots more dialing in ahead then I'll post a youtube.
I used three coats of Zinsser Sealcoat Shellac and they look perfect. I'm going to try a Seas Millenium tweeter in there too because I just have to know.
I used three coats of Zinsser Sealcoat Shellac and they look perfect. I'm going to try a Seas Millenium tweeter in there too because I just have to know.
Attachments
Sealcoat is great stuff. Being shellac it is vulnerable to alcohol, so I have topcoated with waterborne "lacquer" successfully, most recently with General Finishes Endurovar. I used gloss thinking I could back the high sheen down with ultra fine abrasive pads; I was wrong. It gets HARD.
Nice project. Those are looking very good.
With the Seas Millennium tweeter, you can use the crossover designed for the TRYM kit posted on the SEAS website.
With the Seas Millennium tweeter, you can use the crossover designed for the TRYM kit posted on the SEAS website.
Last edited:
Phivates- My original plan was boiled linseed oil but it was too dark on test pieces. Luckily the veneer I used was only $10 per 1'x3' sheet so I tried lots of combos. First I learned I need a roller to apply the glue to the veneers because using a paper towel made the it wavy. Eventually I found the best combination was sanding the $#!T out of it with 80 grit, then 120, then 220. Tack cloth, two thin coats of SealCoat twenty minutes apart, 220 grit, one last layer of sealcoat.
Thank you. I see the Trym crosses over at 1.6khz. Takes the guesswork out of it for me.
Thank you. I see the Trym crosses over at 1.6khz. Takes the guesswork out of it for me.
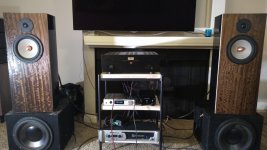
Here's the video as promised: YouTube
I hope this inspires someone else with limited space/tools to say F#&% it and start building.
First Pic Finished speakers showing off their chatoyance
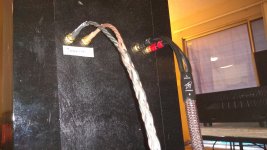
Second Pic I oriented the terminals horizontally so the cables easily stay separated
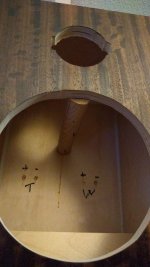
Third Pic The woofer flanges screw directly into oak dowels to reduce vibration
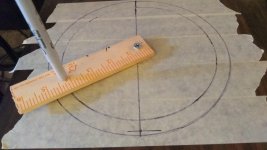
Fourth Pic This yardstick held my sharpie perfectly
Fifth Pic I made the angled center brace large enough to break up standing waves
I hope this inspires someone else with limited space/tools to say F#&% it and start building.
First Pic Finished speakers showing off their chatoyance
Second Pic I oriented the terminals horizontally so the cables easily stay separated
Third Pic The woofer flanges screw directly into oak dowels to reduce vibration
Fourth Pic This yardstick held my sharpie perfectly
Fifth Pic I made the angled center brace large enough to break up standing waves
Attachments
- Status
- Not open for further replies.
- Home
- Loudspeakers
- Multi-Way
- 80% Snell Type E (Orangutan) Apartment Build