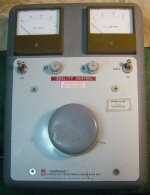
[h=This is a Variac:]%2[/h]

It started acting up on me when I was testing out a power supply.
So, the first thing to do was unplug it and take it apart to find out
what was wrong with it.
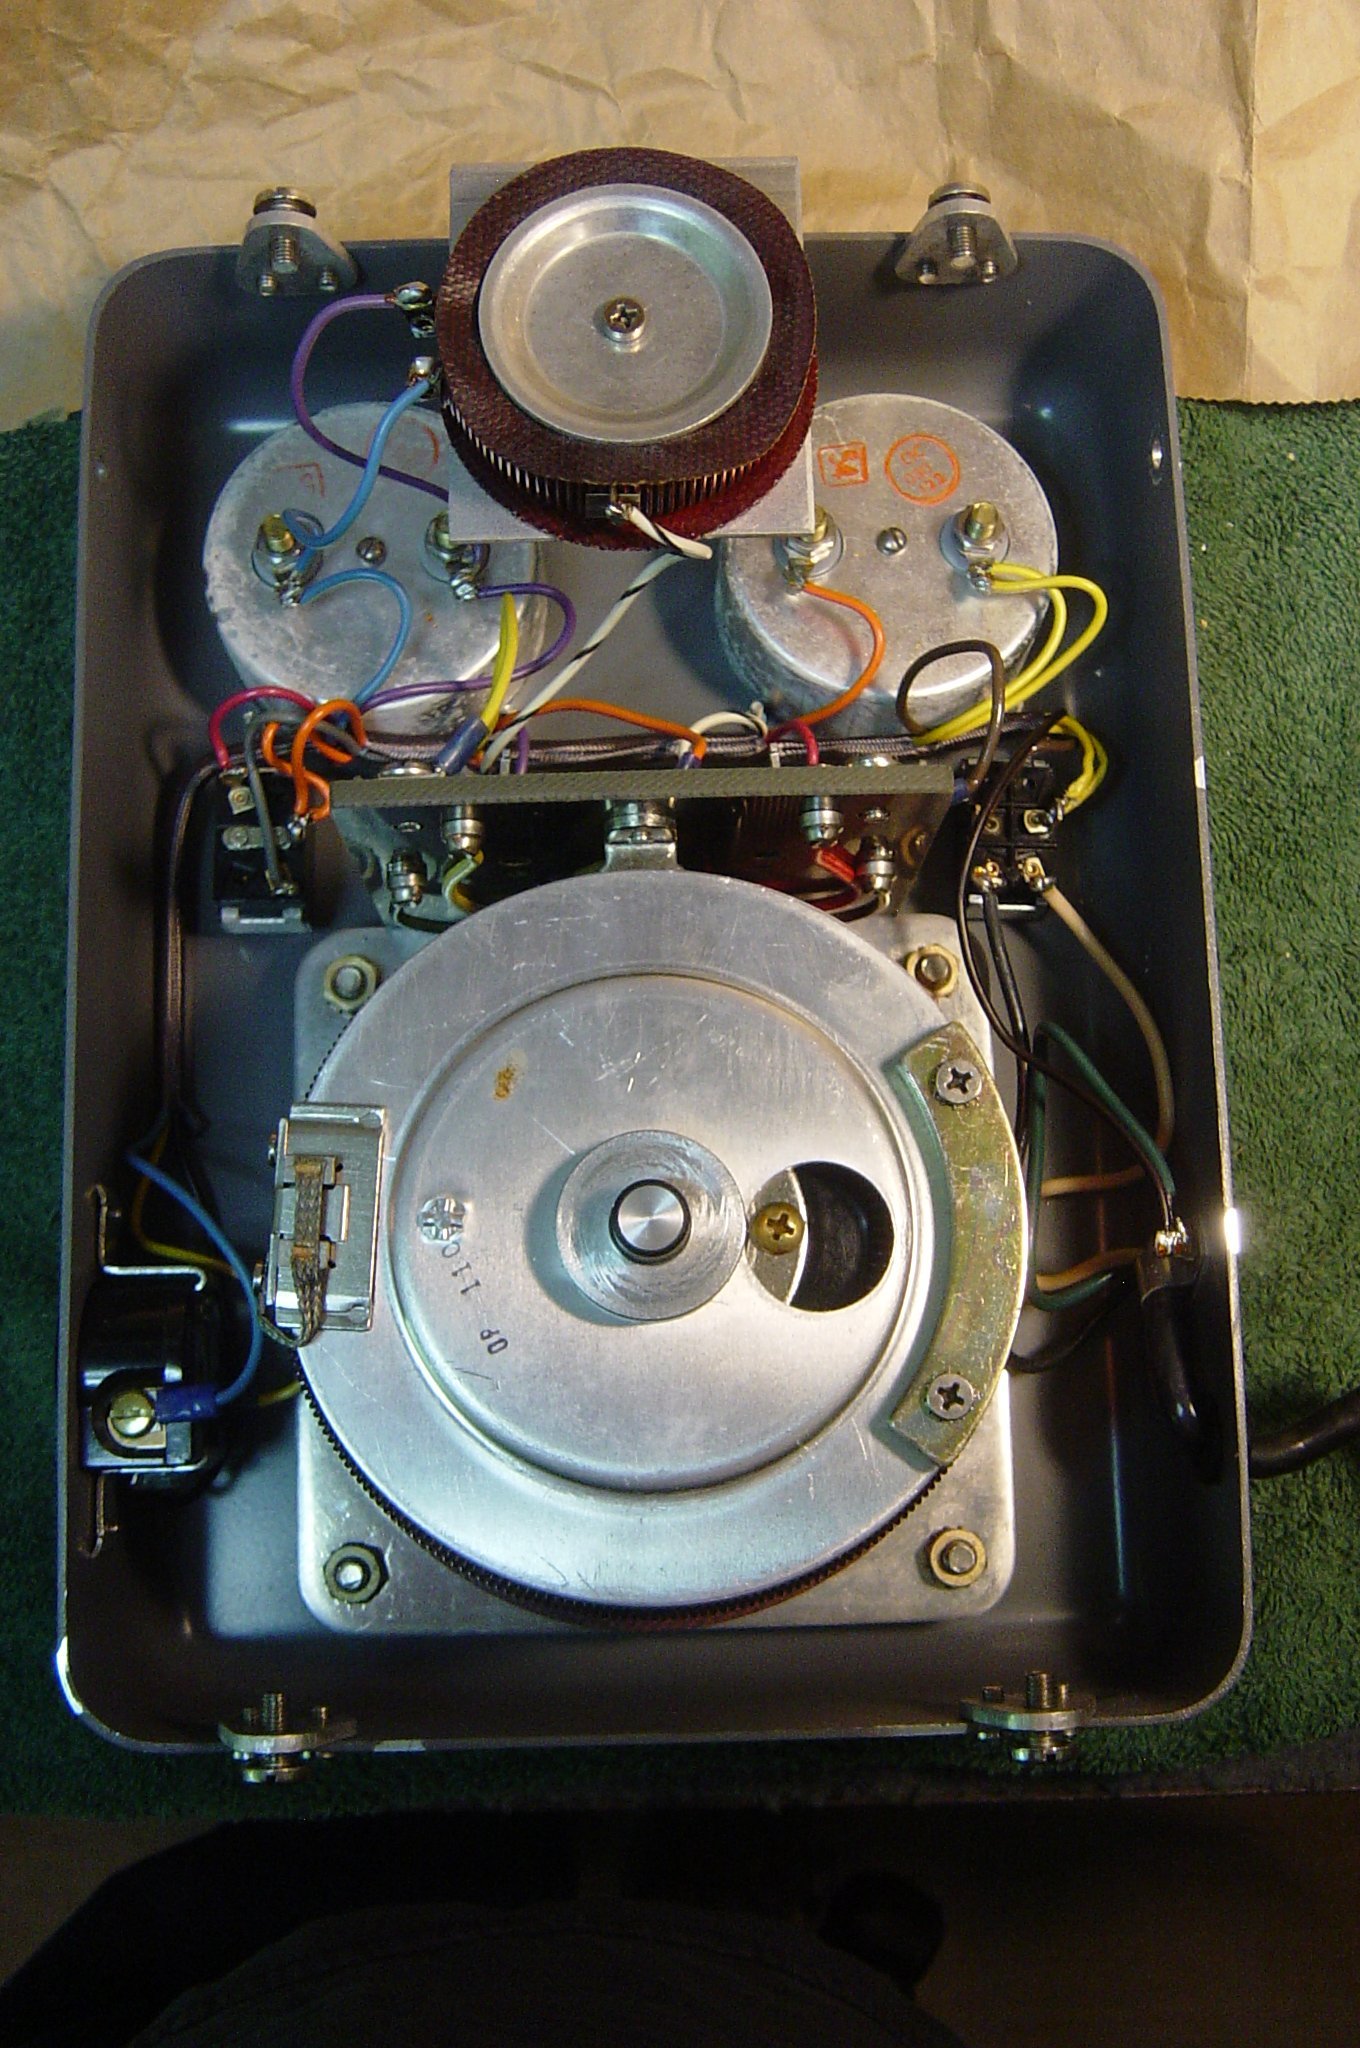
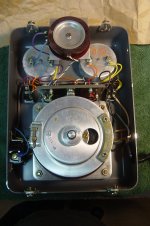
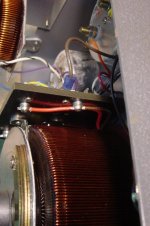
Shown here is the inside of the Variac. To open it up, remove
four large screws. Two at the top, two at the bottom. The black
arrows show where. Then carefully remove the back half of
the unit. The component parts are contained in the front
half of the case as shown:


Here is is and let's take a look inside and see if anything jumps out
at us. Close up inside view:
[h=Take Reference Pics & Notes]%2[/h]
Before taking it apart for further investigation, take some pics of the
instrument, draw diagrams of wiring in your work log. You do have
a work log, or lab log, or something to take notes as you go through
something right? If you don't, get one and start taking notes about
what you do.
There is nothing worse, then life happening in the middle of something
and when you return you forgot what you were doing. Even as a young
man, I did this, however as we get older, we tend to forget more and
more things. Also, it will help you work out other problems and come
up with solutions down the road.
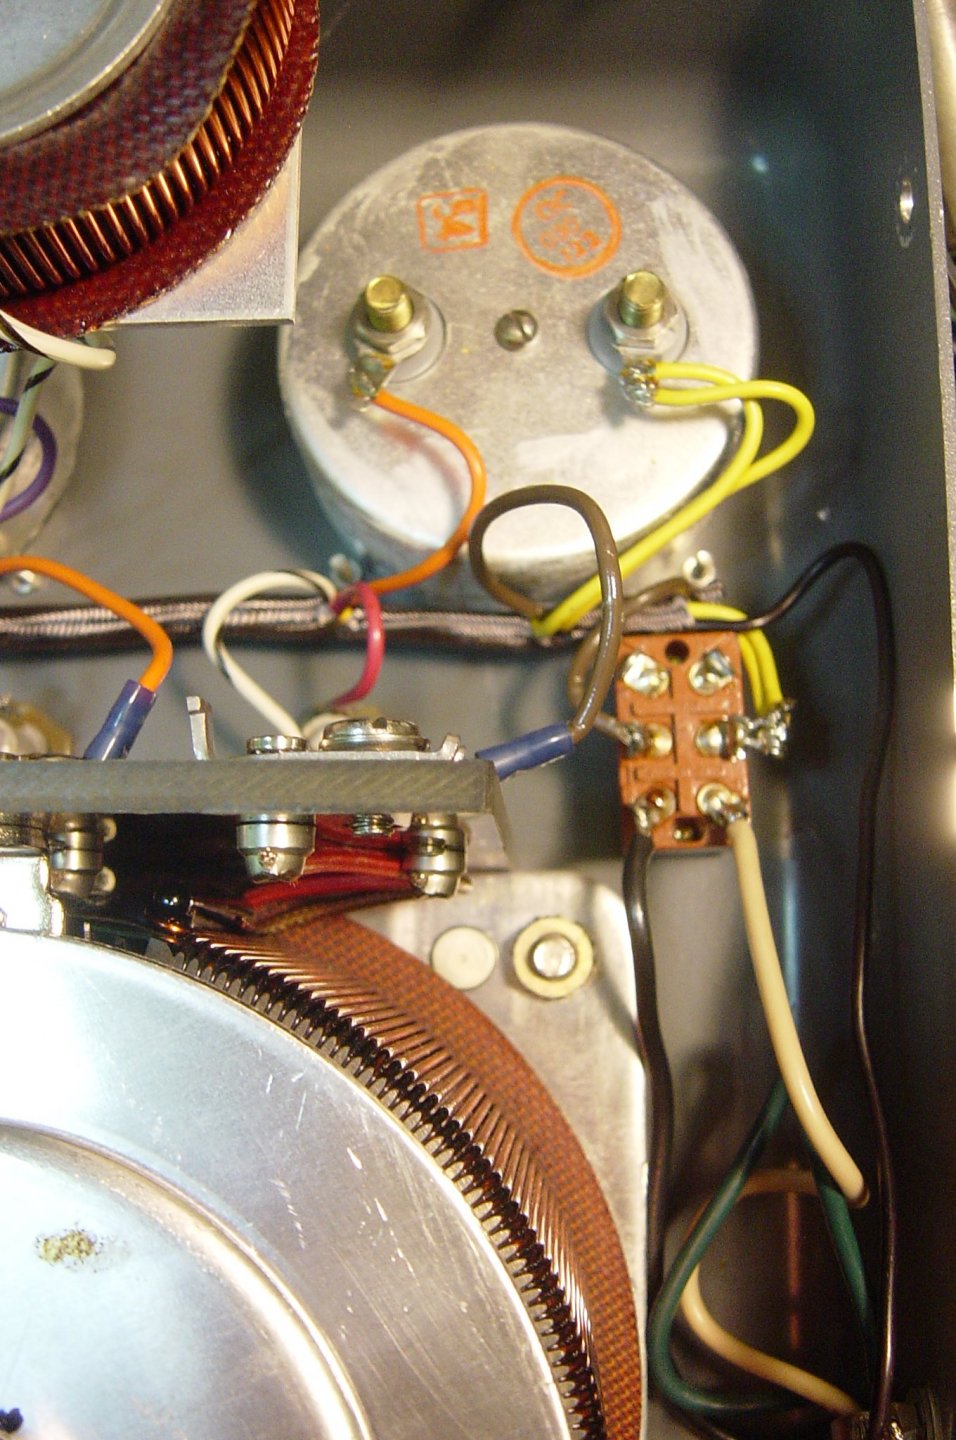
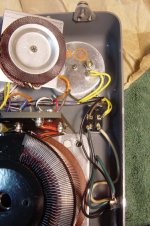
Here is the left half wiring:

Here is the right half wiring:

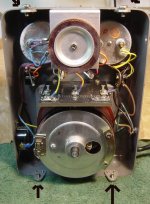
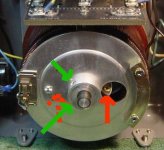
[h=Disassembly of Brush From Track]%2[/h]
As long as we are in here, we should clean the track.
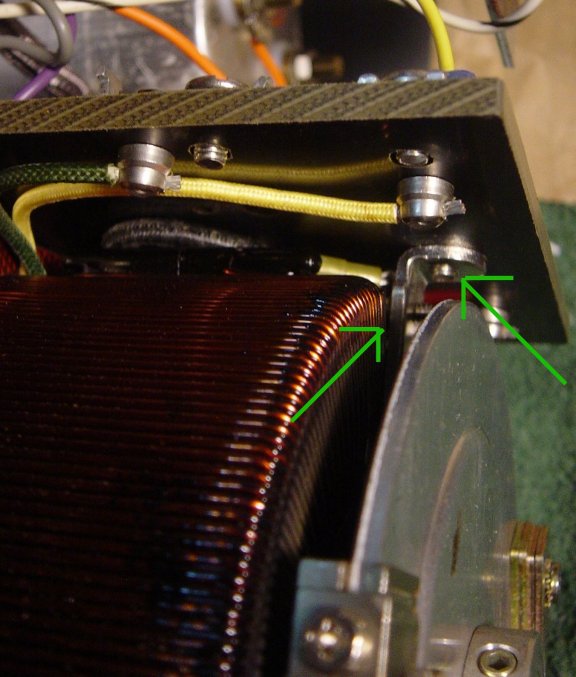
Note the location of the voltage knob and loosen the allen
head screws to free the center shaft (green arrows).
Then, there are two more screws under the brush holder
assembly. Red arrows, the solid arrow points to the visable screw
while the dotted arrow points to the hidden screw. Rotate the
brush wheel to reveal and remove the screw.

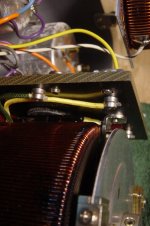
Now there is one more piece to remove, and this is the lead and
fixture for the start poing on the winding. Gently pull the knob
out of the front and then move the brush assembly to unsrew
it. There are two screws which the thin green arrow points too.
Here is a pic of the track after cleaning.
Clean it with a lint free cloth such at Kimwipes or Techwhipes.
it's 70% isopropal alcohol 30% water
OR
use 100% isopropal alcohol. Wipe from center to outside
along to track to get all the old carbon off it.
The part of the track along the upper right still has a
problem after cleaning it. It is noiser then earlier in the
turn cycle.
[h=Track Pic After Cleaning:]%2[/h]


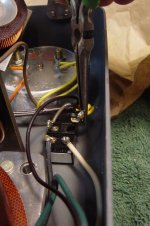
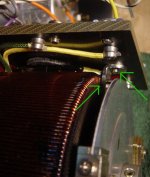
[h=Problem Switch]%2[/h]
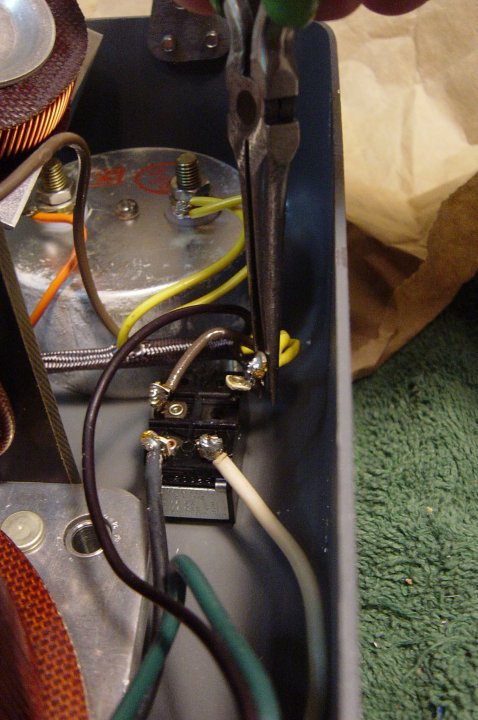
Check out the switch on the right, with the two yellow wires coming
from the meter. Doesn't look so good.
This should explain why I was having problems. This is the on/off
switch and as you can see the terminal was just floating. The rivit
was burned off. Shorted for a long time probably and filled with
carbon.
[h=
Here is the new switch installed.]%2[/h]
Put back together using the opposite order of disasembly.
It started acting up on me when I was testing out a power supply.
So, the first thing to do was unplug it and take it apart to find out
what was wrong with it.
Shown here is the inside of the Variac. To open it up, remove
four large screws. Two at the top, two at the bottom. The black
arrows show where. Then carefully remove the back half of
the unit. The component parts are contained in the front
half of the case as shown:
Here is is and let's take a look inside and see if anything jumps out
at us. Close up inside view:
[h=Take Reference Pics & Notes]%2[/h]
Before taking it apart for further investigation, take some pics of the
instrument, draw diagrams of wiring in your work log. You do have
a work log, or lab log, or something to take notes as you go through
something right? If you don't, get one and start taking notes about
what you do.
There is nothing worse, then life happening in the middle of something
and when you return you forgot what you were doing. Even as a young
man, I did this, however as we get older, we tend to forget more and
more things. Also, it will help you work out other problems and come
up with solutions down the road.
Here is the left half wiring:
Here is the right half wiring:
[h=Disassembly of Brush From Track]%2[/h]
As long as we are in here, we should clean the track.
Note the location of the voltage knob and loosen the allen
head screws to free the center shaft (green arrows).
Then, there are two more screws under the brush holder
assembly. Red arrows, the solid arrow points to the visable screw
while the dotted arrow points to the hidden screw. Rotate the
brush wheel to reveal and remove the screw.
Now there is one more piece to remove, and this is the lead and
fixture for the start poing on the winding. Gently pull the knob
out of the front and then move the brush assembly to unsrew
it. There are two screws which the thin green arrow points too.
Here is a pic of the track after cleaning.
Clean it with a lint free cloth such at Kimwipes or Techwhipes.
it's 70% isopropal alcohol 30% water
OR
use 100% isopropal alcohol. Wipe from center to outside
along to track to get all the old carbon off it.
The part of the track along the upper right still has a
problem after cleaning it. It is noiser then earlier in the
turn cycle.
[h=Track Pic After Cleaning:]%2[/h]
[h=Problem Switch]%2[/h]
Check out the switch on the right, with the two yellow wires coming
from the meter. Doesn't look so good.
This should explain why I was having problems. This is the on/off
switch and as you can see the terminal was just floating. The rivit
was burned off. Shorted for a long time probably and filled with
carbon.
[h=
Here is the new switch installed.]%2[/h]
Put back together using the opposite order of disasembly.
Attachments
-
 005.FrontVariac.jpg60.5 KB · Views: 704
 -
 05.InsideVariac.jpg492.3 KB · Views: 694
 -
 007.InsideVariac.jpg97.6 KB · Views: 574
 -
 008.LeftBFWipeDown.jpg62.5 KB · Views: 513
 -
 008.RtBFWipeDown.jpg64.8 KB · Views: 504
 -
 009.AFTWipeDown.jpg97.1 KB · Views: 498
 -
 012.RtSwitchTab.jpg71.8 KB · Views: 661
 -
 014.BrushAssyRemove.jpg30.4 KB · Views: 515
 -
 015.BrushAssyRemove.jpg66.5 KB · Views: 494
 -
 013.RtSwitchfix.jpg248.7 KB · Views: 482
Last edited: