Hey everyone! I'm in the middle of a project and thought someone might like to see the progress.
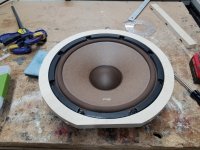
A while back I received a pair of 70's vintage Pioneer FB 12's and I finally found a project for them. These speakers will eventually be a gift for someone's father. It's taking forever because I'm doing this in my spare time. Anyway here are some pics.
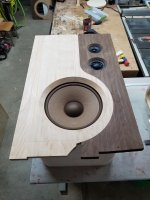
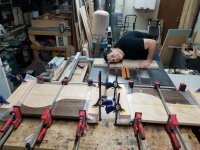
The FB's are in very good shape for the age. The front's are Beach and a very dark Walnut. The shells are 0.75" Baltic Birch. This is my first attempt at kerfing suck a large piece. The resulting round edge was about 2.25". I'm sure there is a better way to do this but I have little experience with kerfing. I started by running three dado cut about 0.25" deep on the long axis along with some particle board ribs for help with alignment. If I ever do this again I think I'll use something a little more structurally ridged. When I strapped it the force was enough to bow the particle board a little. I had to place some cross pieces to force the wall flat again.
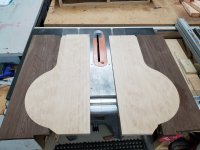
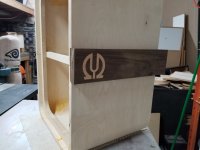
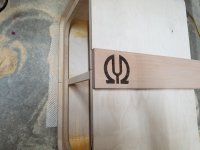
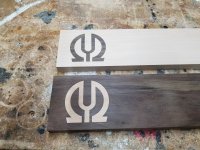
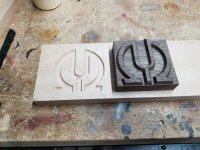
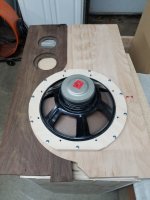
Trying to figure out exactly how long to cut these piece to give a seamless joint was very difficult due to the 0.25" recess into the Baltic Birch. It came out close but I wasn't happy with it. A compromise was to route some 4" channels along the mid section and insert a board. I also decided to engrave the Pioneer logo as an afterthought. I think it meshes pretty well. This is my first try at back mounting the speakers. I think it provides a very clean look that definitely goes well with the contrasting woods.
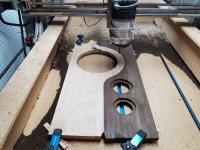
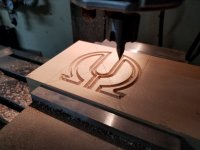
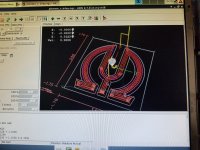
Its projects like these I'm glad I decided to build my wood CNC. I'm sure I could have cut the arc's by hand but its hard to argue with the convenience and accuracy. And I don't have the skill yet to engrave by hand yet. 😀
These will be 3-way loudspeakers. The tweeter is a Peerless BC25SG15-04 and the mid is HiVi DMN-A 2" mid. So far the crossover is up to 17 components. I've done some listening tests but will finalize the crossover once they're out of the test enclosures. When it's done i'll come back and post the schematic for it.
If anyone has questions about this project i'll try to answer them the best I can. I'm definitely not an expert though! And don't mind the dork in photo 2. 🙄
Edited for spell and mistakes.
A while back I received a pair of 70's vintage Pioneer FB 12's and I finally found a project for them. These speakers will eventually be a gift for someone's father. It's taking forever because I'm doing this in my spare time. Anyway here are some pics.
The FB's are in very good shape for the age. The front's are Beach and a very dark Walnut. The shells are 0.75" Baltic Birch. This is my first attempt at kerfing suck a large piece. The resulting round edge was about 2.25". I'm sure there is a better way to do this but I have little experience with kerfing. I started by running three dado cut about 0.25" deep on the long axis along with some particle board ribs for help with alignment. If I ever do this again I think I'll use something a little more structurally ridged. When I strapped it the force was enough to bow the particle board a little. I had to place some cross pieces to force the wall flat again.
Trying to figure out exactly how long to cut these piece to give a seamless joint was very difficult due to the 0.25" recess into the Baltic Birch. It came out close but I wasn't happy with it. A compromise was to route some 4" channels along the mid section and insert a board. I also decided to engrave the Pioneer logo as an afterthought. I think it meshes pretty well. This is my first try at back mounting the speakers. I think it provides a very clean look that definitely goes well with the contrasting woods.
Its projects like these I'm glad I decided to build my wood CNC. I'm sure I could have cut the arc's by hand but its hard to argue with the convenience and accuracy. And I don't have the skill yet to engrave by hand yet. 😀
These will be 3-way loudspeakers. The tweeter is a Peerless BC25SG15-04 and the mid is HiVi DMN-A 2" mid. So far the crossover is up to 17 components. I've done some listening tests but will finalize the crossover once they're out of the test enclosures. When it's done i'll come back and post the schematic for it.
If anyone has questions about this project i'll try to answer them the best I can. I'm definitely not an expert though! And don't mind the dork in photo 2. 🙄
Edited for spell and mistakes.
Attachments


Last edited:
More Photos
Here are some more photos.
I did the inlay with F-Engrave. This is my first project with it and seems to work well once you understand it.
Here are some more photos.
I did the inlay with F-Engrave. This is my first project with it and seems to work well once you understand it.
Attachments

- Status
- Not open for further replies.