
There's no real reason for that to be standardized to just one value.
Also, these are stamped, so there are loose tolerances at best.
Why not use a regular 3/8" nut and lockwasher?
Also, these are stamped, so there are loose tolerances at best.
Why not use a regular 3/8" nut and lockwasher?
Last edited:
There's no real reason for that to be standardized to just one value.
Also, these are stamped, so there are loose tolerances at best.
Why not use a regular 3/8" nut and lockwasher?
Trying to remove the electronics from a 1969 Magnavox Astro-Sonic 300 console. To get the tuner/amp out, one must first remove the faceplate which is held on by 4 recessed inverted pal-nuts. There is no way to get a socket around the outside of these nuts, one must work from the inside. Magnavox had a special tool for this, but I don't want to spend $$$ on a special tool for one operation.
Figure if I know the inside flat to flat I can make a crude tool that should work. (Basically just a long nut with the threads drilled out that fits inside the inverted pal-nut. Then a nut driver on the long nut from the top.)
Last edited:
That's a real pain. They should have installed that essential tool somewhere in the chassis for future repairs.
I guess you could cut-and-try one, but those dimensions are not precise at all. Can you post a photo of this arrangement?
I guess you could cut-and-try one, but those dimensions are not precise at all. Can you post a photo of this arrangement?
Last edited:
Trying to do something better than using 'two screw drivers' or 'needled nosed pliers'. Oh, and the console itself is at the home of an across town acquaintance, so I don't have ready access to it.
I would go the needle nose pliers route and just remove one. Then see if you can make a tool from that nut.
Maybe a friend at a local university or maker space can 3D print one for you.
Last edited:
Some Astrosonics will fool you into extra work- the faceplate will pop off revealing a couple of screws holding the receiver in place, no need to remove the pal-nuts.
A couple of ideas that I've heard to work on them: ½" clear gas line, trim the OD to shape. A hex coupler or turnbuckle, or even a hex nut of fortunate size dropped in over the shaft.
Good luck!
A couple of ideas that I've heard to work on them: ½" clear gas line, trim the OD to shape. A hex coupler or turnbuckle, or even a hex nut of fortunate size dropped in over the shaft.
Good luck!
Attachments
Some Astrosonics will fool you into extra work- the faceplate will pop off revealing a couple of screws holding the receiver in place, no need to remove the pal-nuts.
A couple of ideas that I've heard to work on them: ½" clear gas line, trim the OD to shape. A hex coupler or turnbuckle, or even a hex nut of fortunate size dropped in over the shaft.
Good luck!
The screws to remove the electronics are under the face plate. It won't pop off, I tried that. Your last suggestion is what I am trying to do, but it would be nice to know the internal flat to flat of typical pal-nut. Otherwise, I am going to drill out both a 7/16" and a 1/2" hex coupler (I called it a long nut) to clear the pot threads.
I did find one description that listed the outside hex of the pal-nut at 0.562 (9/16) and the material thickness as 0.017. That would make the internal about 0.562 - 0.034 = 0.528 - so the 1/2" *should* work. But I am going to drill out a 7/16 too just in case.
Wish me luck.
Last edited:
Boy, I'm so glad I never tossed my handy-dandy Magnavox nut removal tool!
Part number 170953-2
Given to me free by Magnavox when I was an authorized servicer for them.
Across the flats it's exactly 7/16", with a core opening of 3/8".
Part number 170953-2
Given to me free by Magnavox when I was an authorized servicer for them.
Across the flats it's exactly 7/16", with a core opening of 3/8".
Boy, I'm so glad I never tossed my handy-dandy Magnavox nut removal tool!
Part number 170953-2
Given to me free by Magnavox when I was an authorized servicer for them.
Across the flats it's exactly 7/16", with a core opening of 3/8".
Thank you, Thank you, Thank you!
Xcelite 99-716 or 99-916, any old TV repair man should have them. I do!
These nuts where also used in cheap lighting fixtures. E
These nuts where also used in cheap lighting fixtures. E
this is the most helpful thread on the internet re: the Pal nut driver --
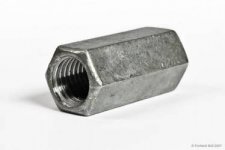
with the info provided here as well as on the Facebook magnavox enthusiasts page, I was able to get a functional tool using a threaded coupling nut and a deep socket -
the key for me was having a friendly hardware man drill out the coupling nut with a 3/8th inch bit -- I had gotten a start but wasn't agressive enough to remove the material adequately inside the nut --
Another trick he used was a spring clip and coarse emery cloth - using the spring clip as a shaft and holder of a few wraps of the emery cloth he was able to ream out the inner part of the coupling nut -- he then followed it up with the 3/8th carbide bit --
All this for $4 -- try that at Home Depot!
Image here - https://i.ibb.co/y4DJCgB/IMG-20210220-134541277.jpg
- Home
- Design & Build
- Parts
- Pal-nuts