So in order not to litter Gerrits thread I open one for my own endeavor building my first ribbon heavily inspired by the mother-thread.
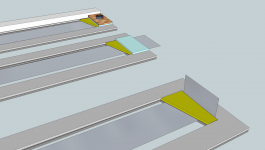
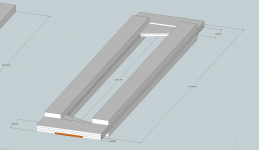
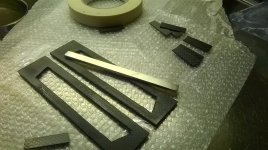
As I want to avoid standing waves I have opted to slant the "roof" and ceiling in the gap which made it take on the look from the well known french "chopper" - hence the name. The strength of the magnets might make the name even more appropriate... The sandwich layers are all 1mm solid carbon.
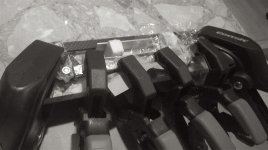
Lets start with some pics. And yes the ribbon is a bit curved.
As I want to avoid standing waves I have opted to slant the "roof" and ceiling in the gap which made it take on the look from the well known french "chopper" - hence the name. The strength of the magnets might make the name even more appropriate... The sandwich layers are all 1mm solid carbon.
Lets start with some pics. And yes the ribbon is a bit curved.
Attachments


Last edited:
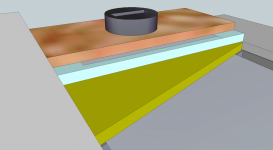
Looking at the femm models made by Gerrit in the mother thread I must try to compensate for the varying field in the gap by etching the ribbon with different thickness.
So etching need to be done in 3 phases, each phase removing something protecting a part of the ribbon to be reduced. Question is what something is and how ti apply and remove it on such a thin material.
//
So etching need to be done in 3 phases, each phase removing something protecting a part of the ribbon to be reduced. Question is what something is and how ti apply and remove it on such a thin material.
//
Attachments

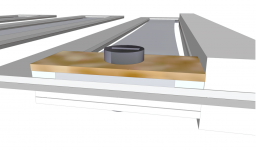
A few more...
Attachments
Last edited:
Got a notification from DHL today. Was not the magnets 🙁
🙂
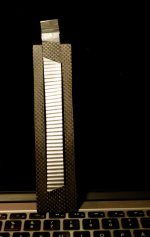
Need to cut the the 10 1mm carbon pieces that makes up the ribbon... but how with some precision...?
//
🙂
Need to cut the the 10 1mm carbon pieces that makes up the ribbon... but how with some precision...?
//
I wish you good luck and lots of fun with your experiments!
regards,
Gerrit
P.S. Please wear safety goggles when handling those big and powerful magnets.
regards,
Gerrit
P.S. Please wear safety goggles when handling those big and powerful magnets.
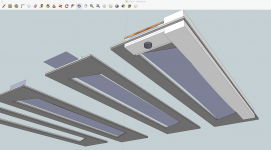
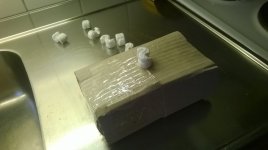
Simplified the design a bit and went for some cutting. The innards of the biggest part is not finished. I will glue the side bars to it and then sand/grind it to shape.
Come magnets...
Come magnets...
Attachments
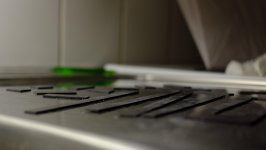


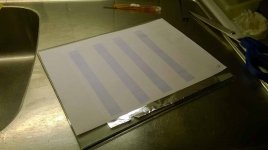
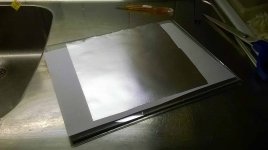
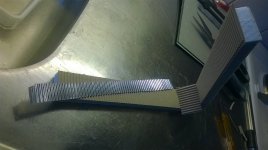
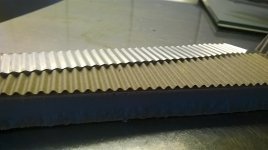
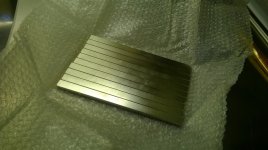
Made the first set of ribbons. Used glass to work on. Using standard kitchen foil 15um making it smooth on the glass. Printing my wanted shape and using spray glue to fix the paper on the foil. Used a contraption to guide cutting the 2,5 meter radius concave curved sides of the ribbon. Got rid of the paper and clean and smoothed the metal with some wipes dipped in chemical clean petrol. 25 minutes in the NaOH bath etched half of the thickness away. They came out pretty good. Need to make a jig so that I can corrugate keeping the ribbons straight - the tend to curve doing it "by hand".
Even more ready for magnets 🙂
//
Even more ready for magnets 🙂
//
Attachments


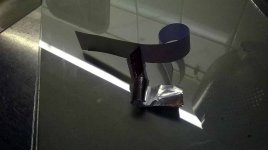
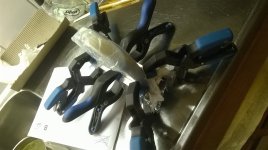
Magnets arrived. Garrets warning seems very valid. You don't handle these - you go into a match with them🙂 First challenge was to separate them one by one - took me half an hour to figure out how to do that with hurting myself or the magnets. While checking out the territory 2 of them clamped together on the wide sides - don't know if a ever can part these from each other... 30€ gone 🙂
Goggles on!
//
Goggles on!
//
Attachments
to separate large magnets--twist and slide. Twist 90 degrees and then slide apart. You may need to use a vise.
I have handled large magnets for several years. My advice: never, ever, have a large magnet without a steel backing of some sort. A large magnet by itself in thin air so to speak is like a piece of C4 hunting for a detonator. Always plan some way to slide the magnet from your backing more or less directly to its final position.
I have handled large magnets for several years. My advice: never, ever, have a large magnet without a steel backing of some sort. A large magnet by itself in thin air so to speak is like a piece of C4 hunting for a detonator. Always plan some way to slide the magnet from your backing more or less directly to its final position.
Thanks for your advice fortitudine. Thats what I ended up with. Bended the magnet 90deg over a corner then used a long aluminum profile to sort of slide it off. This works well. When there are only 2 left it might be a bit of a problem maybe....
Attempted to add the 3rd magnet. Magnet-TNT: 1-0
Result: broken magnet in half.
Need to reassess strategy. Some sort of guiding device will be needed. I wonder if the 4th will be even harder. If so, it might be impossible...
//
Attempted to add the 3rd magnet. Magnet-TNT: 1-0
Result: broken magnet in half.
Need to reassess strategy. Some sort of guiding device will be needed. I wonder if the 4th will be even harder. If so, it might be impossible...
//
Last edited:
For the etch resist, I think I would try a liquid wax or even a magic marker. Either should be easily removable with a solvent, but you may have already come up with a solution.
Thanks marsupialx - a marker sound very convenient - I must do a test run on this. That would go off with e.g. aceton. Wax would be heated off I suppose - would not take much but tricky to apply maybe...
//
//
Last edited:
Attachments

. My advice: never, ever, have a large magnet without a steel backing of some sort. [
...reading this again - what would this mean in practice would you say?
//
- Status
- Not open for further replies.
- Home
- Loudspeakers
- Planars & Exotics
- Guillotine - son of Geriitts reductio ad minimum ribbon