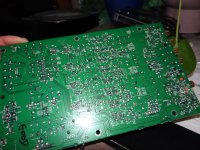
I have desoldered components off boards for about 4 years now however I am currently battling something I have never been able to do with my Hakko 808 or a soldering iron and that is desolder a component off a double sided board
I can get the solder off the opposite side of the component but the solder on the component solder is unaffected
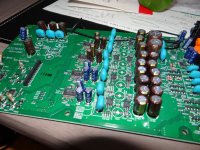
I am trying to remove most of the through the hole caps
Is there a secret I dont know about and I hope it doesnt involve using a soldering iron and the hakko at the same time
I can get the solder off the opposite side of the component but the solder on the component solder is unaffected
I am trying to remove most of the through the hole caps
Is there a secret I dont know about and I hope it doesnt involve using a soldering iron and the hakko at the same time
Attachments
Resolder and add more solder, so both sides are soldered, but not in excess.
Now try again. If the lead fills most of the hole, it is much more difficult.
If necessary, and if the lead on top is accessible, cut the component off and try again.
It should be easier with the lesser heat sinking due to the cut leads.
Now try again. If the lead fills most of the hole, it is much more difficult.
If necessary, and if the lead on top is accessible, cut the component off and try again.
It should be easier with the lesser heat sinking due to the cut leads.
Cutting the component off would defeat the reason for removing the caps which is to reuse them. They are out of production audio grade caps
I have tried adding more solder but there is so much solder on the capacitor side that not enough heat is getting to the other side
I have tried adding more solder but there is so much solder on the capacitor side that not enough heat is getting to the other side
Do you mean the board is expendable?
Are these snap-in capacitors?
Does the lead fill most of the hole?
Are these snap-in capacitors?
Does the lead fill most of the hole?
The board will be tossed it has no value but the through the whole caps are very desirable
they are not snap in
there is an abundance of solder on the component side of the cap leads
they are not snap in
there is an abundance of solder on the component side of the cap leads
On a project that I just did, I found if I pressed the opening in the solder sucker against the leg of the component it transfered the heat through the hole and melted the solder on the other side of the board better. On mine, I didn't care about the components so I don't know if that would risk overheating your capacitors. I did the same couple second count that I do when soldering so it shouldn't be too bad heat wise.
An inexpensive hot air tool can be used as a 'helper' heat source. Adding the
heat near the component to be removed will get the heat all the way through
the board. This is especially useful with 4 layer boards. It's even more important
if the board has a ground plane with no thermal reliefs. Those are common on
computer motherboards. When I was doing this the board was not to be damaged
but the technique is good for preserving the parts.
I was using a Metcal iron with a curved tip that could fit INTO to hole to clear
the solder. The Metcal heater/temp sensor is very near the tip which makes it
especially useful for rework.
Gotta tell you that new caps are pretty cheap in 100 lot from DigiKey and Mouser
and are certain to work so unless you work really cheap, it's hard to believe it's
worth the effort to salvage parts known to be problems.
G²

Melt one pin and wiggle the component so that it lifts slightly. then do the same to the other pin. Repeat until the component is free.
I would probably straighten the ends of the leads with a solder iron and then set my hot air station to "flamethrower". Use a large nozzle to heat both leads/vias on the bottom of the board and then pull the out the cap. Might rip some plated through holes out, but who cares in this case.
I have one of those curved tips and completely forgot about it. I will try it next time that make a mistake and place a component in backwards or something.
Yeah, heat and wiggle while pulling the component away from the board, if only a little.
Repeat on the other lead. Then do both, again and again, until it's separated from the board.
At some point you'll probably pull out the via(s), but it doesn't matter.
Repeat on the other lead. Then do both, again and again, until it's separated from the board.
At some point you'll probably pull out the via(s), but it doesn't matter.
“Gotta tell you that new caps are pretty cheap in 100 lot from DigiKey and Mouser
and are certain to work so unless you work really cheap, it's hard to believe it's
worth the effort to salvage parts known to be problems.”
I have bought many hundreds of caps the past few years but the audio caps on this board are not made anymore and I would love to get them off the boa4d
and are certain to work so unless you work really cheap, it's hard to believe it's
worth the effort to salvage parts known to be problems.”
I have bought many hundreds of caps the past few years but the audio caps on this board are not made anymore and I would love to get them off the boa4d
“Yeah, heat and wiggle while pulling the component away from the board, if only a little.
Repeat on the other lead. Then do both, again and again, until it's separated from the board.”
“Melt one pin and wiggle the component so that it lifts slightly. then do the same to the other pin. Repeat until the component is free.”
I tried that before posting this question and it didn’t help at all
well I was able to get almost all of the caps I wanted. I did what you shouldn't really do and that is keep the desoldering gun on the pad for about 5-10 seconds (I have removed many hundreds of components before but usually go no more than 2 seconds with the desolder gun). ordinarily you risk damaging the pad and or the cap but I had to try it. that removed most, some needed a soldering iron on the component side ti get them off, some never came off and maybe I will cut the board up if I feel like the total destruction approach
one cap I damaged the lead and tossed it. the rest all tested OK on the cap tester
one cap I damaged the lead and tossed it. the rest all tested OK on the cap tester
I share your pain! Double sided boards can be really bad! And especially if someone used good old high temp no-lead solder. I am always able to pull the inside 'circle' of the trace between the board. I have tried many ideas, even using 'chip-Quik' which is cadmium that mixes with the solder, reducing the melt time drastically. No thanks.
A desoldering pump like the following is good for board repair..

The tips are blunt so that the solder melts quickly. But be ready when you release the button, it spits out the solder.
The tips are blunt so that the solder melts quickly. But be ready when you release the button, it spits out the solder.
- Home
- Design & Build
- Construction Tips
- desoldering a double sided board