I wanted to upgrade my stereo system downstairs hoping to eliminate the effect which always reminded me where the sound was originating. My previous speakers were a pair of Sound Dynamics 300TI, which I like very much and worked very well in the room. However, I have a pair of BassZillas in my system upstairs, which create a huge sound stage. I was hoping for something similar downstairs despite the space constraints.
After researching for a while I decided to build a pair of Pi Speakers 7pi.
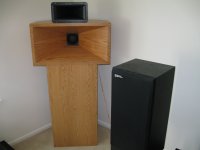
I have just finished building them and am delighted with the results. The 7pi creates a large sound stage, much bigger than the room where they are located.
Many thanks to Wayne Parham for sharing this great design.
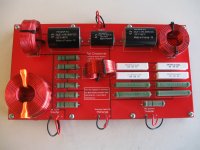
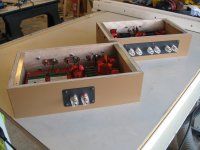
Here are some pictures of the build. I designed my own crossover PCB just as part of the enjoyment of building my own speaker system.

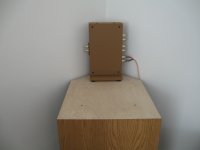
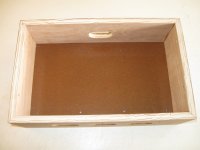
Also built a case for it.

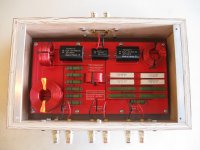
Here is the crossover encased


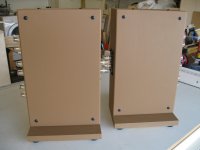
To fit behind the mid-horn I added a base to keep it vertical


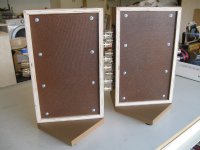
This is how the crossover sits on the bass unit

After researching for a while I decided to build a pair of Pi Speakers 7pi.
I have just finished building them and am delighted with the results. The 7pi creates a large sound stage, much bigger than the room where they are located.
Many thanks to Wayne Parham for sharing this great design.
Here are some pictures of the build. I designed my own crossover PCB just as part of the enjoyment of building my own speaker system.
Also built a case for it.
Here is the crossover encased
To fit behind the mid-horn I added a base to keep it vertical
This is how the crossover sits on the bass unit
Attachments
-
 Crossover_assembled.jpg406.8 KB · Views: 1,423
 -
 Crossover_on_bass_unit.jpg229.7 KB · Views: 1,366
 -
 Crossover_with_base_and_lid.jpg302 KB · Views: 1,351
 -
 Crossover_with_base_bottom.jpg515.9 KB · Views: 1,360
 -
 Crossover_with_base_top.jpg435.8 KB · Views: 1,370
 -
 Crossover_encased_side.jpg341.6 KB · Views: 1,359
 -
 Crossover_encased.jpg395.7 KB · Views: 1,389
 -
 Crossover_case.jpg346 KB · Views: 1,374

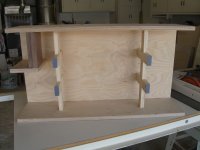
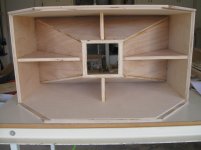
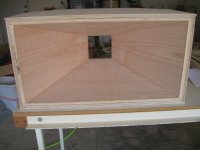
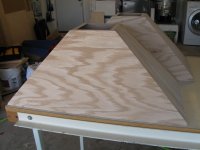
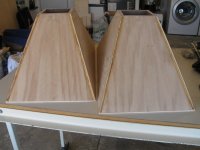
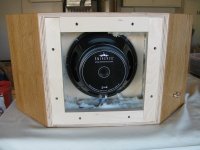
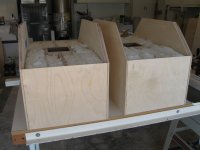
The mid-horn
The mid-horn was the most labor intensive and time consuming portion of the whole build. Here are the flare sides cut and then assembled.


The mid-horn was the most labor intensive and time consuming portion of the whole build. Here are the flare sides cut and then assembled.
Attachments
-
 Mid-horn_flares_in_case_back.jpg470 KB · Views: 1,159
 -
 Mid-horn_plate_installed.jpg274 KB · Views: 1,141
 -
 Mid-horn_flare_mounting_plates.jpg461.1 KB · Views: 1,147
 -
 Mid-horn_flares_in_case_front.jpg299.5 KB · Views: 1,152
 -
 Mid-horn_flares_back2.jpg315.8 KB · Views: 1,157
 -
 Mid-horn_flares_back.jpg335.7 KB · Views: 1,136
 -
 Mid-horn_flares.jpg331.9 KB · Views: 1,163
 -
 Mid-horn_flares_parts.jpg350.7 KB · Views: 1,150
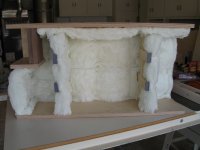
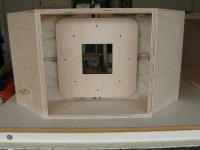
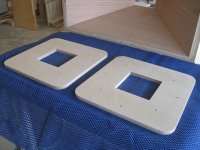
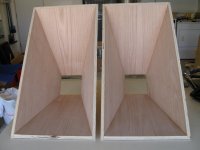
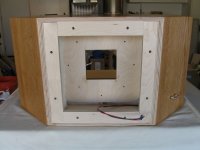
The mid-horn insulation and finish
The designer prescribes filling all spaces with insulation without compression. The insulation was cut in the proper shape to fill the spaces without being compressed.


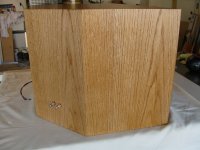
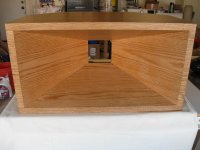
Here is the mid-horn finished.


The designer prescribes filling all spaces with insulation without compression. The insulation was cut in the proper shape to fill the spaces without being compressed.
Here is the mid-horn finished.
Attachments
-
 Mid-horn_finished_with_driver.jpg365.4 KB · Views: 1,092
 -
 Mid-horn_finished_back.jpg321.4 KB · Views: 1,094
 -
 Mid-horn_finished_side.jpg435.5 KB · Views: 1,105
 -
 Mid-horn_finished_front.jpg377.4 KB · Views: 1,117
 -
 Mid-horn_flare_insulation_2.jpg287.9 KB · Views: 1,093
 -
 Mid-horn_flare_insulation_1.jpg479.5 KB · Views: 1,093

I've just gotten agreement (removal of an old, very decorative wood stove) for use of a 16' X 24' room with two perfect corners firing down the long axis, and I'm curious to hear what the separation you have between your corners. I've built nine 1Pi and 2Pi speakers in the past and they are fabulous for the cost. I've heard Wayne's 7Pis a couple of times, and fully appreciate them. But I never had an appropriate room. I think I have much to learn from your experience. I'm inclined more toward the 6Pis.
The wall between the 7pi speakers is 15' 2" long. According to Wayne that is a good distance between them. He also recommends that the point where the forward axis of both speakers intersect be about 3' in front of the listener, which is the case in the room where they are located.
As a general rule he says that the sitting position should be at least half the distance between the speakers.
As a general rule he says that the sitting position should be at least half the distance between the speakers.

- Home
- Loudspeakers
- Multi-Way
- Building the 7pi (seven pi) speakers - Spring/Summer 2021